Table of Contents
Advertisement
Advertisement
Table of Contents

Related Manuals for Abbott FreeStyle Optium Neo H


Summary of Contents for Abbott FreeStyle Optium Neo H
- Page 1 Operator’s Manual Blood Glucose and Ketone Monitoring System...
- Page 2 Symbols These symbols are associated with your meter. Consult instructions for use Use-by date Temperature limit In vitro diagnostic medical device Manufacturer Catalogue number CE Mark Recycle Authorised Representative in the European Serial number Community / European Union Batch code Biological risks Date of manufacture Sterilised using irradiation (lancets only)
-
Page 3: Table Of Contents
FreeStyle Optium Neo H At-A-Glance ........ - Page 4 Understanding Blood Ketone Test Results ........25 View Logbook .
-
Page 5: Intended Use
Intended Use The FreeStyle Optium Neo H Blood Glucose and Ketone Monitoring Meter is an in vitro medical device intended for the automated quantitative measurement of blood glucose and blood β-ketones (β-hydroxybutyrate). The system comprises the meter and test strips and is suitable for professional use as an aid in the monitoring of diabetes mellitus and ketosis including diabetic ketoacidosis (DKA). - Page 6 • FreeStyle Optium Neo H Blood Glucose and Ketone Meter • Operator’s Manual • USB Cable Necessary material, though not provided: • FreeStyle Optium Neo H Blood Glucose Test strips or FreeStyle Optium H Blood β-Ketone Test strips • Lancets • Control solution...
-
Page 7: Freestyle Optium Neo H At-A-Glance
FreeStyle Optium Neo H At-A-Glance Display Window Logbook Displays meter Home screen (shown here) Displays test results and other important information Up Button Mark a venous blood test Adjust settings USB Port Power Button Insert a data cable here for Turn meter on and off... -
Page 8: Meter Symbols
Meter Symbols Symbol What It Means Symbol What It Means Logbook Control solution mark Meter ready for sample application Quality Control test is due Control solution result Number of days Ketone Control solution test Connected to computer Low battery High Out-of-Range indicator Venous blood mark Low Out-of-Range indicator Venous blood test... -
Page 9: Using The Meter
Using the Meter Turning the Meter On and Off To turn the meter on: To turn the meter off: • Press , or • Press and hold for 3 seconds, or • Insert a strip • Do nothing for 2 minutes Checking the Meter Screen Every Time You Turn It On The meter screen should be fully black when powered Meter Off... -
Page 10: Setting Up The Meter
Setting Up the Meter To confirm that the date and time are set correctly, follow the steps below. Set Time Step Action Start with meter off (no test strip inserted). • Press to turn on the meter Press and hold the time (for example 11:50) on the screen for 3 seconds until the screen changes. - Page 11 Step Action Set Time Format (12 hour or 24 hour clock) • Press to change • Press to continue Time Format Note: The meter can display either a 12 h (1:23 PM) or 24 h (13:23) time format. If you prefer the 12 h format, there is no ‘AM’ . If setting a PM time, continue to press until you see the ‘PM’...
-
Page 12: Set Date
Set Date Step Action Set Month • The month blinks. Press to set the month • Press to continue Month Set Day • The day blinks. Press to set the day • Press to continue Set Year • Press to set the year •... -
Page 13: Enabling Out-Of-Range Indicators And Quality Control Reminder
Enabling Out-of-Range Indicators and Quality Control Reminder Introduction The out-of-range indicators and the quality control reminder can be enabled on the meter to support compliance with your facility’s policies and procedures. • The out-of-range indicators notify the user with a if the patient’s blood glucose is lower than the set low glucose threshold or a if the patient’s blood glucose is higher than the set high glucose threshold. - Page 14 Step Action Press to turn meter on. Press and hold at the same time for 4 seconds until the screen changes. • Press and hold until the screen changes to continue...
- Page 15 Step Action Press to set low out-of-range indicator level. • Press to continue Note: - - - will appear if the low out-of-range indicator is disabled. Press to set high out-of-range indicator level. Note: - - - will appear if the high out-of-range indicator is disabled. Press once to proceed to the quality control reminder setup or press twice to exit setup.
- Page 16 Step Action Press to enable a quality control reminder. Note: Leaving the - - - will keep the quality control reminder disabled. Press to enable a quality control reminder by hour or by days. Note: Hours are indicated as H (example: is every 12 hours).
-
Page 17: Preparing The Meter For Glucose And Ketone Testing
Preparing the Meter for Glucose and Ketone Testing Calibrating the Meter for Glucose and Ketone Testing Calibrate the meter to: Calibration is required: • Match the test strips being used • When using the meter for the first time • When using a new carton of test strips Remove the glucose calibrator (white) or the ketone calibrator (purple) from the new carton of test strips. -
Page 18: Prepare The Meter
Prepare the Meter Step Action Hold the calibrator with the LOT number facing you. Insert the calibrator into the meter until it stops. This turns the meter on. Notes: • Check that the meter screen is working properly each time you turn the meter on. -
Page 19: Confirm The Lot Number
Confirm the LOT Number Check to see that the LOT number matches on all the following areas: • Meter display • Test strip calibrator • Test strip instructions for use • Test strip foil packet IMPORTANT: Contact Customer Care if the LOT number does not match. Do not test your patient’s blood glucose and blood ketone. -
Page 20: Testing Blood Glucose Or Blood Ketone
Testing Blood Glucose or Blood Ketone IMPORTANT: Only use a test strip once. Read the test strip instructions for use before performing a blood glucose or ketone test. It contains important information and will tell you how to store and handle the test strips. Test Site Step Action... -
Page 21: Performing A Blood Glucose Or Blood Ketone Test
Performing a Blood Glucose or Blood Ketone Test Step Action Open the foil test strip packet at the notch and tear down to remove the test strip. Insert the test strip into the meter until it stops. This will turn on the meter. - Page 22 Step Action Check that the LOT number of the test strip foil you are using appears. The blinks, indicating the meter is ready for you to (cont.) apply a sample to the test strip. Note: KET will appear on the screen if you have inserted a purple blood ketone strip.
- Page 23 Step Action Apply blood to the test strip. Bring the blood drop to the white area at the end of the test strip. The blood is drawn into the test strip. Hold blood to test strip until you see 3 short lines on the meter screen.
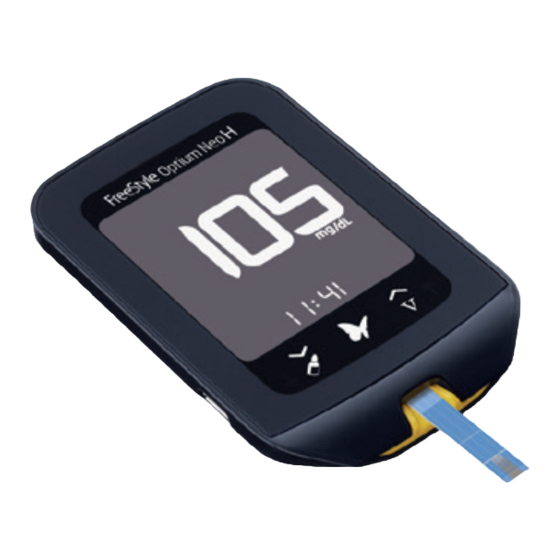
- Page 24 Step Action View the result. The test is complete when the result appears on the meter screen (examples shown). The result is stored in memory. Blood Glucose Result example Blood Ketone Result example Venous Blood Glucose Result example Press and hold to turn off the meter.
-
Page 25: How To Obtain A Neonatal Capillary Blood Heel Stick Sample
How to Obtain a Neonatal Capillary Blood Heel Stick Sample (For Glucose Testing) Action • Use a new pair of clean gloves for each patient. • Use only fresh whole blood samples. • Collect the capillary blood using an auto-disabling, single use lancing device and an appropriate technique. -
Page 26: Understanding Blood Glucose Test Results
Understanding Blood Glucose Test Results The meter displays blood glucose results in mmol/L. The unit of measurement is preset. You cannot change this setting. The meter displays results from 1.1 - 27.8 mmol/L. IMPORTANT: • Low or high blood glucose results can indicate a potentially serious medical condition. •... -
Page 27: Low Blood Glucose Results
Low Blood Glucose Results If You See What It Means What To Do If out-of-range indicators are Follow your facility’s procedure for enabled, appears when result is handling out-of-range results. lower than the range set by your facility. A solid red arrow A solid red arrow... -
Page 28: High Blood Glucose Results
High Blood Glucose Results If You See What It Means What To Do If out-of-range indicators are Follow your facility’s procedure enabled, appears when result is for handling out-of-range results. higher than the range set by your facility. A solid A solid yellow arrow yellow arrow... -
Page 29: Understanding Blood Ketone Test Results
Understanding Blood Ketone Test Results The meter displays ketone results in mmol/L, from 0.0 - 8.0 mmol/L. The unit of measurement is preset. You cannot change this setting. Blood ketone is expected to be below 0.6 mmol/L. High blood ketone may be caused by illness, fasting, vigorous exercise or uncontrolled blood glucose levels. - Page 30 Display What It Means What To Do Result is higher than 1.5 mmol/L. The patient may be at risk of Follow your facility’s policies and developing diabetic ketoacidosis procedures on how to handle (DKA). high blood ketone results. Very high blood ketone Repeat the test with a new test strip.
-
Page 31: View Logbook
View Logbook The meter logbook can store up to 1,000 events – including blood glucose, blood ketone and control solution results, and other meter information. Viewing Logbook Events Step Action While on the Home screen, press to view logbook events. Examples: Press to scroll through to view logbook events. -
Page 32: Viewing Blood Glucose Averages
Venous Blood Glucose Result Control Solution Result screen and control solution test result screen alternate. Note: Check mark in the box indicates a control solution test and not that the result was within range. Viewing Blood Glucose Averages Step Action While on the Home screen, press to open the logbook. - Page 33 While in the logbook, press any time to view the 7-day average. [ • Press to view the 14-day average. [ ] • Press to view the 30-day average. [ ] • Press to return to the logbook events. Notes: •...
-
Page 34: Glucose And Ketone Control Solution Tests
Glucose and Ketone Control Solution Tests A control solution test should be performed when: • You are unsure of your patient’s blood glucose or blood ketone results, or • You receive a test reminder indicating that a quality control test is due. Note: Once completed, will disappear. -
Page 35: Performing A Control Solution Test
Performing a Control Solution Test Step Action Open the foil test strip packet at the notch and tear down to remove the test strip. Insert the test strip into the meter until it stops. This will turn on the meter. Notes: •... - Page 36 Step Action blinks. Press the until the appears. The meter is now ready for you to apply control solution to the test strip. Note: KET will appear on the screen if you have inserted a purple blood ketone strip. Apply control solution to the test strip. Shake the control solution bottle to mix the solution.
- Page 37 Step Action Hold the control solution to the test strip until: • You see 3 short lines on the meter screen. This means you have applied enough control solution and the meter is reading the control solution. Notes: • If you are testing with a blood glucose strip, you will see a 5-second countdown.
- Page 38 Step Action View the result. The test is complete (examples shown) when the result appears on the meter screen. The result is stored in memory as a control solution result. Compare the control solution result to the range printed on the blood glucose or blood ketone test strip instructions for use.
-
Page 39: Transferring Meter Data To A Computer
Transferring Meter Data to a Computer Transferring meter data to a computer requires a compatible data management system. You will also need a micro USB cable to connect the meter’s USB port to a computer. For more information, contact your Sales Representative or Customer Care. WARNING: To avoid the possibility of electric shock, never perform a test while the meter is connected to the computer. -
Page 40: Error Messages
Error Messages Message What It Means What To Do The temperature is too 1. Move the meter and test strips to a location where the hot or too cold for the temperature is within the test strip operating range. meter to work properly (See test strip instructions for use for the appropriate range.) 2. - Page 41 Message What It Means What To Do Blood drop is too small 1. Review the testing instructions. 2. Repeat the test using a new test strip. Incorrect test procedure 3. If the error reappears, contact Customer Care. There may be a problem with the test strip The blood glucose level 1.
- Page 42 Message What It Means What To Do Calibration error 1. Check the date setting on the meter. 2. Check the expiry date on the test strip foil packet. Test strip error 3. Repeat the calibration using the calibrator that came with the test strip you are using.
-
Page 43: Maintenance
Maintenance Replacing the Batteries You will see this screen when the batteries are low. Notes: • Meter settings and logbook information will be saved when you change the batteries. • The time and date will need to be set again if the batteries are not replaced within 1 minute. - Page 44 Step Action Install new batteries with (+) facing up. Note: The meter uses 2 replaceable CR 2032 coin cell batteries. Slide the door back into place until it clicks. Note: The next time you turn the meter on, it may prompt you to reset the time and date.
-
Page 45: Cleaning The Meter
Cleaning the Meter Step Action Assemble cleaning supplies: • Cloth dampened with: • Mild detergent/soap and water, or • 70% isopropyl alcohol, or • A mixture of 1 part household bleach, 9 parts water IMPORTANT: Do not place the meter in water or other liquids. Avoid getting dust, dirt, blood, control solution, water or any other substance in the meter's test strip port, USB port and battery compartment. -
Page 46: Troubleshooting
Troubleshooting Problem What It Means What To Do Test strip is Test strip is not inserted properly 1. With the contact bars (3 black lines) facing inserted in or fully into the meter up, insert the test strip into the meter until the strip port it stops. - Page 47 Problem What It Means What To Do Blood sample is too small 1. See test strip instructions for use for The test does re-application instructions. not start after applying the 2. Repeat the test using a new test strip. blood sample. 3.
-
Page 48: Meter Specifications
Meter Specifications Amperometry Assay method At least two minutes of inactivity Automatic shutoff Up to 3000 tests Battery life For blood glucose testing 1.1 - 27.8 mmol/L Measurement range For blood ketone testing 0.0 - 8.0 mmol/L Up to 1000 events, including blood glucose, blood ketone and control solution Memory results, and other meter information System must only be used with EN60950-1 rated computers. - Page 49 Emissions are low and unlikely to interfere with other nearby electronic equipment. To limit radio frequency interference do not use the FreeStyle Optium Neo H meter near mobile or wireless telephones, radio transmitters or other electrical or electronic equipment that are sources of electromagnetic radiation, as these may interfere with the proper operation of the meter.
-
Page 50: References
Reporting of Serious Incidents If a serious incident has occurred in relation to this device it should be reported to Abbott Diabetes Care. Please go to www.MyFreeStyle.com or refer to the Customer Service phone number. In European Union Member States, serious incidents should also be reported to the competent authority (the government department responsible for medical devices) in your country. -
Page 51: Warranty Statement
Under this Limited Warranty, if the Meter is defective in material or workmanship, Abbott’s sole obligation is to replace the Meter, free of charge, with a same or similar meter as determined by Abbott in its sole discretion. - Page 52 Limitation of Liability TO THE EXTENT POSSIBLE UNDER LAW, ABBOTT WILL NOT BE LIABLE FOR ANY INCIDENTAL OR CONSEQUENTIAL DAMAGES RESULTING DIRECTLY OR INDIRECTLY FROM USE OF THE METER OR FAILURE OF THE METER TO PERFORM IN ACCORDANCE WITH SPECIFICATIONS.
- Page 53 Abbott GmbH Max-Planck-Ring 2 Oman: 80074396 65205 Wiesbaden Germany Patent: https://www.abbott.com/patents FreeStyle and related brand marks are owned by Abbott. Other trademarks are the property of their respective owners. Abbott Diabetes Care Ltd. Range Road Witney, Oxon OX29 0YL, UK...
Need help?
Do you have a question about the FreeStyle Optium Neo H and is the answer not in the manual?
Questions and answers