Table of Contents
Advertisement
Quick Links
Advertisement
Chapters
Table of Contents

Related Manuals for Life Fitness Symbio Runner


Summary of Contents for Life Fitness Symbio Runner
- Page 1 Symbio™ Runner Assembly Instructions 1022782-0001 REV AB...
- Page 3 Latin America and Caribbean* Germany, Austria, and Switzerland Hong Kong Life Fitness, LLC Life Fitness Europe GMBH Life Fitness Asia Pacific LTD Columbia Centre III Neuhofweg 9 26/F, Global Trade Square 9525 Bryn Mawr Avenue 85716 Unterschleißheim 21 Wong Chuk Hang Road Rosemont, IL 60018 U.S.A.
- Page 4 User and Service Documents Link https://lfn.fit/KnowledgeBase https://lfn.fit/SupportDocuments Additional information is available online using the links above. أ علاه إل ر إبط باستخدإم إ لإ ن تر نت على إضافية معلومات تتوفر 点击上面的链接可在线获取更多信息。 Flere oplysninger er tilgængelige online gennem linket ovenfor. Bijkomende informatie is online beschikbaar via bovenstaande link.
-
Page 5: Table Of Contents
Copyright 2023, Life Fitness, LLC. All Rights Reserved. Life Fitness, Hammer Strength, Cybex, ICG and SCIFIT are registered trademarks of Life Fitness, LLC and its affiliated companies and subsidiaries. Disclaimer: Images and specifications are current as of the date of publication and are subject to change. -
Page 6: Additional Information
1. Additional Information Link to Additional Information Online In addition to the content provided in this manual, please scan the QR code for further and updated information. https://lfn.fit/SymbioRunnerInstall Page 4 of 60... -
Page 7: Getting Started
• Life Fitness Family of Brands does not warrant nor guarantee that component parts used in the manufacture of products offered under the Life Fitness Family of Brands are latex-free. Users of these products must take all necessary precautions to prevent accidental contact that could lead to an adverse latex reaction. - Page 8 • Allow LCD consoles to “normalize” with respect to temperature for one hour before plugging the unit in and using. • When the product is not in use, Life Fitness recommends unplugging the product. Disconnect from the electrical outlet when not in use, and before putting on or taking off parts. To disconnect, turn power OFF at the ON/OFF switch, then remove plug from electrical outlet.
-
Page 9: Consignes De
Consignes de Sécurité Veuillez lire toutes les instructions avant usage. AVERTISSEMENT : Une utilisation incorrecte ou excessive de l'appareil peut entraîner des blessures. Life Fitness Family of Brands Recommande VIVEMENT aux utilisateurs de passer un examen médical complet avant d'entamer un programme d'entraînement, et tout particulièrement dans les cas suivants : antécédents familiaux d'hypertension (pression sanguine trop élevée) ou de pathologies cardiaques, utilisateurs de 45 ans ou plus, tabagisme, hypercholestérolémie (taux de cholestérol sanguin trop élevé), obésité, absence d'exercice physique depuis un an ou plus. - Page 10 à la clientèle. Nous vous en fournirons de nouvelles. Les étiquettes d’avertissement sont expédiées avec les appareils et doivent être installées avant utilisation de ces derniers. Life Fitness Family of Brands n’est pas responsable des étiquettes manquantes ou endommagées.
-
Page 11: Immobilization Method
Immobilization Method The purpose of immobilizing the unit is to prevent unauthorized use. The system causes immobilization of the unit when activated. 1. Tap the LANGUAGE icon on the ATTRACT SCREEN to access the SELECT LANGUAGE screen. (Language Icon position may vary on consoles.) 2. - Page 12 6. UNIT IMMOBILIZED BY MANAGER message appears on screen. 7. Tap the upper part of the ATTRACT SCREEN in the following sequence: Upper-Left, Upper-Right, Upper-Left, and Upper-Right to enter SYSTEM OPTIONS. 8. Tap the Immobilize Unit icon to disable. Page 10 of 60...
-
Page 13: Electrical Power
Electrical Power Requirements The unit requires a dedicated* line with isolated neutral according to the electrical configurations listed in the chart below. Commercial Units Outlet & Consumer / Home Units Supply Voltage Frequency (Hz) Breaker (Amps) Outlet & Breaker (Amps) 100 / 120 50 / 60 200 / 220 / 230 / 240... -
Page 14: How To Position And Stabilize The Safety Clearances
How to Position and Stabilize the Unit Follow all safety instructions. Move the treadmill to the location in which it will be used. NOTE: See How to Adjust and Tension the Striding Belt to center the striding belt. Safety Clearances The following information is supplied as regional reference data regarding safety clearances around the exterior of the unit. - Page 15 NOTE: Do not adjust leveling leg more than 12mm (0.47 in.) from the home position. Home Position Maximum 12mm (0.47 in.) from Home Position NOTE: When one leveling leg isn’t touching the ground, the opposite should be turned in. This will prevent false incline values and the Mobility wheel not able to touch the ground.
-
Page 16: Turning The Unit On
Turning the Unit On / Off Located under the unit, the power switch has two positions: "l" (one) for ON and "0" (zero) for OFF. Stride Sensor+ Auto-Shutoff System The Stride Sensor + auto-shutoff system detects whether a user is on the belt/deck. If the user leaves the belt/deck during a workout, the system is triggered and the belt lighting will animate signaling the belt is still running with no user detected. -
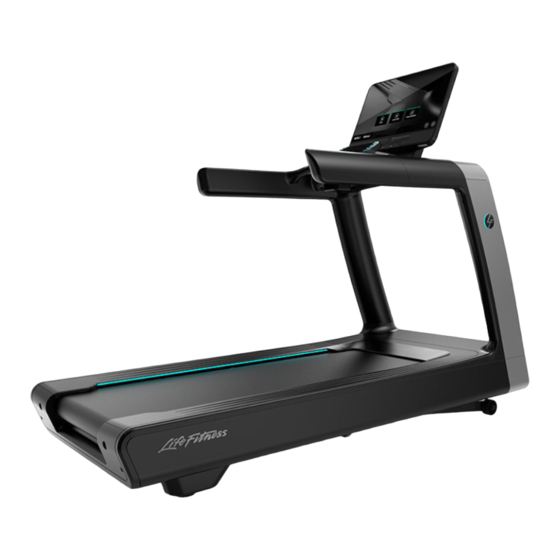
Page 17: Product Overview
3. Product Overview Product Features Item Description Qty. Console Speed Up/Down Arrows Cup Holder Contact Heart Rate Sensors Walking Belt Control Pad Incline Up/Down Arrows Emergency Stop Emergency Stop Lanyard Leveling Foot Wireless Charger Page 15 of 60... -
Page 18: Connections
Connections The following connection receptacle is located on the underside of the front of the treadmill. Item Description Qty. CAT5e Network / Ethernet HDMI Connection Coaxial Connection IR Connection Page 16 of 60... -
Page 19: Mounting And Dismounting The User Position
Mounting and Dismounting the Unit Use the handrails to enhance stability when mounting or dismounting the unit. Never mount or dismount the unit while the running belt is moving. Use the STOP button on the console to end a workout and stop the running belt. Use the Emergency Stop System to stop the belt immediately. -
Page 20: How To Adjust Smart
How To Adjust Smart Lighting The base is equipped with lighting that can be tuned On or Off, has three brightness setting, and 16 colors. 1. Select Language icon from Attract Screen to access the Select Language screen. 2. Tap the bottom part of the Select Language screen in the following sequence: Lower-Left, Lower-Right, Lower- Left, Lower-Right. - Page 21 3. Navigate through the System Options menu to Configuration > Manager. 4. Scroll down to Smart Lighting. 5. Toggle the Enabled button to turn lights On or Off. 6. Adjust the Brightness as needed. 7. Adjust the Color to your choice of 16 colors. Page 19 of 60...
-
Page 22: Qi ® Wireless Induction
® Wireless Induction Charger How to use: 1. Place your device on the wireless rubber charging station indicated with the charging symbol. Item Description Blue Indicator Light Wireless Charging Station Phone 2. If your device supports Qi Wireless Charging, the blue indicator light will turn blue along with a notification on your mobile phone that the device is charging. -
Page 23: Assembly Procedure
4. Assembly Procedure Two people will be required for this procedure. TIP: Read and understand all instructions thoroughly before assembling this unit. Check all items carefully. If there is damage, see the Customer Service section of this manual for proper procedure to return, replace, or reorder parts. Link to Additional Information Online In addition to the content provided in this manual, please scan the QR code for further and updated information. - Page 24 Hardware and Required Tools Item Description Tool GROMMET: SCREW, 8 OR 10 (Lower Bridge Plastic) SCREW: M8 X 1.25 6G6H X 20, UNS, HXW, CS, ST 13 mm socket (Uprights / Top Bridge Assembly) 10 mm socket SCREW: M6 X 1-6G6G X 20, HXS, HXF, FHB, ST (Upright Outer Castings / Console Mount) SCREW: M6 X 1.00-6G6G X 12, DIN, PHL, PAN, MS, ST #3 Phillips...
-
Page 25: Attach Motor Side Shrouds To Base
Attach Motor Side Shrouds to Base Frame 1. Snap motor shrouds to base frame. 2. Attach motor side shrouds to base frame with two screws. NOTE: DO NOT TIGHTEN SCREWS! Item Description Qty. Motor Side Shroud, Right Motor Side Shroud, Left Screw: M4.2 X 0.7 6G6G X 19, DIN, PHL, PAN, AB, ST, ZB LOOSELY INSERT SCREWS (2-3 THREADS) -
Page 26: Attach Uprights To
Attach Uprights to Base NOTE: Remove the outer castings from uprights before installing if packaged together. NOTE: DO NOT TIGHTEN SCREWS! Image shows left upright assembled. Item Description Qty. Right Upright Assembly Left Upright Assembly Screw: M8 X 1.25 6G6H X 20, UNS, HXW, CS, ST LOOSELY INSERT SCREWS (2-3 THREADS) -
Page 27: Attach Top Bridge Assembly To
Attach Top Bridge Assembly to Uprights 1. Loosely insert one screw into each side of the top bridge assembly weldment before attaching the top bridge assembly to the uprights. This helps hold the top bridge assembly in place. NOTE: DO NOT TIGHTEN SCREWS! 2. -
Page 28: Attach Outer Castings To
Attach Outer Castings to Uprights Attach right and left outer castings to right and left uprights. Loosely insert screws. Item Description Qty. Upright Outer Casting, Right Upright, Right Upright Outer Casting, Left Upright, Left SCREW: M6 X 1-6G6G X 20, HXS, HXF, FHB, ST LOOSELY INSERT SCREWS (2-3 THREADS)! DO NOT TIGHTEN! - Page 29 Tightening Sequence for Uprights Bolts 1. Follow the tightening sequence (1-4). TIGHTEN TO 28.8 Nm (21.24 ft. lbs.) Front VIew Page 27 of 60...
- Page 30 2. Follow the tightening sequence (5-6). TIGHTEN TO 28.8 Nm (21.24 ft. lbs.) Front View 3. Hold and align the top bridge covers with bridge to achieve the correct fit and finish. Page 28 of 60...
- Page 31 4. Follow the tightening sequence (7-10). TIGHTEN TO 28.8 Nm (21.24 ft. lbs.) Front View Page 29 of 60...
-
Page 32: Screw: M5 X 0.8 X 16, Slt, Hxf, Tt, St, Zs
5. Insert screws into inner frames and continue tightening sequence (11-12). Run these two screws in until bottomed out. NOTE: Do not over-tighten screws! Over-tightening will cause the screws to strip out. Front View Item Description Qty. 11 / 12 Screw: M5 X 0.8 X 16, SLT, HXF, TT, ST, ZS TIGHTEN TO 3.3 Nm (29.2 in. - Page 33 6. Secure Grounding Braid Cables to Base Frame and Bridge Upright to Bridge Base Frame NOTE: Braiding ground cables are on both sides of the treadmill. Secure all four grounding braid cables. Item Description Qty. Grounding Braid Cable Screw: M5 X 0.8 X 16, SLT, HXF, TT, ST, Z 5.3 Nm (3.9 ft.
-
Page 34: Screw: M5 X 0.8 X 14, Phl, Pan, Ms, St, Bz
Attach Console Mount to Bridge 1. Remove the four screws securing the top bridge covers to the bridge. Retain hardware. Front View 2. Remove the right bridge cover from the bridge. After right bridge cover is removed, then remove the left bridge cover from the bridge. - Page 35 3. Attach console mount to bridge. NOTE: Follow tightening sequence for proper alignment! FIRST: Tighten screws to the front of the console mount. SECOND: Tighten screws to the top of the bridge. Item Description Qty. Console Mount Screw: M6 X 1-6G6G X 20, HXS, HXF, FHB, ST 10 Nm (7.37 ft.
- Page 36 Secure Top Bridge Covers to Bridge 1. Secure the left top bridge cover to the bridge. Then secure the right bridge cover to the bridge. Left Top Bridge Cover (Front View) Right Top Bridge Cover (Front View) Item Description Qty. Bridge Cover, Left Bridge Cover, Right Screw: M6 X 1.00-6G6G X 12, DIN, PHL, PAN, MS, ST...
- Page 37 Tightening Sequence for Upright Outer Casting Bolts IMPORTANT: Align four corners of the upright casting with top bridge castings. NOTE: FOLLOW THE TIGHTENING SEQUENCE (1-4)! NOTE: Tighten USER FRONT bolts first. TIGHTEN BOLTS to 10 Nm (7.37 ft. lbs.) LEFT - USER FRONT BOLTS LEFT - USER REAR BOLTS RIGHT - USER FRONT BOLTS RIGHT - USER REAR BOLTS...
-
Page 38: Route Cables
Route Cables Reference the images for cable routing. Use cable ties to secure cables. NOTE: Trim excess lengths from cable ties. CAUTION: Do not cut cables! Cable Tie Locations User View: Underneath Bridge Top View Item Description WIRELESS CHARGER, 12V & UART BASE CONSOLE COMM CONSOLE TO BASE POWER ACTIVITY ZONE / LIFEPULSE / HANDLEBARS... - Page 39 Attach LF LED Bug to Uprights 1. Peel the adhesive backer off the back off the LF LED Bug. 2. Make cable connection from the cable assembly through the upright opening to LF LED Bug. 3. Adhere LF LED Bug to the upright. Item Description Qty.
-
Page 40: Attach Lower Bridge Plastic To
Attach Lower Bridge Plastic to Bridge 1. Remove the two screws attaching the bottom of the center console to the center console. Set aside the hardware. NOTE: Remove the tape holding the top and bottom ergo bars together. Item Description Center Console Center Console Screws Ergo Bar, Top... -
Page 41: Place Console On Console
3. Secure the bottom of the center console with the previously removed hardware. Secure lower ergo bars to top ergo bars with four screws. Item Description Center Console Center Console Screws (previously removed) 1.4 Nm (12.4 in. lbs.) Ergo Bar, Lower, Right Ergo Bar, Lower, Left SCREW: M3 X 0.5-6H6H X 25, PHL, PAN, CS, ST. -
Page 42: Secure Console To Console
Base to Console Cable Connections Item Description Ethernet HDMI Wireless Charger Coax Power Activity Zone / Lifepulse / Handlebars Base Com Center Console CSAFE Secure Console to Console Mount Item Description Qty. Console Screw: M5 X 0.8 X 14, PHL, PAN, MS, ST, 1.9 Nm (16.8 in. - Page 43 Attach Power Cord and Make I/O Panel Connections Follow these steps if power cord is not already installed: 1. Plug power cord into power source. 2. Incline the treadmill. 3. Unplug power cord from power source. 4. Grab the line cord end and insert into receptacle on base frame assembly. 5.
-
Page 44: Attach Console Rear
Attach Console Rear Cover Item Description Qty. Rear Cover Screw: M5 X 0.8 X 14, PHL, PAN, MS, ST, Console Mounting Bracket 1.9 Nm (16.8 in. lbs.) Attach L-Shaped Shroud Covers to Upright Outer Castings Slide the L-shape shroud covers in between the upright outer castings and upright. Item Description Qty. -
Page 45: Attach Motor
Attach Motor Cover Snap motor cover into place. Item Description Qty. Motor Cover Attach Grommets to Bridge Item Description Qty. GROMMET: SCREW, 8 OR 10 Attach Inner Shrouds to Uprights 1. Snap the front of the inner shroud into the tinnerman clips on the upright casting. Item Description Qty. - Page 46 2. Snap the tinnerman clips on the rear of the inner shroud into the plates on the L-shaped shroud covers. 3. Secure with screw. Item Description Qty. Screw: M4.2 X 0.7 6G6G X 19, DIN, PHL, PAN, AB, ST, ZB 1.4 Nm (12.4 in.
-
Page 47: Lighting
5. Specifications Specifications Heavy / Commercial EN ISO 20957 Class S (Symbio Runner) Designed Use Home EN ISO 20957 Class H (Symbio Home Runner) Maximum User Weight 400 lbs. / 181 kg Speed Range 0.5 - 16.0 MPH (0.8 - 25 KPH) in 0.1 increments... - Page 48 Treadmill Dimensions Physical Dimensions Length 84.85 in. / 215.52 cm Width 36.5 in. / 92.71 cm Height 65.73 in. / 166.95 cm (with console) 55.73 in. / 141.55 cm (without console) Step-Up Height 11 in. / 27.9 cm Weight 579 lbs. / 263 kg (without console) Console Dimensions Physical Dimensions Depth...
-
Page 49: Frame
6. Service and Technical Data Preventive Maintenance Tips NOTE: Safety of the equipment can be maintained only if the equipment is examined regularly for damage or wear. Keep the equipment out of use until defective parts are repaired or replaced. Pay special attention to parts that are subject to wear, as outlined below. - Page 50 Using a voltmeter, verify power at outlet. If no power exists, reset circuit breaker at panel. Line cord is damaged. Replace line cord. Contact Life Fitness Customer Support. Line cord is improperly seated in socket. Inspect power connections at wall outlet and at machine for proper contact.
- Page 51 • Incorrect console or power supply. • Line cord at treadmill • Power switch • All console connections • All lower electronics connections Contact Life Fitness Customer Support. Unit resets randomly or pauses. Probable Cause Corrective Action Power source is insufficient.
- Page 52 Troubleshooting - Smart Lighting The base is equipped with lighting that can be tuned On or Off, has three brightness setting, and 16 colors. 1. Select Language icon from Attract Screen to access the Select Language screen. 2. Tap the bottom part of the Select Language screen in the following sequence: Lower-Left, Lower-Right, Lower- Left, Lower-Right.
- Page 53 2. Remove the phone Charging Error coils. case. Place phone on 2. The phone case is too wireless charger. thick. 3. Contact Life Fitness 3. Wireless charger is Customer Support damaged. Services. Troubleshooting the Polar ® Heart Rate Chest Strap...
- Page 54 Probable Cause Corrective Action Belt transmitter electrodes are not laying flat against the Ensure the belt transmitter electrodes are laying flat skin. against the skin. Belt transmitter needs cleaning. Wash the belt transmitter with mild soap and water. Belt transmitter not properly set up. Setup of the belt transmitter is accomplished by initially bringing it with in 1 foot of the receiver.
- Page 55 Mobility Wheel A mobility wheel lever is located at the rear end of the unit. This lever will engage a wheel and elevate the rear end of the unit. The treadmill can then be easily moved for cleaning or servicing. WARNING: Shock and electrocution hazard.
- Page 56 Engage Mobility Wheel 1. Unplug power cord from power outlet. 2. Grasp the mobility wheel lever and slide to the right and lift up to lock in place. Item Description Qty. Mobility wheel lever The mobility wheel will lower and raise the rear feet off the floor. Item Description Qty.
-
Page 57: Base
How To's Knowledge Base https://lfn.fit/KnowledgeBase for more detailed information. Page 55 of 60... - Page 58 How to Adjust and Tension the Striding Belt Do not move the treadmill or place hands under the treadmill while it is plugged into an electrical outlet! Belt Tensioning Bolts An 8 mm Allen wrench is required for this task. The treadmill has access holes in the rear roller guards which allow access to the tensioning bolts.
- Page 59 NOTE: Do not exceed one full turn of the adjusting screws in either direction. If after one full turn the belt does not track properly, contact Life Fitness Customer Support. Do not overtighten the tensioning bolts while making belt adjustments. Overtightening of bolts may over stretch and damage the striding belt or roller.
- Page 60 2. Locate and write down the serial number of the unit which is located on the small serial label on the back of the unit on the end cap near the wheel mount. Remove top motor cover to view the large serial number located on the base frame.
- Page 61 Who Pays Transportation and Insurance For Service If the Product or any covered part must be returned to a service facility for repairs, We, Life Fitness Family of Brands, will pay all transportation and insurance charges for the first year. You are responsible for transportation and insurance charge after the first year.
- Page 62 Changes in Warranty Not Authorized No one is authorized to change, modify or extend the terms of this limited warranty. Effects of State Laws This warranty gives you specific legal rights, and you may have other rights which vary from state to state and country by country.
Need help?
Do you have a question about the Symbio Runner and is the answer not in the manual?
Questions and answers