Table of Contents
Advertisement
Advertisement
Table of Contents

Related Manuals for dji GOGGLES 3


Summary of Contents for dji GOGGLES 3
- Page 1 User Manual v1.0 2024.04...
- Page 2 Users should only refer to this document and the content thereof as instructions to operate DJI UAV. The document should not be used for other purposes.
-
Page 3: Using The Manual Legend
Download the DJI Fly App • The Android version of DJI Fly is compatible with Android v7.0 and later. The iOS version of DJI Fly is compatible with iOS v11.0 and later. • The interface and functions of DJI Fly may vary as the software version is updated. -
Page 4: Download Dji Assistant 2
DJI Goggles 3 User Manual Download DJI Assistant 2 Download DJI ASSISTANT 2 (Consumer Drones Series) at: https://www.dji.com/downloads/softwares/dji-assistant-2-consumer-drones-series • Compatible software version and OS version are listed on the same web site: https:// www.dji.com/goggles-3/downloads © 2024 DJI All Rights Reserved. -
Page 5: Table Of Contents
Powering on the Goggles Wearing the Goggles Getting Clear Vision Using the Corrective Lenses Using the Additional Forehead Pad Activation Linking Linking via DJI Fly App (recommended) Linking via Button Using the Goggles Operating the Goggles Buttons AR Cursor Goggles Screen... - Page 6 Using the Head Tracking Function (only supported by certain aircraft) Maintenance Replacing the Foam Padding Cleaning and Maintenance of the Goggles Updating Firmware Using DJI Fly App Using DJI Assistant 2 (Consumer Drones Series) Appendix Specifications Compatible Products Risk and Warnings Troubleshooting...
-
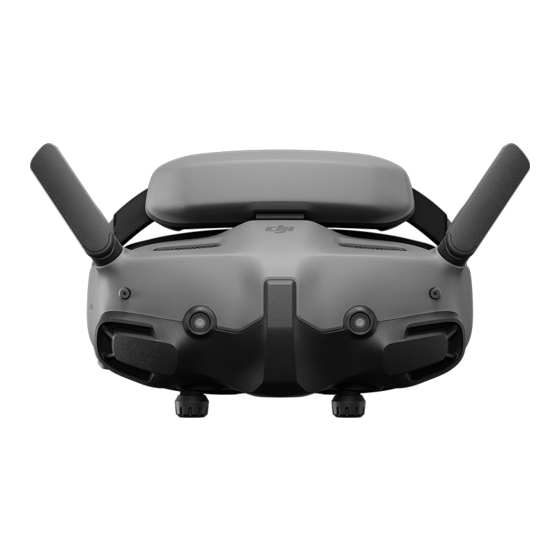
Page 7: Product Profile
With this function, the aircraft and gimbal can be controlled using head movements. When used with the DJI RC Motion 3, users can control the aircraft and the gimbal camera freely to meet their shooting needs in various scenarios. -
Page 8: Getting Started
DJI Goggles 3 User Manual Getting Started Preparing the Goggles Powering on the Goggles Press the power button once to check the current battery level. Press once, then press and hold for two seconds to power the goggles on or off. -
Page 9: Wearing The Goggles
DJI Goggles 3 User Manual The table below shows the battery level during charging: LED1 LED2 LED3 LED4 Battery Level 1%-50% 51%-75% 76%-99% 100% • USB-C port spec: USB 2.0 (480 Mbps). The maximum input power is 9V/3A. Wearing the Goggles •... -
Page 10: Getting Clear Vision
DJI Goggles 3 User Manual 3. Put on the goggles after the devices are powered on. 4. Rotate the headband adjustment knob on the battery compartment to adjust the length of the headband. Rotate clockwise to tighten the headband and counterclockwise to loosen the headband. - Page 11 DJI Goggles 3 User Manual 3. Slowly rotate the knobs to adjust the diopters. The supported adjustment range is from -6.0D to +2.0D. +2.0D ~ -6.0D +2.0D ~ -6.0D • The goggles do not support astigmatism correction. If you require astigmatism correction or if the diopters of the goggles are unsuitable, you can purchase additional lenses and use the corrective lenses frames provided to install them on the goggles.
-
Page 12: Using The Corrective Lenses
DJI Goggles 3 User Manual Using the Corrective Lenses DJI Goggles 3 supports diopter adjustment from -6.0D to +2.0D. If your vision is in the range of -6.0D to -8.0D, you can install the provided -2.0D Corrective Lenses. 1. Detach the original lens frames from the goggles by rotating counterclockwise as shown. - Page 13 DJI Goggles 3 User Manual 4. Adjust the diopters of the goggles according to your needs and lock the knobs. • After installing the -2.0D Corrective Lenses, the diopter value displayed on the screen is not the actual diopter value. The actual diopter value is the sum of the on-screen value and -2.0D.
-
Page 14: Using The Additional Forehead Pad
DJI Goggles 3 User Manual 3. Take out the purchased lenses, also identify the shortest cut edge. 4. Distinguish the left and right lens and the corresponding frame. Align the shortest cut edge and install the lens into the frame with the concave side of the lens facing the eye. -
Page 15: Activation
Connect the USB-C port of the goggles to the mobile device with the USB-C OTG cable and a suitable data cable. Run DJI Fly app and follow the on-screen instructions to activate the device and update the firmware. Make sure the mobile device is connected to the internet during activation. -
Page 16: Linking
Linking via DJI Fly App (recommended) Keep the goggles connected to the mobile device after activation. Tap Connection Guide on DJI Fly from the mobile device and follow the on-screen instructions to connect the aircraft. - Page 17 Once linking is completed, the goggles and remote control device stop beeping and both the battery level LEDs turn solid and display the battery level. • If you are using DJI RC 2 or DJI RC-N2, make sure that the remote controller and aircraft are linked, then link the aircraft with the goggles.
-
Page 18: Using The Goggles
Press to return to the previous menu or exit the current view. AR Cursor • AR Cursor is only supported when used with DJI RC Motion 3 (hereinafter referred to as motion controller). • AR Cursor cannot function properly when being used on moving objects, such as cars and ships. - Page 19 DJI Goggles 3 User Manual Before takeoff or when using the lock button to trigger the aircraft to hover, users can use the AR Cursor (the white line with a circle at the end) to interact with the screen of the googles.
- Page 20 DJI Goggles 3 User Manual Operating the Menu • Using motion controller movements, move the cursor to the arrow on the left side of the screen. Gently press the accelerator to the first stop position, then the cursor will become small and the menu will be opened.
- Page 21 DJI Goggles 3 User Manual • Move the cursor to the arrow on the top of the screen, press the accelerator to enter the shortcut menu, and configure settings such as Recording or Enhanced Display. • Move the cursor to the arrow on the bottom of the screen, press the accelerator to enter camera settings, and configure settings for the parameters of the aircraft camera.
-
Page 22: Goggles Screen
DJI Goggles 3 User Manual Goggles Screen • The actual screen interface may differ from the descriptions in this manual, and vary depending on the aircraft used and the firmware version of the goggles. FPV View 1. Flight Direction Indicator When controlling the aircraft with the motion controller, the circle indicates the direction in which the aircraft is heading. - Page 23 DJI Goggles 3 User Manual 7. GNSS Status Displays the current strength of the aircraft GNSS signal. If the devices are not used for an extended period of time, it may take longer than usual to search for the GNSS signal. If the signal is unobstructed, it takes approximately 20 seconds to search for the GNSS signal when powering on and off within a short period of time.
-
Page 24: Shortcut Menu
DJI Goggles 3 User Manual Shortcut Menu Push the 5D button backward to open the shortcut menu from the FPV view and access the quick controls of the following functions: • Take a photo, or start/stop recording • Enable/disable Enhanced Display •... -
Page 25: Camera Settings
DJI Goggles 3 User Manual Camera Settings Push the 5D button forward from the FPV view to open the camera settings panel and change camera-related parameters. In the parameter panel, push to the right to view and set more parameters. -
Page 26: Goggles Menu
DJI Goggles 3 User Manual Goggles Menu Press down the 5D button or push it to the right to open the menu from the FPV view. • The actual menu options may differ from the descriptions in this manual, and vary depending on the aircraft used and the firmware version of the goggles. - Page 27 DJI Goggles 3 User Manual number will be displayed when Broadcasting mode is enabled so that other devices can find the device and enter the channel to see the flight liveview. b) Disable the Focus mode, or set to auto. (only supported by certain aircraft) c) Set the Channel mode to auto or manual.
- Page 28 DJI Goggles 3 User Manual • Control a) Configure remote controller-related functions, such as setting the stick mode, customizable buttons, and calibrating the IMU and compass. b) View motion controller instructions, switch Handedness, adjust Gain Tuning, or calibrate the motion controller.
-
Page 29: Goggles Footage Storage And Export
DJI Goggles 3 User Manual Goggles Footage Storage and Export microSD Card Slot Footage Storage The goggles support the installation of a microSD card. After a microSD card is inserted, if Record With is set to both the aircraft and the goggles while the aircraft is recording video the goggles will simultaneously record the flight live view displayed on the screen and store it on the microSD card of the goggles. -
Page 30: Real View
DJI Goggles 3 User Manual Real View DJI Goggles 3 are equipped with binocular cameras, in order for users to view the surrounding environment without removing the goggles. Tap twice firmly on the right side of the goggles, or press twice on the dial of the motion controller to enter Real View. -
Page 31: Wired Connection With Mobile Device
1. It is recommended to use a suitable data cable or the USB-C OTG cable provided to connect the mobile device to the USB-C port on the goggles. 2. Launch DJI Fly app and tap GO FLY in the lower right corner of the screen to enter the liveview. -
Page 32: Panorama/3D Video Playback
DJI Goggles 3 User Manual Panorama/3D Video Playback The goggles support playing panoramic videos and 3D videos, bringing you an immersive viewing experience. 1. Import panoramic/3D videos to a microSD card, and insert it into the goggles. 2. Enter the goggles menu and then Album, then select the video file to play. -
Page 33: Maintenance
DJI Goggles 3 User Manual Maintenance Replacing the Foam Padding 1. Hold the bottom of the foam padding and remove it gently, as shown below. • DO NOT pull the sides when removing the foam padding. Otherwise, the padding may be damaged. -
Page 34: Cleaning And Maintenance Of The Goggles
DJI Goggles 3 User Manual Cleaning and Maintenance of the Goggles Clean the surface of the goggles with a soft, dry, clean cloth. Use the lens cleaning cloth to clean the lenses in a circular motion from the center to the outer edges. -
Page 35: Updating Firmware
Power off the aircraft, and then power on the goggles and the remote control device. Connect the USB-C port of the goggles to the mobile device, run DJI Fly, and follow the prompt to update. An internet connection is required. - Page 36 DJI Goggles 3 User Manual • Make sure to follow all the steps to update the firmware, otherwise the update may fail. • The firmware update will take several minutes. It is normal for the screen to turn off or the goggles to restart automatically during the update.
-
Page 37: Appendix
DJI Goggles 3 User Manual Appendix Specifications Model TKGS3 Weight Approx. 470 g Dimensions (L×W×H) With antennas folded: 170×109×112 mm (L×W×H) With antennas unfolded: 205×109×112 mm (L×W×H) Screen Size (single screen) 0.49 inch Resolution (single screen) 1920×1080 Refresh Rate Up to 100 Hz... - Page 38 1080p/100fps video transmission quality: latency down to 24 ms 1080p/60fps video transmission quality: latency down to 40 ms Max Transmission When used with DJI Avata 2, DJI Goggles 3 can achieve the Distance following max video transmission distance: 13 km (FCC), 10 km (CE/SRRC/MIC)
-
Page 39: Compatible Products
If the goggles screen goes off unexpectedly during flight, press the motion controller lock button once to brake the aircraft first, and then initiate RTH manually. After the aircraft is back, check the goggles power level and try to restart the goggles. If the problem persists, contact DJI support. -
Page 40: Troubleshooting
DJI Goggles 3 User Manual Troubleshooting 1. Power-on and start-up problems Check if the battery has power. Contact DJI support if it cannot be started normally. 2. Power-off and shutdown problems Contact DJI support. 3. The device is not functioning after powering on. -
Page 41: Aftersales Information
DJI Goggles 3 User Manual Aftersales Information Visit https://www.dji.com/support to learn more about aftersales service policies, repair services, and support. © 2024 DJI All Rights Reserved. ... - Page 42 DJI SUPPORT This content is subject to change. https://www.dji.com/goggles-3/downloads If you have any questions about this document, please contact DJI by sending a message to DocSupport@dji.com. DJI and DJI AVATA are trademarks of DJI. Copyright © 2024 DJI All Rights Reserved.
Need help?
Do you have a question about the GOGGLES 3 and is the answer not in the manual?
Questions and answers