
Related Manuals for Impulse HSR005


Summary of Contents for Impulse HSR005
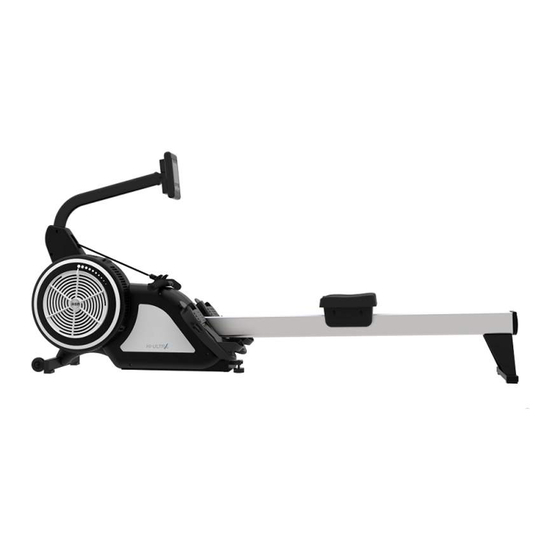
- Page 1 HSR005 Rower Owner's Manual CAUTION! Read all precautions and instructions in this manual before using this equipment.
-
Page 2: Table Of Contents
Table Of Contents ! CAUTION Read all precautions and instructions in this manual before using this equipment. Important Safety Instructions---------------------------------------------------------------- 3 Warm Up Exercises ---------------------------------------------------------------------------- 5 Parts List and Exploded View ----------------------------------------------------------------- 6 Maintenance & Service----------------------------------------------------------------------- 19 Console Panel Functions --------------------------------------------------------------------- 20... -
Page 3: Important Safety Instructions
Important Safety Instructions Every Machine is built for maximum safety and meets or exceeds all applicable domestic and international standards. However, certain precautions must be taken when operating any piece of fitness equipment. Always follow basic safety precautions when using this product to reduce the chance of injury, fire, or damage. - Page 4 Important Safety Instructions When using Machine, you should always take basic precautions, including the following: ● The Machine should not be used without prior instruction by qualified personnel. ● Do not use while under the influence of alcohol, drugs, or narcotics. ●...
-
Page 5: Warm Up Exercises
Warm Up Exercises EXERCISE GUIDELINES WARNING! Before beginning this or any exercise program, you should consult your physician. This is especially important for individuals over the age of 35 or individuals with pre-existing health problems. Warming up prepares the body for the exercise by increasing circulation, supplying more oxygen to the muscles and raising body temperature. -
Page 6: Parts List And Exploded View
Parts List and Exploded View Overall ItemNo. Part No. Description HSR00501ASSY Base Frame HSR00502ASSY Console Mask HSR00504ASSY REAR FOOT SR72600ASSY SEAT ASSEMBLY HSR0051500ASSY Console SR74100 Left Cover SR74200 Right Cover HSR00503ASSY Beam SR79100 Crash Pad GB70M6*10DS20NL Hexagon socket head cap screws 6*10 GB70M8*20DS20NL Hexagon socket head cap screws 8*20 GB70M8*50DHS20... - Page 7 Parts List and Exploded View Main Frame Assembly ItemN o. Grade No. Part No. Description HSR0050100 Main Frame HSR50101ASSY Fan Shaft Assembly HSR50102ASSY Adapting Piece Assembly HSR0050600ASSY Chain HSR00552500ASSY Fan Assembly HSR0050600 Spacer 1 HSR0050800 Nylon stick HSR0051000 TPU Wheel HSR0051100 Chain Base 1.10...
- Page 8 Parts List and Exploded View Main Frame Assembly ItemN o. Grade No. Part No. Description 1.32 DP86703100V1 PU Wheel 1.33 NXSC-013400 Nylon Spacer 1.34 BNH0008 Plug 1.35 DC1600A9200 Foot Cushion 1.36 IS4005100 Adjustment plate 1.37 DQXK14 U-tape clip 1.38 ECU7P3500 Plastic Nut 1.39 GB17880.5M8*16.5DCS17...
- Page 9 Parts List and Exploded View Main Frame Assembly ─ 9 ─...
- Page 10 Parts List and Exploded View Main Frame Assembly ─ 10 ─...
- Page 11 Parts List and Exploded View Main Frame Assembly ─ 11 ─...
- Page 12 Parts List and Exploded View Main Frame Assembly ─ 12 ─...
- Page 13 Parts List and Exploded View Fan Shaft Assembly ItemN o. Grade No. Part No. Description 1.2.1 HSR0050200 Fan Shaft 1.2.2 HSR0050300 Chain Wheel 1.2.3 HSR0050400 Barney 1.2.4 HSR0051300 Bearing holder 1 1.2.5 HSR0051400 Bearing holder 2 1.2.6 GB2766004-2ZC3NBK Bearing 1.2.7 GB2766001-2ZC3 Bearing 1.2.8...
- Page 14 Parts List and Exploded View Adapting Piece Assembly ItemN o. Grade No. Part No. Description 1.3.1 HSR0050500 Sliding seat 1.3.2 HSR0050600 Spacer 1 1.3.3 HSR0051000 TPU Wheel 1.3.4 HSR0057600 Elastic Pulley 1.3.5 GB70M5*30DHS20 Screw M5*30 1.3.6 GB70M6*40*22FH21 Screw M6*40 1.3.7 NM5DHS2 Nut M5 1.3.8...
- Page 15 Parts List and Exploded View The Handle Assembly Fan Assembly ItemN o. Grade No. Part No. Description 1.5.1 HSR0052501ASSY Fan Sleeve Assembly 1.5.2 HSR0052502ASSY 1.5.3 GB70M5*12DHS20 Screw M5*12 ItemN o. Grade No. Part No. Description 1.10.1 SR715700 aluminium tube Handle Cover 1.10.2 SR715900 1.10.3...
- Page 16 Parts List and Exploded View Sensor Assembly 2 Electronic table brace Assembly Underneath Support Frame Assembly ItemN o. Grade No. Part No. Description 1.61.1 SR76400 Sensor 1.61.2 DQCGQ01-SR7 Sensor 1.61.3 GB845ST4.2*16DHS Pan Head Tapping Sc rew s W ith C ros s Recessed 4. 2*16 ItemN o.
- Page 17 Parts List and Exploded View Cushion Assembly ItemN o. Grade No. Part No. Description SR77900 Cushion SR75900 Cushion Cover SR73900 Cushion Plate SR71300ASSY Cushion Roller Assembly Seat Slip Wheel SR78200 shaft SR715000 SR714900 stud GB894.110FH12 External Retaining Ring Φ25 GB70M6*15DHS4 Screw M6*15 4.10 DQ10DHS2A...
- Page 18 Parts List and Exploded View Electronic table Assembly ItemN o. Grade No. Part No. Description B240-HSR005 Electronic table SR007MM01 mask SR75300 Front Shroud Of Table SR75400 Back Shroud Of Table GB845ST2.9*6.5DS Pan Head Tapping Screws With Cross Recessed 2. 9*6. 5 GB845ST2.9*13DHS...
-
Page 19: Maintenance & Service
Maintenance & Service All Machines are engineered for years of operation. Regular maintenance and cleaning will lengthen the life and preserve the appearance of the Machine. Let noise be your first indication that a repair or adjustment is required. Please discontinue use immediately and contact an Authorized Service Technician Dealer if an unusual noise, scraping, knocking, grinding or vibration is detected. -
Page 20: Console Panel Functions
Console Panel Functions 1. HARDWARE OVERVIEW The display shall consist of the following principle elements: • Main PCB * Core microcontroller with internal flash memory which shall programmable via USB interface and/or over-the-air (OTA) via NPE GEM module. * NPE GEM module Model: GEMSRB02 (supports both Bluetooth and ANT+ communication). - Page 21 Console Panel Functions 1.1 STATIC LCD • Size: 100mm x 60mm • Viewing Angle: 6 o'clock LCD WITH ALL SEGMENTS ILLUMINATED – (150% SCALE) ─ 21 ─...
- Page 22 1.2 KEYPAD OVERLAYS The display shall utilize six (6) physical key switches mounted to the PCB. The display assembly shall consist of a physical structure similar to other Impulse display consoles. The top layer shall consist of a graphical overlay with printed buttons.
- Page 23 Console Panel Functions 2. SYSTEM MODES OVERVIEW Wake Mode – This is the mode the system enters upon power up or when it awakes from Sleep Mode. All system initializations happen in this mode. Idle Mode – This is the mode the system enters upon successful power up of the system.
- Page 24 Console Panel Functions 3. IDLE MODE During the IDLE MODE the system is waiting for the user to press either the START, SELECT WORKOUT, or BLUETOOTH buttons. The initial state of the display readouts shall be as follows: To begin a workout quickly the user can press the START button on the keypad. Pressing this button will transition the system to PROGRAM MODE.
- Page 25 Console Panel Functions 4. PROGRAM SETUP MODE To enter the PROGRAM SETUP mode the user needs to press the SELECT WORKOUT button on the IDLE screen. 4.1 WORKOUT SELECTION SCREENS In this mode the user shall be asked to select the type of program that they would like to do.
- Page 26 Console Panel Functions 4.2 TIME GOAL SCREEN The TIME GOAL screen is shown below: On the TIME GOAL screen the user shall be able to choose the duration of their workout. The user shall be able to enter a duration from 1 to 99 minutes. The default value shall be 30:00 minutes.
- Page 27 Console Panel Functions 4.3 DISTANCE GOAL SCREEN The DISTANCE GOAL screen is shown below: On the DISTANCE GOAL screen the user shall be able to choose the desired distance for their workout. The user shall be able to enter a length from 100 to 9900 meters.
- Page 28 Console Panel Functions 4.4 CALORIE GOAL SCREEN The CALORIE GOAL screen is shown below: On the CALORIE GOAL screen the user shall be able to choose the desired calorie goal for their workout. The user shall be able to enter a goal from 5 to 1000 calories.
- Page 29 Console Panel Functions 4.5 INTERVALS SCREEN The INTERVALS screens are shown below: There shall be two interval types that can be selected and they are as follows: • Time Intervals • Distance Intervals The first screen that will be shown is the one for TIME INTERVAL GOAL. To select between the available Interval types, the user shall press either the DOWN or UP button to navigate to the next or previous choice respectively.
- Page 30 Console Panel Functions 4.6 TIME INTERVALS SCREEN The TIME INTERVALS screen is shown below: An interval consists of a segment of high intensity and segment of low intensity exercise. The high intensity segment is defined by the WORK TIME. The low intensity segment is defined by the REST TIME.
- Page 31 Console Panel Functions • If the UP button continues to be held for 2 more seconds then the work time value shall increment by 5 minutes every 500ms • If the DOWN button is held for more than 2 seconds then the work time value shall decrement by 10 seconds every 500ms •...
- Page 32 Console Panel Functions The user can adjust the value up or down by using the UP and DOWN buttons respectively. Each press of either the UP or DOWN button shall change the current displayed value by 1. The UP button shall be used to increase the number of intervals and the DOWN button shall be used to decrease the number of intervals.
- Page 33 Console Panel Functions An interval consists of a segment of high intensity and segment of low intensity exercise. The high intensity segment is defined by the WORK DISTANCE. The low intensity segment is defined by the REST DISTANCE. On the DISTANCE INTERVALS screens the user shall be able to specify the desired distance for the work and rest segments and the total number of intervals desired for the given workout.
- Page 34 Console Panel Functions The user can adjust the value up or down by using the UP and DOWN buttons respectively. Each press of either the UP or DOWN button shall change the current displayed value by 100. The UP button shall be used to increase the distance and the DOWN button shall be used to decrease the distance.
- Page 35 Console Panel Functions Once the NUMBER OF INTERVALS is set to the desired value for the given workout the ENTER button shall be pressed. Upon pressing the ENTER button the system shall transition to PROGRAM MODE and the workout will begin. See section 6 PROGRAM MODE (I.E.
- Page 36 Console Panel Functions 5.1 STANDARD WORKOUT SCREENS For quick workouts that are initiated by hitting the START button from the IDLE SCREEN or workouts that are initiated by selecting a TIME GOAL, DISTANCE GOAL, or CALORIE GOAL the following screens shall be provided during the workout. The default value to display in the lower window is CALORIES.
- Page 37 Console Panel Functions 5.2 TIME INTERVAL WORKOUT SCREENS For TIME INTERVAL workouts the following initial screen shall be provided during the workout. The default value to display in the lower window is CALORIES. The following fields are present: • Time – The elapsed time for the workout in MM:SS format •...
- Page 38 Console Panel Functions 5.3 DISTANCE INTERVAL WORKOUT SCREENS For DISTANCE INTERVAL workouts the following initial screen shall be provided during the workout. The default value to display in the lower window is CALORIES. The following fields are present: • Time – The elapsed time for the workout in MM:SS format •...
- Page 39 Console Panel Functions 6. PAUSE/SUMMARY MODE 6.1 USER STOPS EXERCISING If the user stops exercising (i.e. the RPM has been less than 300 RPM for 4 or more seconds) during a workout the system shall transition to PAUSE/SUMMARY MODE, the elapsed time shall stop incrementing, the distance and calories shall stop accumulating and the system shall start displaying the average values for pace, stroke/rate, watts, and heart rate as shown in the screen image below.
- Page 40 Console Panel Functions 6.3 WORKOUT GOAL IS REACHED If the user reaches their chosen workout goal then the system shall also transition to PAUSE/SUMMARY MODE, the elapsed time shall stop incrementing, the distance and calories shall stop accumulating and the system shall start displaying the average values for pace, stroke/rate, power, and heart rate as shown in the screens images below.
- Page 41 Console Panel Functions 7. BLUETOOTH PAIRING MODE 7.1 CONNECTING TO A SMARTPHONE Press the BLUETOOTH button to initiate the Bluetooth pairing process. The Bluetooth icon shall begin to flash at a 1Hz rate to indicate that the Bluetooth radio is advertising and Is looking for an available mobile device to pair with. During advertising, the console shall automatically generate a randomized 4-digit code that will serve as the unique identifier for this console the first time the BLUETOOTH Button is pressed, and the advertised label will be “Ski-Row XXXX”,...
- Page 42 Console Panel Functions 8. HEART RATE STRAP CONNECTION MODE 8.1 CONNECTING TO A HEART RATE STRAP If the console is connected via Bluetooth LE to a smartphone, pairing of a Bluetooth HR strap will be managed by the iOS or Android application, and the connection shall occur via Bluetooth LE protocol within the NPE GEM module as described in the BLUETOOTH PAIRING MODE section above and the latest version of the NPE GEM Host Controller Interface specification.
- Page 43 Console Panel Functions 9. CONFIGURATION MODES 9.1 SETTINGS SCREENS To enter CONFIGURATION MODE the user shall press START, UP, and STOP simultaneously. The graphic below shows the SETTINGS screens: There shall be five options provided to the user on these screens and they are as follows: •...
- Page 44 Console Panel Functions 9.2 STATISTICS SCREEN The graphic below shows the STAT screens: There shall be three different statistics provided to the user on these screens and they are as follows: • Total Time – This is the total amount of time, in hours, minutes, and seconds, of all workouts performed on this given machine;...
- Page 45 Console Panel Functions 9.3 HR TEST SCREEN The graphic below shows the HR TEST screen: The HR Test shall allow the user to verify the functionality of their heart rate strap. The system shall support Bluetooth Smart compatible HR straps. When on this screen the user shall be able to connect their HR strap to the console by pressing the BLUETOOTH button.
- Page 46 Console Panel Functions 9.4 VOLUME SCREEN The graphic below shows the VOLUME screens: The console shall be equipped with a piezo style beeper that shall be used to generate tones for button presses and various system related events. The volume of this beeper shall be adjustable in order to allow users to control how loud or quiet they desire the tones to be.
Need help?
Do you have a question about the HSR005 and is the answer not in the manual?
Questions and answers