Yamaha YST-SW515 Owner's Manual
Active servo processing subwoofer system
Hide thumbs
Also See for YST-SW515:
- Owner's manual (121 pages) ,
- Service manual (24 pages) ,
- Product catalog (44 pages)
Table of Contents
Advertisement
Quick Links
Advertisement
Table of Contents

Related Manuals for Yamaha YST-SW515


Summary of Contents for Yamaha YST-SW515
- Page 1 YST-SW515 Subwoofer System OWNER’S MANUAL...
-
Page 2: Important Safety Instructions
IMPORTANT SAFETY INSTRUCTIONS Explanation of Graphical Symbols The lightning flash with arrowhead symbol, within an equilateral triangle, is intended to alert you to the presence of uninsulated "dangerous voltage" within the product's enclosure that may be of sufficient magnitude to constitute a risk of electric shock to persons. - Page 3 Yamaha Electronics Corp., U.S.A. 6660 Orangethorpe Ave, Buena Park, CA 90620. The above statements apply ONLY to those products distributed by Yamaha Corporation of America or its subsidiaries. We Want You Listening For A Lifetime YAMAHA and the Electronic Industries Association’s...
- Page 4 Thank you for selecting this YAMAHA subwoofer system. CAUTION: Read this before operating your unit Please read the following operating precautions before use. YAMAHA will not be held responsible for any damage and/or injury caused by not following the cautions below.
-
Page 5: Table Of Contents
Connecting to speaker output terminals of the amplifier ... 6 Connecting to the INPUT1/ OUTPUT terminals of the subwoofer ...8 Plug in the subwoofer to the AC outlet ...8 CONTROLS AND THEIR FUNCTIONS ... 9 AUTOMATIC POWER-SWITCHING FUNCTION ... 11 Changing the AUTO STANDBY setting ...11... -
Page 6: Features
• You can select bass effect suitable for the source by using the B.A.S.S. button. • This subwoofer system is equipped with a linear port unique to Yamaha that provides smooth bass response during playback, minimizing extraneous noise not included in the original input signal. -
Page 7: Placement
In such a case, face the subwoofer obliquely to the wall. It also may be necessary to break up the parallel surfaces by placing bookshelves etc. along the walls. -
Page 8: Connections
• After all connections are completed, plug in the subwoofer and other audio/video components. Connecting to line output (pin jack) terminals of the amplifier • To connect with an amplifier (or AV receiver), connect the SUBWOOFER (or LOW PASS etc.) terminal on the rear of the amplifier (or AV receiver) to the •... -
Page 9: Using Two Subwoofers
■ Using one subwoofer Subwoofer To AC outlet Amplifier ■ Using two subwoofers Subwoofer To AC outlet Subwoofer To AC outlet CONNECTIONS Mono pin cable (not included) Audio pin cable (not included) Mono pin cable(not included) Mono pin cable (not included) -
Page 10: Connecting To Speaker Output Terminals Of The Amplifier
• Connect one set of front speaker output terminals of the amplifier to the INPUT1 terminals of the subwoofer, and connect the other set of front speaker output terminals of the amplifier to the front speakers. - Page 11 If your amplifier has only one set of front speaker output terminals. Connect the speaker output terminals of the amplifier to the INPUT1 terminals of the subwoofer, and connect the OUTPUT terminals of the subwoofer to the front speakers. ■...
-
Page 12: Connecting To The Input1/Output Terminals Of The Subwoofer
Do not bundle or roll up the excess part of the cables. If the connections are faulty, no sound will be heard from the subwoofer or the speakers, or both of them. Make sure that the + and – polarity markings of the speaker cables are observed and set correctly. -
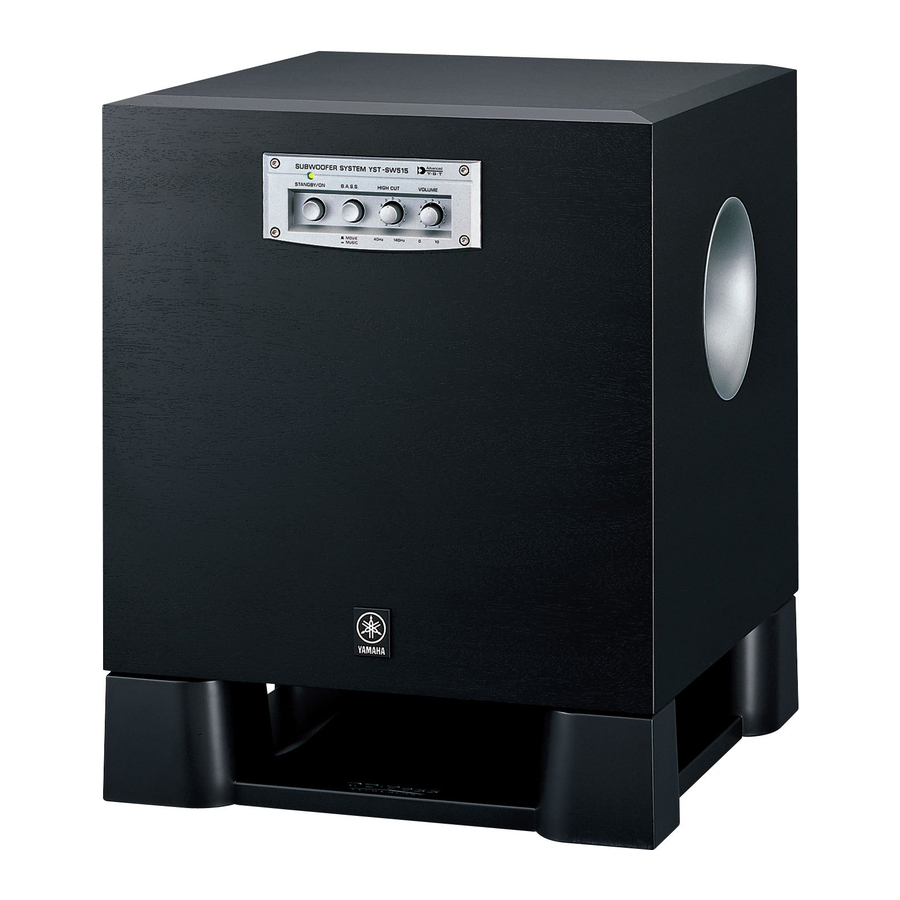
Page 13: Controls And Their Functions
CONTROLS AND THEIR FUNCTIONS 1 Power indicator Lights up in green while the subwoofer is on. Lights up in red while the subwoofer is set in the standby mode by the operation of the automatic power- switching function. Goes off when the subwoofer is set in the standby mode. - Page 14 11. If you do not need this function, leave this switch in the OFF position. * Make sure to change the setting of this switch only when the subwoofer is set in the standby mode by pressing the STANDBY/ON button. B PHASE switch Normally this switch is to be set to the REV (reverse) position.
-
Page 15: Automatic Power-Switching Function
AUTOMATIC POWER-SWITCHING FUNCTION This function automatically switches the unit between standby and power-on modes. The subwoofer automatically places itself in standby mode if it does not receive an input signal for 7 or 8 minutes. (The power indicator lights red.) When the subwoofer detects a bass signal input of below 200 Hz, it automatically places itself in power-on mode. -
Page 16: Adjusting The Subwoofer Before Use
ADJUSTING THE SUBWOOFER BEFORE USE Before using the subwoofer, adjust the subwoofer to obtain the optimum volume and tone balance between the subwoofer and the front speakers by following the procedures described below. Set the VOLUME control to minimum (0). -
Page 17: Frequency Characteristics
This subwoofer’s frequency characteristics The figures below show the optimum adjustment of each control and the frequency characteristics when this subwoofer is combined with a typical front speaker system. ■ EX.1 When combined with a 4” or 5” (10 cm or 13 cm) acoustic suspension, 2 way system front... -
Page 18: Advanced Yamaha Active Servo Technology Ii
ADVANCED YAMAHA ACTIVE SERVO TECHNOLOGY II In 1988, Yamaha brought to the marketplace speaker systems utilizing YST (Yamaha Active Servo Technology) to give powerful, high quality bass reproduction. This technique uses a direct connection between the amplifier and speaker, allowing accurate signal transmission and precise speaker control. -
Page 19: Troubleshooting
Refer to the chart below when this unit does not function properly. If the problem you are experiencing is not listed below or if the instructions given below do not help, disconnect the power cord and contact your authorized YAMAHA dealer or service center. -
Page 20: Specifications
YAMAHA ELECTRONICS (UK) LTD. YAMAHA HOUSE, 200 RICKMANSWORTH ROAD WATFORD, HERTS WD18 7GQ, ENGLAND YAMAHA SCANDINAVIA A.B. J A WETTERGRENS GATA 1, BOX 30053, 400 43 VÄSTRA FRÖLUNDA, SWEDEN YAMAHA MUSIC AUSTRALIA PTY, LTD. 17-33 MARKET ST., SOUTH MELBOURNE, 3205 VIC., AUSTRALIA SPECIFICATIONS Power Consumption...80 W...
Need help?
Do you have a question about the YST-SW515 and is the answer not in the manual?
Questions and answers