Table of Contents
Advertisement
Quick Links
M2
Series
MICRO-INVERTER
USER MANUAL
Tel.: (86)20 66608588
Fax.: (86)20 66608589
Web: www.saj-electric.com
GUANGZHOU SANJING ELECTRIC CO.,LTD
Add: SAJ Innovation Park, No.9, Lizhishan Road, Science City, Guangzhou High-tech Zone, Guangdong, P.R.China
M2-1.8K-S4 丨 M2-2K-S4 丨 M2-2.2K-S4 丨 M2-2.25K-S4
V0.2
Advertisement
Table of Contents

Related Manuals for SAJ M2 Series


Summary of Contents for SAJ M2 Series
- Page 1 Series MICRO-INVERTER USER MANUAL Tel.: (86)20 66608588 Fax.: (86)20 66608589 Web: www.saj-electric.com GUANGZHOU SANJING ELECTRIC CO.,LTD Add: SAJ Innovation Park, No.9, Lizhishan Road, Science City, Guangzhou High-tech Zone, Guangdong, P.R.China M2-1.8K-S4 丨 M2-2K-S4 丨 M2-2.2K-S4 丨 M2-2.25K-S4 V0.2...
- Page 2 Preface Thank you for choosing SAJ inverter. We are pleased to provide you first-class products and exceptional service. This manual includes information for installation, operation, maintenance, trouble shooting and safety. Please follow the instructions of this manual so that we can ensure delivery of our professional guidance and wholehearted service.
-
Page 3: Table Of Contents
2.3 Datasheet .................................. 8 Chapter 6 Fault Code and Troubleshooting ..............35 Chapter 3 Installation Instruction..................11 Chapter 7 Recycling and Disposal ..................39 3.1 Safety Instructions ..............................12 3.2 Pre-installation Check............................12 Contact SAJ ..........................40 3.2.1 Check the Package ............................12... - Page 4 M2 Series Micro-inverter 1.1 Scope of Application This User Manual describes instructions and detailed procedures for installing, operating, maintaining, and troubleshooting of the following SAJ products: M2-1.8K-S4; M2-2K-S4; M2-2.2K-S4; M2-2.25K-S4; 1.2 Safety Instructions DANGER · DANGER indicates a hazardous situation which, if not avoided, will result in death or serious injury.
- Page 5 Equipment with the CE mark fulfills the requirements of the Low Voltage Directive and Electro- ·SAJ Electric shall not be liable for any loss or warranty claims arising from any unauthorized change of product which may Magnetic Compatibility.
- Page 6 M2 Series Micro-inverter M2 Series The M2-(1.8K-2.25K)-S4 micro-inverter is used in grid-tied applications, comprised of two key elements: a. M2-(1.8K-2.25K)-S4 Micro-inverter. b. Monitoring and analysis system. The micro-inverter converts the DC electricity generated by solar panels into AC electricity which is in accordance with the requirements of the public grid and sends the AC into the grid, reducing the load pressure of the grid.
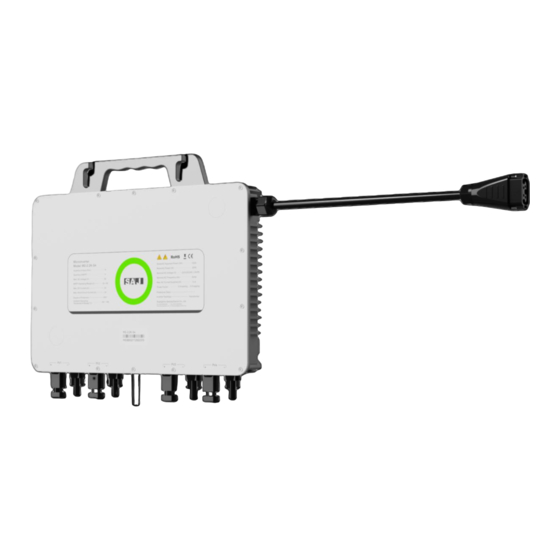
- Page 7 M2 Series Micro-inverter 2.2 Overview of Product Code Name Mounting Hole DC Cables Antenna Table 2.1 M2 microinverter AC Cables Interface description LED Indicators Figure 2.2 Dimensions of M2 microinverter 2.4 Datasheet 2.3 Terminals Description Model M2-1.8K-S4 M2-2K-S4 M2-2.2K-S4 M2-2.25K-S4...
- Page 8 M2 Series Micro-inverter Overvoltage Category ⅡI Total Harmonic Distortion [THDi] <3% Maximum Units per 10AWG Branch Efficiency Peak Efficiency 97.00% CEC Efficiency 96.00% Mechanical Data Operating Temperature Range -40℃ to +60℃ (45℃ to 60℃ with derating) Communication Wi-Fi / Bluetooth...
- Page 9 3.2.1 Check the package INSTALLATION Although SAJ’s inverters have thoroughly tested and checked before delivery, it is uncertain that the inverters may suffer damages during transportation. Please check the package for any obvious signs of damage, and if such evidence is present, do not open the package and contact your dealer as soon as...
-
Page 10: Scope Of Delivery
M2 Series Micro-inverter 3.2.2 Scope of Delivery 3.3 Determining the installation method and position Please contact after sales if there is missing or damaged components (1) The equipment employs natural convection cooling, and it can be installed indoor or outdoor. -
Page 11: Mounting Procedure
M2 Series Micro-inverter 3.4.2 Mounting Procedures 3.4 Mounting Procedure Step 1: Plan and install the microinverter After Installation, you are suggested to tick in the right box (□) on the system label according to the number of battery modules. Mark the position of each microinverter on the rail. Secure the screws on the marks to the rail. Face the cover toward the photovoltaic module. -
Page 12: Chapter 4 Electrical Connection
M2 Series Micro-inverter 4.1 Safety Instruction Electrical connection must only be carried out by professional technicians. Before connection, necessary protective equipment must be employed by technicians including insulating gloves, insulating shoes and safety helmet. DANGER · Dangerous to life due to potential fire or electricity shock. -
Page 13: Ac Side Cable Connection
M2 Series Micro-inverter 4.3 AC Side Cable Connection Part Name Part Name AC trunk cable Mounting bracket (optional) Step1: Take out the AC connector from the package. AC trunk connector unlock tool AC trunk port cap AC trunk end cap... - Page 14 M2 Series Micro-inverter (3) If the micro-inverter is connected to 127/220 V three-phase power grid, connect one live line to port L and connect another live line to port N. Figure 4.7 Unlock tool usage (2) Insert the other main cable into the body shell and crimp the inner wires into the slot according to the L, PE, and N marks.
- Page 15 M2 Series Micro-inverter (5) Lay the AC trunk cables on the guide rail and fix it with ties. Figure 4.12 Figure 4.15 Fixing the cables with ties Single-machine system Note: If you need to remove the output-side AC connector of the microinverter from AC trunk cable, please Step 3: Complete AC Connection insert the branch connector unlock tool into the AC branch cable connector.
-
Page 16: Dc Side Cable Connection
M2 Series Micro-inverter 4.5 PV Module Connection NOTICE · If there are more than one installation site, please make the installation map separately and give a clear Connecting the PV Modules description about the installation site. · The row of the table corresponds the shorter side of PV module and the column of the table corresponds Install PV modules above microinverters. -
Page 17: Chapter 5 Commissioning
M2 Series Micro-inverter 5.1 Start Up and Shut Down the Micro-Inverter 5.1.1 Start Up Step 1: While installation is all finished, turn on the main utility-grid AC circuit breaker. Step 2: Wait for two minutes and your system will start running. -
Page 18: Logging In To The App
M2 Series Micro-inverter 5.2.2 Logging in to the App 5.2.3 Completing the Initialization Settings Procedure Follow the instructions on the screen. 1. Open the App and click on the three-dot icon on the top right corner. 2. Set the Language to English and Network Node to Overseas Node. - Page 19 M2 Series Micro-inverter 5.2.4 Bluetooth Connection Step 1: Log in, and go to “Service” interface, and select “Remote Configuration”. Step 2: Click on “Bluetooth”, and then click on “Next” Step 3: Select your device, and click “WiFi Configuration” Step 4: Select your WiFi and enter the WiFi passwords, then choose your correct router Step 5: Click the right arrow of your device, and click “Initialization”...
- Page 20 M2 Series Micro-inverter 5.2.5 Plant Creation Step 1: Enter the Management page, click the + button in the upper right corner, then Create Plant for Me Step 2: Fill in the inverter SN, click the + button to read the device information, then click Next.
- Page 21 Disconnect the AC switch for 5-10 minutes, and check whether the fault disappears. Master Bus Voltage High Restart the inverter. If this fault appears continuously, please contact the SAJ service. Restart the inverter. Master Bus Voltage Low If this fault appears continuously, please contact the SAJ service.
- Page 22 Master No Grid Error After the above inspections confirm that there is no power failure or If this fault appears continuously, please contact the SAJ service. disconnection, or insecure connection, please close the AC switch and re- Disconnect the AC switch for 5 minutes and then restart the inverter.
-
Page 23: Contact Saj
It must be disposed of carefully by an approved collection and recycling facility in your area. Contact SAJ Guangzhou Sanjing Electric Co., Ltd. SAJ Innovation Park, No.9, Lizhishan Road, Guangzhou Science City, Guangdong, P.R.China. Postcode: 510663 Web: http: //www.saj-electric.com Technical Support & Service...
Need help?
Do you have a question about the M2 Series and is the answer not in the manual?
Questions and answers