Table of Contents

Related Manuals for Hisense HI6401CH


Summary of Contents for Hisense HI6401CH
- Page 1 Questo manuale d’istruzione è fornito da trovaprezzi.it. Scopri tutte le offerte per Hisense BI64211EPB cerca il tuo prodotto tra le migliori offerte di Forni Instruction Manual / Installation Manual Induction hob HI6401CH...
-
Page 2: Table Of Contents
Content 1. Foreword ................... 4 1.1 Safety Warnings ................4 1.2 Installation ..................4 1.2.1 Electrical Shock Hazard ............4 1.2.2 Cut Hazard ..............4 1.2.3 Important safety instructions ..........4 1.3 Operation and maintenance ............... 5 1.3.1 Electrical Shock Hazard ............5 1.3.2 Health Hazard .............. - Page 3 9.5 Adjusting the bracket position ............23 9.6 Cautions ..................23 9.7 Connecting the hob to the mains power supply ........23...
-
Page 4: Foreword
1. Foreword 1.1 Safety Warnings Your safety is important to us. Please read this information before using your cooktop. 1.2 Installation 1.2.1 Electrical Shock Hazard • Disconnect the appliance from the mains electricity supply before carrying out any work or maintenance on it. •... -
Page 5: Operation And Maintenance
• This appliance can be used by children aged from 8 years and above and persons with reduced physical, sensory or mental capabilities or lack of experience and knowledge if they have been given supervision or instruction concerning use of the appliance in a safe way and understand the hazards involved. -
Page 6: Hot Surface Hazard
(such as insulin pumps) must consult with their doctor or implant manufacturer before using this appliance to make sure that their implants will not be affected by the electromagnetic field. • Failure to follow this advice may result in death. 1.3.3 Hot Surface Hazard •... - Page 7 • Do not leave children alone or unattended in the area where the appliance is in use. • Children or persons with a disability which limits their ability to use the appliance should have a responsible and competent person to instruct them in its use.
-
Page 8: Product Induction
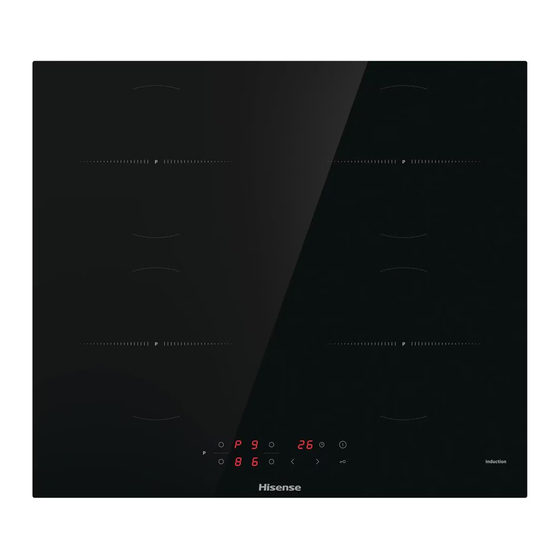
2. Product Induction 2.1 Top View 1. Max. 1200/1500 W zone 2. Max. 1500/2000 W zone 3. Max. 1500/2000 W zone 4. Max. 1200/1500 W zone 5. Glass plate 6. Control panel 7. ON/OFF control 2.2 Control Panel 1. Heating zone selection controls 2. -
Page 9: Technical Specification
2.5 Technical Specification HI6401CH Cooking Hob Cooking Zones 4 Zones Supply Voltage 220-240V~ 50Hz or 60Hz Installed Electric Power 7000W Product Size L×W×H(mm) 590X520X60 Building-in Dimensions A×B (mm) 560X490 Weight and Dimensions are approximate. Because we continually strive to improve our products we may change specifications and designs without prior notice 3. -
Page 10: How To Use
Use pans whose diameter is as large as the graphic of the zone selected. Using a pot a slightly wider energy will be used at its maximum efficiency. If you use smaller pot efficiency could be less than expected. Pot less than 140 mm could be undetected by the hob. -
Page 11: Finish Cooking
Warning: The whole hob can take in charge a maximum power of 3000W. Consequently, the hob automatically reduces the maximum output power by allowing a maximum sum of the all power levels of 12 If the display flashes alternately with the heat setting This means that: •... -
Page 12: Locking The Controls
Touching the heating zone selection control Touching the boost control ,the zone indicator show “b” and the power reach Max Cancel the Boost function Touching the heating zone selection control that you wish to cancel the boost function Touching the "Boost" control or the “-” button to cancel the Boost function, then the cooking zone will revert to its original setting. -
Page 13: Timer Control
3.3.5 Timer control You can use the timer in two different ways: You can use it as a minute minder. In this case, the timer will not turn any cooking zone off when the set time is You can set it to turn one or more cooking zones off after the set time is up. The timer of maximum is 99 min. -
Page 14: Default Working Times
Touch timer control, the minder indicator will start flashing and “10” will show in the timer display. Set the time by touching the or control of the timer Hint: Touch the “-” or “+” control of the timer once will decrease or increase by 1 minute. Touch and hold the “-”... -
Page 15: Power Management Function
3.3.7 Power Management Function • it is possible to set a maximum power absorption level for the induction hob, choosing up to different power ranges. • induction hobs are able to limit themselves automatically in order to work at lower power, to avoid the risk of overloading. -
Page 16: Cooking Guidelines
4. Cooking Guidelines Take care when frying as the oil and fat heat up very quickly, particularly if you’re using PowerBoost. At extremely high temperatures oil and fat will ignite spontaneously and this presents a serious fire risk. 4.1 Cooking Tips •... -
Page 17: Heat Settings
5. Heat Settings The settings below are guidelines only. The exact setting will depend on several factors, including your cookware and the amount you are cooking. Experiment with the induction hob to find the settings that best suit you. Heat setting Suitability •... -
Page 18: Hints And Tips
Spillovers on the 1. Switch the power to the cooktop off. • The cooktop may beep and turn touch controls 2. Soak up the spill itself off, and the touch controls 3. Wipe the touch control area with a clean may not function while there is damp sponge or cloth. -
Page 19: Failure Display And Inspection
Pans do not become hot The induction hob cannot Use cookware suitable for induction and appears in the display. detect the pan because it is not cooking. See section ‘Choosing the right suitable for induction cooking. cookware’. The induction hob cannot detect the Centre the pan and make sure that its base pan because it is too small for the matches the size of the cooking zone. - Page 20 circuit/open circuit for 1#) Temperature sensor of the IGBT failure.(short FC /FD circuit/open circuit for 2#) Specific Failure & Solution Failure Problem Solution A Solution B The LED does not No power supplied. Check to see if plug is come on when unit is plugged secured tightly in outlet and that outlet is working.
-
Page 21: Installation
9. Installation 9.1 Selection of installation equipment Cut out the work surface according to the sizes shown in the drawing. For the purpose of installation and use, a minimum of 5 cm space shall be preserved around the hole. Be sure the thickness of the work surface is at least 30mm. Please select heat-resistant and insulated work surface material (Wood and similar fibrous or hygroscopic material shall not be used as work surface material unless impregnated) to avoid the electrical shock and larger deformation caused by the heat radiation from the hotplate. -
Page 22: Before Installing The Hob, Make Sure That
WARNING: Ensuring Adequate Ventilation Make sure the induction cooker hob is well ventilated and that air inlet and outlet are not blocked. In order to avoid accidental touch with the overheating bottom of the hob, or getting unexpectable electric shock during working, it is necessary to put a wooden insert, fixed by screws, at a minimum distance of 50mm from the bottom of the hob. - Page 23 9.5 Adjusting the bracket position Fix the hob on the work surface by screw 2 brackets on the bottom of hob (see picture) after installation. Adjust the bracket position to suit for different table top thickness. Under any circumstances, the brackets cannot touch with the inner surfaces of the worktop after installation (see picture) 9.6 Cautions 1.
- Page 24 • If the total number of heating unit of the appliance you choose is not less than 4, the appliance can be connected directly to the mains by single-phase electric connection, as shown below. • If the cable is damaged or to be replaced, the operation must be carried out the by after-sale agent with dedicated tools to avoid any accidents.
- Page 25 This appliance is labeled in compliance with European directive 2012/19/EU for Waste Electrical and Electronic Equipment (WEEE). By ensuring that this appliance is disposed of correctly, you will help prevent any possible damage to the environment and to human health, which might otherwise be caused if it were disposed of in the wrong way.
Need help?
Do you have a question about the HI6401CH and is the answer not in the manual?
Questions and answers