Aprilaire E070 Installation & Owner's Manual
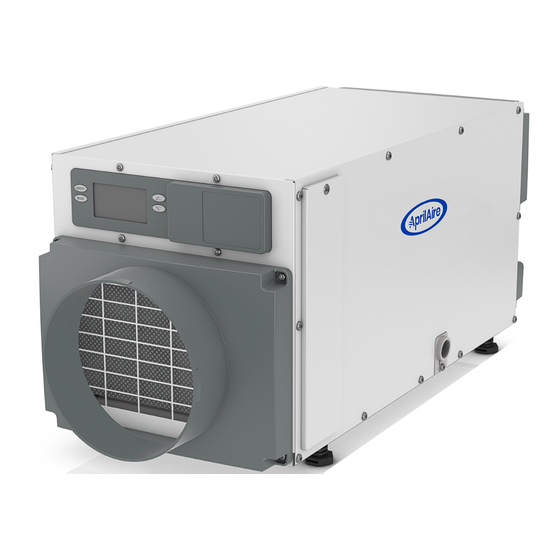
70 ppd professional-grade, crawl space dehumidifier
Hide thumbs
Also See for E070:
- Owner's manual (4 pages) ,
- Installation instructions manual (12 pages) ,
- User manual
Table of Contents
Troubleshooting

Related Manuals for Aprilaire E070


Summary of Contents for Aprilaire E070
- Page 1 INSTALLATION & OWNER'S MANUAL Model E070 70 PPD Professional-Grade, Dehumidifier Crawl Space Dehumidifier Installed By: Installer Phone: Date Installed: Product Info & Digital Manual PLEASE LEAVE THIS MANUAL WITH THE DEHUMIDIFIER OWNER English...
-
Page 2: Table Of Contents
Warranty Registration � � � � � � � � � � � � � � � � � � � � � � � � � � � � � � � � � � � � � � � � � � � � � � �16 SPECIFICATIONS Model E070 Unit Weight 56 lbs�... -
Page 3: Safety Instructions
SAFETY INSTRUCTIONS CRAWL SPACE DEHUMIDIFICATION Be sure to read and understand all safety precautions and The AprilAire Dehumidifier controls the humidity level in your ® instructions before installing and operating the unit� crawl space. A powerful blower inside the dehumidifier draws... -
Page 4: Operating The Dehumidifier
3. The dehumidifier blower will turn on, the word SETTING OPERATING THE DEHUMIDIFIER disappears from the display, and the words AIR SAMPLING appear (see FIGURE 3). This wording indicates that the dehumidifier is sampling the air to determine if 1. If equipped, use the ON/OFF Power Switch, located by the dehumidification is needed and shows the measured power cord, to apply power to the dehumidifier. -
Page 5: Maintenance
MAINTENANCE CLEANING THE DRAIN 1. With the filter door on the drain side of the dehumidifier removed, clean the accessible portion of the drain pan CLEANING THE FILTER using a mild detergent� After initial installation the air filter and drain should be checked 2. -
Page 6: Preparing The Unit For Installation
PREPARING THE UNIT FOR INSTALLATION INSTALLING THE DUCT COLLARS Use the screws in the parts bag to attach the duct collars to IMPORTANT: Cut the strap securing the compressor shipping the inlet and outlet of the dehumidifier. support bracket and remove the strap and shipping bracket� See FIGURE 7�... -
Page 7: Installing The Dehumidifier
INSTALLING THE DEHUMIDIFIER LEVELING AND RAISING THE DEHUMIDIFIER The feet can be adjusted to level the unit and accommodate DEHUMIDIFIER LOCATION drain fittings and condensate pans as required. Leveling is required to ensure proper drainage from the dehumidifier. • Electrical service access and drain cleaning will require the If installing a condensate pump (see FIGURE 11) to the side of removal of the electrical service side panel (see FIGURE 9). -
Page 8: Installing The Drain
INSTALLING THE DRAIN INSTALLING THE CONDENSATE PUMP • The AprilAire Model 4856 condensate pump is capable of USING HARD PIPE: lifting water up to 22 feet� • Install a 3/4” PVC slip x 3/4” MNPT PVC fitting to the • The dehumidifier can be elevated (while remaining level) to dehumidifier and use 3/4”... -
Page 9: Wiring
If using the AprilAire Model 76 as a remote control, wire to the {+ - A B} terminals. Refer to the installation instructions for the control being used for wiring details�... -
Page 10: Installer Setup
INSTALLER SETUP SETTING UP REMOTE CONTROL – CRAWL SPACE/ SEALED ATTIC If wiring to a Model 76 for remote control (see page 9 for details) Enter the setup menu if: press the s or t button to ENABLE� • remote control will be used •... -
Page 11: Starting Up The Unit And Sequence Of Operation
STARTING UP THE UNIT AND SEQUENCE OF USING A MODEL 76 AS A REMOTE CONTROL OPERATION 1. Press the ON/OFF button to turn the dehumidifier control ON. The display will show the word REMOTE to indicate that a Ensure unit is plugged in and if equipped use the ON/OFF remote control is to be used to control the dehumidifier. -
Page 12: Troubleshooting
TROUBLESHOOTING Technical support is available Monday through Friday 7:00 a�m� to 5:00 p�m� CST at 800�334�6011� Use the guides on the following pages to identify and correct system faults� Contact Technical Support before replacing the unit or any components and for additional troubleshooting�... - Page 13 TABLE 1: DIAGNOSTIC CODES Diagnostic Code Failure Mode Action Reset 1. Check the low temperature sensor connection at the power board� 2. Remove the side access panel and verify the sensor is not damaged and Low Temperature connected to the suction line� Cycle Power Thermistor Failure 3.
-
Page 14: Troubleshooting Guide
TABLE 2: TROUBLESHOOTING GUIDE Symptom Failure Mode Action • Check that the dehumidifier is plugged in. • Check that the power switch is turned ON (if equipped). Dehumidifier does No power to unit. not turn on/run. • Check that the user interface is turned ON. •... -
Page 15: Service Parts
SERVICE PARTS 90-2298 Part Description Part No. Part Description Part No. Filter, 8” x 11.75” x 1” EZK 5695 Sensor, High Temperature 5456 Leveling Foot 5457 Internal Control Board 5444 Capacitor, 45MFD, 370 VAC 5458 User Interface Assembly 5445 Capacitor, 6MFD, 250 VAC 5582 Wiring Access Door 5446... -
Page 16: Limited Warranty
– 5:00 p.m. Central Time. • Modifications, changes, repurposing, or alterations to the AprilAire product. At the sole discretion of AprilAire, you may be required to: return the product not • Extended warranties or satisfaction guarantees offered by third parties.
Need help?
Do you have a question about the E070 and is the answer not in the manual?
Questions and answers