Advertisement
WIRING INSTRUCTIONS
Should it be necessary to change the plug, please note the wires in the mains lead are coloured in accordance with the following code:
BLUE – NEUTRAL
BROWN – LIVE
GREEN AND YELLOW – EARTH
As the colours of the wires in the mains lead of this appliance may not correspond with the coloured markings identifying the terminals in your plug, proceed as follows:
- The BLUE wire is the NEUTRAL and must be connected to the terminal which is marked with the letter N or coloured BLACK.
- The BROWN wire is the LIVE and must be connected to the terminal which is marked with the letter L or coloured RED.
- The GREEN/YELLOW is the EARTH and must be connected to the terminal which is marked with the letter E or coloured GREEN or GREEN/YELLOW.
- Always ensure that the cord grip is positioned and fastened correctly.
- Only ever use the same fuse as fitted in the original product, if in doubt please contact Meaco first, or a qualified electrician.
Example wiring for a Standard British Plug:
Please note: The Earth Terminal is marked with the letter E or Earth Symbol ![]() .
.

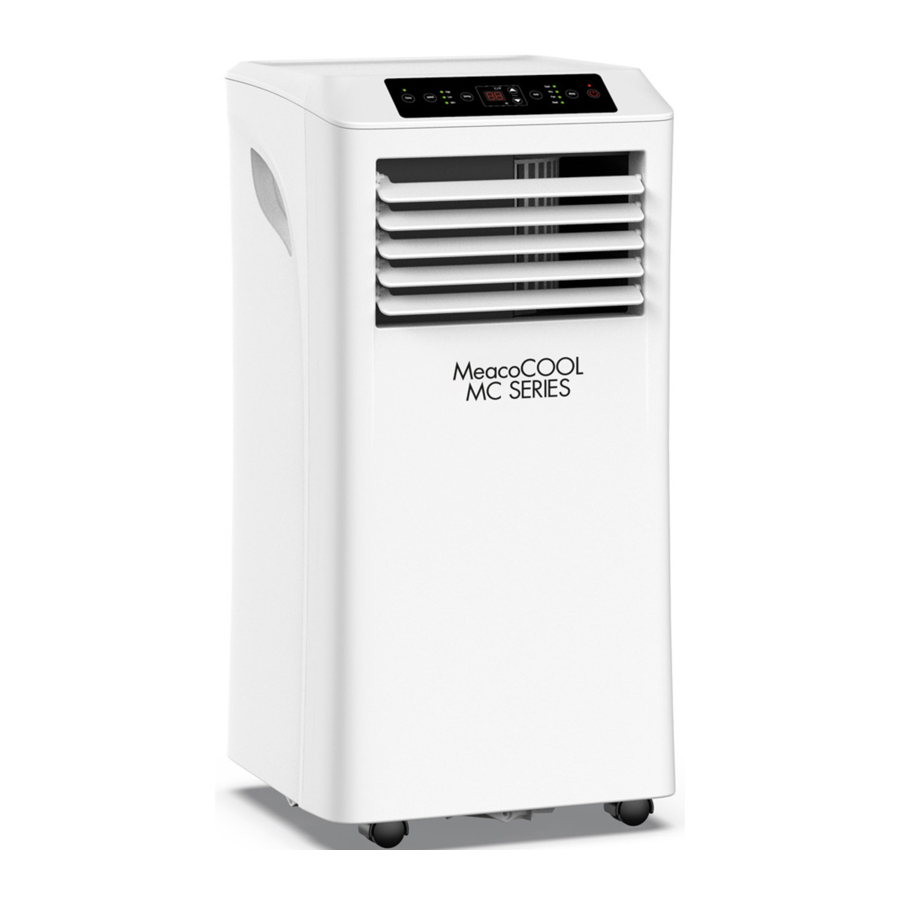
PRODUCT IDENTIFICATION
Along with the portable air conditioner the box will contain the following: a duct, a duct machine adaptor, a duct window adaptor, a drainage hose, a remote control, a spare bung, 2 window kits and window kit screws. If at any point certain parts are damaged or lost, replacement parts are available to purchase at www.meaco.com.

GENERAL ADVICE
- Before putting your portable air conditioner into operation for the first time, the instruction manual should be studied carefully.
- After receiving the portable air conditioner, you should check the unit for any transport damage. In case of damage, you should inform the sender immediately.
- It is very important to allow the portable air conditioner to stand upright for eight hours before turning the unit on.
- When using the portable air conditioner make sure it is placed on a level surface with at least 50cm of free space around it to allow for adequate air flow.
![]()
- Do not operate the portable air conditioner near to walls, curtains or other objects that may block the air outlet or air inlet.
- Keep the packaging for the portable air conditioner in a safe place in order to be able to despatch the unit safely if it requires a service. In order to save space, you can simply cut through the adhesive tape using a knife and fold the cardboard box.

PORTABLE AIR CONDITIONER PRINCIPLES
Cooling works best in a well-sealed room with as little heat gain from sunlight as possible. We advise keeping all doors, windows and curtains/blinds closed before using the portable air conditioner in order to pre-cool the room. This is especially useful in bedrooms where pre-cooling the room before going to bed is more sensible than trying to sleep with an air conditioner turned on in the room.
SET UP
The portable air conditioner needs to be vented to the outside in order to remove hot air, this is typically done through a window. The duct provided is 1.8 metres long and cannot be extended.
There are two different window kits provided: the window kit plates and the flexible window kit – only one window kit needs to be used depending on the type of window/door you wish to use. We recommend using the window kit plates for all sliding windows and doors, and the flexible window kit for all other types.
Steps 3 and 4 are only required when using the window kits plates. For instructions on how to set up the flexible window kit, see separate leaflet inside the flexible window kit box.
The following steps are not required if you wish to use your portable air conditioner in Dry Mode, Fan Mode or Heat Mode.
- Connect the duct machine adaptor to the duct using a twisting motion. Do not force the connection as this could cause damage.
![]()
- Connect the duct window adaptor to the other end of the duct using a twisting motion. Do not force the connection as this could cause damage.
![]()
- Attach the duct to the window kit plates using the duct window adaptor.
![]()
- Connect the duct to section B.
- After completing the assembly, fit and adjust sections A and C depending on the length you require, using the window kit screws provided.
Plate A: 65cm
Plate B: 65cm
Plate C: 51cm
Total combined: 170cm
Please note the diagram is schematic drawing for reference only.
- Install the duct via the duct window adaptor into the hole in section B.
- Close the window to secure the window kit in place. It is recommended that the gap between the window kit and the sides of the window are sealed for maximum efficiency.
![]()
- Attach the duct via the air exhaust on the portable air conditioner using the duct machine adaptor.

* Whilst cooling, do not remove this bung. This is the water revisor where water sits until it is evaporated out via the duct. - Extend the duct to the desired length avoiding any bends or kinks in the hose.

- Manually open the louvre on the front of the portable air conditioner. The internal louvres can also be moved manually from left to right to direct the airflow.

- If using the portable air conditioner in Dry Mode or Heat Mode the drainage hose must also be connected.
- Plug the portable air conditioner into a mains socket and turn on using the Power Button.


CONTROL PANEL

Please note the Heat LED will only show on the display if you have a CH (Cooling and Heating) model.
POWER BUTTON
When first plugged in the portable air conditioner will enter standby mode. All lights on the display will turn on for one second and then switch off (apart from the Power Button which will continuously stay lit up). Press the Power Button to switch the unit on – the unit will enter the default Fan Mode and the default temperature (23°C). The compressor will start working with a 3-minute delay. Press the Power Button again to turn the unit off, the compressor will stop at once and the fan will stop ten seconds after the Power Button has been pressed.
MODE BUTTON
Press the Mode Button to scroll through the available modes: Cool, Dry, Fan and Heat. (Heat is only available on the CH models). An LED light will indicate which mode is currently in use. Please note there is also a Sleep Mode which is only available via the remote control.
UP AND DOWN BUTTONS
Use the UP and DOWN buttons when choosing a desired temperature or setting the On / Off timer.
TIMER BUTTON
Use the Timer Button to set either an On or Off Timer between 1 and 24 hours.
FAN SPEED BUTTON
Use the Speed Button to select either Low or High Fan Speed. This function is disabled in Dry and Sleep Mode. An LED light will indicate which mode is currently in use.
THE MODES
COOL MODE
- Press the Mode Button until the LED light next to Cool on the display appears.
- Press the Up and Down arrows to adjust the temperature displayed. The temperature can be set between 16°C and 32°C. The portable air conditioner will run until the desired temperature is reached (the compressor will turn off, but the fan will continue to run). If the temperature in the environment increases above the target temperature, the portable air conditioner will automatically come back on.
- Press the Fan Speed Button to change the fan speed between High and Low. An LED light will appear on the display indicating the chosen fan speed.
- To control the direction of air flow horizontally, adjust the inner louver from left to right manually.
DRY MODE
- Press the Mode Button until the LED light next to Dry on the display appears.
- The portable air conditioner will run according to the ambient temperatures below:
> 25°C: The compressor runs for 15 minutes and then stops for 3 minutes. The fan will run continuously.
25°C to 20°C: The compressor runs for 10 minutes and then stops for 3 minutes. The fan will run continuously.
20°C to 15°C: The compressor runs for 6 minutes and then stops for 3 minutes. The fan will run continuously.
< 15°C: The compressor will stop working and therefore stop drying. When the temperature reaches 17°C the unit will run as per above. - The fan speed cannot be changed in this mode – it will automatically revert to low fan speed.
- A desired temperature cannot be selected in this mode.
- The drainage hose should be attached for continuous operation. The duct does not need to be attached in this mode, however, if the duct is not attached the noise level and the room temperature will increase.
FAN MODE
- Press the Mode Button until the LED light next to Fan on the display appears.
- Press the Fan Speed Button to change the fan speed between High and Low. An LED light will appear on the display indicating the chosen fan speed.
- A desired temperature cannot be selected in this mode.
- In Fan Mode the room air is circulated but not cooled. To control the direction of air flow horizontally, adjust the inner louver from left to right manually.
HEAT MODE (only available on CH models)
- Press the Mode Button until the LED light next to Heat on the display appears.
- Press the Up and Down arrows to adjust the temperature displayed. The temperature can be set between 16°C and 32°C. The portable air conditioner will run until the desired temperature is reached. If the temperature in the environment drops below the target temperature, the portable air conditioner will automatically come back on.
Please Note: The compressor will stop working straight away however the fan may continue to run if the coil pipe temperature is detected to be above 34°C. The fan will stop running once the coil pipe temperature reaches 34°C or below. - Press the Fan Speed Button to change the fan speed between High and Low. An LED light will appear on the display indicating the chosen fan speed.
- To control the direction of air flow horizontally, adjust the inner louver from left to right manually.
- The drainage hose should be attached for continuous operation.
- The supply air fan will run continuously, blowing hot air out the front of the portable air conditioner. The exhaust air fan, blowing hot air out the back of the portable air conditioner, will turn on periodically as required. In certain conditions, depending on the temperature and humidity level, the exhaust air fan will run continuously. Both situations are normal operation.
SLEEP MODE (only available via remote control)
- This mode can only be activated when the portable air conditioner is in Cool or Heat mode.
- Press the Sleep Button on the remote control.
- The portable air conditioner will run on Low Fan Speed only to reduce the noise level.
- In Cool Mode: After 1 hour the pre-set temperature is increased by 1°C, after another hour the pre-set temperature will increase by another 1°C. The temperature is kept constant for 10 hours.
- The LED display will dim.
OTHER FUNCTIONS
THE TIMER
The timer has two modes of operation and can be set anywhere between 1-24 hours: Off Timer and On Timer.
- To set the Off Timer, when the portable air conditioner is turned on, press the Timer Button. Use the Up and Down arrows to set the number of hours in which you want the portable air conditioner to turn off.
- To set the On Timer, when the portable air conditioner is turned off on the display (but there is power to the machine), press the Timer Button. Use the Up and Down arrows to set the number of hours in which you want the portable air conditioner to turn on.
- To remove any set timers, press the Up or Down arrow until the display shows '00'. When the power is turned off, all set timers will be lost.
AUTOMATIC DEFROST
- At low room temperature frost may build up at the evaporator during operation. The portable air conditioner will automatically start defrosting and the LED above the Power Button will flash.
- When the portable air conditioner operates in Cool or Dry Mode and the ambient temperature sensor senses that the evaporator coil temperature is below -1°C, the compressor will stop operating for ten minutes or until the coil temperature has reached 7°C. The portable air conditioner will restart in Cool Mode.
- This is not a fault and is part of the portable air conditioners process.
OVERLOAD PROTECTION
In the event of a power cut, the portable air conditioner has a memory function and therefore will continue to run on the same setting it was set to before the power cut occurred. In order to protect the compressor, the compressor will start after a three-minute delay.
REMOTE CONTROL

DRAINAGE
When the portable air conditioner is used in Dry Mode or Heat Mode the drainage hose needs to be attached continuously in order to remove any collected water.

When the portable air conditioner is used in Cool Mode the drainage hose does not need to be attached continuously. However, in high humidity conditions or after a long period of use, the water tank will need to be drained using the drainage hose. Ft (Full Tank) will appear on the display to inform you when this needs to be done.

- Unplug the portable air conditioner.
- Raise the portable air conditioner slightly to allow water to drain out from the water tank via gravity.
- Remove the plug from the water outlet opening (it is very important not to lose the plug).
- Securely attach the drainage hose to the outlet.
- Place the end of the hose over a drain or bucket and ensure that the water can flow freely out of the portable air conditioner.
- Do not submerge the end of the hose into the water as this will create an air lock.
- Once the water has been drained, remove the hose and reinsert the plug.
CLEANING AND STORAGE
The air filters must be cleaned a minimum of once every two weeks. Dust will collect on the filters restricting its airflow. The restricted airflow will reduce the efficiency of the system and if it becomes blocked, it can cause damage to the portable air conditioner. Cleaning the air filters frequently will prolong the life of your portable air conditioner. Do not use the portable air conditioner without both filters.

- Unplug the portable air conditioner.
- Remove the filters from the portable air conditioner (there is one at the top and bottom).
- Use the end of a hoover to clean both sides of each filter thoroughly.
- Alternatively, the filters can be cleaned gently using warm water. Leave the filter to air dry completely before reinstalling.
Before moving or storing the portable air conditioner, drain any collected water away using the drainage hose provided. When storing the portable air conditioner use the cable compartment to store the mains cable. Clean the filters and then store the unit in its plastic bag or original box to protect the portable air conditioner from dust.
Remember the portable air conditioner can also be used as a dehumidifier (above 15°C) and a heater during the winter months if required.
SPECIFICATIONS
| 7000 / 7000CH | 8000 / 8000CH | 9000 / 9000CH | 10000 / 10000CH | |
| Cooling Capacity | 7000BTU | 8000BTU | 9000BTU | 10000BTU |
| Power Consumption | 780 watts | 1003 watts | 1003 watts | 1114 watts |
| Heating Capacity (CH models only) | 5800BTU | 7000BTU | 7000BTU | 7800BTU |
| Noise Level (on low fan speed) | 53dB | 53dB | 53dB | 53dB |
| Energy Rating | A | A | A | A |
| Maximum airflow | 300m³ / hour | 325m³ / hour | 325m³ / hour | 325m³ / hour |
| Approx. Room Size | 12-22m² | 16-26m² | 16-26m² | 18-28m² |
| Duct Diameter | 15cm / 5.9' | 15cm / 5.9' | 15cm / 5.9' | 15cm / 5.9' |
| Duct Length | 1.8m / 71' | 1.8m / 71' | 1.8m / 71' | 1.8m / 71' |
| Moisture Removal | 0.8 litres / hour | 1.2 litres / hour | 1.2 litres / hour | 1.4 litres / hour |
| Current (nominal) | 3.5A | 4.5A | 4.5A | 5A |
| Off Timer | Yes | Yes | Yes | Yes |
| On Timer | Yes | Yes | Yes | Yes |
| Power Supply | 220-240V / 50Hz | 220-240V / 50Hz | 220-240V / 50Hz | 220-240V / 50Hz |
| Refrigerant | R290 / 140g | R290 / 180g | R290 / 180g | R290 / 200g |
| Dimensions (HWD) | 701 x 350 x 348mm | 701 x 350 x 348mm | 701 x 350 x 348mm | 701 x 350 x 348mm |
| Nett Weight | 20.5Kgs / 21Kgs | 23.5Kgs / 24Kgs | 23.5Kgs / 24Kgs | 24Kgs / 24.5Kgs |
| Gross Weight | 25.5Kgs / 26Kgs | 28.5Kgs / 29Kgs | 28.5Kgs / 29Kgs | 29Kgs / 29.5Kgs |
TROUBLE SHOOTING
| TROUBLE | CAUSE | SOLUTION |
| No power to the machine | There is no power to the unit. | Plug in the unit and check the power outlet. |
| The ON/OFF button has not been pressed. | Press the ON/OFF button. | |
| Power button does not work | Check the instructions above. | If it still does not work please contact Meaco. |
| Machine turned on but compressor does not work | The compressor does not turn on for the first three minutes of operation. | Wait three minutes. |
| Remote control does not work | The battery needs changing or the remote is out of range. | Replace the battery in the remote or stand closer to the machine. |
| Increased noise level | The filter is dirty. | Clean the filter. |
| The air inlet is blocked. | Make sure there is enough space around the unit and that the air inlet is not blocked by a wall, furniture or curtains. | |
| The unit is being used on uneven floor. | Place the unit on a level surface. | |
| Too noisy to use in a bedroom | Pre-cool the room. | Run the unit for several hours before you go to bed with the curtains and door closed in order to pre-cool the room. |
| Fan speed does not change | The unit is in Sleep Mode or Dehum Mode. | Change operation mode if required. |
| Cooling is not effective | Room size is too large. | Check whether the air coming out of the unit is cool and either let the unit run for longer or use it in a smaller room. Keep all doors and windows shut. |
| Cooling is not effective | Too much direct sunlight. | Block the heat gain from the sun with blinds or curtains. |
| Unit has not been running long enough. | It takes time to cool a room due to the heat retain in the fabric of the room. | |
| Filter is blocked or dirty. | Clean the filter and make sure there is enough space around the unit and that the air inlet is not blocked by a wall, furniture or curtains. | |
| Heating is not effective | Room size is too large. | Check whether the air coming out is warm. |
| Machine turns itself off | The set point has been reached. | Either accept that the target has been reached or select a new set point so that the unit will run for longer. |
| Machine leaks water when moved | Internal water container is full. | Always drain for unit of water before moving it. |
| Display shows 'Ft' | Internal water container is full. | Please see Diagram 2. |
| E0 | Display board error. | Please contact Meaco. |
| E1 | Temperature sensor is faulty. | Please contact Meaco. |
| E2 | Evaporator coil sensor is faulty. | Please contact Meaco. |
SAFETY INFORMATION
This portable air conditioner must not be used in rooms under the following conditions:
- Potentially explosive atmosphere
- Aggressive atmospheres
- Featuring a high concentration of solvents
- An extremely high ratio of dust
Keep Children Away: Do not allow children to play with or around this unit, which could result in injury. Be sure the unit is inaccessible to children when not attended. This appliance is not intended for use by person (including children) with reduced physical, sensory or mental capabilities, or lack of experience and knowledge, unless they have been given supervision or instruction concerning use of the appliances by a person responsible for their safety.
Keep Unit Grounded: Always operate the unit with a grounded plug and a grounded electrical outlet. A grounded plug is an essential safety feature that helps reduce the risk of shock or fire.
Protect Power Cord from Damage: Never operate a unit with a damaged power cord, as this may lead to electrical or fire hazards. If the power supply cord is damaged, it must be replaced by a cord of the same type and amperage rating.
Extension Cords: Extension cords must be grounded and able to deliver the appropriate voltages to the unit.
Handle with Care: Do not drop, throw or crash the air conditioner. Rough treatment can damage the components or wiring and create a hazardous condition.
Run on Stable Surface: Always operate the unit on a stable, level surface, for example the floor or a strong counter, so that the portable air conditioner cannot fall and cause injury.
Keep Out of Water: Never operate the unit in pooled or standing water, as this may create a risk of injury from electrical shock. Do not store or operate outdoors. If electrical wiring or components become wet, thoroughly dry them before using the unit. If in doubt do not use the portable air conditioner and consult a qualified electrician or a Meaco approved engineer.
Keep Air Intakes Clear: Do not clog or block the air intakes by placing the portable air conditioner too close to curtains, walls or anything that will restrict the air inlet. This may cause the unit to overheat and result in a fire or electrical hazard.
Keep Electrical Components Dry: Never allow water inside the portable air conditioner's electrical components. If these areas become wet for any reason, thoroughly dry them before using the portable air conditioner. If in doubt, do not use the portable air conditioner and consult a qualified electrician or a Meaco approved engineer.
The operator must make the operating instruction available for the user and make sure that the user does understand the manual.
The MeacoCool MC Series 7000 BTU, 7000CH BTU, 8000 BTU, 8000CH BTU, 9000 BTU, 9000CH BTU, 10000 BTU, 10000CH BTU portable air conditioners use the new R290 refrigerant gas to comply with European Environmental Directives. R290 is kinder to the environment and is part of attempts to reduce global warming as it has a low greenhouse effect (GWP).
When using the MeacoCool MC Series portable air conditioner you must take into account the following:
- This portable air conditioner uses about 140 grams of R290 refrigerant in the 7000 BTU and 7000CH BTU model, 180 grams of R290 refrigerant in the 8000 BTU, 8000CH BTU, 9000 BTU and 9000CH BTU model and 200 grams of R290 refrigerant in the 10000 BTU and 10000CH BTU model, which is flammable. Therefore, it is part of a sealed system and must only be serviced by a trained Meaco engineer.
- Do not use or store this portable air conditioner in a room smaller than 4m² to prevent a fire or explosion hazard if there is a leak of refrigerant and the gas comes into contact with an ignition source.
- Do not use in a room with any continuous sources of ignition, for example open flames, gas fires or hobs, cigarettes or any other sources of ignition.
- If the portable air conditioner is installed, operated or stored in a non-ventilated area, then the room must be designed to prevent the accumulation of refrigerant leaks resulting in a risk of fire or explosion due to ignition of the refrigerant caused by electric heaters, cookers, or other sources of ignition.
- R290 refrigerant gas is odourless.
- Do not puncture either during the units working life or after. At the end of life dispose of following local recycling regulations.
- If there is any damage to the portable air conditioner then do not use it and contact Meaco or your retailer.
- As with all portable air conditioner, always keep upright and leave the portable air conditioner standing upright for eight hours before using it upon receipt.
 Failure to comply with these instructions could result in fire, damage to property, serious injury or potentially death.
Individuals who operate or work on the refrigerant circuit must have the appropriate certification issued by a national accredited organisation that ensures competence in handling flammable refrigerants according to a specific evaluation recognised by national associations in the industry and compliant with the latest R290 guidance.
Servicing should only be carried out by a Meaco approved engineer using original Meaco parts to prevent damage to the unit and potential injury to the engineer.
If you need to contact Meaco, please use the contact details below.
Contact Number: 01483 234900
Contact Email: customerservice@meaco.com / service@meaco.com
Live Chat: www.meaco.com

Documents / Resources
References
Download manual
Here you can download full pdf version of manual, it may contain additional safety instructions, warranty information, FCC rules, etc.
Download Meaco MeacoCool MC Series 7000/8000/9000/10000 BTU - Portable Air Conditioner Manual
Advertisement


Need help?
Do you have a question about the MeacoCool MC Series 7000BTU and is the answer not in the manual?
Questions and answers