Table of Contents
Advertisement
Quick Links
Advertisement
Table of Contents
Troubleshooting

Related Manuals for Whirlpool JennAir JJW6024HM


Summary of Contents for Whirlpool JennAir JJW6024HM
- Page 1 Mul�media Enhanced TECHNICAL MANUAL JennAir® 60 cm Built-In Steam Oven W11482044...
- Page 2 • Successfully perform necessary repairs. • Successfully return the oven to its proper operational status. WHIRLPOOL CORPORATION assumes no responsibility for any repairs made on our products by anyone other than authorized In-Home Service Professionals. ©2020 Whirlpool Corporation. Benton Harbor, MI 49022...
-
Page 3: Table Of Contents
TABLE OF CONTENTS JennAir® 60 cm Built-In Steam Oven SECTION 1: GENERAL INFORMATION ................1-01 SAFETY .............................. 1-02 PRODUCT SPECIFICATIONS ....................... 1-03 PRODUCT FEATURES ......................... 1-05 MODEL NUMBER NOMENCLATURE ....................1-05 MODEL NUMBER AND SERIAL NUMBER LABEL LOCATION ............. 1-06 WIRING DIAGRAM LOCATION ......................1-06 SECTION 2: DIAGNOSTICS AND TROUBLESHOOTING ..........2-01 SAFETY .............................. -
Page 4: Jennair® 60 Cm Built-In Steam Oven
Notes JennAir® 60 cm Built-In Steam Oven... -
Page 5: Section 1: General Information
GENERAL INFORMATION Section 1: General Information This section provides general safety, parts, and information for the “JennAir® 60 cm Built-In Steam Oven.” ■ Safety ■ Product Specifications ■ Product Features • Control Panel ■ Model Number Nomenclature ■ Model Number and Serial Number Label Location ■... -
Page 6: Safety
GENERAL INFORMATION (Cont.) Safety Your safety and the safety of others are very important. We have provided many important safety messages in this manual and on your appliance. Always read and obey all safety messages. This is the safety alert symbol. This symbol alerts you to potential hazards that can kill or hurt you and others. -
Page 7: Product Specifications
GENERAL INFORMATION (Cont.) Product Specifications JennAir® 60 cm Built-In Steam Oven Dimensions Capacity (cu. ft.) Cutout Depth (IN, inches) 199/16 Cutout Width (IN, inches) 2115/16 Depth Closed Excluding Handles (IN, inches) 203/8 Depth Closed Including Handles (IN, inches) 221/2 Depth Excluding Doors (IN, inches) 199/16 Depth With Door Open 90 Degree (IN, inches) 355/8... - Page 8 GENERAL INFORMATION (Cont.) Oven Rack 1 Type Standard Oven Rack 2 Type Baking Tray Oven Rack 3 Type Steam Tray Oven Interior Depth (IN, inches) 153/8 Oven Interior Height (IN, inches) 95/16 Oven Interior Width (IN, inches) 145/8 Delay Clean Oven Cleaning Type Steam Clean Self-Cleaning Oven Racks...
-
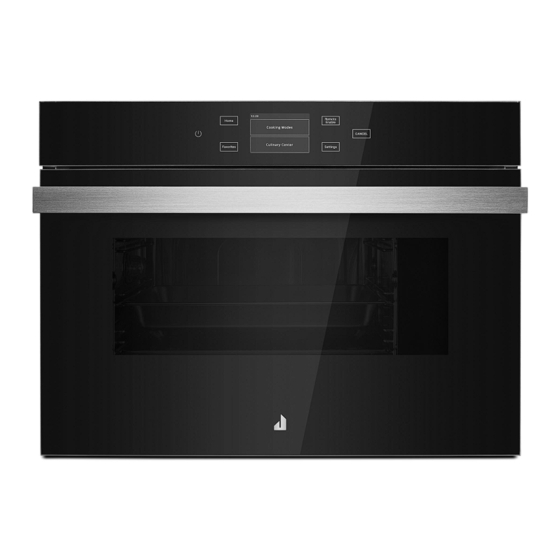
Page 9: Product Features
GENERAL INFORMATION (Cont.) Product Features Control Panel The control panel houses the control menu and function controls. The control keypads are very sensitive and require only a light touch to activate. The functions will work only if the oven is on. Home Light CANCEL... -
Page 10: Model Number And Serial Number Label Location
GENERAL INFORMATION Model Number and Serial Number Label Location Model Number and Serial Number Label Loca�on Wiring Diagram Location Wiring Diagram Loca�on (On the Right Side of the Oven) JennAir® 60 cm Built-In Steam Oven... -
Page 11: Section 2: Diagnostics And Troubleshooting
DIAGNOSTICS AND TROUBLESHOOTING Section 2: Diagnostics and Troubleshooting This section provides diagnostics and troubleshooting information for the “JennAir® 60 cm Built-In Steam Oven.” ■ Safety ■ Diagnostics ■ Troubleshooting ■ Failure/Error Display Codes JennAir® 60 cm Built-In Steam Oven... -
Page 12: Safety
DIAGNOSTICS AND TROUBLESHOOTING (Cont.) For Service Technician Use Only Safety WARNING DANGER Electrical Shock Hazard Electrical Shock Hazard Disconnect power before servicing. Only authorized technicians should perform diagnostic voltage measurements. Replace all parts and panels before operating. After performing voltage measurements, Failure to do so can result in death or disconnect power before servicing. -
Page 13: Diagnostics
Reassemble all parts and panels and plug in the oven or reconnect power. 3. The display must turn on. The Whirlpool logo is shown, then the time and date appear. 4. If the U.I. Configuration was not done, run as per the U.I. -
Page 14: Troubleshooting
DIAGNOSTICS AND TROUBLESHOOTING (Cont.) For Service Technician Use Only Troubleshooting No display - Copernicus NOTE: Before starting any test, cycle power to the oven (power off, wait 10 seconds, and control is blank Appliance Manager power on). (AM), User 1. Unplug oven or disconnect power. Interface 2. - Page 15 DIAGNOSTICS AND TROUBLESHOOTING (Cont.) For Service Technician Use Only Failure Error Likely Failure Condition Suggested Corrective Action Procedure User Interface/ NOTE: To test, start a cooking cycle and in 1 minute, the error code may appear. If it Appliance Manager does not, reassemble all parts and panels and follow the “Final Steps”...
- Page 16 DIAGNOSTICS AND TROUBLESHOOTING For Service Technician Use Only Failure Error Likely Failure Condition Suggested Corrective Action Procedure 1. Unplug oven or disconnect power. Check the wire connection from the home power Product not wired correctly supply to the conduit according to the installation instructions. Reassemble all parts and panels and plug in oven or reconnect power.
-
Page 17: Section 3: Component Testing
COMPONENT TESTING Section 3: Component Testing This section provides the wiring diagram, component testing, and component location for the “JennAir® 60 cm Built-In Steam Oven.” ■ Safety ■ Wiring Diagram ■ Component Testing ■ Component Location JennAir® 60 cm Built-In Steam Oven... -
Page 18: Safety
COMPONENT TESTING (Cont.) For Service Technician Use Only Safety DANGER WARNING Electrical Shock Hazard Electrical Shock Hazard Only authorized technicians should perform Disconnect power before servicing. diagnostic voltage measurements. Replace all parts and panels before operating. After performing voltage measurements, Failure to do so can result in death or disconnect power before servicing. -
Page 19: Wiring Diagram
COMPONENT TESTING (Cont.) For Service Technician Use Only Wiring Diagram Oven Control J64/P14 J67/P6 Thermal K2/20 Switch K4/40 Halogen Lights JennAir® 60 cm Built-In Steam Oven... -
Page 20: Component Testing
COMPONENT TESTING For Service Technician Use Only Component Testing Component Testing Chart To properly check for voltage, complete the following steps: 1. Unplug oven or disconnect power. 2. Connect voltage measurement equipment to check points. 3. Plug in oven or reconnect power and confirm voltage reading. 4. -
Page 21: Section 4: Component Access
COMPONENT ACCESS Section 4: Component Access Mul�media This section provides service parts access, removal, and Enhanced replacement instructions for the “JennAir® 60 cm Built-In Steam Oven.” n Removal of Console n Removal of Top Panel n Accessing Components From the Top n Removal of Left Side Panel n Removal of Rear Panel n Removal of Right Side Panel... -
Page 22: Removal Of Console
COMPONENT ACCESS (Cont.) Removal of Console 3. Remove the two (2) screws on the HMI cover and then, remove the cover as shown below to access the HMI. WARNING Electrical Shock Hazard Disconnect power before servicing. Replace all parts and panels before operating. Failure to do so can result in death or electrical shock. -
Page 23: Removal Of Top Panel
COMPONENT ACCESS (Cont.) Removal of Top Panel Accessing Components From the Top WARNING WARNING Electrical Shock Hazard Electrical Shock Hazard Disconnect power before servicing. Disconnect power before servicing. Replace all parts and panels before operating. Replace all parts and panels before operating. Failure to do so can result in death or Failure to do so can result in death or electrical shock. -
Page 24: Removal Of Left Side Panel
COMPONENT ACCESS (Cont.) Removal of Left Side Panel WARNING Electrical Shock Hazard Disconnect power before servicing. Replace all parts and panels before operating. Failure to do so can result in death or electrical shock. A. Oven Door Switch B. Line Fuse (20 A) 1. -
Page 25: Removal Of Rear Panel
COMPONENT ACCESS (Cont.) Removal of Rear Panel Removal of Right Side Panel WARNING WARNING Electrical Shock Hazard Electrical Shock Hazard Disconnect power before servicing. Disconnect power before servicing. Replace all parts and panels before operating. Replace all parts and panels before operating. Failure to do so can result in death or Failure to do so can result in death or electrical shock. -
Page 26: Removal Of Water Tank
COMPONENT ACCESS Accessing Heat Element and Convection Fan WARNING Electrical Shock Hazard Disconnect power before servicing. Replace all parts and panels before operating. A. Water Fill Tube Failure to do so can result in death or electrical shock. B. Fill Pump C. - Page 27 PRODUCT SPECIFICATIONS & WARRANTY INFORMATION SOURCES IN THE UNITED STATES: FOR PRODUCT SPECIFICATIONS AND WARRANTY INFORMATION CALL: FOR JENNAIR PRODUCTS: 1-800-253-1301 FOR TECHNICAL ASSISTANCE WHILE AT THE CUSTOMER’S HOME CALL: THE TECHNICAL ASSISTANCE LINE: 1-800-832-7174 HAVE YOUR STORE NUMBER READY TO IDENTIFY YOU AS AN AUTHORIZED IN-HOME SERVICE PROFESSIONAL FOR LITERATURE ORDERS (CUSTOMER EXPERIENCE CENTER): PHONE: 1-800-851-4605...
- Page 28 JennAir® 60 cm Built-In Steam Oven W11482044...