Table of Contents
Advertisement
Quick Links
Advertisement
Table of Contents

Related Manuals for Grundig UMS 4700 SPCD


Summary of Contents for Grundig UMS 4700 SPCD
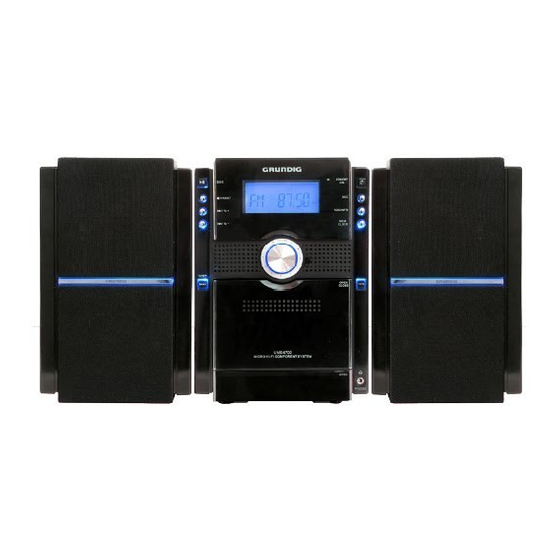
- Page 1 HIFI STEREO MICRO SYSTEM UMS 4700 SPCD...
-
Page 2: Table Of Contents
CONTENTS ------------------------------------------------------------------------------------------------ SET-UP AND SAFETY OVERVIEW The hi-fi system controls The hi-fi system displays The remote control CONNECTION AND PREPARATION Connecting the antennas Connecting the loudspeakers Connecting the power cord Connecting external devices Connecting the headphones Putting batteries in the remote control SETTINGS Setting the time Tuning and storing radio stations... - Page 3 CONTENTS ------------------------------------------------------------------------------------------------ TAPE MODE Selecting the tape input source Tape playback Fast forward and reverse search Recording onto tape Recording from the radio Recording from a CD CD synchro recording TIMER MODE Switch-on timer Sleep timer INFORMATION Cleaning the CD unit Cleaning the tape drive Environmental note Technical data...
-
Page 4: Set-Up And Safety
SET-UP AND SAFETY ------------------------------------------------------------ Please note the following instructions when setting up the system: The hi-fi system is designed for the playback of audio signals. Any other use is expressly prohibited. If you want to set up the hi-fi system on wall shelves or in cupboards, please ensure that it is adequately ventilated. -
Page 5: Overview
OVERVIEW ---------------------------------------------------------------------------------------------- The hi-fi system controls The front of the device DISC Selects the CD input source. In CD mode: starts and pauses playback. /PRESET In CD mode: ends playback. Pressing twice deletes a playlist. In tuner mode: switches to the next preset in steps. - Page 6 OVERVIEW ---------------------------------------------------------------------------------------------- ß – Adjust the volume. • Infra-red sensor for remote control signals. Switches the hi-fi system to and from standby mode. Standby indicator in the button. Lights up blue when the hi-fi system is in standby mode. The only way to completely disconnect the hi-fi...
- Page 7 OVERVIEW ---------------------------------------------------------------------------------------------- ≈ TAPE Selects the TAPE input source. In standby mode: activates and saves timer settings. Headphone jack for connecting a stereo headphone set with a jack plug (ø 3.5 mm). This automatically switches off the loud - speakers. Under the front flap •...
-
Page 8: The Hi-Fi System Displays
OVERVIEW ---------------------------------------------------------------------------------------------- The hi-fi system displays RANDOM SLEEP RESUME BASS INTRO MEMORY MP3 WMA 000000 FOLDER REPEAT ALL RADIOZ 000000.00 VOL MIN VOL 31 Displays the volume setting (» « to » «, VOL MAX » «); displays the preset sound settings. In tuner mode: displays the frequency band and frequency, the station name and the station type provided RDS infor- mation is being received. - Page 9 OVERVIEW ---------------------------------------------------------------------------------------------- MEMORY In CD mode: a playlist is created or played back. In CD-mode: a CD-DA track is repeated. In CD-mode: an MP3 track is being played. In CD-mode: an WMA track is being played. In MP3/WMA-mode: information is displayed as ticker text in ID3 mode.
- Page 10 OVERVIEW ---------------------------------------------------------------------------------------------- The back of the device FM ANT 75Ω Antenna socket for the outdoor antenna cable or the wire antenna supplied (VHF). AM ANT Terminals for connecting the MW loop antenna (medium wave) supplied. AUX IN Audio signal input for connecting 1 L/R 2 L/R two external devices.
-
Page 11: The Remote Control
OVERVIEW ---------------------------------------------------------------------------------------------- The remote control Switches the hi-fi system to standby mode and from standby mode to the last input source selected. 1 ... 0 Number buttons: select the preset 1 to 9 directly in tuner mode. Select the track number up to 9 in CD mode. - Page 12 OVERVIEW ---------------------------------------------------------------------------------------------- RAND. In tuner mode: switches between FM stereo and mono reception. In CD mode: plays back tracks in random order. DISPLAY In CD-DA mode: switches between elapsed playing time of the track, remaining playing time of the track and remaining playing time of the CD.
-
Page 13: Connection And Preparation
CONNECTION AND PREPARATION ---- Connecting the antennas Plug the roof antenna cable into the antenna socket »FM ANT Ω« on the hi-fi system. Insert the wires from the loop antenna cable supplied into the »AM ANT« terminals on the hi-fi system. Note: If no roof antenna is available, use the auxiliary antenna supplied. -
Page 14: Connecting External Devices
CONNECTION/PREPARATION ---------------------- Connecting external devices Note: Switch the hi-fi system off before you connect external devices. Use standard audio cables to connect the audio outputs of the external device to the »AUX IN 1« or »AUX IN 2« sockets on the hi-fi... -
Page 15: Settings
SETTINGS ---------------------------------------------------------------------------------------------------- Setting the time The first time you connect the hi-fi system to the mains, it switches to standby. The time appears in the display. You can only set this in standby mode. 24 H ¥ To activate the setting, press and hold down »MEMORY «. - Page 16 SETTINGS ---------------------------------------------------------------------------------------------------- press and hold down » « or » « until the frequency changes to rapid run-through. – The search stops when a station with good reception is found. 100.60 ¥ Open the memory function by pressing »MEMORY «. –...
-
Page 17: General Functions
GENERAL FUNCTIONS ---------------------------------------------------- Switching on and off The only way to disconnect the hi-fi system from the mains supply is to pull out the plug. Switch on the hi-fi system from standby mode by pressing » «. – The last input source used is automatically selected. 22:45 Switch the hi-fi... -
Page 18: Switching The Ultra Bass System On And Off
GENERAL FUNCTIONS ---------------------------------------------------- Switching the Ultra Bass System on and off Switch the Ultra Bass System on and off by pressing »BASS« on BASS the remote control. FANTASY – Display: »BASS« or »BASS« disappears press and hold down »BASS/DSC« on the hi-fi system. Muting You can switch the hi-fi... -
Page 19: Tuner Mode
TUNER MODE ------------------------------------------------------------------------------------ Selecting the tuner input source Select the TUNER input source with »TUNER BAND« on the hi-fi system or »FUNCTION« on the remote control. TUNER – Display: » « and the frequency. – The most recently selected station is played (Last Station Memory). -
Page 20: Rds Information
« and » «. Notes: It may take some time before all the RDS information is available. GRUNDIG has no influence on the correctness of this informa- tion. Searching for RDS stations Search for the RDS station by pressing »... -
Page 21: Cd Mode
CD MODE ---------------------------------------------------------------------------------------------------- The hi-fi system is suitable for music CDs bearing the logo shown here (CD-DA), and for CD-Rs and CD-RWs with audio data or MP3/WMA formats. In MP3/WMA mode, the terms “album” and “file” are very important. “Album” corresponds to a folder on a PC, “file” to a file on a PC or a CD-DA track. -
Page 22: Inserting And Playing Cds
CD MODE ---------------------------------------------------------------------------------------------------- Inserting and playing CDs Press » OPEN« to open the CD compartment on the hi-fi system. OPEN – Display: » «. OPEN Insert your CD in the compartment with its label facing upwards. Close the lid of the CD compartment by pressing » «... -
Page 23: Selecting Another Track
CD MODE ---------------------------------------------------------------------------------------------------- Selecting another track During playback, press » « or » « repeatedly until the number of the track appears in the display. – Playback of the selected track starts automatically select the track with »1 ... 0« on the remote control. For track numbers from 10 onwards, first press »+10«. -
Page 24: Repeating A Track (Repeat One)
CD MODE ---------------------------------------------------------------------------------------------------- Repeating a track (Repeat One) Press »REPEAT« once on the remote control during playback. REPEAT – Display: » «. 011 00:16 – The current track is repeated. REPEAT REPEAT To quit this function, press »REPEAT« repeatedly until » «... -
Page 25: Playing The Start Of Each Track (Intro)
CD MODE ---------------------------------------------------------------------------------------------------- Playing the start of each track (Intro) Press »INTRO« on the remote control during playback. INTRO INTRO – Display: » «. 004 00:09 – Intro playback starts automatically. – The first ten seconds of all the remaining tracks on the CD are played. - Page 26 CD MODE ---------------------------------------------------------------------------------------------------- Playing a playlist Start playback of the playlist with » II«. MEMORY MEMORY – Display: » « and » «. 008 00:01 – Playback begins with the first programmed track. Press »PRESET « to end playback. To play the playlist again, press » II«.
-
Page 27: Tape Mode
TAPE MODE ---------------------------------------------------------------------------------- Selecting the tape input source ≈ Select the tape input source with »TAPE « on the hi-fi system or »FUNCTION« on the remote control. TAPE TAPE – Display: » «. – When a tape is inserted, playback starts automatically ≈... -
Page 28: Recording From The Radio
TAPE MODE -------------------------------------------------------------------------------------------- Notes: Only use NORMAL-type tapes (IEC I) for recording. CHROME (IEC II) or METAL (IEC IV) tapes are not suitable. The Ultra Bass System does not affect recording. Recording from the radio Insert the tape without deletion protection and go to the position you want with »... -
Page 29: Cd Synchro Recording
TAPE MODE -------------------------------------------------------------------------------------------- CD synchro recording Insert the tape without deletion protection and go to the position you want with » « or » « (under the front flap). Press »FUNCTION« to select the CD input source on the remote control. -
Page 30: Timer Mode
TIMER MODE ---------------------------------------------------------------------------------------- Your hi-fi system has two timer modes: – The switch-on timer, which switches the hi-fi system on at the set time and wakes you with the input source you selected. – The sleep timer, which switches the hi-fi system off at a preset time. Switch-on timer Setting the switch-on timer The time must be set on the hi-fi... -
Page 31: Sleep Timer
TIMER MODE ---------------------------------------------------------------------------------------- To alter the timer settings, proceed as described in the previous section from step 2. Activating and deactivating the alarm T OFF To switch off the alarm function, press » « in the timer menu (see page 30). –... -
Page 32: Information
INFORMATION ------------------------------------------------------------------------------ Cleaning the CD unit If the device is unable to scan CDs perfectly, use a standard, commercially available cleaning CD to clean the laser optics. Other cleaning methods may damage the laser optics. Use a lint-free cloth for cleaning the CD and always wipe it from the inside out in a straight line. -
Page 33: Technical Data
INFORMATION ------------------------------------------------------------------------------ Technical data This device is noise-suppressed according to the applicable EU directives. This product fulfils the European directives 2006/95/EC, 2004/108/EC and 1999/5/EC. This device conforms to the safety regulation DIN EN 60065 (VDE 0860) and therefore the international safety regulation IEC 60065. The type plate is located on the back of the hi-fi... -
Page 34: Troubleshooting
Cables that have accidentally been disconnected, damaged CDs and flat batteries for the remote control will impair functioning. If the following measures do not resolve the problem satisfactorily, please visit www.grundig.com, product range: hi-fi, micro CD stations or contact your specialist dealer. Problem Possible cause/remedy No sound. - Page 36 Grundig Multimedia B.V. Atrium, Strawinskylaan 3105 • NL-1077 ZX Amsterdam • http://www.grundig.com...
Need help?
Do you have a question about the UMS 4700 SPCD and is the answer not in the manual?
Questions and answers