Table of Contents
Advertisement
Available languages
Available languages
Quick Links
Advertisement
Chapters
Table of Contents

Related Manuals for Silvercrest 290455


Summary of Contents for Silvercrest 290455
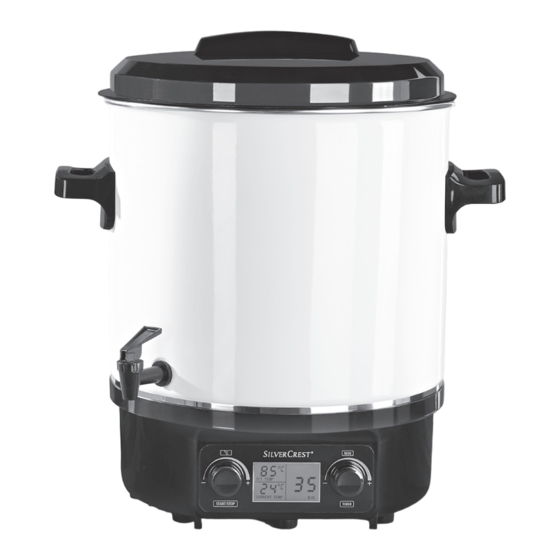
- Page 1 BOLLITORE ELETTRICO PASTORIZZATORE SEAD 1800 A1 BOLLITORE ELETTRICO PASTORIZZATORE Istruzioni per l'uso ELECTRIC FRUIT PRESERVER & JAM MAKER Operating instructions EINKOCHAUTOMAT Bedienungsanleitung IAN 290455...
- Page 2 Prima di leggere aprire la pagina con le immagini e prendere confidenza con le diverse funzioni dell'apparecchio. Before reading, unfold the page containing the illustrations and familiarise yourself with all functions of the device. Klappen Sie vor dem Lesen die Seite mit den Abbildungen aus und machen Sie sich anschließend mit allen Funktionen des Gerätes vertraut.
-
Page 4: Table Of Contents
Indice Introduzione . . . . . . . . . . . . . . . . . . . . . . . . . . . . . . . . . . . . . . . . . . . . . . . . . . 2 Informazioni sul presente manuale di istruzioni . -
Page 5: Introduzione
Introduzione Informazioni sul presente manuale di istruzioni Congratulazioni per l’acquisto del nuovo apparecchio . È stato scelto un prodotto di alta qualità . Il manuale di istruzioni è parte integran- te del presente prodotto . Esso contiene importanti indicazioni sulla sicurezza, l’uso e lo smaltimento . -
Page 6: Avvertenze
Avvertenze Nel presente manuale di istruzioni vengono utilizzate le seguenti avvertenze: PERICOLO Un'avvertenza contrassegnata da questo livello di pericolo indica una situazione pericolosa . Qualora sia impossibile evitare tale situazione pericolosa, essa può dare luogo a decesso o lesioni gravi . ►... -
Page 7: Indicazioni Di Sicurezza
Indicazioni di sicurezza In questo capitolo sono riportate importanti indicazioni di sicurezza per l'uso dell'apparecchio . Questo apparecchio corrisponde alle disposizioni di sicurezza prescritte . L'uso non conforme può comportare danni a persone e cose . Per l'uso sicuro dell'apparecchio, rispettare le seguenti avvertenze di sicurezza: PERICOLO - SCOSSA ELETTRICA! Controllare l'apparecchio prima dell'uso per rilevare even- ►... - Page 8 AVVERTENZA - PERICOLO DI LESIONI! Questo apparecchio può essere utilizzato dai bambini di ► almeno 8 anni di età e da persone con capacità fisiche, sensoriali o mentali ridotte o insufficiente esperienza o cono- scenza, solo se sorvegliati o istruiti sull’uso sicuro dell’appa- recchio e qualora ne abbiano compreso i pericoli associati .
- Page 9 ATTENZIONE - DANNI MATERIALI! I componenti guasti devono essere sostituiti esclusivamen- ► te da pezzi di ricambio originali . Solo con questi pezzi di ricambio è garantita la conformità ai requisiti di sicurezza . Assicurarsi che l'apparecchio, il cavo di rete o la spina di ►...
-
Page 10: Volume Della Fornitura
Volume della fornitura La fornitura standard dell'apparecchio comprende i seguenti componenti: ▯ Bollitore elettrico pastorizzatore ▯ Griglia di bollitura ▯ Coperchio ▯ Istruzioni per l'uso AVVERTENZA ► Controllare la completezza e integrità della fornitura in relazione ai danni visibili . ►... -
Page 11: Installazione E Collegamento
Installazione e collegamento Estrazione dalla confezione ♦ Prelevare tutte le componenti dell'apparecchio e il manuale di istruzioni dal cartone . ♦ Rimuovere completamente il materiale di imballaggio . Smaltimento della confezione L'imballaggio protegge l'apparecchio dai danni da trasporto . I materiali di imballaggio sono stati selezionati in relazione alla loro ecocompatibilità... -
Page 12: Installazione E Preparazione Dell'apparecchio
Installazione e preparazione dell'apparecchio ■ Svolgere completamente il cavo dal dispositivo di avvolgimento del cavo 8 . ■ Collocare l'apparecchio su una superficie piana e antisdrucciolo . Accertarsi che la presa di corrente sia facilmente accessibile . ■ Pulire l'apparecchio come descritto al capitolo “Pulizia e cura” . ■... -
Page 13: Preparazione Di Alimenti/Vasetti Di Vetro
Preparazione di alimenti/vasetti di vetro Per la bollitura utilizzare possibilmente vasetti di vetro con anello di gomma e fermaglio di chiusura . I vasetti devono essere perfettamente integri . 1) I vasetti devono essere il più possibile privi di germi e batteri, poiché in caso contrario si potrebbe verificare il deterioramento precoce degli alimenti . -
Page 14: Bollitura
3) Premere il tasto Riscaldamento START/STOP 9 . Comincia il riscaldamento . Il riscaldamento viene segnalato dalla barra in movimento " " . Nella visualizzazione del display "Temperatura corrente" 6 si visualizza la temperatura di riscaldamento momentanea . Non appena si conclude la fase di riscaldamento, risuonano dei segnali acustici, nel display compare "... - Page 15 3) Versare nel bollitore una quantità di acqua che consenta l’immersione in ac- qua dei vasetti superiori per almeno i 3/4 . Non superare mai la marcatura MAX . Per impedire la penetrazione dell’acqua, assicurarsi che i vasetti dello strato inferiore siano ben chiusi . 4) Chiudere il bollitore con il coperchio 1 .
- Page 16 Verdure Temperatura in ° C Tempo in minuti Cavolfiore 100 (MAX) Asparagi 100 (MAX) Piselli 100 (MAX) Cetriolini Carotine/carote 100 (MAX) Zucche Cavoli rapa 100 (MAX) Sedano 100 (MAX) Cavoletto di Bruxelles/cavolo 100 (MAX) rosso Funghi 100 (MAX) Fagioli 100 (MAX) Pomodori/salsa di pomodoro AVVERTENZA ►...
-
Page 17: Riscaldamento Di Liquidi
Riscaldamento di liquidi ATTENZIONE - DANNI MATERIALI! ► Versare i liquidi senza superare la marcatura MAX, altrimenti il liquido potrebbe fuoriuscire! 1) Versare i liquidi (ad es . bevanda alcolica o cacao) nel bollitore . 2) Collocare il coperchio 1 sul bollitore . AVVERTENZA - PERICOLO DI LESIONI! ►... -
Page 18: Protezione Dal Surriscaldamento
Protezione dal surriscaldamento L'apparecchio è dotato di protezione dal surriscaldamento . Il surriscaldamento può verificarsi quando il liquido nel bollitore è scarso o assente . In tal caso risuoneranno dei segnali acustici e nel display lampeggerà il simbolo " " . In tal caso versare immediatamente del liquido . Se non si versa del liquido nell'apparecchio, esso si spegnerà... -
Page 19: Pulizia Del Rubinetto
Pulizia del rubinetto Per pulire bene il rubinetto 0 si può svitare la leva q . Il rubinetto 0 può restare sull’apparecchio . 1) Svitare la leva q in senso antiorario dal rubinetto 0 . 2) Immergere la leva del rubinetto q in una soluzione detergente delicata e agitarla . -
Page 20: Decalcificazione
Decalcificazione I depositi di calcare sul fondo dell'apparecchio causano sprechi di energia e compromettono la durata di vita dell'apparecchio . Decalcificare l'apparecchio non appena si notano i primi depositi di calcare . 1) Utilizzare un decalcificante normalmente disponibile in commercio . Procedere come descritto nelle istruzioni riportate sul prodotto . -
Page 21: Ricette
Ricette Pasticcio di fegato 2 kg di pancetta di maiale con la cotenna 500 g di fegato di maiale 500 g di cipolle 100 g di sugna di maiale 2 cucchiaini di pimento macinato 1 cucchiaio di timo e maggiorana secchi 1 cucchiaino di pepe bianco 1 cucchiaio di sale Preparazione... -
Page 22: Zucca In Agrodolce
Zucca in agrodolce 2 kg di zucca 1/2 l di aceto 1 l di acqua 1/4 l di aceto di vino 1 kg di zucchero buccia e succo di un limone una radice di zenzero (zenzero fresco affettato) una stecca di cannella qualche chiodo di garofano Preparazione Dividere la zucca a metà... -
Page 23: Pere Caramellate
Pere caramellate 1,5 kg di pere (sode/mature) 150 g zucchero 750 ml acqua Preparazione Sbucciare le pere . Dividerle in quarti e rimuovere i noccioli . Caramellizzare lo zucchero in una padella . Versare l’acqua nella padella e farla bollire fino a sciogliere lo zucchero . Introdurre le pere nei vasetti preparati . -
Page 24: Dati Tecnici
Dati tecnici Tensione di alimentazione 220 - 240 V ~ 50 Hz Potenza nominale 1800 W Capacità ca . 27 litri Intervallo di temperatura 30 - 100° C Tipo di protezione IPX3 (protezione dagli spruzzi di acqua) Tutti i componenti di questo appa- recchio che vengono a contatto con alimenti sono idonei per il contatto con gli alimenti . -
Page 25: Garanzia Della Kompernass Handels Gmbh
Garanzia della Kompernass Handels GmbH Egregio Cliente, Questo apparecchio ha una garanzia di 3 anni dalla data di acquisto . Qualora questo prodotto presentasse vizi, Le spettano diritti legali nei confronti del venditore del prodotto . La garanzia qui di seguito descritta non costituisce alcun limite a tali diritti legali . -
Page 26: Assistenza
E-Mail: kompernass@lidl .it Service Malta Tel .: 80062230 E-Mail: kompernass@lidl .com .mt IAN 290455 Importatore Badi che il seguente indirizzo non è quello del servizio di assistenza clienti . Contatti innanzitutto il servizio di assistenza clienti indicato . KOMPERNASS HANDELS GMBH... - Page 27 ■ 24 │ IT │ MT SEAD 1800 A1...
- Page 28 Index Introduction . . . . . . . . . . . . . . . . . . . . . . . . . . . . . . . . . . . . . . . . . . . . . . . . . . 26 Information for these operating instructions .
- Page 29 Introduction Information for these operating instructions Congratulations on the purchase of your new appliance . You have selected a high-quality product . The operating instructions are part of this product . They contain important information about safety, use and disposal . Before using the product, please familiarise yourself with all operating and safety instructions .
- Page 30 Warnings In these operating instructions the following warnings are used: DANGER A warning at this danger level indicates a threatening dangerous situation . If the dangerous situation is not avoided, it could result in death or serious physical injury . ►...
- Page 31 Safety instructions In this chapter you receive important safety information regarding the handling of the appliance . This appliance complies with the statutory safety regulations . Incorrect usage can, however, lead to personal injury and property damage . For safe handling of the appliance observe the following safety information: RISK - ELECTRIC SHOCK! Before taking it into use, check the appliance for signs of vis- ►...
- Page 32 WARNING - RISK OF INJURY! This appliance may be used by children over the age of 8 ► and by persons with reduced physical, sensory or mental abilities or by those without experience and/or knowledge, if they are supervised or have been instructed in the safe use of the appliance and have understood the potential risks .
- Page 33 WARNING - PROPERTY DAMAGE! Defective components may only be replaced with original ► replacement parts . Only by using original replacement parts can it be assured that the safety requirements are being com- plied with . Ensure that the appliance, the power cable and the plug ►...
- Page 34 Items supplied The appliance is delivered with the following components as standard: ▯ Electric Fruit Preserver & Jam Maker ▯ Preserving grill ▯ ▯ Operating instructions NOTICE ► Check the contents to make sure everything is there and for visible damage . ►...
- Page 35 Setting up and connecting to the mains power supply Unpacking ♦ Remove all parts of the appliance and the operating instructions from the packaging . ♦ Remove all packing material . Disposal of the packaging The packaging protects the appliance from transport damage . The packaging materials are selected from the point of view of their environmental friendliness and disposal technology and are therefore recyclable .
- Page 36 WARNING - RISK OF INJURY! ► When it is hot, take hold of the appliance ONLY by means of the heat insulated handles 2 . Risk of Burns! ■ Add about 5 litres of water to the appliance and leave it to boil at 100° for 20 minutes (see section “Switching the appliance on and off”) .
- Page 37 Using the appliance Switching the appliance on and off 1) Using the control dial “Temperature” 9, set the desired temperature . You can set the temperature in 1°C steps . A signal tone sounds for every 5°C . The set temperature appears in the display indicator “Set Temperature” 7 . 2) Using the control dial “Minutes”...
- Page 38 Preserving NOTICE ► To be understood under the term preserving is the conservation of food- stuffs by, amongst others, the effects of heat . Dependent upon the type and mass of the items to be preserved, a differentiation is made between the processes of sterilisation and pasteurisation .
- Page 39 Meat Temperature in °C Time in minutes Roast meat, in pieces, (cooked 100 (MAX) well) Broth 100 (MAX) Game / Poultry (cooked well) 100 (MAX) Goulash ( cooked well) 100 (MAX) Minced meat, Sausage meat (raw) 100 (MAX) Fruit Temperature in °C Time in minutes Apples soft/hard 30/40...
- Page 40 Beans 100 (MAX) Tomatoes/Tomato puree NOTICE ► The time periods specified in the tables refer to the actual cooking time . The time period begins therefore first when the preserving boiler has reached the set temperature . With a completely full appliance this can take up to 90 minutes! 6) Using the control dial “Minutes”...
- Page 41 WARNING - PROPERTY DAMAGE! ► Do not pour off liquids with solid constituents, for example, soups . The solids will block the pouring tap 0! 1) To do so, hold a cup or similar under the tap 0 and press the dispensing lever q downwards .
- Page 42 Cleaning and Care WARNING - RISK OF INJURY! ► Before cleaning, ALWAYS remove the plug from the mains power socket! Otherwise, there is the risk of receiving an electric shock! ► Let the appliance cool down before cleaning it . Risk of Burns! WARNING - PROPERTY DAMAGE! NEVER submerse the appliance in water or other liquids! The appliance could be irreparably damaged!
- Page 43 Cleaning the pouring tap To clean the tap 0 thoroughly, you can unscrew the tap lever q . The tap 0 cannot be unscrewed as this could lead to problems with the seal . 1) Screw the tap lever q anticlockwise off the tap 0 . 2) Place the pouring lever q in a mild soapy solution and swirl it back and forth .
- Page 44 Scale removal Deposits of scale on the bottom of the appliance lead to increased energy consumption and reduce the service life of the appliance . Descale the appliance as soon as scale deposits become apparent . 1) Use a standard commercial descaling product . Proceed as described in the instructions for usage of the descaler .
- Page 45 Recipes Coarse liver sausage 2 kg Bellypork with rind 500 g Pig liver 500 g Onions 100 g Pork dripping 2 Tsp crushed Allspice 1 Tbsp Thyme and Marjoram, dried 1 Tsp white Pepper 1 Tbsp Salt Preparation Boil the bellypork for 1 .5 hours in salt water and then allow it all to cool . Subsequently, turn it through a mediem meat grinder disc .
- Page 46 Pumpkin, sweet and sour 2 kg Pumpkin 1/2 l Vinegar 1 l Water 1/4 l Wine vinegar 1 kg Sugar Juice and rind of one Lemon a Ginger root ( fresh ginger cut into slices) a stick of Cinnamon a few Cloves Preparation Halve the pumpkin and remove the pith .
- Page 47 Caramel Pears 1 .5 kg pears (firm/ripe) 150 g sugar 750 ml water Preparation Peel the pears . Quarter them and remove the cores . Caramelise the sugar in a pan . Pour the water into the pan and boil it until the sugar is dissolved . Place the pears into the pre-prepared glasses .
- Page 48 Technical data Power supply 220 - 240 V ~ 50 Hz Nominal power 1800 W Capacity ca . 27 Liter Temperature range 30 - 100°C Protection type IPX3 (protection against water spray) All of the parts of this appliance which come into contact with food are food-safe .
- Page 49 Kompernass Handels GmbH warranty Dear Customer, This appliance has a 3-year warranty valid from the date of purchase . If this product has any faults, you, the buyer, have certain statutory rights . Your statutory rights are not restricted in any way by the warranty described below . Warranty conditions The validity period of the warranty starts from the date of purchase .
- Page 50 E-Mail: kompernass@lidl .co .uk Service Malta Tel .: 80062230 E-Mail: kompernass@lidl .com .mt IAN 290455 Importer Please note that the following address is not the service address . Please use the service address provided in the operating instructions . KOMPERNASS HANDELS GMBH...
- Page 51 ■ 48 │ GB │ MT SEAD 1800 A1...
- Page 52 Inhaltsverzeichnis Einführung . . . . . . . . . . . . . . . . . . . . . . . . . . . . . . . . . . . . . . . . . . . . . . . . . . . 50 Informationen zu dieser Bedienungsanleitung .
-
Page 53: Einführung
Einführung Informationen zu dieser Bedienungsanleitung Herzlichen Glückwunsch zum Kauf Ihres neuen Gerätes . Sie haben sich damit für ein hochwertiges Produkt entschieden . Die Bedie- nungsanleitung ist Bestandteil dieses Produkts . Sie enthält wichtige Hinweise für Sicherheit, Gebrauch und Entsorgung . Machen Sie sich vor der Benutzung des Produkts mit allen Bedien- und Sicherheitshinweisen vertraut . -
Page 54: Warnhinweise
Warnhinweise In der vorliegenden Bedienungsanleitung werden folgende Warnhinweise verwendet: GEFAHR Ein Warnhinweis dieser Gefahrenstufe kennzeichnet eine drohende gefährliche Situation . Falls die gefährliche Situation nicht vermieden wird, kann dies zum Tod oder zu schweren Verletzungen führen . ► Die Anweisungen in diesem Warnhinweis befolgen, um die Gefahr des Todes oder schwerer Verletzungen von Personen zu vermeiden . -
Page 55: Sicherheitshinweise
Sicherheitshinweise In diesem Kapitel erhalten Sie wichtige Sicherheitshinweise im Umgang mit dem Gerät . Dieses Gerät entspricht den vorgeschriebenen Sicherheitsbestimmungen . Ein unsachgemäßer Gebrauch kann zu Personen- und Sachschäden führen . Beachten Sie für einen sicheren Umgang mit dem Gerät die folgenden Sicher- heitshinweise: GEFAHR - ELEKTRISCHER SCHLAG! Kontrollieren Sie das Gerät vor der Verwendung auf äuße-... - Page 56 WARNUNG - VERLETZUNGSGEFAHR! Dieses Gerät kann von Kindern ab 8 Jahren sowie von Per- ► sonen mit reduzierten physischen, sensorischen oder menta- len Fähigkeiten oder Mangel an Erfahrung und/oder Wis- sen benutzt werden, wenn sie beaufsichtigt oder bezüglich des sicheren Gebrauchs des Gerätes unterwiesen wurden und die daraus resultierenden Gefahren verstanden haben .
- Page 57 ACHTUNG - SACHSCHADEN! Defekte Bauteile dürfen nur gegen Original-Ersatzteile aus- ► getauscht werden . Nur bei diesen Teilen ist gewährleistet, dass sie die Sicherheitsanforderungen erfüllen werden . Stellen Sie sicher, dass das Gerät, das Netzkabel oder der ► Netzstecker nicht mit heißen Quellen wie Kochplatten oder offenen Flammen in Berührung kommt .
-
Page 58: Lieferumfang
Lieferumfang Das Gerät wird standardmäßig mit folgenden Komponenten geliefert: ▯ Einkochautomat ▯ Einkochgitter ▯ Deckel ▯ Bedienungsanleitung HINWEIS ► Prüfen Sie die Lieferung auf Vollständigkeit und auf sichtbare Schäden . ► Bei einer unvollständigen Lieferung oder Schäden infolge mangelhafter Verpackung oder durch Transport wenden Sie sich an die Service-Hotline (siehe Kapitel Service) . -
Page 59: Aufstellen Und Anschließen
Aufstellen und Anschließen Auspacken ♦ Entnehmen Sie alle Teile des Gerätes und die Bedienungsanleitung aus dem Karton . ♦ Entfernen Sie sämtliches Verpackungsmaterial . Entsorgung der Verpackung Die Verpackung schützt das Gerät vor Transportschäden . Die Verpackungs- materialien sind nach umweltverträglichen und entsorgungstechnischen Gesichts- punkten ausgewählt und deshalb recyclebar . -
Page 60: Gerät Aufstellen Und Betriebsbereit Machen
Gerät aufstellen und betriebsbereit machen ■ Wickeln Sie das Netzkabel vollständig von der Kabelaufwicklung 8 ab . ■ Stellen Sie das Gerät auf eine ebene und rutschfeste Fläche . Achten Sie darauf, dass die Netzsteckdose gut zu erreichen ist . ■... -
Page 61: Lebensmittel/Einmachgläser Vorbereiten
Lebensmittel/Einmachgläser vorbereiten Benutzen Sie zum Einmachen/Einkochen am besten Gläser mit Gummiring und Klammern . Die Einmachgläser müssen frei von Beschädigungen sein . 1) Die Einmachgläser müssen möglichst frei von Keimen und Bakterien sein, an- sonsten kann das Einmachgut vorzeitig verderben . Kochen Sie die Einmach- gläser am besten vor dem Einfüllen der Lebensmittel ca . -
Page 62: Einkochen
3) Drücken Sie die Taste Heizen START/STOP 9 . Das Aufheizen beginnt . Das Aufheizen wird durch die laufenden Balken „ “ angezeigt . In der Displayanzeige „aktuelle Temperatur“ 6 wird die momentane Aufheiz- temperatur angezeigt . Sobald das Aufheizen abgeschlossen ist, erklingen Signaltöne, im Display erscheint „... - Page 63 3) Füllen Sie so viel Wasser in den Einkochautomaten, bis die oberen Einmach- gläser mindestens zu 3/4 im Wasser stehen . Überschreiten Sie jedoch dabei nicht die Markierung MAX . Achten Sie darauf, dass die Einmachgläser in der unteren Lage gut verschlossen sind, damit kein Wasser eindringen kann . 4) Schließen Sie den Einkochautomaten mit dem Deckel 1 .
- Page 64 Gemüse Temperatur in °C Zeit in Minuten Blumenkohl 100 (MAX) Spargel 100 (MAX) Erbsen 100 (MAX) Gewürzgurken Möhren/Karotten 100 (MAX) Kürbis Kohlrabi 100 (MAX) Sellerie 100 (MAX) Rosenkohl/Rotkohl 100 (MAX) Pilze 100 (MAX) Bohnen 100 (MAX) Tomaten/Tomatenmark HINWEIS ► Die in den Tabellen angegebenen Zeitspannen beziehen sich auf die tatsächliche Einkochzeit .
-
Page 65: Flüssigkeiten Aufwärmen / Warmhalten
Flüssigkeiten aufwärmen / warmhalten ACHTUNG - SACHSCHADEN! ► Füllen Sie Flüssigkeiten höchstens bis zur MAX-Markierung ein! Ansons- ten kann die Flüssigkeit überlaufen! 1) Füllen Sie die Flüssigkeit (zum Beispiel Glühwein oder Kakao) in den Ein- kochautomaten . 2) Setzen Sie den Deckel 1 auf den Einkochautomaten . WARNUNG - VERLETZUNGSGEFAHR! ►... -
Page 66: Überhitzungsschutz
Überhitzungsschutz Dieses Gerät ist mit einem Überhitzungsschutz ausgestattet . Zu einer Überhitzung kann es kommen, wenn sich zu wenig oder keine Flüssigkeit im Einkochautomat befindet . In diesem Fall erklingen Signaltöne und das Symbol „ “ blinkt im Display . Füllen Sie in diesem Fall sofort Flüssigkeit nach . Wenn keine Flüssigkeit nachgefüllt wird, schaltet sich das Gerät nach 5 Minuten aus . -
Page 67: Reinigung Des Zapfhahnes
Reinigung des Zapfhahnes Um den Zapfhahn 0 gründlich zu reinigen, können Sie den Zapfhebel q ab- schrauben . Der Zapfhahn 0 kann nicht abgeschraubt werden, da es ansonsten Probleme mit der Dichtigkeit geben kann . 1) Schrauben Sie den Zapfhebel q gegen den Uhrzeigersinn vom Zapf- hahn 0 ab . -
Page 68: Entkalken
Entkalken Kalkablagerungen am Geräteboden führen zu Energieverlusten und beeinträchti- gen die Lebensdauer des Gerätes . Entkalken Sie das Gerät, sobald sich Kalkablagerungen zeigen . 1) Benutzen Sie einen handelsüblichen Entkalker . Gehen Sie so vor, wie in der Anleitung des Entkalkers beschrieben . 2) Reinigen Sie nach dem Entkalken das Gerät mit viel klarem Wasser . -
Page 69: Rezepte
Rezepte Grobe Leberwurst 2 kg Schweinebauch mit Schwarte 500 g Schweineleber 500 g Zwiebeln 100 g Schweineschmalz 2 TL zerstoßener Piment 1 EL Thymian und Majoran, getrocknet 1 TL weißer Pfeffer 1 EL Salz Zubereitung Kochen Sie den Schweinebauch 1,5 Stunden in Salzwasser und lassen Sie ihn darin abkühlen . -
Page 70: Kürbis Süß-Sauer
Kürbis süß-sauer 2 kg Kürbis 1/2 l Essig 1 l Wasser 1/4 l Weinessig 1 kg Zucker Saft und Schale von einer Zitrone eine Ingwerwurzel (in Scheiben geschnittener frischer Ingwer) eine Stange Zimt einige Nelken Zubereitung Halbieren Sie den Kürbis und entfernen Sie das Mark . Schälen Sie den Kürbis und schneiden Sie ihn in kleine Würfel . -
Page 71: Karamellbirnen
Karamellbirnen 1,5 kg Birnen (fest/reif) 150 g Zucker 750 ml Wasser Zubereitung Schälen Sie die Birnen . Vierteln Sie diese und entfernen Sie das Kerngehäuse . Karamellisieren Sie den Zucker in einer Pfanne . Schütten Sie das Wasser in die Pfanne und kochen Sie es solange auf, bis der Zucker gelöst ist . -
Page 72: Technische Daten
Technische Daten Spannungsversorgung 220 - 240 V ~ (Wechselstrom) 50 Hz Nennleistung 1800 W Fassungsvermögen ca . 27 Liter Temperaturbereich 30 - 100 °C Schutzart IPX3 (Schutz gegen Sprühwasser) Alle Teile dieses Gerätes, welche mit Lebensmitteln in Berührung kommen, sind lebensmittelecht . -
Page 73: Garantie Der Kompernaß Handels Gmbh
Garantie der Kompernaß Handels GmbH Sehr geehrte Kundin, sehr geehrter Kunde, Sie erhalten auf dieses Gerät 3 Jahre Garantie ab Kaufdatum . Im Falle von Mängeln dieses Produkts stehen Ihnen gegen den Verkäufer des Produkts gesetz- liche Rechte zu . Diese gesetzlichen Rechte werden durch unsere im Folgenden dargestellte Garantie nicht eingeschränkt . -
Page 74: Service
Service Schweiz Tel .: 0842 665566 (0,08 CHF/Min ., Mobilfunk max . 0,40 CHF/Min .) E-Mail: kompernass@lidl .ch IAN 290455 Importeur Bitte beachten Sie, dass die folgende Anschrift keine Serviceanschrift ist . Kontak- tieren Sie zunächst die benannte Servicestelle . - Page 75 KOMPERNASS HANDELS GMBH BURGSTRASSE 21 DE - 44867 BOCHUM GERMANY www.kompernass.com Versione delle informazioni · Last Information Update Stand der Informationen: 12/ 2017 · Ident.-No.: SEAD1800A1-102017-2 IAN 290455...
Need help?
Do you have a question about the 290455 and is the answer not in the manual?
Questions and answers