YABER K2s - Projector Manual
- Manual (182 pages) ,
- Quick start manual (29 pages) ,
- Manual (4 pages)
Advertisement
- 1 YABER Lifetime Professional Support
- 2 Tips
- 3 Package List
- 4 Device Specifications
- 5 Device Overview
- 6 Remote Control Overview
- 7 Installation
- 8 Operation
- 9 Maintainance Tips
- 10 Documents / Resources
YABER Lifetime Professional Support
Thank you for your support of YABER! Before using your projector, please take a moment to read through the manual thoroughly. Should you encounter any issues, simply email support@yabertech.com with your order number and a brief explanation of the problem. Our team will respond within 24 hours with a fast and effective solution.
Many common issues such as signal or sound problems, failed Bluetooth or WiFi connections, dark spots, or choppy animations can often be resolved through simple adjustments to the settings. Rest assured that all of our projectors have undergone a rigorous 100% inspection and packaging process prior to shipping.
If you have any further questions or concerns, please don't hesitate to contact us. We welcome the opportunity to improve and guarantee that we will work with you to find a satisfactory solution.
Thank you for your understanding and for choosing YABER!
Best regards, The YABER Service Team.
Tips
- To ensure the longevity of your projector, it is important to avoid placing it in excessively hot or cold environments. The optimal working temperature range is between 5°C and 35°C.
- If you notice any black spots on the projection screen, please don't worry. Simply contact us at support@yabertech.com and we will provide a video tutorial on how to remove dust particles.
- To prevent damage to the projector, it is crucial to protect it from strong impact, extrusion, and vibration. Avoid moving the device during operation, as this can lead to internal circuit faults.
- The lens is a critical component of the projector that directly impacts picture quality. To ensure optimal performance, it is important to keep the lens clean and free of dust. Use a soft cotton cloth to gently wipe the glass lens surface, avoiding the use of abrasive materials or hard cloths.
Package List

Device Specifications
| Model No. K2s | |||
| Native Resolution | 1920*1080P | Keystone Correction | Auto/Manual Vertical& Horizontal |
| Compatible Resolution | 4K(H265 only) | Light Source | LED |
| Aspect Ratio | 16:9 / 4:3 | Display Technology | LCD |
| Projection Ratio | 1.54:1 | Interfaces | HDMI*2/USB*1/USB-C*1/Earphone*1/AV*1 |
| Recommended Projection Distance | 4.5-22.4ft | Projector Weight | 7.05 pounds(3.2 kg) |
| Power Voltage | AC 100-240V | Wi-Fi | Wi-Fi 6 |
| Power Consumption | 140W | Bluetooth | 5.0 |
| Projection Method | Front/Rear on Desk, Front/ Rear on Ceiling | ||
| Picture Format | JPG/JPEG/BMP/PNG | ||
| Video Format | MP4/MKV/WMV/3GP/MPG/VOB/TP/TS/DAT/MOV/FLV/TRP/4K H.264/H.265(≤30fps) | ||
| Audio Format | MP3/WAV/WMA/M4A/AAC/OGG/FLAC | ||
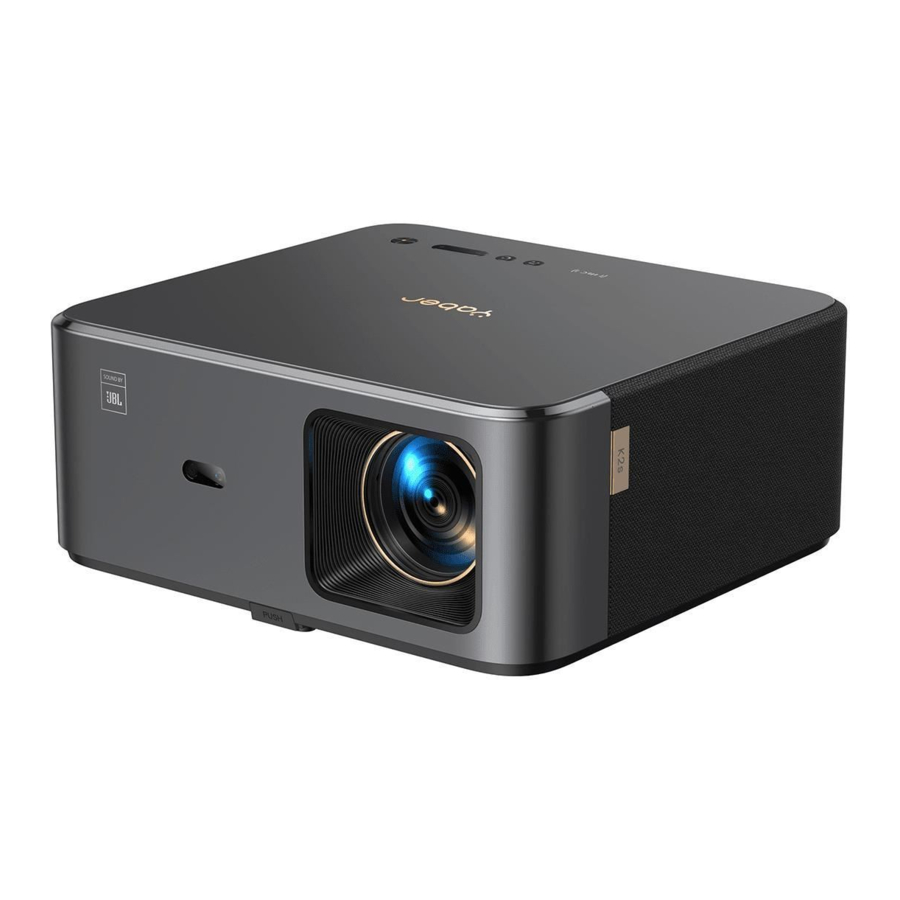
Device Overview

Remote Control Overview
Android TV Remote Control

Device Remote Control

Installation
Install the TV Dongle
- Push once to open the lid, and take out the tray.

- Mount the TV Dongle and make sure the Micro HDMI port downside and the Micro USB port upside.

- Insert the mounted TV Dongle into the slot.

- Plug the USB power cable into the Micro USB port, and push to close the lid.


Distance and Projection Size
| Distance | Screen Size |
| 1.4m (4.5ft) | 40" |
| 2.1m (6.7ft) | 60" |
| 2.7m (8.9ft) | 80" |
| 3.4m (11.2ft) | 100" |
| 4.1m (13.4ft) | 120" |
| 5.1m (16.8ft) | 150" |
| 6.8m (22.4ft) | 200" |
The recommended projection distance is about 8.9ft, the shortest projection distance is 4.5ft. The image size depends on the distance between projector and screen, there may be 3% deviation among above listed data. Different settings cause various distances.
Angle Adjustment
The projector is equipped with an angle adjuster foot. Push the button to adjust its angle.
- Place the projector on flat surface, press and hold the adjuster button and lift the projector.
![]()
- Release the button when you find a suitable angle and the adjuster foot will drop into position and be locked.
![]()


Install on the Ceiling
The YABER Projector Manual Catalog provides detailed instructions for hanging your projector on the ceiling. To do so, you will need to purchase a universal projector ceiling mount. Once you have the mount, remove the four rubber pads on the bottom of the projector to reveal the screw holes. Use M5*10mm screws to securely install the projector on the ceiling using the hanger frame. With these simple steps, you can easily mount your projector for the best viewing experience.

Connect Devices
The projector has 5 ports, HDMI port/USB port/USB-C port/AV_in/Audio out.
Please select the correct connecting ports to connect your devices.

Operation
Starting Up the Device
Prepare the remote control
- Open the battery compartment.
![]()
- Insert two AAA batteries with correct polarity indicated.
![]()
- Close the battery compartment.
![]()


Note: You must use the Yaber remote control to complete the first time setup of the projector.
Power on
Press the power key on the remote controller or projector. The power LED on the projector turns from orange to off.
To turn off the projector, press once and then press it again when the power menu pops up. The power LED on the projector lights up.
First time setup
When you turn on the projector for the first time or the projector is reset to the Factory Default Settings, you are prompted to make the first time setup.
You can select your system language, connect to Wi-Fi, and learn about the new features and tips of the projector.
After setup, the projector will go to the Home Page.
Image Adjustment
Focus the image
When using the projector for the first time, it normally displays an unclear image. This is due to the lens being out of focus or the incorrect keystone setting.
Please use the auto focus and manual focus key on remote control to get the best image. The auto focus can also be triggered by moving the projector to another location.

Auto and Manual Keystone
When the projection screen is not rectangular, it can be adjusted by auto keystone and 4-point manual keystone correction.
The image will be adjusted automatically when you move the projector to another location.
For the extra spacing between the auto keystone correction, go to "Settings" -> "Projection" -> "Projection Settings" -> "Manual Keystone". Use the arrow keys on the remote control to adjust the horizontal or vertical parameters of each point, until the projection screen becomes the desired rectangle.

Rotate the Image by Placement
For different projector placements, choose the appropriate projection mode to get the correct image.

|
|
|
|


Switching Input Signal
The projector can be connected to multiple devices at the same time but it can only display one full screen at a time. Select the desired signal source (Android TV/HDMI/AV) on the homepage.

USB Disk Input Mode
Play Video/Music/Photo in the File Manager
- Insert the USB Disk, the [USB] icon of the homepage will turn white.
- Select the [USB] icon, or File Manager.
- Select the desired file (or folder to enter the subfolder) in the USB disk, then press the [OK] button to play.
Play Interface

Screencast
Warming Tips:
- The fluency of screen mirroring with wireless connection will be affected by the network environment. A bandwidth of 100Mbit or more is recommended when using screen mirroring.
- Make sure your mobile device is close to the projector when using wireless connection. A distance within 1 meter is recommended.
- Some mobile devices may not support screen mirroring due to the compatibility.
- Any questions, please feel free to email YABER via support@yabertech.com
iOS Cast (for iOS Devices)
iOS Wi-Fi Mirroring
For iPhone/iPad
- Connect the projector to your home Wi-Fi.

- Turn on the Wi-Fi on your iPhone/iPad, and connect to the same network.
- Press the
![]() Screen Mirroring on your iPhone/iPad and then choose [K2s_xxxx].
Screen Mirroring on your iPhone/iPad and then choose [K2s_xxxx].

For Macbook
- Make sure your Mac and projector are on the same network.
- Click Apple menu -> System Preference -> Sharing -> Airplay Display.
![]()
- Click Airplay icon on menu bar and Select [K2s_xxxx] to connect and start wireless projection.
![]()


iOS AP Mirroring
For iPhone/iPad
- Turn on the Wi-Fi on your iPhone/iPad and connect to projector hotspot: [K2s_xxxx] K2s_xxxx
![]()

- Press the
![]() Screen Mirroring of iOS device and then choose [K2s_xxxx].
Screen Mirroring of iOS device and then choose [K2s_xxxx].


 Screen Mirroring of iOS device and then choose [K2s_xxxx].
For Macbook
- Make sure your Mac and projector are on the same network.
- Click Apple menu -> System Preference -> Sharing -> Airplay Display.
![]()
- Click Airplay icon on menu bar and Select [K2s_xxxx] to connect and start wireless projection.
![]()


Miracast for Android Devices
Android Mirroring
- Turn on the Wi-Fi on the mobile phone.
- Turn on the Wireless Display / Screen Mirroring function in the phone settings and choose [K2s_xxxx] to start screen mirroring.


- Press Windows logo key [Win+K] on your keyboard.
![]()
- Select [K2s_xxxx] to connect and start wireless projection.
![]()


NFC Screencast
- Download and install E-share App by scan QR code or visit http://h.eshare.app
![]()
- Make sure your phone and projector are connected to same network, and connect the projector on E-share App.
![]()
- Go to Settings on E-share App, Select "Write NFC Tags" and follow the prompts to activate the NFC area on the projector.
![]()
- Now you can tap your phone closely on the NFC area to Screencast while the projector is powered on and on the same Wi-Fi network as your phone.


Note:
- NFC screencast requires your phone to touch the NFC detection area on the projector, which may not be suitable for ceiling mounts.
- NFC reading areas and the range of your smartphone vary from brand and model. Please refer to your smartphone manufacturer for detailed instructions.
- Currently the NFC tag does not support cross-OS use. An activated tag can only be read by casting devices with the same operating system as the setting device.
Bluetooth Setting
Bluetooth Connection

Go to home page -> Select the [ Settings ] -> [ Bluetooth ] -> Scan the Bluetooth devices nearby automatically -> Choose the Bluetooth device desired -> it will be paired and connected automatically.
Bluetooth Speaker Mode

This projector supports the function of Bluetooth speaker.
Press the [ ![]() ] button on projector, or select the [ Bluetooth Speaker Mode ] on home page, then you can search and pair your projector [ K2s_xxxx ] with your mobile device as a bluetooth speaker for music playing.
] button on projector, or select the [ Bluetooth Speaker Mode ] on home page, then you can search and pair your projector [ K2s_xxxx ] with your mobile device as a bluetooth speaker for music playing.
Quiet Mode
Using the quiet mode, you can control the noise of the projector to keep it at a low level. The device will work under lower power consumption, and the projection brightness will also be slightly lower than the normal state.

Press the [  ] button on projector, or select the [ Bluetooth Speaker Mode ] on home page to switch on or off the Quiet Mode.
Alexa Setup
Notice:
This function needs to be used with Alexa enabled smart speakers, and must be configured through the Alexa App on the mobile phone.
This function is only supported in some countries and regions.

- Make sure K2s is connected to the Wi-Fi with Internet access.
- Select the Alexa icon on top right of the projector home page to start the setup.
- Click "Account" to log in and follow the instructions to finish linking projector K2s to Alexa.
![]()
- A prompt will pop up on the screen, indicating that the projector has been successfully connected.
![]()
- Open Alexa on your phone and log in your account.
![]()
- Go to Home -> More -> Skills & Games, search and enable Whale Video.
![]()
- Complete the Whale Video skill setup, click "Settings" -> "Manage In TV & Video" on the page, bind the projector and your Alexa speaker.
![]()
- Now try this "Alexa, open Netflix on the projector".


System Update
Local Upgrade
Download the software upgrading package at the company website and copy it to the root directory of portable hard drive or USB drive, and plug the drive into the USB port. Go to "About" -> "Upgrade" and select "Local Upgrade", then the system will automatically detect the upgrading package and install it for upgrading.
Online Upgrade
Go to "About" -> "Upgrade" and select "Online Upgrade". The system will automatically detect whether there is new version available and ask your permission to upgrade it.
Power On Mode
In the Power On Standby mode, plug in the power supply, and the Power LED on the projector will light up. You need to press the power button to turn on the projector.
If switched to Power On, the machine will automatically turn on after plugging in the power cord.
Safe Shutdown
- Press the button on the projector or remote controller, then press OK key to power off the projector.
- Unplug the power cord of the projector.
- Cover the lens and store the projector in a cool and dry place.
Maintainance Tips
Care of Projectors
- Do not place projector in too warm or too cold room, because the high temperature or low temperature will shorten lifespan of the device. The working environment would be 5°C-35°C better.
- If there are black spots on the projection screen, please don't worry. Please contact support@ yabertech.com via email, we can send you a video about how to remove the dust.
- The projector shall be strictly protected from strong impact, extrusion and vibration.
- Lens, as the core component of the projector, is directly related to the picture definition and effect. Clean the lens whenever you noticed dirt or dust on the surface. Use a canister of compressed air to remove dust from the lens. If there is dirt or smears, use the cleaning cloth to gently wipe the lens surface.
Cleaning the Air Filter
You need to clean the projector's air filter in the following situations:
- The filter or vents get dusty.
- You see a message telling you to clean it.
- The projector is getting noisier.
Follow the steps below.
- Turn off the projector and unplug the power cord and cables.
- Wipe the exterior of the projector with a soft cloth.
- Press and hold the edge of the air filter cover, and pull to remove the cover.

- Pull the air filter out of the projector.

- Tap each side of the air filter 4 to 5 times to shake off any excess dust. Vacuum the front of the air filter to remove any remaining dust


Attention:
Do not use excessive force when tapping the air filter, or it may crack and become unusable. Do not rinse the air filter in water, or use any detergent or solvent to clean it. Do not use canned air; the gases may leave a residue, or push dust and debris into the projector's optics or other sensitive areas.

Documents / Resources
References
Download manual
Here you can download full pdf version of manual, it may contain additional safety instructions, warranty information, FCC rules, etc.
Advertisement


Need help?
Do you have a question about the K2s and is the answer not in the manual?
Questions and answers