Table of Contents
Advertisement
Available languages
Available languages
Quick Links
Advertisement
Chapters
Table of Contents

Related Manuals for Yaber K2s


Summary of Contents for Yaber K2s
- Page 1 K2s PROJECTOR...
- Page 2 LANGUAGE English 01~25 Deutsch 26~50 Français 51~75 Italia 76~100 日本語 日本語 101~125 한국인 한국인 126~150 151-175 Polish...
-
Page 3: Table Of Contents
CONTENTS YABER Lifetime Professional Support Tips Package List Projector Specifications Projector Overview Remote Control Overview 1. Android TV Remote Control 2. Projector Remote Control Installation 1. Install the TV Dongle 2. Distance and Projection Size 3. Angle Adjustment 4. Install on the Ceiling 5. -
Page 4: Yaber Lifetime Professional Support
YABER Lifetime Professional Support Thank you for your support of YABER! Before using your projector, please take a moment to read through the manual thoroughly. Should you encounter any issues, simply email support@yabertech.com with your order number and a brief explanation of the problem. -
Page 5: Package List
Package List K2s Projector Projector HDMI Cable Remote Control TV Dongle TV Dongle Power Cord Remote Control 3-in-1 AV Cable Quick Start Guide Cleaning Kits Lens Cover... -
Page 6: Projector Specifications
Projector Specifications Model No. K2s Auto/Manual Vertical& Native Resolution 1920*1080P Keystone Correction Horizontal Compatible Resolution 4K(H265 only) Light Source Aspect Ratio 16:9 / 4:3 Display Technology HDMI*2/USB*1/ Projection Ratio 1.54:1 Interfaces USB-C*1/Earphone*1/ AV*1 Recommended 4.5-22.4ft Projector Weight 7.05 pounds(3.2 kg) -
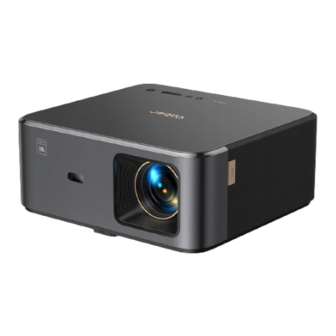
Page 7: Projector Overview
Projector Overview IR Window IR Window Air Inlet Power Port HDMI Port USB Port Automatic Focus Projector USB-C Port Signal Receiver Lens Headphone Jack AV Port NFC Area Heat-Sink Window Bluetooth Speaker Mode Quiet Mode Volume Power Angle Adjusting Stand Rubber Pad (Remove for Ceiling Mount) TV Dongle Slot Bottom Label... -
Page 8: Remote Control Overview
Remote Control Overview 1. Android TV Remote Control Standby On/Off Voice Search Arrow Keys Back/Exit APPs Home Page Google Play 2. Projector Remote Control Power On/Off Arrow Keys Back/Exit Home Page Menu Auto Focus Volume +/- Focus +/-... -
Page 9: Installation
Installation 1. Install the TV Dongle Micro USB port (Mark on the Back) Tray Mounted TV TV Dongle Dongle Slot Micro HDMI port (Mark on the Back) 1. Push once to open the lid, and take out the tray. 2. Mount the TV Dongle and make sure the Micro HDMI port downside and the Micro USB port upside. -
Page 10: Distance And Projection Size
2. Distance and Projection Size Distance Screen Size 1.4m (4.5ft) 40" 2.1m (6.7ft) 60" 2.7m (8.9ft) 80" 3.4m (11.2ft) 100" 4.1m (13.4ft) 120" 5.1m (16.8ft) 150" 6.8m (22.4ft) 200" The recommended projection distance is about 8.9ft, the shortest projection distance is 4.5ft. The image size depends on the distance between projector and screen, there may be 3% deviation among above listed data. -
Page 11: Install On The Ceiling
4. Install on the Ceiling The YABER Projector Manual Catalog provides detailed instructions for hanging your projector on the ceiling. To do so, you will need to purchase a universal projector ceiling mount. Once you have the mount, remove the four rubber pads on the bottom of the projector to reveal the screw holes. -
Page 12: Operation
2. Insert two AAA batteries with correct polarity indicated. 3. Close the battery compartment. Note: You must use the Yaber remote control to complete the first time setup of the projector. · Power on Press the power key on the remote controller or projector. The power LED on the projector turns from orange to off. -
Page 13: Image Adjustment
2. Image Adjustment · Focus the image When using the projector for the first time, it normally displays an unclear image. This is due to the lens being out of focus or the incorrect keystone setting. Please use the auto focus and manual focus key on remote control to get the best image. The auto focus can also be triggered by moving the projector to another location. - Page 14 · Auto and Manual Keystone When the projection screen is not rectangular, it can be adjusted by auto keystone and 4-point manual keystone correction. The image will be adjusted automatically when you move the projector to another location. For the extra spacing between the auto keystone correction, go to "Settings" -> "Projection" -> "Projection Settings"...
- Page 15 · Rotate the Image by Placement For different projector placements, choose the appropriate projection mode to get the correct image. 1. Front projection Ceiling mount 2. Rear projection Ceiling mount 3. Front projection Desk mount 4. Rear projection Desk mount...
-
Page 16: Switching Input Signal
3. Switching Input Signal The projector can be connected to multiple devices at the same time but it can only display one full screen at a time. Select the desired signal source (Android TV/HDMI/AV) on the home- page. 4. USB Disk Input Mode ·... -
Page 17: Screencast
2. Make sure your mobile device is close to the projector when using wireless connection. A distance within 1 meter is recommended. 3. Some mobile devices may not support screen mirroring due to the compatibility. 4. Any questions, please feel free to email YABER via support@yabertech.com iOS Cast (for iOS Devices) · iOS Wi-Fi Mirroring For iPhone/iPad 1. - Page 18 1. Make sure your Mac and projector are on the same network. 2. Click Apple menu -> System Preference -> Sharing -> Airplay Display. 3. Click Airplay icon on menu bar and Select [K2s_xxxx] to connect and start wireless projection. ·...
- Page 19 Miracast for Android Devices · Android Mirroring 1. Turn on the Wi-Fi on the mobile phone. 2. Turn on the Wireless Display / Screen Mirroring function in the phone settings and choose [K2s_xxxx] to start screen mirroring. CONNECT Searching for wireless display and audio devices Where in my devices Search K2s_440E...
-
Page 20: Bluetooth Setting
3. Go to Settings on E-share App, Select "Write NFC Tags" and follow the prompts to activate the NFC area on the projector. 4. Now you can tap your phone closely on the NFC area to Screencast while the projector is powered on and on the same Wi-Fi network as your phone. -
Page 21: Quiet Mode
· Bluetooth Speaker Mode This projector supports the function of Bluetooth speaker. Press the [ ] button on projector, or select the [ Bluetooth Speaker Mode ] on home page, then you can search and pair your projector [ K2s_xxxx ] with your mobile device as a bluetooth speaker for music playing. -
Page 22: Alexa Setup
1. Make sure K2s is connected to the Wi-Fi with Internet access. 2. Select the Alexa icon on top right of the projector home page to start the setup. 3. Click "Account" to log in and follow the instructions to finish linking projector K2s to Alexa. - Page 23 5. A prompt will pop up on the screen, indicating that the projector has been successfully connected . 6. Open Alexa on your phone and log in your account.
- Page 24 7. Go to Home -> More -> Skills & Games, search and enable Whale Video. 8. Complete the Whale Video skill setup, click “Settings” -> “Manage In TV & Video” on the page, bind the projector and your Alexa speaker. 9.
-
Page 25: System Update
9. System Update · Local Upgrade Download the software upgrading package at the company website and copy it to the root directory of portable hard drive or USB drive, and plug the drive into the USB port. Go to "About" ->... -
Page 26: Cleaning The Air Filter
4. Lens, as the core component of the projector, is directly related to the picture definition and effect. Clean the lens whenever you noticed dirt or dust on the surface. Use a canister of compressed air to remove dust from the lens. If there is dirt or smears, use the cleaning cloth to gently wipe the lens surface. - Page 27 5. Tap each side of the air filter 4 to 5 times to shake off any excess dust. Vacuum the front of the air filter to remove any remaining dust Attention: Do not use excessive force when tapping the air filter, or it may crack and become unusable. Do not rinse the air filter in water, or use any detergent or solvent to clean it.
- Page 28 INHALT YABER Lifetime Professionelle Unterstützung Hinweise Lieferumfang Technische Daten des Projektors Projektor-Übersicht Überblick über die Fernbedienung 1. Android TV-Fernbedienung 2. Projektor-Fernbedienung Installation 1. Installieren Sie den TV-Dongle 2. Entfernung und Projektionsgröße 3. Winkelverstellung 4. Installation an der Decke 5. Geräte verbinden Vorgang 1.
-
Page 29: Yaber Lifetime Professionelle Unterstützung
YABER Lifetime Professionelle Unterstützung Lieber Kunde, vielen Dank, dass Sie YABER unterstützen! Bitte lesen Sie dieses Benutzerhandbuch sorgfältig durch, bevor Sie den Projektor benutzen. Wenn Sie irgendwelche Probleme haben, mailen Sie Ihre Bestellnummer und das Problem zu support@yabertech.com. Wir werden innerhalb von 24 Stunden eine schnelle Lösung liefern. -
Page 30: Lieferumfang
Lieferumfang K2s Projector Projektor- HDMI-Kabel Fernbedienung TV Dongle TV Dongle Netzanschlu Fernbedienung 3-in-1 AV Kable Schnellstartanleitung Reinigungskits Objektivabdeckung... -
Page 31: Technische Daten Des Projektors
Technische Daten des Projektors Modell Nr. K2s Auto/Manuell Vertikal& Normale Auflösung 1920*1080P Trapezkorrektur Horizontal Kompatible Auflösung 4K(H265 only) Licht-Quelle Projektionsverhältnis 16:9 / 4:3 Display-Technologie HDMI*2/USB*1/ Projektionsverhältnis 1.54:1 Schnittstellen USB-C*1/Earphone*1/ AV*1 Empfohlener 4.5-22.4ft Projektor Gewicht 7.05 pounds(3.2 kg) Projektionsabstand Stromspannung AC 100-240V... -
Page 32: Projektor-Übersicht
Projektor-Übersicht Infrarot-Fenster Infrarot-Fenster Lufteingang Netzanschluss HDMI-Anschluss USB-Anschluss Projektorlins USB-C Anschluss Kopfhöreranschluss Automatischer Fokussierungssignalempfänger AV Anschluss NFC-Bereich Wärmesenke-Fenster Bluetooth- Lautsprechermodus Leiser Modus Umfang Leistung Winkelständer Gummipolster (für Deckenbefestigung entfernen) TV Dongle Steckplatz Unteres Label... -
Page 33: Überblick Über Die Fernbedienung
Überblick über die Fernbedienung 1. Android TV-Fernbedienung Bereitschaft ein/aus Sprachsteue Pfeiltasten Zurück/Beenden APPs Hauptseite Google Play 2. Projektor-Fernbedienung Einschalten/Ausschalten Pfeiltasten Zurück/Beenden Hauptseite Menü Auto Focus Umfang +/- Focus +/-... -
Page 34: Installation
Installation 1. Installieren Sie den TV-Dongle Micro-USB- Anschluss Deckel (Markierung auf der Rückseite) Tablett Montierter TV- TV-Dongle- Dongle Steckplatz Micro-HDMI- Anschluss (Markierung auf der Rückseite) 1. Drücken Sie einmal, um den Deckel zu öffnen, und nehmen Sie den Deckel heraus. 2. -
Page 35: Entfernung Und Projektionsgröße
2. Entfernung und Projektionsgröße Entfernung Bildschirmgröße 1.4m (4.5ft) 40" 2.1m (6.7ft) 60" 2.7m (8.9ft) 80" 3.4m (11.2ft) 100" 4.1m (13.4ft) 120" 5.1m (16.8ft) 150" 6.8m (22.4ft) 200" Der empfohlene Projektionsabstand beträgt ca. 8,9 Fuß, der kürzeste Projektionsabstand ist 4,5 Fuß. Die Bildgröße hängt von der Entfernung zwischen Projektor und Leinwand ab, es kann eine Abweichung von 3% zwischen den oben genannten Angaben geben. -
Page 36: Installation An Der Decke
4. Installation an der Decke Der Projektor kann mit einem Hängerahmen an der Decke aufgehängt werden. Bitte kaufen Sie eine universelle Deckenhalterung für den Projektor. Entfernen Sie die vier Gummipads an der Unterseite des Projektors, dann sehen Sie die Schraubenlöcher und verwenden Sie die M5*10mm Schrauben für die Installation an der Decke. -
Page 37: Vorgang
1. Öffnen Sie das Batteriefach. 2. Legen Sie zwei Batterien mit der richtigen Ausrichtung ein. 3. Schließen Sie das Batteriefach. Hinweis: Sie müssen die Yaber-Fernbedienung verwenden, um die Ersteinrichtung des Projektors abzuschließen. · Einschalten Drücken Sie die Netztaste auf der Fernbedienung oder am Projektor. Die Betriebs-LED am Projektor wechselt von orange auf aus. -
Page 38: Bildanpassung
2. Bildanpassung · Fokussieren des Bildes Wenn Sie den Projektor zum ersten Mal benutzen, zeigt er in der Regel ein unscharfes Bild an. Das ist darauf zurückzuführen, dass das Objektiv unscharf ist oder die Trapezeinstellung nicht korrekt ist. Bitte verwenden Sie die Autofokus-und die manuelle Fokustaste auf der Fernbedienung, um das beste Bild zu erhalten. - Page 39 · Automatische und manuelle Trapezkorrektur Wenn die Projektionsfläche nicht rechteckig ist, kann sie mit der automatischen Trapezkorrek- tur und der manuellen 4-Punkt-Trapezkorrektur eingestellt werden. Das Bild wird automatisch angepasst, wenn Sie den Projektor an einen anderen Ort bewegen. Für die zusätzlichen Abstände zwischen der automatischen Trapezkorrektur gehen Sie zu "Einstellungen"...
- Page 40 · Drehen des Bildes nach Platzierung Wählen Sie für verschiedene Projektoraufstellungen den entsprechenden Projektionsmodus, um das richtige Bild zu erhalten. 1. Aufwärtsprojektion-Deckenmontage 2. Rückprojektions-Deckenhalterung 3. Aufprojektion Pultmontage 4. Rückprojektion Pultmontage...
-
Page 41: Schalteingangssignal
3. Schalteingangssignal Der Projektor kann mit mehreren Geräten gleichzeitig verbunden werden, er kann jedoch nur einen Vollbildschirm gleichzeitig anzeigen. Wählen Sie die gewünschte Signalquelle (Android TV/HDMI/AV) auf der Startseite aus. 4. USB-Datenträger-Eingabemodus · Video/Musik/Foto im Dateimanager abspielen 1. Stecken Sie den USB-Datenträger ein, das [USB]-Symbol auf der Startseite wird weiß. 2. -
Page 42: Bildschirmaufzeichnung
2. Make sure your mobile device is close to the projector when using wireless connection. A distance within 1 meter is recommended. 3. Some mobile devices may not support screen mirroring due to the compatibility. 4. Any questions, please feel free to email YABER via support@yabertech.com iOS Cast (for iOS Devices) · iOS Wi-Fi Spiegelung For iPhone/iPad 1. - Page 43 1. Stellen Sie sicher, dass sich Ihr Mac und Ihr Projektor im selben Netzwerk befinden. 2. Klicken Sie auf Apple -> Menü -> Systemeinstellungen -> Sharing -> Airplay Display. 3. Klicken Sie auf das Airplay-Symbol in der Menüleiste und wählen Sie [K2s_xxxx], um eine Verbindung herzustellen und die drahtlose Projektion zu starten.
- Page 44 Miracast für Android Devices · Android Spiegelung 1. Schalten Sie das Wi-Fi auf dem Mobiltelefon ein. 2. Aktivieren Sie die Funktion Drahtlose Anzeige / Bildschirmspiegelung in den Telefone- instellungen und wählen Sie [K2s_xxxx], um die Bildschirmspiegelung zu starten. CONNECT Searching for wireless display and audio devices Where in my devices Search K2s_440E...
-
Page 45: Bluetooth-Einstellung
3. Gehen Sie in der E-Share App zu Einstellungen, wählen Sie "NFC-Tags schreiben" und folgen Sie den Anweisungen, um den NFC-Bereich auf dem Projektor zu aktivieren. 4. Jetzt können Sie Ihr Telefon genau auf den NFC-Bereich tippen, um Screencasts zu machen, während der Projektor eingeschaltet ist und sich im selben Wi-Fi-Netzwerk wie Ihr Telefon befindet. -
Page 46: Leiser Modus
· Bluetooth Lautsprecher Modus Dieser Projektor unterstützt die Funktion des Bluetooth-Lautsprechers. Drücken Sie die Taste [ ] am Projektor oder wählen Sie [ Bluetooth-Lautsprechermodus ] auf der Startseite, dann können Sie Ihren Projektor [ K2s_xxxx ] suchen und mit Ihrem Mobilgerät als Bluetooth-Lautsprecher für die Musikwiedergabe koppeln. -
Page 47: Alexa-Einrichtung
Alexa-App auf dem Mobiltelefon konfiguriert werden. Diese Funktion wird nur in einigen Ländern und Regionen unterstützt. 1. Stellen Sie sicher, dass der K2s mit dem Wi-Fi mit Internetzugang verbunden ist. 2. Wählen Sie das Alexa-Symbol oben rechts auf der Projektor-Startseite, um die Einrichtung zu starten. - Page 48 5. Auf dem Bildschirm erscheint eine Eingabeaufforderung, die anzeigt, dass der Projektor erfolgreich angeschlossen wurde. 6. Öffnen Sie Alexa auf Ihrem Telefon und melden Sie sich bei Ihrem Konto an.
- Page 49 7. Gehen Sie zu Home -> Mehr -> Fähigkeiten & Spiele, suchen und aktivieren Sie Whale Video. 8. Vervollständigen Sie die Einrichtung des Whale Video Skills, klicken Sie auf der Seite auf "Einstellungen" -> "In TV & Video verwalten", verbinden Sie den Projektor und Ihren Alexa- Lautsprecher.
-
Page 50: System-Aktualisierung
9. System-Aktualisierung · Lokales Systemupgrade Laden Sie das Software-Upgrade-Paket von der Website des Herstellers herunter und kopieren Sie es in das Hauptverzeichnis einer tragbaren Festplatte oder eines USB-Laufwerks, und schließen Sie das Laufwerk an den USB-Anschluss an. Gehen Sie zu "Über" -> "Upgrade" und wählen Sie "Lokales Upgrade". -
Page 51: Reinigen Des Luftfilters
4. Die Linse ist das wichtigste Bauteil des Projektors und steht in direktem Zusammenhang mit der Bildschärfe und -wirkung. Entfernen Sie den Staub von der Linse, wenn Sie Schmutz oder Staub auf der Oberfläche bemerken. Verwenden Sie einen Druckluftbehälter, um Staub von der Linse zu entfernen. - Page 52 5. Tippen Sie 4 bis 5 Mal auf jede Seite des Luftfilters, um überflüssigen Staub abzuschütteln. Saugen Sie die Vorderseite des Luftfilters ab, um den restlichen Staub zu entfernen. Achtung: Wenden Sie beim Abklopfen des Luftfilters keine übermäßige Kraft an, da er sonst reißen und unbrauchbar werden kann.
- Page 53 CONTENU Assistance professionnelle à vie YABER Conseils Liste des packages Projector Specifications Projector Overview Présentation de la télécommande 1. Télécommande Android TV 2. Télécommande du projecteur Installation 1. Installez le dongle TV 2. Distance et taille de projection 3. Ajustement de l'angle 4.
-
Page 54: Assistance Professionnelle À Vie Yaber
Assistance professionnelle à vie YABER Cher client, Merci beaucoup de soutenir YABER ! Veuillez lire attentivement ce manuel avant d'utiliser le projecteur. Si vous rencontrez des problèmes, envoyez votre numéro de commande et le problème par e-mail à support@ yabertech.com Nous vous fournirons une solution rapide dans les 24 heures. -
Page 55: Liste Des Packages
Liste des packages K2s Projecteur Projecteur Câble HDMI Télécommande Clé de télévision Télécommande Cordon d'alimentati Dongle TV Câble AV 3 en 1 Guide de Kits de nettoyage démarrage rapide Couverture d'objectif... -
Page 56: Projector Specifications
Projector Specifications Model No. K2s Auto/Manuel Vertical& Correction Résolution native 1920*1080P trapézoïdale Horizontal Résolution compatible 4K(H265 only) Source de lumière Technologie Ratio d'aspect 16:9 / 4:3 d'affichage HDMI*2/USB*1/ Rapport de projection 1.54:1 Interfaces USB-C*1/Earphone*1/ AV*1 Distance de projection 4.5-22.4ft Poids du projecteur 7,05 livres (3,2 kg) recommandée... -
Page 57: Projector Overview
Projector Overview Fenêtre IR Fenêtre IR Entrée d'air Port d'alimentation HDMI Port USB Port Récepteur de Lentille du USB-C Port signal de mise projecteur Headphone Jack AV Port Zone NFC Fenêtre du dissipateur Mode haut-parleur Bluetooth Mode silencieux Volume Power Support de réglage d'angle Coussinet en caoutchouc (retirer pour montage au plafond) -
Page 58: Présentation De La Télécommande
Présentation de la télécommande 1. Télécommande Android TV Veille Marche/Arrêt Recherche vocale Touches directionnelles Retour/Sortie APPs Page d'accue Google Play 2. Télécommande du projecteur Marche/arrêt Touches directionnelles Retour/Sortie Page d'accueil Menu Auto Focus Volume +/- Focus +/-... -
Page 59: Installation
Installation 1. Installez le dongle TV Port micro-USB (Marque au dos) Tray Mounted TV TV Dongle Dongle Slot Micro HDMI port (Mark on the Back) 1. Appuyez une fois pour ouvrir le couvercle et sortez le plateau. 2. Montez le dongle TV et assurez-vous que le port Micro HDMI est à l'envers et le port Micro USB à... -
Page 60: Distance Et Taille De Projection
2. Distance et taille de projection Distance Taille de l'écran 1.4m (4.5ft) 40" 2.1m (6.7ft) 60" 2.7m (8.9ft) 80" 3.4m (11.2ft) 100" 4.1m (13.4ft) 120" 5.1m (16.8ft) 150" 6.8m (22.4ft) 200" La distance de projection recommandée est d'environ 8,9 pieds, la distance de projection la plus courte est de 4,5 pieds. -
Page 61: Installer Au Plafond
4. Installer au plafond Le projecteur peut être suspendu au plafond avec un cadre de suspension. Veuillez acheter un support de plafond universel pour projecteur. Retirez les quatre patins en caoutchouc au bas du projecteur, vous verrez les trous de vis et utilisez les vis M5 * 10 mm pour l'installation au plafond. Screw holes: M5*10mm 210mm 5. -
Page 62: Opération
1. Ouvrez le compartiment à piles. 2. Insérez deux piles en respectant la polarité indiquée. 3. Fermez le compartiment à piles. Remarque: Vous devez utiliser la télécommande Yaber pour effectuer la première configuration du projecteur. · Allumer Appuyez sur la touche d'alimentation de la télécommande ou du projecteur. Le voyant d'alimentation du projecteur passe de l'orange à... -
Page 63: Ajustement De L'image
2. Ajustement de l'image · Réglages de l'image Lorsque vous utilisez le projecteur pour la première fois, il affiche normalement une image floue. Cela est dû au fait que l'objectif n'est pas au point ou que le réglage de la distorsion trapézoïdale est incorrect. - Page 64 · Trapèze automatique et manuel Lorsque l'écran de projection n'est pas rectangulaire, il peut être ajusté par correction trapézoïdale automatique et correction trapézoïdale manuelle en 4 points. L'image sera ajustée automatiquement lorsque vous déplacerez le projecteur vers un autre emplacement. Pour un espacement supplémentaire entre la correction trapézoïdale automatique, allez dans "Paramètres"...
- Page 65 · Faire pivoter l'image par placement Pour différents emplacements du projecteur, choisissez le mode de projection approprié pour obtenir la bonne image. 1. Projection frontale Montage au plafond 2. Rétroprojection Montage au plafond 3. Projection frontale Montage sur bureau 4. Rétroprojection Support de bureau...
-
Page 66: Commutation Du Signal D'entrée
3. Commutation du signal d'entrée Le projecteur peut être connecté à plusieurs appareils en même temps, mais il ne peut afficher qu'un seul plein écran à la fois. Sélectionnez la source de signal souhaitée (Android TV/ HDMI/AV) sur la page d'accueil. 4. -
Page 67: Partage D'écran
3. Certains appareils mobiles peuvent ne pas prendre en charge la duplication d'écran en raison de la compatibilité. 4. Pour toute question, n'hésitez pas à envoyer un e-mail à YABER via support@yabertech.com iOS Cast (for iOS Devices) · iOS Wi-Fi Mirroring For iPhone/iPad 1. - Page 68 1. Assurez-vous que votre Mac et votre projecteur sont sur le même réseau. 2. Cliquez sur le menu -> Préférences Système -> Partage -> Affichage Airplay. 3. Cliquez sur l'icône Airplay dans la barre de menu et sélectionnez [K2s_xxxx] pour vous connecter et démarrer la projection sans fil.
- Page 69 Miracast for Android Devices · Partage d’ecran Android 1. Activez le Wi-Fi sur le téléphone portable. 2. Activez la fonction Affichage sans fil/partage d’ecran dans les paramètres du téléphone et choisissez [K2s_xxxx] pour démarrer la duplication d'écran. CONNECT Searching for wireless display and audio devices Where in my devices Search K2s_440E...
-
Page 70: Paramètres Bluetooth
3. Accédez aux Paramètres sur l'application E-share, sélectionnez "Écrire des balises NFC" et suivez les instructions pour activer la zone NFC sur le projecteur. 4. Vous pouvez maintenant rapprocher de près votre téléphone sur la zone NFC pour le partage d’écran pendant que le projecteur est allumé et connecté sur le même réseau Wi-Fi que votre téléphone. -
Page 71: Mode Silencieux
· Mode Haut - parleur Bluetooth Ce projecteur prend en charge la fonction de haut-parleur Bluetooth. Appuyez sur le bouton [ ] du projecteur ou sélectionnez le [ Mode haut-parleur Bluetooth ] sur la page d'accueil, puis vous pouvez rechercher et coupler votre projecteur [ K2s_xxxx ] avec votre appareil mobile en tant que haut-parleur Bluetooth pour écouter de la musique. -
Page 72: Configuration Alexa
Cette fonction n'est prise en charge que dans certains pays et régions. 1. Assurez-vous que K2s est connecté au Wi-Fi ayant un accès Internet. 2. Sélectionnez l'icône Alexa en haut à droite de la page d'accueil du projecteur pour démarrer la configuration. - Page 73 5. Un message apparaîtra à l'écran, indiquant que le projecteur a été connecté avec succès. 6. Ouvrez Alexa sur votre téléphone et connectez-vous à votre compte.
- Page 74 7. Accédez à Accueil -> Plus -> Compétences et jeux, recherchez et activez l’application Whale Video 8. Terminez la configuration Whale Video, cliquez sur "Paramètres" -> "Gérer dans TV et vidéo" sur la page, liez le projecteur et votre haut-parleur Alexa. 9.
-
Page 75: Mise À Jour Du Système
9. Mise à jour du système · Mise à jour locale Téléchargez le package de mise à jour du logiciel sur le site Web de l'entreprise et copiez-le dans le répertoire racine du disque dur portable ou du lecteur USB, puis branchez le lecteur sur le port USB. Allez dans "À... -
Page 76: Nettoyage Du Filtre À Air
3. Le projecteur doit être strictement protégé contre les chocs violents, l'extrusion et les vibrations. 4. L'objectif, en tant que composant central du projecteur, est directement lié à l’effet de la haute définition de l'image. Nettoyez la lentille chaque fois que vous remarquez de la saleté ou de la poussière sur la surface. - Page 77 5. Tapotez chaque côté du filtre à air 4 à 5 fois pour secouer tout excès de poussière. Passez l'aspirateur sur l'avant du filtre à air pour enlever toutes poussières restantes. Avertir: N'utilisez pas une force excessive lorsque vous tapotez sur le filtre à air, sinon il pourrait se fissurer et devenir inutilisable.
- Page 78 CONTENUTI Supporto professionale a vita YABER Suggerimenti Elenco dei pacchetti Specifiche del proiettore Panoramica del proiettore Panoramica del telecomando 1. Telecomando TV Android 2. Telecomando del proiettore Installazione 1. Installare il dongle TV 2. Distanza e dimensione della proiezione 3. Regolazione dell'angolo 4.
-
Page 79: Supporto Professionale A Vita Yaber
Se avete domande, vi preghiamo di contattarci in modo che il problema possa essere risolto. E dacci l'opportunità di migliorare. Garantiamo che ti forniremo una soluzione soddisfacente. Grazie per la tua comprensione! Team di assistenza YABER Suggerimenti 1. Non collocare il proiettore in una stanza troppo calda o troppo fredda, perché la temperatura alta o bassa ridurrà... -
Page 80: Elenco Dei Pacchetti
Elenco dei pacchetti Proiettore K2s Telecomando del Cavo HDMI proiettore Dongle TV Telecomando Cavo di con Dongle TV alimentazione Cavo AV 3 in 1 Guida Rapida Kit di pulizia Copriobiettivo... -
Page 81: Specifiche Del Proiettore
Specifiche del proiettore Modello n. K2s Automatico/Manuale Correzione Risoluzione nativa 1920*1080P trapezoidale Verticale&Orizzontale Risoluzione 4K (solo H265) Fonte di luce compatibile Tecnologia di Proporzioni 16:9 / 4:3 visualizzazione HDMI*2/USB*1/ Rapporto di 1.54:1 Interfacce USB-C*1/Auricolare*1/ proiezione AV*1 Distanza di proiezione 4,5-22,4 piedi... -
Page 82: Panoramica Del Proiettore
Panoramica del proiettore Finestra IR Finestra IR Ingresso d'aria Porta di alimentazione HDMI Ricevitore Auto Obiettivo USB-C Focus del Segnale Jack per cuffie Finestra dissipatore di calore Area NFC Modalità altoparlante Bluetooth Modalità silenziosa Volume Interruttore Supporto per la regolazione dell'angolo Cuscinetto in gomma (rimuovere per montaggio a soffitto) Slot per Dongle TV... -
Page 83: Panoramica Del Telecomando
Panoramica del telecomando 1. Telecomando TV Android Standby acceso/spento Ricerca vocale Tasti freccia Indietro/Esci dalla pagina Iniziale Google Play 2. Telecomando del proiettore Accensione/ spegnimento Tasti freccia Indietro/Esci dalla pagina Iniziale Menù Messa a fuoco Volume +/- Automatica Messa a Fuoco +/-... -
Page 84: Installazione
Installazione 1. Installare il dongle TV Porta micro USB (segno sul retro) Coperchio Vassoio Dongle TV Vassoio montato Slot per Dongle TV Porta micro HDMI (segno sul retro) 1. Spingere una volta per aprire il coperchio ed estrarre il vassoio. 2. -
Page 85: Distanza E Dimensione Della Proiezione
2. Distanza e dimensione della proiezione Distanza Dimensione dello schermo 1,4 m (4,5 piedi) 40" 2,1 m (6,7 piedi) 60" 2,7 m (8,9 piedi) 80" 3,4 m (11,2 piedi) 100" 4,1 m (13,4 piedi) 120" 5,1 m (16,8 piedi) 150" 6,8m (22,4 piedi) 200"... -
Page 86: Installa Sul Soffitto
4. Installa sul soffitto Il proiettore può essere appeso al soffitto con un telaio di sospensione. Si prega di acquistare un supporto da soffitto universale per proiettore. Rimuovere i quattro gommini sulla parte inferiore del proiettore, vedrai i fori delle viti e utilizzare le viti M5*10mm per l'installazione sul soffitto. Screw holes: M5*10mm 210mm 5. -
Page 87: Operazione
1. Aprire il vano batteria. 2. Inserire due batterie AAA con la corretta polarità indicata. 3. Chiudere il vano batteria. Nota: è necessario utilizzare il telecomando Yaber per completare la prima configurazione del proiettore. · Accensione Premere il tasto di accensione sul telecomando o sul proiettore. Il LED di alimentazione sul proiettore passa da arancione a spento. -
Page 88: Regolazione Dell'immagine
2. Regolazione dell'immagine · Mettere a fuoco l'immagine Quando si utilizza il proiettore per la prima volta, normalmente visualizza un'immagine poco nitida. Ciò è dovuto all'obiettivo non a fuoco o all'impostazione errata della distorsione trapezoidale. Utilizzare la messa a fuoco automatica e il tasto di messa a fuoco manuale sul telecomando per ottenere l'immagine migliore. - Page 89 · Correzione Keystone Automatica e Manuale Quando lo schermo di proiezione non è rettangolare, può essere regolato mediante correzione trapezoidale automatica e correzione trapezoidale manuale a 4 punti. L'immagine verrà regolata automaticamente quando si sposta il proiettore in un'altra posizione. Per la spaziatura extra tra la correzione trapezoidale automatica, vai su "Impostazioni"...
- Page 90 · Ruota l'immagine in base al posizionamento Per un diverso posizionamento del proiettore, scegliere la modalità di proiezione appropriata per ottenere l'immagine corretta. 1. Montaggio a soffitto a proiezione frontale 2. Montaggio a soffitto a retroproiezione 3. Supporto da scrivania per proiezione frontale 4.
-
Page 91: Commutazione Del Segnale Di Ingresso
3. Commutazione del segnale di ingresso Il proiettore può essere collegato a più dispositivi contemporaneamente, ma può visualizzare solo uno schermo intero alla volta. Selezionare la sorgente del segnale desiderata (Android TV/ HDMI/AV) nella home page. 4. Modalità di input del disco USB ·... -
Page 92: Screencast
Si consiglia una distanza entro 1 metro. 3. Alcuni dispositivi mobili potrebbero non supportare il mirroring dello schermo a causa della compatibilità. 4. Per qualsiasi domanda, non esitare a inviare un'e-mail a YABER tramite support@yabertech. iOS Cast (per dispositivi iOS) · Mirroring Wi-Fi iOS Per iPhone/iPad 1. - Page 93 1. Assicurati che il Mac e il proiettore siano sulla stessa rete. 2. Fai clic sul menu Apple -> Preferenze di Sistema -> Condivisione -> Display Airplay. 3. Fare clic sull'icona Airplay sulla barra dei menu e selezionare [K2s_xxxx] per connettersi e avviare la proiezione wireless.
- Page 94 Miracast per dispositivi · Mirroring Android 1. Attiva il Wi-Fi sul cellulare. 2. Attiva la funzione Wireless Display / Screen Mirroring nelle impostazioni del telefono e scegli [K2s_xxxx] per avviare il mirroring dello schermo. CONNECT Searching for wireless display and audio devices Where in my devices Search K2s_440E...
-
Page 95: Impostazioni Bluetooth
3. Vai su Impostazioni sull'app E-share, seleziona "Scrivi tag NFC" e segui le istruzioni per attivare l'area NFC sul proiettore. 4. Ora puoi avvicinare il telefono all'area NFC per eseguire lo Screencast mentre il proiettore è acceso e sulla stessa rete Wi-Fi del telefono. E-share Nota: 1. -
Page 96: Modalità Silenziosa
· Modalità altoparlante Bluetooth Questo proiettore supporta la funzione di altoparlante Bluetooth. Premere il pulsante [ ] sul proiettore o selezionare [Modalità altoparlante Bluetooth] nella home page, quindi è possibile cercare e associare il proiettore [K2s_xxxx] al dispositivo mobile come altoparlante bluetooth per la riproduzione di musica. -
Page 97: Configurazione Alexa
Alexa sul telefono cellulare. Questa funzione è supportata solo in alcuni paesi e regioni. 1. Assicurati che K2s sia connesso al Wi-Fi con accesso a Internet. 2. Selezionare l'icona Alexa in alto a destra nella home page del proiettore per avviare la configurazione. - Page 98 5. Sullo schermo comparirà un prompt che indica che il proiettore è stato collegato correttamente. 6. Apri Alexa sul tuo telefono e accedi al tuo account.
- Page 99 7. Vai a Home -> Altro -> Abilità e giochi, cerca e attiva Whale Video 8. Completa la configurazione della skill Whale Video, fai clic su "Impostazioni" -> "Gestisci in TV e video" nella pagina, associa il proiettore e il tuo altoparlante Alexa. 9.
-
Page 100: Aggiornamento Del Sistema
9. Aggiornamento del sistema · Aggiornamento locale Scarica il pacchetto di aggiornamento del software dal sito Web dell'azienda e copialo nella directory principale del disco rigido portatile o dell'unità USB, quindi collega l'unità alla porta USB. Vai a "Informazioni" -> "Aggiorna" e seleziona "Aggiornamento locale", quindi il sistema rileverà automaticamente il pacchetto di aggiornamento e lo installerà... -
Page 101: Pulizia Del Filtro Dell'aria
4. L'obiettivo, in quanto componente principale del proiettore, è direttamente correlato alla definizione e all'effetto dell'immagine. Pulisci l'obiettivo ogni volta che noti sporco o polvere sulla superficie. Utilizzare una bomboletta di aria compressa per rimuovere la polvere dall'obiettivo. In presenza di sporco o macchie, utilizzare il panno per la pulizia per pulire delicatamente la superficie dell'obiettivo. - Page 102 5. Picchiettare ogni lato del filtro dell'aria 4 o 5 volte per scrollarsi di dosso la polvere in eccesso. Aspirare la parte anteriore del filtro dell'aria per rimuovere la polvere residua. Attenzione: Non esercitare una forza eccessiva quando si tocca il filtro dell'aria, altrimenti potrebbe rompersi e diventare inutilizzabile.
- Page 103 目次 YABER プロフェッショナルサポート 102 ヒント パッケージリスト 103 仕様書 プロジェクターの概要 リモコンの概要 1. Android テレビのリモコン 2. Projector Remote Control 106 インストール 1. TV Dongle のインストール 2. 距離と投影サイズ 3. プロジェクターの設置 4. 天井取り付け 5. デバイスの接続 109 オペレーション 1. プロジェクターを起動する 2. 画像調整 111 3. 入力信号の切替え...
- Page 104 YABER プロフェッショナルサポート いつも YABER を応援していただき、誠にありがとうございます! プロジェクターを使用する前に、このマニュアルをよく読んでください。何か問題があれば、注文番号と問題を電 support@yabertech.com 子メールで まで送ってください。24 時間以内に迅速な解決策を提供します。 例えば、信号がない、音が出ない、Bluetooth 接続に失敗した、WiFi 接続に失敗した、暗い点がある、アニメーシ ョンが乱れるなどです。私たちは、すべてのプロジェクターが 100%慎重にチェックされ、出荷前にパッケージ化 されていることを約束します。 ご不明な点がございましたら、お問い合わせください。私たちは、改善に努めます。私たちはお客様にとって満足 のいく解決策を提供することを保証します。 ご理解とご了承ありがとうございます! YABER サービスチーム ヒント 1. 高温または低温はデバイスの寿命を短くするので、極端に暖かい又は寒い部屋にプロジェクターを配置しないで ください。作業環境は 5℃ ~35℃が最良です。 support@yabertech.com 2. プロジェクタースクリーンに黒い斑点があっても、ご心配なく。 までメールでご 連絡ください。埃を取り除く方法についてのビデオをお送り致します。 3. プロジェクターは強い衝撃、押し出し、振動から厳重に保護する必要があります。強い衝撃、押し出し、振動で 動かそうとしないでください。内部回路の故障や移動を避けて下さい。 4. レンズは、プロジェクターの中核部品として、画像の鮮明さと効果に直接関係します。その上に過度の埃は画質 に影響を与えます。汚れたレンズは、ガラスレンズの表面は柔らかい綿布で拭くこと。硬い布や研磨剤は使用 しないでください。...
- Page 105 パッケージリスト プロジェクター プロジェクター HDMI ケーブル リモコン TV ドングル TV ドングル 電源コード リモコン 3-in-1 AV ケーブル クイックスタートガイド クリーニングキット レンズカバー...
- Page 106 仕様書 モデル番号:K2s 自動/手動的 ネイティブ解像度 1920*1080P 台形調整 タテ·ヨコ方向の補 対応解像度 4K(H265 のみ ) 光源 アスペクト比 16:9 / 4:3 ディスプレイ技術 HDMI*2/USB*1/ 投影比率 1.54:1 インターフェイス USB-C*1/Auricolare*1/ AV*1 推奨投影距離 4.5-22.4ft プロジェクター重量 3.2 kg 電源電圧 AC 100-240V Wi-Fi Wi-Fi 6 消費電力について 140W Bluetooth 投影方法 机上前面 / 背面、天井前面 / 背面...
- Page 107 プロジェクターの概要 IR 信号 IR 信号 エアインレット 電源ポート HDMI ポート USB ポート プロジェクター USB-C ポート レンズ ヘッドフォン端子 オートフォーカス AV ポート 信号受信装置 ヒートシンク NFC エリア Bluetooth スピーカーモ ード 静音モード ボリューム 電源 角度調整用スタンド ゴムパッド(天吊り用には取り外してください) TV ドングル スリット ボトムレーベル...
- Page 108 リモコンの概要 1. Android テレビのリモコン 電源ボタン 音声検索 矢印キー 戻る アプリ ホームページ Google Play 2. Projector Remote Control 電源ボタン 矢印キー 戻る メニュー ホームページ オートフォーカス 音量調整 +/- フォーカス +/-...
- Page 109 インストール 1. TV Dongle のインストール Micro USB ポート(背 面にマークあり) 蓋 トレイ TV Dongle 搭載 TV Dongle スロット Micro HDMI ポート(背 面にマークあり) 1. 一回押すとフタが開き、トレイを取り出す。 2. TV Dongle を取り付け、Micro HDMI ポートが下向き、Micro USB ポートが上向きであることを確認する。 USB Power ケーブル 3. 装着した TV Dongle をスロットに挿入する。 4. USB 電源ケーブルを Micro USB ポートに差し込み、押して蓋を閉じます。...
- Page 110 2. 距離と投影サイズ 距離 投影サイズ 1.4m (4.5ft) 40" 2.1m (6.7ft) 60" 2.7m (8.9ft) 80" 3.4m (11.2ft) 100" 4.1m (13.4ft) 120" 5.1m (16.8ft) 150" 6.8m (22.4ft) 200" 推奨投影距離は約 8.9ft、 最短投影距離は 4.5ft です。 画像サイズはプロジェクターとスクリーンの間の距離に依存し、 上記のデータの間に 3%の偏差がある可能性があります。設定の違いにより、様々な距離が発生します。 3. プロジェクターの設置 最大角度 : 60° プロジェクターには、角度調整用の足が装備されています。ボタンを押すと、角度を調整することができます。 1. プロジェクターを平らな場所に置き、アジャスターボタンを押しながら、プロジェクターを持ち上げます。 2.
- Page 111 4. 天井取り付け ハンガーフレームを使用することで、プロジェクターを天井に吊るすことができます。ユニバーサルロジェクター シーリングマウントを購入してください。プロジェクターの底にある 4 つのゴムパッドを取ると、ネジ穴が現れ、 天井に取り付けるための M5 * 10mm のネジを使用します。 ネジ穴 : M5*10mm 210mm 5. デバイスの接続 プロジェクターには、HDMI ポート /USB ポート /USB-C ポート /AV_in/Audio out の 5 つのポートがあります。 お使いのデバイスを接続する際は、正しい接続ポートを選択してください。...
- Page 112 オペレーション 1. プロジェクターを起動する • リモコンを準備する 1. バッテリー収納を開ける。 2. 単 4 形乾電池 2 本を挿入してください。 3. バッテリー収納を閉じる。 ご注意 : プロジェクターの初回セットアップを完了するには、Yaber リモコンを使用する必要があります。 • 電源オン リモコンまたはプロジェクターの電源キーを押す。 プロジェクターの電源 LED がオレンジ色から消灯に変わります。 プロジェクターの電源を切るには、一度押して、電源メニューがポップアップしたらもう一度押してください。プ ロジェクターの電源 LED が点灯します。 • 初回設定 初めてプロジェクターの電源を入れたとき、またはプロジェクターが工場出荷時設定にリセットされたとき、初回 設定を行うよう促されます。 システム言語の選択、Wi-Fi への接続、プロジェクターの新機能やヒントについて知ることができます。 設定後、プロジェクターはホームページへ移動します。...
- Page 113 2. 画像調整 • 画像にピントを合わせる プロジェクターを初めて使用するとき、通常、不鮮明な画像が表示されます。これは、レンズが焦点から外れてい るか、キーストーン設定が正しくないためです。 質の高い画像を表示するために、リモートコントロールのオートフォーカスおよびマニュアルフォーカスキーを使 用してください。オートフォーカスは、プロジェクターを別の場所に移動することによってもトリガーすることが できます。 Alexa オートフォーカス フォーカス +/-...
- Page 114 • オートキーストーン、マニュアルキーストーン 投写画面が長方形でない場合、自動台形補正と 4 点手動台形補正で調整できます。 プロジェクターを別の場所に移動すると、自動的に映像が調整されます。 オートキーストーン補正の間隔を広げるには、 「設定」 - 「 投影」 - 「 投影設定」 - 「 マニュアルキーストーン」 で行います。 リモコンの矢印キーを使って、投影画面が希望の長方形になるまで、各ポイントの水平または垂直パラメータを調整 します。...
- Page 115 • 配置によって画像を回転させる プロジェクターの設置場所が異なる場合は、正しい画像を表示するために適切な投影モードを選択してください。 1. 天吊り設置 2. 逆面 - 天吊り設置 3. 机上設置 4. 逆面 - 机上設置...
- Page 116 3. 入力信号の切替え プロジェクターは同時に複数の機器を接続することができますが、同時に表示できる全画面は 1 つだけです。ホー ム画面で希望の信号源(Android TV/HDMI/AV)を選択します。 4. USB ディスク入力モード • ファイルマネージャーで動画 / 音楽 / 写真を再生する 1. USB Disk を挿入すると、ホームページの [USB] アイコンが白色になります。 2. [USB] アイコン、またはファイルマネージャーを選択します。 3. USB ディスク内の目的のファイル(サブフォルダに入る場合はフォルダ)を選択し、[OK] ボタンを押すと再生さ れます。 • プレイインターフェース...
- Page 117 1. ワイヤレス接続でのスクリーンミラーリングの流暢さは、ネットワーク環境に影響されます。スクリーンミラーリ ングを使用する場合は、100Mbit 以上の帯域幅を推奨します。 2. ワイヤレス接続を使用する場合、モバイルデバイスがプロジェクターに近いことを確認してください。1m 以内の 距離を推奨します。 3. モバイルデバイスによっては、互換性によりスクリーンミラーリングをサポートしない場合があります。 support@yabertech.com 4. ご不明な点がございましたら、 お気軽に YABER までメール ( ) でお問い合わせください。 iOS Cast ( iOS デバイス向け ) • iOS Wi-Fi ミラーリング For iPhone/iPad 1. プロジェクターをご自宅の Wi-Fi に接続します。 2. iPhone/iPad の Wi-Fi を ON にし、同じネットワークに接続する。...
- Page 118 1. Mac とプロジェクターが同じネットワーク上にあることを確認する。 2. Apple メニュー -> システム環境設定 -> Sharing -> Airplay Display をクリックします。 3. メニューバーの Airplay アイコンをクリックし、[K2s_xxxx] を選択して接続し、ワイヤレス投影を開始します。 • iOS AP ミラーリング For iPhone/iPad 1. iPhone/iPad の Wi-Fi をオンにし、プロジェクターのホットスポットに接続する:[K2s_xxxx]。 K2s_xxxx 2. iOS デバイスの画面ミラーリングを押して、[K2s_xxxx] を選択します。 Chrome Edit View File About This Mac AirPlay Looking for TV System Preferences...
- Page 119 Android 端末向け Miracast • Android ミラーリング 1. 携帯電話の Wi-Fi を ON にする。 2. 携帯電話の設定でワイヤレスディスプレイ / スクリーンミラーリング機能をオンにし、[K2s_xxxx] を選択してス クリーンミラーリングを開始します。 CONNECT Searching for wireless display and audio devices Where in my devices Search K2s_440E Dirplay 1. キーボードの Windows ロゴキー[Win+K]を押す。 2. K2s_xxxx] を選択して接続し、ワイヤレス投影を開始します。 NFC スクリーンキ...
- Page 120 3. E-share アプリの「設定」から「NFC タグを書き込む」を選択し、プロジェクターの NFC エリアを有効にするた めにプロンプトに従います。 4. プロジェクターの電源が入っていて、ご自身の携帯電話と同じ Wi-Fi ネットワーク上にある間、あなたはスクリ ーンキャストをするために NFC エリアにあなたの携帯電話を密接にタップする E-share ご注意 : 1. NFC スクリーンキャストは、お使いの携帯電話がプロジェクターの NFC 検出エリアに触れる必要があり、天井マ ウントに適さない場合があります。 2. NFC の読み取りエリアとスマートフォンの範囲は、 ブランドやモデルによって異なります。 詳細な手順については、 お使いのスマートフォンのメーカーにお問い合わせください。 3. 現在、NFC タグはクロス OS での使用には対応していません。起動したタグは、設定機器と同じ OS を搭載したキ ャスティング機器でのみ読み取ることができます。 6. Bluetooth 設定 •...
- Page 121 • Bluetooth スピーカモード このプロジェクターは、Bluetooth スピーカーの機能をサポートしています。 プロジェクターの [ ] ボタンを押すか、 ホームページで [ Bluetooth Speaker Mode ] を選択すると、 プロジェクター [ K2s_xxxx ] とモバイルデバイスを検索し、音楽再生用の Bluetooth スピーカーとしてペアリングできます。 7. 静音モード 静寂モードを使用すると、プロジェクターの騒音を低く抑えるように制御することができます。デバイスはより低 い消費電力で動作し、投影輝度も通常状態より若干低くなります。 プロジェクターの [ ] ボタンを押すか、ホームページの [ Bluetooth スピーカーモード ] を選択すると、静音モー ドのオン / オフが切り替えられます。...
- Page 122 8. アレクサセットアップ お知らせです: 本機能は、Alexa 対応のスマートスピーカーで使用する必要があり、携帯電話の Alexa App から設定する必要があ ります。 本機能は一部の国や地域でのみサポートされています。 1. K2s がインターネットに接続可能な Wi-Fi に接続されていることを確認します。 2. プロジェクターホームページの右上にある Alexa アイコンを選択し、セットアップを開始します。 3. 「アカウント」をクリックしてログインし、プロジェクター K2s を Alexa にリンクさせるための手順に従ってく ださい。...
- Page 123 5. プロジェクターが正常に接続されたことを示すプロンプトがスクリーンにポップアップ表示されます。 6. スマホで Alexa を開き、自分のアカウントにログインします。...
- Page 124 7. ホーム -> その他 -> スキル&ゲーム -> 検索してクジラのビデオを有効にする 8. Whale Video スキルのセットアップを完了し、ページ上の「設定」 -> 「テレビとビデオで管理」をクリックし、 プロジェクターと Alexa スピーカーを縛ります。 9. では、「アレクサ、プロジェクターで Netflix を開いて」と試してみてください。...
- Page 125 9. システムアップデート • ローカルアップグレード 公式ウェブサイトからソフトウェアのアップグレードパッケージをダウンロードし、ポータブルハードドライブま たは USB ドライブのルートディレクトリにコピーし、ドライブを USB ポートに差し込みます。バージョン情報」 -> 「アップグレード」で「ローカルアップグレード」を選択すると、システムが自動的にアップグレードパッケー ジを検出し、インストールします。 • オンラインアップグレード 「バージョン情報」 -> 「アップグレード」で、「オンラインアップグレード」を選択します。新しいバージョン があるかどうかが自動的に検出され、アップグレードの許可を得ることができます。 10. パワーオンモード パワーオン・スタンバイモードで、電源プラグを差し込むと、プロジェクターの Power LED が点灯します。プロジ ェクターの電源を入れるには、電源ボタンを押す必要があります。 パワーオンに切り替えると、電源コードを差し込んだ後、自動的に電源が入ります。 11. セーフシャットダウン 1. プロジェクターまたはリモートコントローラーのボタンを押し、OK キーを押してプロジェクターの電源をオフ にします。 2. プロジェクターの電源コードを抜きます。 3. レンズをカバーし、プロジェクターを涼しく乾燥した場所に保管してください。 M メンテナンス 1. プロジェクターのお手入れ 1.
- Page 126 4. レンズは、プロジェクターの中核部品として、画像の鮮明さと効果に直接関係しています。レンズの表面に汚れ やほこりが付着していることに気づいたら、いつでもレンズを清掃してください。圧縮空気の入ったキャニス ターを使用して、レンズの埃を除去してください。汚れやしみがある場合は、クリーニングクロスを使用して レンズの表面を優しく拭いてください。 2. エアフィルターの清掃 次のような場合は、プロジェクターのエアフィルターを清掃する必要があります: 1. フィルターや吹き出し口にホコリがつく。 2. 掃除をするようにメッセージが表示される。 3. プロジェクターの音がうるさくなってきた。 以下の手順で操作してください。 1. プロジェクターの電源を切り、電源コードやケーブル類を抜きます。 2. プロジェクターの外装を柔らかい布で拭いてください。 3. エアフィルターカバーの端を押しながら持ち、引っ張るとカバーが外れます。 4. エアフィルターをプロジェクターから引き抜きます。...
- Page 127 5. エアフィルターの両側を 4 ~ 5 回叩き、余分なホコリを振り落とす。エアフィルターの前面を掃除機で吸い取り、 残ったホコリを取り除きます ご注意 : エアフィルターをたたくときに、無理な力を加えると、割れて使えなくなることがあります。エアフィルターを水 で洗ったり、洗剤や溶剤で洗浄したりしないでください。ガスの残留やプロジェクターの光学系やその他の敏感な 部分にホコリやゴミを押し込む可能性があるため、缶詰の空気は使用しないでください。...
- Page 128 연락처 연락처 YABER 평생 전문 지원 YABER 평생 전문 지원 팁 팁 패키지 목록 패키지 목록 프로젝터 사양 프로젝터 사양 프로젝터 개요 프로젝터 개요 원격 제어 개요 원격 제어 개요 1. 안드로이드 TV 리모컨 2. 프로젝터 원격 제어 설치 설치...
-
Page 129: Yaber 평생 전문 지원
YABER 평생 전문 지원 YABER 평생 전문 지원 친애하는 고객 , YABER 를 지원해 주셔서 대단히 감사합니다 ! support@yab support@yab 프로젝터를 사용하기 전에이 설명서를 철저히 읽으십시오 . 문제가 있으면 주문 번호와 문제를 ertech.com ertech.com 이메일로 보내 주시면 24 시간 내에 빠른 솔루션을 제공합니다 . -
Page 130: 패키지 목록
패키지 목록 패키지 목록 K2s 프로젝터 프로젝터 원격 HDMI 케이블 제어 텔레비전 암호화 개 텔레비전 암호화 전원 코드 개 리모컨 3-in-lAV 케이블 빠른 시작 가이드 청소키트 렌즈 커버... -
Page 131: 프로젝터 사양
프로젝터 사양 프로젝터 사양 모델 번호 K2s 모델 번호 K2s 기본 해상도 1920*1080P 키스톤 수정 자동 / 수동 수직 & 수평 호환해상도 4K(H265 만 ) 광원 종횡비 16:9 / 4:3 디스플레이 기술 HDMI*2/USB*1/ 프로젝션 비율 1.54:1 인터페이스 USB-C*1/ Auricolare*1/AV*1 추천투영 거리... -
Page 132: 프로젝터 개요
프로젝터 개요 프로젝터 개요 시우창 IR 윈도 공기 흡입구 전원 포트 HDMI 포트 USB 포트 프로젝터렌즈 USB-C 포트 헤드폰 잭 자동초점신호 AV 포트 수신기 열 싱크 창 NFC 영역 Bluetooth 스피커 모드 조용 모드 볼륨 권력 각도 조절 스탠드 고무 패드 (천장 마운트 제거) 텔레비전... -
Page 133: 원격 제어 개요
원격 제어 개요 원격 제어 개요 1. 안드로이드 TV 리모컨 1. 안드로이드 TV 리모컨 대기 켜기 / 끄기 음성 검색 화살표 키 뒤로 / 종료 애플리케이션 홈 페이지 Google Play 2. 프로젝터 원격 제어 2. 프로젝터 원격 제어 대기 켜기 / 끄기 화살표... -
Page 134: 텔레비전 암호화 개를 설치하다
설치 설치 1. 텔레비전 암호화 개를 설치하다 1. 텔레비전 암호화 개를 설치하다 Micro USB 포트 ( 후면에 표시됨 ) 뚜껑 디스크 차량용 텔레비전 소 아래쪽 프트웨어 개 레이블 Micro HDMI 포트 ( 후면에 표시됨 ) 1. 뚜껑을 열려면 한 번 밀고 트레이를 꺼냅니다 . 2. -
Page 135: 거리 및 투영 크기
2. 거리 및 투영 크기 2. 거리 및 투영 크기 거리 거리 화면 크기 화면 크기 1.4m (4.5ft) 40" 2.1m (6.7ft) 60" 2.7m (8.9ft) 80" 3.4m (11.2ft) 100" 4.1m (13.4ft) 120" 5.1m (16.8ft) 150" 6.8m (22.4ft) 200" 권장 투영 거리는 약 8.9ft 이고 , 가장 짧은 투영 거리는 4.5ft 입니다 . 이미지 크기는 프로젝터와 화면 사이의 거 리에... -
Page 136: 천장에 설치
4. 천장에 설치 4. 천장에 설치 프로젝터는 옷걸이 프레임으로 천장에 매달릴 수 있습니다 . 범용 로젝터 천장 마운트를 구입하십시오 . 프 로젝터 바닥에있는 4 개의 고무 패드를 제거하면 구멍을 뚫고 천장에 설치하기 위해 M5 * 10mm 나사를 사용합니다 . 나사 구멍 : M5*10mm 210mm 5. -
Page 137: 프로젝터 시작
2. 올바른 극성이 표시된 두 개의 배터리를 삽입하십시오 . 3. 배터리 실을 닫습니다 . 참고 : 참고 : 프로젝터의 처음 설정을 완료하려면 Yaber 리모컨을 사용해야합니다 . • 파워 론 • 파워 론 원격 컨트롤러 또는 프로젝터의 전원 키를누릅니다 . 프로젝터의 전원 LED 는 주황색에서 꺼집니다 . -
Page 138: 이미지 조정
2. 이미지 조정 2. 이미지 조정 •이미지에 초점 •이미지에 초점 프로젝터를 처음 사용할 때 일반적으로 불분명 한 이미지가 s 시됩니다 . 이것은 렌즈가 초점이 맞지 않거나 잘못된 키스톤 설정 때문입니다 . 최고의 이미지를 얻으려면 리모콘에 자동 초점 및 수동 초점 키를 사용하십시오 . 자동 초점은 프로젝터를 다른 위 치로... - Page 139 • 자동및수동키스톤 • 자동및수동키스톤 프로젝션 스크린이 직사각형이 아닌 경우 자동 키스톤 및 4 점 수동 키스톤 보정으로 조정할 수 있습니다 . 프로젝터를 다른 위치로 이동하면 이미지가 자동으로 조정됩니다 . 자동 키스톤 사이의 추가 간격을 보려면 '' 설 -> -> -> 정...
- Page 140 • 배치로 이미지 회전 • 배치로 이미지 회전 다른 프로젝터 배치의 경우 올바른 이미지를 얻으려면 적절한 프로젝션 모드를 선택하십시오 . 1. 호이스팅 전면 프로젝션 2. 전면 프로젝션 데스크 마운트 3. 전면 프로젝션 데스크 마운트 4. 후면 프로젝션 데스크 마운트...
-
Page 141: 입력 신호 전환
3. 입력 신호 전환 3. 입력 신호 전환 프로젝터는 동시에 여러 장치에 연결할 수 있지만 한 번에 하나의 전체 화면 만 표시 할 수 있습니다 . 홈 페이지에 서 원하는 신호 소스 (Android TV/HDMI/AV) 를 선택하십시오 . 4. USB 디스크 입력 모드 4. -
Page 142: 스크린 캐스트
3. 일부 모바일 장치는 호환성으로 인해 화면 미러링을 지원하지 않을 수 있습니다 . support@yabertech.com support@yabertech.com 4. 질문 , 통해 YABER 에게 이메일을 보내 주시기 바랍니다 IOS 미러링(IOS 를 통한 연결) IOS 미러링(IOS 를 통한 연결) IOS WI-FI 미러링 IOS WI-FI 미러링... - Page 143 1. Mac 과 프로젝터가 동일한 네트워크에 있는지 확인하십시오 . -> -> -> 2. Apple 메뉴 그 시스템 선호도 그 공 유 그 Airplay Display 를 클릭합니다 . 3. 메뉴 막대에서 Airplay 아이콘을 클릭하고 [K2s_xxxx] 를 선 택하여 무선 프로젝션을 연결하고 시작합니다 . •...
- Page 144 Miracast forAndroid 기기 Miracast forAndroid 기기 • 안드로이드 미러링 • 안드로이드 미러링 1. 휴대 전화에서 Wi-Fi 를 켭니다 . 2. 전화 설정에서 무선 디스플레이 / 화면 미러링 기능을 켜고 [K2s_xxxx] 를 선택하여 화면 미러링을 시작하십 시오 . CONNECT Searching for wireless display and audio devices Where in my devices Search K2s_440E...
-
Page 145: 블루투스 설정
3. E-share 앱의 설정으로 이동하여 "NFC 태그 쓰기 ', 를 선택하고 프롬프트에 따라 프로젝터의 NFC 영역을 활 성화하십시오 . 4. 이제 프로젝터가 켜져 있고 휴대 전화와 동일한 Wi-Fi 네트워크에 켜져있는 동안 Screencast 에 NFC 영역에 서 휴대 전화를 밀접하게 탭할 수 있습니다 . E-share 참고... -
Page 146: 조용한 모드
• Bluetooth 스피커 모드 • Bluetooth 스피커 모드 이 프로젝터는 블루투스 스피커의 기능을 지원합니다 . 프로젝터의 [ ] 버튼을 누르거나 홈 페이지에서 [ 블루 투스 스피커 모드 ] 를 선택하십시오 . 그러면 음악 재생을위한 블루투스 스피커로 프로젝터 [K2s_xxxx] 를 모바 일... -
Page 147: 알렉사설정
1. K2 가 인터넷에 액세스 할 수있는 Wi-Fi 에 연결되어 있는지 확인하십시오 . 2. 프로젝터 홈 페이지의 오른쪽 상단에있는 theAlexa 아이콘을 선택하여 설정을 시작합니다 . 3. "Account" "Account" 을 클릭하여 로그인하고 프로젝터 K2s 를 Alexa 에 연결하기 위한 지침을 따르세요 . - Page 148 5. 프로젝터가 성공적으로 연결되었음을 나타내는 프롬프트가 화면에 나타납니다 . 6. 휴대 전화에서 Alexa 를 열고 계정에 로그인하십시오 .
- Page 149 7. 집으로 이동그 더그 기술 및 게임 , 검색 및 활성화 고래 비디오 8. 고래 비디오 스킬 설정을 완료하고 페이지에서 " 설정 " -> " 그 " TV 및 비디오 관리 ', 를 클릭하고 프로젝터와 Alexa 스피커를 바인딩하십시오 . 9. 이제이 "Alexa, 프로젝터에서 Netflix 열기 " 를 사용해보십시오 .
-
Page 150: 시스템 업데이트
9. 시스템 업데이트 9. 시스템 업데이트 • 로컬업그레이드 • 로컬업그레이드 회사 웹 사이트에서 소프트웨어 업그레이드 패키지를 다운로드하여 휴대용 하드 드라이브 또는 USB 드라이브의 루트 디렉토리에 복사하고 드라이브를 USB 포트에 연결하십시오 . " 정보 " -> " 그 " 업그레이드 " 로 이동하여 " 로컬... -
Page 151: 공기 필터 청소
4. 렌즈는 프로젝터의 핵심 구성 요소로 그림 정의 및 효과와 직접 관련이 있습니다 . 표면에 먼지 나 먼지 가 생길 때마다 렌즈를 청소하십시오 . 압축 공기의 용기를 사용하여 렌즈에서 먼지를 제거하십시오 . 먼지 나 얼룩이 있 으면 청소 천을 사용하여 렌즈 표면을 부드럽게 닦으십시오 . 2. - Page 152 5. 공기 필터의 각면을 4~5 번 눌러 과도한 먼지를 털어냅니다 . 남아있는 먼지를 제거하기 위해 공기 필터의 정면 을 진공 청소하십시오 . 주의 : 주의 : 에어 필터를 탭할 때 과도한 힘을 사용하지 마십시오 . 그렇지 않으면 균열이 발생하여 사용할 수 없게됩니다 . 공 기...
- Page 153 ZAWARTOŚĆ Dożywotnie profesjonalne wsparcie YABER Porady Lista pakietów Dane techniczne projektora Projector Overview Omówienie pilota zdalnego sterowania 1. Pilot do telewizora z Androidem 2. Pilot do projektora Instalacja 1. Zainstaluj klucz sprzętowy telewizora 2. Odległość i wielkość projekcji 3. Regulacja kąta 4.
-
Page 154: Dożywotnie Profesjonalne Wsparcie Yaber
Dożywotnie profesjonalne wsparcie YABER Dziękujemy za wsparcie dla YABER! Przed użyciem projektora poświęć chwilę na dokładne przeczytanie instrukcji. Jeśli napotkasz jakiekolwiek problemy, po prostu wyślij e-mail na adres support@yabertech.com, podając numer zamówienia i krótkie wyjaśnienie problemu. Nasz zespół odpowie w ciągu 24 godzin, dostarczając szybkie i skuteczne rozwiązanie. -
Page 155: Lista Pakietów
Lista pakietów Projektor K2s Pilot do projektora Kabel HDMI Klucz telewizyjny Pilot do telewizora Kabel zasilający Kabel AV 3 w 1 Skrócona instrukcja Zestawy do obsługi czyszczenia Osłona obiektywu... -
Page 156: Dane Techniczne Projektora
Dane techniczne projektora Model nr K2s Korekcja zniekształceń Automatyczny/Ręczny Rozdzielczość natywna 1920*1080P trapezowych Pionowy Poziomy Zgodna rozdzielczość 4K (tylko H265) Źródło światła Technologia Współczynnik proporcji 16:9 / 4:3 wyświetlania HDMI*2 / USB*1 / Współczynnik projekcji 1.54:1 Interfejsy USB-C*1 / Słuchawki*1 / AV*1 Zalecana odległość... -
Page 157: Projector Overview
Projector Overview okno na podczerwień okno na podczerwień Wlot powietrza Gniazdo zasilania Port HDMI Port USB Automatyczny Obiektyw Port USB-C odbiornik sygnału projektora Gniazdo słuchawkowe Focus Port AV Obszar NFC Okno radiatora Tryb głośnika Bluetooth Tryb cichy Głośność Stojak z regulacją kąta Gumowa podkładka (wymontowana w celu montażu sufitowego) Gniazdo klucza telewizyjnego... -
Page 158: Omówienie Pilota Zdalnego Sterowania
Omówienie pilota zdalnego sterowania 1. Pilot do telewizora z Androidem Włącz/wyłącz tryb Szukanie głosowe gotowości Klawisze strzałek Powrót/Wyjście APPs Strona główna Google Play 2. Pilot do projektora Zasilanie włącz / wyłącz Klawisze strzałek Powrót/Wyjście Strona główna Menu Automatyczne ustawianie ostrości Głośność... -
Page 159: Instalacja
Instalacja 1. Zainstaluj klucz sprzętowy telewizora Port Micro USB (oznaczenie z tyłu) Pokrywa Taca Zamontowany Gniazdo klucza telewizor Dongle telewizyjnego Port Micro HDMI (oznaczenie z tyłu) 1. Naciśnij raz, aby otworzyć pokrywę i wyjmij tacę. 2. Zamontuj klucz sprzętowy telewizora i upewnij się, że port Micro HDMI jest skierowany do dołu, a port Micro USB do góry. -
Page 160: Odległość I Wielkość Projekcji
2. Odległość i wielkość projekcji Dystans Screen Size 1.4m (4.5ft) 40" 2.1m (6.7ft) 60" 2.7m (8.9ft) 80" 3.4m (11.2ft) 100" 4.1m (13.4ft) 120" 5.1m (16.8ft) 150" 6.8m (22.4ft) 200" Zalecana odległość projekcji wynosi około 8,9 stopy, najkrótsza odległość projekcji to 4,5 stopy. -
Page 161: Zamontuj Na Suficie
4. Zamontuj na suficie Katalog instrukcji projektora YABER zawiera szczegółowe instrukcje dotyczące zawieszania projektora na suficie. W tym celu należy zakupić uniwersalny uchwyt sufitowy do projektora. Po przygotowaniu uchwytu usuń cztery gumowe podkładki na spodzie projektora, aby odsłonić otwory na śruby. Użyj śrub M5*10mm, aby bezpiecznie zamontować projektor na suficie za pomocą... -
Page 162: Operacja
1. Otwórz komorę baterii. 2. Włóż dwie baterie AAA, zachowując zaznaczoną polaryzację 3. Zamknij komorę baterii. Uwaga: Do przeprowadzenia pierwszej konfiguracji projektora należy użyć pilota Yaber · Zasilanie włączone Naciśnij klawisz zasilania na pilocie lub projektorze. Dioda zasilania na projektorze zmieni kolor z pomarańczowego na wyłączony. -
Page 163: Regulacja Obrazu
2. Regulacja obrazu · Skoncentruj obraz Podczas pierwszego użycia projektora zazwyczaj wyświetla on niewyraźny obraz. Jest to spowodowane brakiem ostrości obiektywu lub nieprawidłowym ustawieniem trapezu. Aby uzyskać najlepszy obraz, użyj przycisku automatycznego ustawiania ostrości i ręcznego ustawiania ostrości na pilocie. Automatyczną ostrość można także uruchomić, przesuwając projektor w inne miejsce. - Page 164 · Automatyczna i ręczna korekcja trapezowa Gdy ekran projekcyjny nie jest prostokątny, można go wyregulować za pomocą automatycznej korekcji trapezu i 4-punktowej ręcznej korekcji trapezu. Obraz zostanie dostosowany automatycznie po przeniesieniu projektora w inne miejsce. Aby uzyskać dodatkowe odstępy między sprawdzoną korekcją trapezu, przejdź do „Ustawienia” ->...
- Page 165 · Obróć obraz według umieszczenia W przypadku różnych rozmieszczeń projektorów wybierz odpowiedni tryb projekcji, aby uzyskać prawidłowy obraz. 1. Projekcja przednia. Uchwyt sufitowy 2. Projekcja tylna Mocowanie sufitowe 3. Uchwyt do projekcji przedniej 4. Uchwyt do projekcji tylnej na biurko...
-
Page 166: Przełączanie Sygnału Wejściowego
3. Przełączanie sygnału wejściowego Projektor może być podłączony do wielu urządzeń jednocześnie, ale jednocześnie może wyświetlać tylko jeden pełny ekran. Wybierz żądane źródło sygnału (Android TV/HDMI/AV) na stronie głównej. 4. Tryb wejścia dysku USB · Odtwarzaj wideo/muzykę/zdjęcia w menedżerze plików 1. -
Page 167: Screencast
Zalecana jest odległość nie większa niż 1 metr. 3. Niektóre urządzenia mobilne mogą nie obsługiwać funkcji dublowania ekranu ze względu na kompatybilność. 4. Wszelkie pytania prosimy kierować na adres e-mail firmy YABER pod adresem support@ yabertech.com Przesyłanie iOS (urządzenia forioS) ·... - Page 168 1. Upewnij się, że komputer Mac i projektor znajdują się w tej samej sieci. 2. Kliknij menu Apple -> Preferencje systemowe -> Udostępnianie -> Wyświetlacz Airplay. 3. Kliknij ikonę Airplay na pasku menu i wybierz [K2s-xxxx], aby połączyć się i rozpocząć projekcję bezprzewodową.
- Page 169 · Dublowanie Androida 1. Włącz Wi-Fi w telefonie komórkowym. 2. Włącz funkcję Bezprzewodowe wyświetlanie / Screen Mirroring w ustawieniach telefonu i wybierz (K2s xxxx], aby rozpocząć dublowanie ekranu. CONNECT Searching for wireless display and audio devices Where in my devices...
-
Page 170: Ustawienia Bluetooth
3. Przejdź do Ustawień w aplikacji E-share, wybierz opcję „Wpisz tagi NFC i postępuj zgodnie z instrukcjami, aby aktywować obszar NFC w projektorze. 4. Teraz możesz zbliżyć telefon do obszaru NFC, aby wykonać Screencast, gdy projektor jest włączony i znajduje się w tej samej sieci Wi-Fi co telefon. E-share Notatka: 1. -
Page 171: Tryb Cichy
] na projektorze lub wybierz [Tryb głośnika Bluetooth] na stronie głównej, a następnie możesz wyszukać i sparować swój projektor (K2s xxxx z urządzeniem mobilnym jako głośnik Bluetooth do odtwarzania muzyki. 7. Tryb cichy Korzystanie z trybu cichego. możesz kontrolować hałas projektora, aby utrzymać go na niskim poziomie. -
Page 172: Konfiguracja Alexy
Alexa na telefonie komórkowym. Ta funkcja jest obsługiwana tylko w niektórych krajach i regionach. 1. Upewnij się, że K2s jest podłączony do Wi-Fi z dostępem do Internetu. 2. Wybierz ikonę Alexa w prawym górnym rogu strony głównej projektora, aby rozpocząć... - Page 173 5. Na ekranie pojawi się komunikat wskazujący, że projektor został pomyślnie podłączony. 6. Otwórz Alexę na swoim telefonie i zaloguj się na swoje konto...
- Page 174 7. Przejdź do Strona główna -> Więcej -> Umiejętności i gry, wyszukaj i włącz Whale Video. 8. Dokończ konfigurację umiejętności Whale Video, kliknij „Ustawienia” -> „Zarządzaj telewizją i wideo” na stronie, połącz projektor i głośnik Alexa. 9. Teraz spróbuj tego: "Alexa, otwórz Netflix na projektorze"...
-
Page 175: Aktualizacja Systemu
9. Aktualizacja systemu · Aktualizacja lokalna Pobierz pakiet aktualizacyjny oprogramowania ze strony internetowej firmy i skopiuj go do katalogu głównego przenośnego dysku twardego lub napędu USB. i podłącz dysk do portu USB. Przejdź do „O programie->„Aktualizacja” i wybierz „Aktualizacja lokalna”, a system automatycznie wykryje pakiet aktualizacyjny i zainstaluje go w celu aktualizacji. -
Page 176: Czyszczenie Filtra Powietrza
4. Obiektyw, jako podstawowy element projektora, jest bezpośrednio powiązany z rozdzielczością obrazu i efektem. Oczyść obiektyw zawsze, gdy zauważysz brud lub kurz na powierzchni. Do usunięcia kurzu z obiektywu użyj pojemnika ze sprężonym powietrzem. Jeżeli na soczewce znajdują się zabrudzenia lub smugi, użyj ściereczki do czyszczenia i delikatnie przetrzyj powierzchnię... - Page 177 5. Stuknij każdą stronę filtra powietrza 4 do 5 razy, aby strząsnąć nadmiar kurzu. Odkurz przód filtra powietrza, aby usunąć pozostały kurz Uwaga: Nie używaj nadmiernej siły podczas uderzania w filtr powietrza, gdyż może on pęknąć i stać się bezużyteczny. Nie płucz filtra powietrza w wodzie ani nie używaj do jego czyszczenia żadnych detergentów ani rozpuszczalników.
- Page 178 Warranty · DOLBY Manufactured under license from Dolby Laboratories. Dolby, Dolby Audio, and the double-D symbol are trademarks of Dolby Laboratories Licensing Corporation. · HDMI The terms HDMI, HDMI High-Definition Multimedia Interface, HDMI trade dress and the HDMI Logos are trademarks or registered trademarks of HDMI Licensing Administrator, Inc.
- Page 179 FCC STATEMENT : This device complies with Part 15 of the FCC Rules. Operation is subject to the following two conditions: (1) This device may not cause harmful interference, and (2) This device must accept any interference received, including interference that may cause undesired operation.
- Page 180 FCC Radiation Exposure Statement: This equipment complies with FCC radiation exposure limits set forth for an uncontrolled environment. This equipment should be installed and operated with minimum distance 20cm between the radiator & your body. Correct Disposal of this product This marking indicates that this product should not be disposed with other household wastes throughout the EU.
- Page 181 Trade name: Yaber Equipment: Entertainment Projector Model No. : K2s to which this declaration relates is in conformity with the essential requirement set out in the Council Directive on the Approximation of the laws of the Member States relating to RED Directive(2014/53/EU) &...
- Page 182 Scan and download the PDF user manual Where to Get More Help support@yabertech.com aftersales@yabertch.com www.yaber.com @Yaber Entertainment Projector @Yaber Entertainment Projector...
Need help?
Do you have a question about the K2s and is the answer not in the manual?
Questions and answers