Advertisement
Quick Links
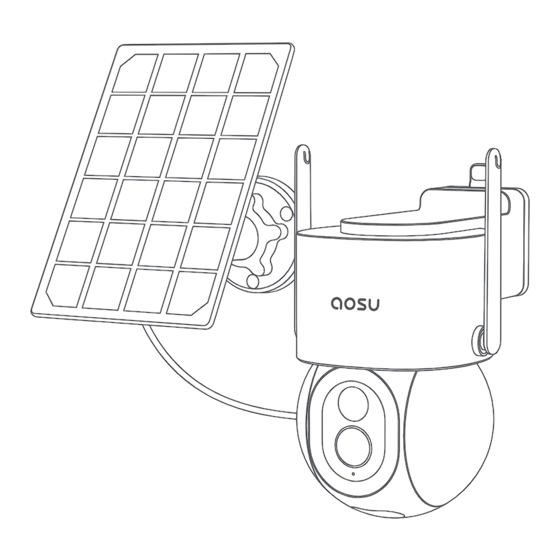
Solar-Powered Wireless Security Camera& Spotlight
SolarCam D1 Max
Quick Start Guide
United States: +1-866-905-9950 Mon-Fri 9AM-5PM(PST)
United Kingdom: +44-20-3885-0830 Mon-Fri 9AM-5PM(GMT)
Germany: +49-32-221094692 Mon-Fri 9AM-5PM(CET)
Japan: +81-50-5840-2601 Mon-Fri 9AM-5PM( JST)
support@aosulife.com
www.aosulife.com
@aosulife
Advertisement

Related Manuals for aosu SolarCam D1 Max


Summary of Contents for aosu SolarCam D1 Max
- Page 1 Solar-Powered Wireless Security Camera& Spotlight SolarCam D1 Max Quick Start Guide United States: +1-866-905-9950 Mon-Fri 9AM-5PM(PST) United Kingdom: +44-20-3885-0830 Mon-Fri 9AM-5PM(GMT) Germany: +49-32-221094692 Mon-Fri 9AM-5PM(CET) Japan: +81-50-5840-2601 Mon-Fri 9AM-5PM( JST) support@aosulife.com www.aosulife.com @aosulife...
- Page 2 Get all the tutorial videos of using product including but no limit to set up the app, installation and format micro sd card, visit: aosulife.com Join "Aosu Care" today as three ways below to get all of your problems solved by one-on-one live chat and phone service tech support.
- Page 3 TABLE OF CONTENTS What's Included Product Overview Setting Up the System Mounting the Camera P04-12 P13-P15 Notice Customer Service...
- Page 4 What's Included SolarCam D1 Max Camera USB-C Charging Screw Pack Cable (C9S2CH11) Quick Start Guide Security Sticker Mounting Bracket Position Sticker Solar Panel Locking Solar Panel Universal Joint Socket nut Screw Cap Mounting Screws Base and Anchors...
- Page 5 Product overview Antenna PIR Motion Sensor Lens Status LED Infrared LEDs White LED spotlights Microphone Charging Indicator Power USB-C Port Micro SD Card Slot Reset button Speaker CAUTION: Please insert the Micro SD Card according to the direction shown in the diagram. Micro SD Card might JAM if inserted incorrectly and device could be damaged.
- Page 6 Setting Up the System Download the Aosu App from the App Store (iOS devices) or Google Play (Android devices). Sign up for an Aosu App account, then follow the onscreen instructions to complete the setup.
- Page 7 Find a Good Mounting Spot To find a spot to mount Camera, you need to test wireless signal strength. ① Open the aosu App, go to Camera Settings > Mounting Guide. ② To test the wireless signal strength, take your camera and phone to the location where you want to mount the camera.
- Page 8 Select Height and location Hang Camera 2-3meters above the ground. This height maximizes the detection range of the motion sensor of Camera. Avoid placing Camera under direct sunlight. Up TO 10 Meters...
- Page 9 Installation instruction of solar panel 1. keep the installation angle of solar panels about 30-45° with the horizontal plane, as shown in the picture below. 2. The installation between the solar panel and the camera is shown in the following figure (open up the silicone cover at the bottom of the camera, remove the small center part of the cover, insert the power cord through the opening and plug it into the USB-C Port and then close the cover taking up any slack in the...
- Page 10 Test the Wi-Fi signal at installation position Use cell phone to test Wi-Fi signal quality at the installation position before installing camera, make sure the Wi-Fi router can provide good Wi-Fi signal.
- Page 11 Installation 1. Drilling according to position sticker, drill bit: 15/64''(6 mm). 2. Insert the plugs. 3. Tighten the screws. What is required: Power Drill 15/64”(6mm) (not provided) Drill Bit Base bracket Sticker Screws Wall Wall Anchors...
- Page 12 Installation instruction of solar panel Place Solar Panel in an area with consistent sunlight through- out the year.It only needs a few hours of direct sunlight each day to keep your camera powered. The amuont of energy that the solar panel produces is affected by weather conditions,seasonal changes, geographic loction,etc.
- Page 13 2. First,install the locking screw cap into the universal joint and then screw the circular socket nut into the universal joint. Front Socket nut Locking Screw Cap Universal Joint Back 3. Screw the universal joint into the back of the solar panel.Tighten it firmly with the attached nut.
- Page 14 4. Screw the locking screw cap into the base.Make sure that the universal joint is angled upward. Base Locking Screw Cap 5. When adjusting the solar panel left or right,loosen thelock- ing screw cap,turn the sleeve rod,and tighten thelocking screw cap when the panel is in position.
- Page 15 ② ③ Sleeve Rod Locking Screw Cap 6. Solar panel’s angle can be adjusted up and down up to 90°. ° Tip: After the installation is complete,please check that all locking mechanisms are tightly secured. °...
- Page 16 Notice FCC Statement This device complies with Part 15 of the FCC Rules. Operation is subject to the following two conditions: (1) this device may not cause harmful interference, and (2) this device must accept any interference received, including interference that may cause undesired operation.
- Page 17 This product complies with the radio interference requirements of the European Community. Declaration of Conformity Hereby, Aosu declares that this device is in compliance with the essential requirements and other relevant provisions of Directive 2014/53/EU. For the declaration of conformity, visit the Web site:https://ww- w.aosulife.com.
- Page 18 IC Statement This device contains licence-exempt transmitter(s)/receiver(s) that comply with Innovation, Science and Economic Development Canada’s licence-exempt RSS(s). Operation is subject to the following two conditions: (1)This device may not cause interference. (2)This device must accept any interference, including interference that may cause undesired operation of the device.
- Page 19 Customer Service Warranty 12-month limited warranty ( The actual warranty period shall be implemented according to the requirements of local laws and regulations) Email Us Customer Support: support@aosulife.com Call Us United States: +1-866-905-9950 Mon-Fri 9AM-5PM (PST) United Kingdom: +44-20-3885-0830 Mon-Fri 9AM-5PM (GMT) Germany: +49-32-221094692 Mon-Fri 9AM-5PM (CET)...
Need help?
Do you have a question about the SolarCam D1 Max and is the answer not in the manual?
Questions and answers
What format. Type for micro sd card
The Aosu SolarCam D1 Max requires a Micro SD card that must be formatted after insertion. It supports Micro SD cards up to 128GB.
This answer is automatically generated
Hello. I have 4 of the d1 classic ptz and homebase. 1 camera won't pair with the base. It scans the QR code but never completes pairing. All other cams are paired and work fine. Please let me know what I should try to get the last one working. Thank you and have a great day!
To troubleshoot pairing issues with the Aosu SolarCam D1 Max and its homebase, follow these steps:
1. Check Wi-Fi Compatibility – Ensure that you are connecting to a 2.4G Wi-Fi network, as the camera does not support 5G Wi-Fi.
2. Verify Wi-Fi Signal Strength – Use your mobile phone to check the Wi-Fi signal at the planned installation location to ensure the camera receives a strong signal.
3. Confirm Device Power – Ensure the camera is fully charged or receiving adequate power from the solar panel.
4. Restart Devices – Restart both the camera and homebase to reset the connection.
5. Check Micro SD Card – If a Micro SD card is inserted, ensure it is properly formatted.
6. Use the ALU App – Open the ALU app and check if the camera appears in the device list. If not, try re-adding it.
7. Reset the Camera – If issues persist, reset the camera and attempt the pairing process again.
If the problem continues, contact Aosu support for further assistance.
This answer is automatically generated
Whee do I plug charger in for this camera
The Aosu SolarCam D1 Max has a USB Type-C connector for charging. Plug the charger into the Type-C connector on the camera.
This answer is automatically generated
How do I reformat my cd card
The Aosu SolarCam D1 Max requires the Micro SD card to be formatted after inserting it. However, the provided information does not include specific steps for reformatting the SD card. You may need to check the camera’s app or settings for a formatting option.
This answer is automatically generated