Table of Contents
Advertisement
Quick Links
Advertisement
Table of Contents

Related Manuals for UMAX Technologies Astra 6400


Summary of Contents for UMAX Technologies Astra 6400
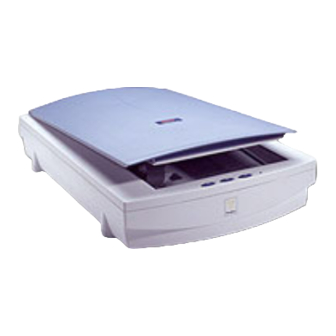
- Page 1 Astra 6400 & 6450 OWNER’S GUIDE...
- Page 2 Trademarks UMAX is a trademark of UMAX Technologies, Inc. Astra is a trademark of UMAX Technologies, Inc. IBM PC/AT is a trademark of International Business Machines Corporation. MS-Windows, Windows, and MS-DOS are trademarks of Microsoft Corporation. Presto! PageManager is a trademark of NewSoft Technology Corporation.
-
Page 3: Table Of Contents
Using VistaAccess – Direct Access... 46 Turning the Scanner Lamp On and Off... 47 Using VistaShuttle ... 47 Using the UMAX Copy Utility... 50 CHAPTER 4. PUSH BUTTON SCANNING ... 52 Configuring the Push Buttons ... 52 CHAPTER 5. SCANNING PROJECTS... 59 Using VistaScan to Scan a Photo to E-mail ... - Page 4 Converting Scanned Text with OmniPage LE ... 63 CHAPTER 6. HOW TO GET HELP ... 65 SING NLINE ANUALS Accessing the UMAX VistaScan Online Manual ... 65 Accessing the Presto! PageManager Online Manual... 66 Accessing the Caere OmniPage Online Manual ... 66 ROUBLESHOOTING ONTACTING ECHNICAL ...
-
Page 5: Chapter 1. Getting Started
Introduction Thank you for purchasing the UMAX Astra series scanner. This manual covers both the Astra 6400 and Astra 6450. The Astra 6450 includes a Universal Transparency Cover (UTC) for scanning transparent media. The UTC is an optional accessory on the Astra 6400. - Page 6 ® Adobe Photoshop LE CD-ROM UMAX Scanner CD-ROM. This CD-ROM contains software ® ® ® for Caere OmniPage LE OCR, NewSoft Presto! ® PageManager (full version), NewSoft Presto! PageType™ (full version, PC), UMAX Copy Utility (PC), Scanning Solutions electronic book...
-
Page 7: Getting To Know Your Scanner
Scan, Copy and Custom (OCR or E-Mail) Buttons Astra 6400/6450 Back Panel FireWire/IEEE-1394 Connector UMAX Astra 6400/6450 Owner’s Guide Object Glass Glass surface on which documents or images are placed. Power Indicator Illuminates to indicate that the scanner is powered on. -
Page 8: System Requirements
System Requirements This section defines the minimum system requirements necessary to operate the Astra 6400/6450 scanner. Please refer to the section below that applies to your computer type. PC Requirements An IBM-compatible PC with a Pentium processor or above ®... -
Page 9: Installing Adobe Photoshop Le On The Macintosh
Photoshop registration card. You can find the registration card in the CD-ROM case. 6. Click the Install Now… button. 7. Continue with the installation process by following the remaining screen prompts. UMAX Astra 6400/6450 Owner’s Guide... -
Page 10: Scanner Solutions E-Book
Installing VistaScan and Other Bundled Software (Presto! PageManager, Presto! PageType, Presto! ImageFolio, OmniPage LE and Online Manuals) 1. Insert the UMAX Scanner CD into your computer’s CD-ROM drive after you have finished installing the software on the Photoshop LE CD. If the Setup process begins automatically, go to step 2. -
Page 11: About The Scanner's Firewire/Ieee-1394 Connectors
NOTE: Proper scanner hardware installation depends on installing the software first. If you have not installed the software that came bundled with the scanner, refer to Installing the Software earlier in this chapter for instructions. Installing the FireWire/1394 Card (for PC) 1. -
Page 12: Connecting The Cables
FireWire/1394 peripherals should work with the included FireWire/1394 card, UMAX is able to support the compatibility of the card only with the Astra 6400 and Astra 6450 scanners. Connecting the Cables Find a suitable location near your computer to place the scanner. -
Page 13: Connecting The Power Adapter
1. Plug the scanner’s power adapter into an electrical outlet. 2. Insert the other end of this cable into the power adapter receptacle on the rear panel of the scanner. The power indicator on the front panel of the scanner should now be illuminated. -
Page 14: Chapter 2. Your First Scan
Refer to Chapter 1. Getting Started, for software and hardware installation instructions. Using the Astra 6400/6450, there are three ways to scan an image: 1. Using third party application software to acquire your image. Application software is Adobe Photoshop LE for example. - Page 15 UMAX Astra 6400/6450 Owner’s Guide 13. Choose Save As from the File menu to save the scanned image. Enter the file name, save location and file type (ie. JPG, TIFF, etc)
-
Page 17: Chapter 3. Scanning Basics
CHAPTER 3. Scanning Basics VistaScan is the primary program or driver you use to scan with your Astra 6400/6450 scanner. It is a TWAIN-compliant program, which means that it can be run from other programs that support scanning, like Caere OmniPage and others. It is also a stand-alone program, which allows you to scan images for a variety of uses, even without launching another program first. - Page 18 Color Matching/Correction Color Matching allows you to fine-tune the colors of scanned images so that they emulate the colors of your original source documents as closely as possible. This is accomplished using MagicMatch. When you click on the MagicMatch checkbox (so a checkmark appears) the Profile List displays.
-
Page 19: Scan Destination
UMAX Astra 6400/6450 Owner’s Guide Show Ruler The Show Ruler command displays or hides the rulers that border the top and left sides of the Preview window. These rulers correspond to the rulers on your scanner's object glass. Clicking on the Show Ruler checkbox turns off (removes the checkmark) and hides the ruler. - Page 20 File To set the location for your stored images: Click on the File icon. The file preferences appear to the right of the Scan To icon set. Enter the directory in which you want to store the scanned image file, in the File Directory text box. If you are not sure of the directory path, click the Browse button to locate the desired directory.
- Page 21 If you want to change any of the settings, click on the Properties button. The standard Print Setup dialog box opens. Make any changes you want, and then click OK to return to the Preference settings. UMAX Astra 6400/6450 Owner’s Guide...
-
Page 22: Scanner Information
Name text box. If you are not sure of the directory path, click the Browse button to locate the correct path. Select the image format in which you want to save scanned images from the Image Format drop down list. Scanner Information The Scanner Information tab displays important information about your scanner. -
Page 23: Vistascan Beginner Window Features
The information includes: Scanner Manufacturer Scanner Model Firmware Version VistaScan Version Maximum Scan Width and Length Maximum Resolution VistaScan Beginner Window Features The VistaScan Beginner window appears when you launch VistaScan. The features of the VistaScan Beginner window let you scan a wide variety of documents, photos, and graphics. -
Page 24: Performing The Preview Scan
Scanning an item via the Beginner window consists of just a few steps: Perform a preview scan of the item to be scanned by clicking the Preview button. The item is quickly scanned at low- resolution, and is displayed in the Preview window (on the left side of the VistaScan Beginner window). - Page 25 You can also move a selected frame by positioning the cursor inside the frame (which changes the cursor shape to a four-direction arrow), and dragging the frame to another location in the Preview window. UMAX Astra 6400/6450 Owner’s Guide Zoom Tool Frame Tool Move Tool...
- Page 26 Move tool – Lets you move an image in the Preview window so you can see portions that are not visible because the image is zoomed too large to display completely. Click on the Move tool. Put the cursor inside the Preview window (which changes the cursor shape to a hand).
-
Page 27: Defining The Type Of Image To Scan
Clicking on any of these icons automatically starts the final scan process using the pre-defined scan settings. The scanned image is saved or sent to the device or application you specified by clicking on the Scan To icon. UMAX Astra 6400/6450 Owner’s Guide Printed Matter Settings icon Web Image... -
Page 28: Vistascan Advanced Features
VistaScan Advanced Features The VistaScan Advanced window gives you the ability to adjust the scan setting individually so you can customize the settings for the type of document you are going to scan. If you are a novice computer user, you may want to use the VistaScan Beginner window until you are more familiar with VistaScan and the scanning process. - Page 29 UTA (Negative): Scans 4” x 5” photographic negatives. Auto Doc Feeder: The Automatic Document Feeder option is not available for this scanner. NOTE: For more information about scanning photo transparencies or negatives, refer to the Universal Transparency Cover (UTC) section of this manual.
- Page 30 True Color, CMYK: Converts RGB (video) color data into CMYK (printed) color data using a special color transformation process. When scanning is completed the CMYK image is ready for printing on a CMYK color printer. NOTE: Most ink jet printers use RGB rather than CMYK printing. 256 Colors: Scans color images using 256 colors.
- Page 31 Changing the Resolution Setting Scanning resolution is measured in dots per inch (DPI). Resolution determines the amount of information the scanner will capture in a scanned image. The higher the resolution, the finer the image detail, and the larger the file sizes.
- Page 32 The following table gives you an idea of the file sizes you can expect based on the original image size and the resolution setting you specify. These values are based on scanning images in 24-bit, True Color RGB mode. Image sizes shown below are given in megabytes.
-
Page 33: Changing The Descreen Feature
The Descreen option helps eliminate the patterns that can appear when you scan printed images found in magazines, brochures, catalogues, etc. This is accomplished by changing the number of lines that appear in every inch (lines per inch) of the scanned image. UMAX Astra 6400/6450 Owner’s Guide... - Page 34 The Descreen feature is unavailable when you have chosen the B/W Document, Fax or OCR resolution settings. To change the Descreen setting: Click the Descreen option to display the drop down menu. Choose one of the descreen options: No Descreen — No Descreening. Magazine —...
-
Page 35: Changing The Filter Setting
No Filter — Use this option when you do not want to sharpen or blur the image. Sharpen — Use this option to sharpen lines that may be fuzzy or not clean in the original image. UMAX Astra 6400/6450 Owner’s Guide... - Page 36 Sharpen More — Use this option when you want to sharpen the image more than the standard Sharpen filter does. Blur — Use this option when you want to soften the edges of an image. Blur More — Use this option when you want to soften the edges more than the Blur filter does.
- Page 37 Auto Adjustment provides a simple way to adjust the light and dark values of a color or grayscale image you want to scan. To automatically adjust the light and dark values: 1. Place the item you want to scan on the scanner object glass. UMAX Astra 6400/6450 Owner’s Guide...
- Page 38 2. Click the Preview button from the VistaScan Advanced window. 3. Select an area that you want to adjust using the Frame tool. You can edit the Preview image before scanning the final image using the “Zoom Tool” and the “Frame Selection Tool.” To find out more about how to use these tools, click on the user tips text that appears when your cursor pauses over the tool.
- Page 39 Click outside of a selected area to save the frame. To create other frames, repeat steps 1 and 2 until you have created all the desired frames. UMAX Astra 6400/6450 Owner’s Guide...
- Page 40 After you create a frame, the Single Frame tool is automatically selected so you can resize or move the frame you just created. To select one of the frames you created, double-click on the desired frame. The frame border of the active frame changes to a marquis style frame (dotted lines).
- Page 41 UMAX Astra 6400/6450 Owner’s Guide Rotation/Invert To access the color adjustment features, click the Color Adjustment icon from the VistaScan Advanced window. Adjusting Image Brightness, Contrast, Highlights and Shadows When you click on the Brightness/Contrast tab from the Color Adjustment panel a series of slide bars appear. Adjust the associated tones by dragging the slider in one of the bars to the left or the right.
- Page 42 All optical devices, such as monitors and scanners, have some variance in their light sensitivity characteristics. To get a scanned image with good results, VistaScan provides gamma adjustment capabilities so you can compensate for this variance in your scanner.
-
Page 43: Adjusting The Image Tones
UMAX Astra 6400/6450 Owner’s Guide Moving the slider on the scroll bar to the right increases the brightness of the mid-range gray tones. Moving it to the left decreases the brightness of the mid-range gray tones. The default setting is 1.2. - Page 44 When you click in the wheel the image tones are shifted to the particular hue that is represented in that area. Click the Reset button to cancel the changes and return the value to default setting. Rotating/Inverting an Image You can rotate an image clockwise or counter clockwise, and you can flip images 180 degrees vertically or horizontally.
-
Page 45: Using The Universal Transparency Cover (Utc)
The Astra 6450 scanner is equipped with an UTC, which gives you the capability to scan slides and transparencies. The UTC is optional on the Astra 6400. Negative film normally contains an emulsion that affects the color of the image when scanned. Other transmissive images may appear clear, but negatives often have a muddy, brown, gray or orange tint to the image. -
Page 46: Using Vistaaccess - Direct Access
VistaAccess is a utility that provides instant access to several VistaScan applications. VistaAccess loads at startup, and can be found in the system tray (PC) or control strip (Mac) as the scanner icon. With VistaAccess, you can open any of the listed applications with a few clicks of your mouse. -
Page 47: Turning The Scanner Lamp On And Off
Click the Exit option to remove the scanner icon from the Finder area and close VistaAccess. Turning the Scanner Lamp On and Off You can turn the scanner lamp on and off using the Power Saving utility built into VistaAccess. The power saving option is accessible by accessing VistaAccess. - Page 48 To use VistaShuttle to create an E-Card (electronic greeting card you send via e-mail): Click the scanner icon in the system tray (to the far right of the Windows task bar) using your right mouse button. Select the VistaShuttle application from the VistaAccess menu. The VistaShuttle Main window appears.
- Page 49 E-Card window. Click the Finish button to place the text on the card. UMAX Astra 6400/6450 Owner’s Guide...
-
Page 50: Using The Umax Copy Utility
E-Card to the message. Send your e-mail message. Using the UMAX Copy Utility The UMAX Copy utility is a PC-based application that lets you scan and automatically print copies of an image. NOTE: The UMAX Copy Utility is not Macintosh compatible. - Page 51 Scaling — Sets the printout size of your scanned image; the default is 100%. Copy/Stop — Copy your scanned image by clicking the Copy button. When copying begins the button text changes to read Stop. To stop printing copies, click the Stop button. UMAX Astra 6400/6450 Owner’s Guide...
-
Page 52: Chapter 4. Push Button Scanning
CHAPTER 4. Push Button Scanning The defining feature of the Astra 6400/6450 is its push button functionality. You can scan an image to e-mail, perform OCR (optical character recognition), or even use the scanner as a copy machine by pushing one of the three buttons on the front panel of the scanner. - Page 53 For Macintosh Users: a. Click on the scanner icon in the Control Strip located in the lower left corner of the Desktop. A pop-up menu appears which contains: VistaScan Push Button Configuration Lamp On/Off Control Find/Refresh Scanner b. Click on the Push Button Configuration option. The Push Button Configuration window appears.
- Page 54 9. Click the OK button to save the Scan push button configuration settings. These settings will be used whenever you press the Scan button on the front of the scanner. NOTE: You can also click the Default button to return the values in each field to the default settings.
- Page 55 8. Click the OK button to save the Copy push button configuration settings. These settings will be used whenever you press the Copy button on the front of the scanner. NOTE: You can also click the Default button to return the values in each field to the default settings.
- Page 56 To configure the values for the e-mail function: If the E-mail icon is not selected (enclosed in a red box), click the E-mail icon. Select the e-mail application (only Microsoft Exchange and Lotus cc:Mail are supported) to send the scanned image to, by clicking on the arrow to the right of the Mail Destination field.
- Page 57 OCR function of the Custom button. Using the Push Buttons Once you have configured the variables for each of the push buttons, you can scan images and text by simply pressing one of the buttons on your scanner. UMAX Astra 6400/6450 Owner’s Guide...
- Page 58 To scan using one of the scanner’s push buttons: 1. Press the Scan, Copy, or Custom (i.e. e-mail or OCR) button. 2. A Scan Progress window appears showing you the status of the scanning task. 3. When the scan is complete, the image you scanned appears in the application that you specified when you configured the button.
-
Page 59: Chapter 5. Scanning Projects
CHAPTER 5. Scanning Projects The UMAX Astra 6400/6450 scanner includes bundled software to help you with a variety of tasks. This chapter shows you how to make a personalized calendar, create Web-ready images, and even turn a page of text into an online text document that you can edit. - Page 60 Select VistaScan from the Programs menu. d. Select VistaScan from the VistaScan menu. For Macintosh Users: a. Click on the scanner icon in the control strip located in the lower left corner of the Desktop. A drop down menu appears.
-
Page 61: Using Vistascan To Scan A Photo To E-Mail
CC Mail. Follow steps 1 through 3 as listed in the Scan and Print instructions, then proceed with the following steps: 1. Click the E-mail icon to set the scanner settings to the best values for scanning an image to e-mail. -
Page 62: Using Presto! Pagemanager To Scan A Form And Edit It With
VistaScan Beginner window appears. Lift the document cover and place the form you want to scan face-down in the center of the object glass of the scanner. Click the Preview button. Click the Text/Lineart icon in the Click to Scan area to begin the scan. -
Page 63: Converting Scanned Text To Editable Text With Omnipage
3. Double-click the OmniPage LE icon. An OmniPage toolbar appears. (If this toolbar does not appear, click on the Window menu and select Show Toolbar). 4. Click Select Scanner from the Settings menu. Select UMAX Astra Series then click OK. Converting Scanned Text with OmniPage LE 1. - Page 64 For PC Users: Choose Acquire Image from the File menu. Select Flatbed from the Paper Path field in the Load Scanner dialog box and then click Scan to scan the image. When the scan is complete, the text appears in the OmniPage window.
-
Page 65: Chapter 6. How To Get Help
CHAPTER 6. How to Get Help The Astra 6400/6450 scanner has been designed to be reliable, easy-to-install, and easy-to-use. If you encounter any problems while installing or using your scanner, please follow the solutions outlined below. Consult the online manual... -
Page 66: Accessing The Presto! Pagemanager Online Manual
1. Double-click the Hard Drive icon on the desktop. 2. Double-click the UMAX VistaScan folder. 3. Double-click the VistaScan Help. Your Internet browser should launch the VistaScan User’s Guide. Accessing the Presto! PageManager Online Manual For PC Users: 1. Click Start. -
Page 67: Troubleshooting
Your system resources are low on a Windows PC. Your system resources are the amount of free resources your system can call on at a given time. This should be at 90% or above to run a scanner. Anything under 60% will cause system freezes or link fails when you attempt to access the scanner. - Page 68 I cannot get the scanner to install properly on my Macintosh, or it does not run once it is installed. Solution: If you are having problems installing or using the Astra 6400/6450 scanner, ensure that Macintosh OS 9.0 or higher is installed on your computer.
-
Page 69: Contacting Technical Support
Booting with the shift key still loads the UMAX scanner extension required for scanning. Problem: When using a Macintosh computer your system goes to the Finder when you try to acquire the scanner. Solution: Plug the scanner into its own power outlet. If the problem still occurs, please call UMAX Technical Support. -
Page 70: Maintenance
Call UMAX technical support at the following number: 214-739-1915.Contact your dealer or call the UMAX support line between 9 NOTE: You are eligible to receive 1-year free technical support (caller is responsible for toll charges), and 2-years free e-mail support from the date of scanner purchase. -
Page 71: Cleaning
Regularly cleaning the object glass will ensure that dirt or smudges will not reduce the quality of your scanned images. Before you clean the glass, make sure the scanner is turned off and the power cord is unplugged. Clean the object glass and document cover with a soft damp cloth and a mild detergent or alcohol. -
Page 72: Scanner Specifications
Line Art 1 bit/pixel Grayscale 14 bits/pixel internal Color 42 bits/pixel internal Data Output 42-bit color 14-bit grayscale 8.5” x 11.7”, A4 Size 4” x 5” 18.4” x 12.2” x 3.9” 8.5 lbs. (Astra 6450) Weight 7.8 lbs. (Astra 6400) -
Page 73: Fcc Declaration Of Conformity
Changes or modifications not expressly approved by the manufacturer responsible for compliance could void the user’s authority to operate the equipment. The party responsible for product compliance: Corporate Name: UMAX Technologies, Inc. Address: 3561 Gateway Blvd., Fremont, CA 94538, USA Telephone No.: 510-651-4000... -
Page 74: Warranty
ONE (1) YEAR from the original date of purchase. Should any defect(s) be discovered, the product may be returned either to the manufacturer or an authorized UMAX service center. If you are returning product for repair, please be sure to do the following: 1) Call UMAX Technical Support Monday-Friday between 9 A.M–...
Need help?
Do you have a question about the Astra 6400 and is the answer not in the manual?
Questions and answers