Table of Contents
Advertisement
USE AND CARE GUIDE
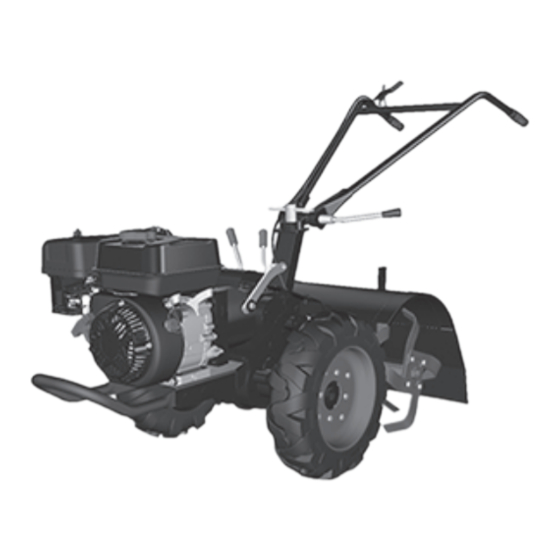
20 INCH 212 cc Forward/Reverse Rear Gearbox Tiller
Questions, problems, missing parts?
Before returning to the store, call
Customer Service
8 a.m. - 7 p.m., EASTERN
877-527-0313
HOMEDEPOT.COM
We appreciate the trust and confidence you have placed in Legend Force through the purchase of this tiller. We strive to
continually create quality products designed to enhance your home. Visit us online to see our full line of products available for your home
THANK YOU
improvement needs. Thank you for choosing Legend Force!
Item #LF20212RTG2
Model #1009682409
Advertisement
Table of Contents

Related Manuals for LEGEND FORCE LF20212RTG2


Summary of Contents for LEGEND FORCE LF20212RTG2
- Page 1 THANK YOU We appreciate the trust and confidence you have placed in Legend Force through the purchase of this tiller. We strive to continually create quality products designed to enhance your home. Visit us online to see our full line of products available for your home...
-
Page 2: Table Of Contents
Table of Contents Safety Information ........2 Assembly . - Page 3 Safety (continued) GENERAL SAFETY □ □ Do not put hands or feet near or under rotating parts. Keep If the equipment should start to vibrate abnormally, stop clear of discharge area at all times as the rotating tines the engine and check immediately for the cause. Vibration is generally a warning of trouble.
- Page 4 Safety (continued) GENERAL SAFETY □ □ Always be sure of your footing. A slip and fall can cause Remove gasoline-powered equipment from the truck or serious personal injury. If you feel you are losing your trailer and refuel it on the ground. If this is not possible, balance, release the control lever immediately and the then refuel such equipment on a trailer with a portable tine will stop rotating.
- Page 5 Safety (continued) GENERAL SAFETY □ Do not modify engine. Before cleaning, repairing, or inspecting, make certain the tines and all moving parts have stopped. Disconnect the □ To avoid serious injury or death, do not modify engine in any spark plug wire and ground against the engine to prevent unintended starting.
-
Page 6: Warranty
From the date of original purchase, Legend Force warrants to the original purchaser that each lawn and garden product sold, shall be free from defect in material and workmanship for the items and time period set forth below. Legend Force, at its discretion, agrees to repair or replace any defective part that upon examination, inspection, and testing by a Legend Force authorized service dealer, is found to be defective within the original warranty period. - Page 7 Legend Force obligation under this warranty is exclusively limited to product repair or replacement and shall not be liable fo any incidental or consequential damages including, but not limited to, the expense of delivering product to and from repair center, loss or damage to personal property, loss of revenue, telephone charges, loss of time, or inconvenience.
-
Page 8: Pre-Assembly
Pre-Assembly PLANNING ASSEMBLY Place box on a level surface. Remove all items from box. Make sure all items listed on the package contents list are included and not damaged. TOOLS REQUIRED 了 Funnel wrench HARDWARE INCLUDED 色 NOTE: Hardware not shown to actual size. 冒... -
Page 9: Assembly
Assembly Assembling the Depth Regulator NOTICE: This tiller is shipped without gasoline or oil in the engine. Fill up the gasoline and oil BEFORE operating your machine. □ Insert the depth regulator (C) through the protective shields (D) opening into the top of the depth regulator bracket with handle facing to the rear. - Page 10 Assembly (continued) Assembling the Wheels □ Insert the wheel (B) through the axle on the tiller body. Then place the clevis pin (LL) through the hole on the wheel Tiller Body through the axle to secure the wheel in place. Place the cotter pin (FF) to lock in place.
- Page 11 Assembly (continued) Check Tire Pressure □ (Models with pneumatic tires) Check the air pressure in both tires before each use. The air pressure should be between 25 PSI and 30 PSI (pounds per square inch). □ If the air pressure is lower than 25 PSI, inflate the tires air pressure with air pump.
-
Page 12: Operation
Operation Adding Gasoline and Oil □ We recommend the use of 10W-30 oil. Other high-quality detergent oils are acceptable if classified for service SF, SG, SH, SJ or higher. □ WARNING: Use extreme care when handling gasoline. Do not use special additives. Gasoline is extremely flammable and the vapors are explosive. - Page 13 Operation (continued) Controls and Features DEPTH REGULATOR □ In hard compacted soil, it helps restrain the tiller's forward RECOIL STARTER motion. In looser soil, it controls how deeply the tines can dig into the ground. □ The recoil starter is attached to the right side of the upper handle.
- Page 14 Operation (continued) Pre-Start Inspection Starting the Tiller Make sure all safety guards are in place and all nuts and □ □ The controls required to start and run the tiller are located bolts are secure. on the engine and are marked with the icon for choke, slow and fast for the throttle, and on/off fuel valve.
- Page 15 Operation (continued) Shutting Down the Tiller WARNING: Temperature of muffler and nearby areas may exceed 150˚F. Avoid these areas. Do not move choke control to stop engine, backfire or engine damage may occur. To stop wheels and tines at any time, release drive safety □...
- Page 16 Operation (continued) Handle Height and Left/Right Control Gear Box Adjustment □ To adjust the handle height just loosen the up/down lever □ The gear box is located on the tiller frame. See Figure1-13 lock (DD) and push handle up or down to the required height. □...
- Page 17 Operation (continued) Wire Tension Adjustment Tilling Tips □ Proper wire tension is critical to good performance. After □ The key to successful tilling is to begin with a shallow cut on 1/2 hour of operation, all cables may have to be adjusted. the first pass, and then work an inch or two deeper on each After using the tiller for the first time check tension after successive pass.
-
Page 18: Maintenance
Maintenance Always observe safety rules when performing any □ Lubricate the wheels at least once a season with light oil (or maintenance. motor oil). If wheels are removed for any reason, lubricate surface of the axle bolt and inner surface of the wheel with □... - Page 19 Maintenance (continued) MAINTENANCE SCHEDULE □ Your tiller has been designed and produced by the industry’s leading manufacturer of outdoor power equipment to provide you with years of reliable operation. Keeping your tiller in top running condition will prolong its life, and help you obtain optimum performance. □...
- Page 20 Maintenance (continued) CHECK OR FILL ENGINE CRANKCASE Dipstick □ Add oil. Do not overfill. Use a clean, high quality detergent oil. Do not mix oil with gasoline. Oil level must be full. □ Check the oil level by removing oil fill plug. Oil level should be up to the bottom of the fill plug opening.
-
Page 21: Care, Cleaning And Storage
Care, Cleaning and Storage STORAGE: When preparing the Tiller for storage, allow the unit to cool for 30 minutes then follow the guidelines below. STORAGE TIME PRIOR TO STORING Check Air filter, clean if necessary. Less than 2 months ... -
Page 22: Troubleshooting
Troubleshooting Problem Cause Solution □ Add fresh fuel □ The engine is Out of fuel □ difficult to start Turn the engine switch on □ The engine switch is "Off" □ Press the primer bulb 3 to 6 times until fuel flow is □... -
Page 23: Service Parts
Service Parts Part Description Quantity Part Description Quantity Wheel Recoil Air cleaner Assy Tines Tine Wheel Recoil Air Filter Assembly HOMEDEPOT.COM Please contact 1-877-527-0313 for further assistance. - Page 24 Questions, problems, missing parts? Before returning to the store, call Customer Service 8 a.m. - 7 p.m., EASTERN 877-527-0313 HOMEDEPOT.COM Retain this manual for future use. Version NO.001...
Need help?
Do you have a question about the LF20212RTG2 and is the answer not in the manual?
Questions and answers