
Related Manuals for Leader Fox CARGO


Summary of Contents for Leader Fox CARGO
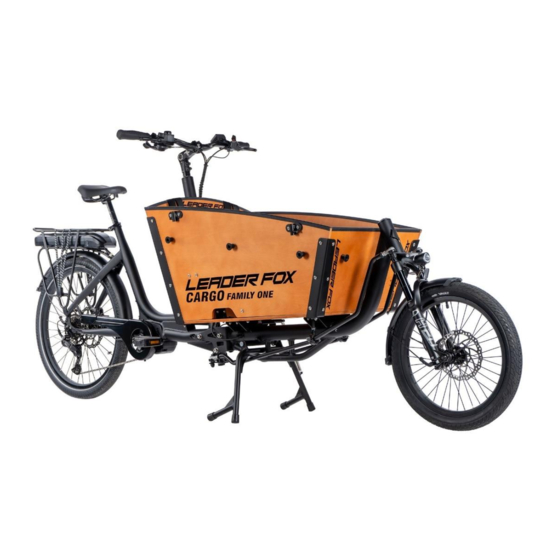
- Page 1 Instructions for use of the e-bike The seller is legally obliged to include the instruction manual for the LEADER FOX electric bicycle with each product. E – BIKE POWER RIDE Family One...
-
Page 2: What Is An E-Bike
Foreword Dear users, To ensure the optimal functioning of your e-bike, please read the E-LF product information carefully before using it. By means of a conscientious description, we inform you in the following text about all details (including device installation, settings and normal use of the display) related to the use of our display. This manual will also help you to resolve any uncertainties and faults. - Page 3 1. The range of an e-bike cannot be accurately determined because it is influenced by many factors. 2. Tyre rolling resistance. LEADER FOX electric bikes use tyres with low rolling resistance and increased puncture resistance. It is also important that the tyres are properly inflated. So if you have under-inflated tyres on your e-bike, for example, your range will be reduced.
-
Page 4: Safety Recommendations
Safety recommendations Batteries: Do not throw the battery into the fire. Do not use the battery with other devices. Do not disassemble or modify the battery. Do not connect the positive and negative poles of the battery with a metal object. Do not immerse the battery in water. - Page 5 We recommend that you always fully charge the battery after each journey to ensure that you always have a full battery capacity for your next journey. Charging the battery can take from 1 to 5 hours depending on the state of the battery cells. It should be carried out in a covered, dry area (moisture and water can damage the charger) at a temperature of 5 to 40°C.
- Page 6 LCD display Product Name: Supplier: Bafang Model: DP C221.CAN BUS Electrical parameters: Storage space Humidity: 30-70% Operating temperature - 20 ~ 45 °C Storage temperature - 20 ~ 50 °C Functional overview Remaining distance display (depending on driving style) Information display (battery, controller, HMI and sensor) Display of error messages Bluetooth function CALORIES energy consumption display...
- Page 7 Description of OLED Displays Kilometers/miles. Can be set according to customer preferences. Speed display: AVG SPEED, MAX SPEED, SPEED (real time). Smart Battery Indicator: provides a reliable battery indicator, will not fluctuate. With engine on/off. BMS support. (need access to BMS information system support). Backlight brightness setting: 5 sections. 9step PAS: 3-PAS/5-PAS/6-PAS/9-PAS...
-
Page 8: Assembly And Disassembly
Assembly and disassembly Mounting the display: I must note that we are in a huge1.Remove the bracket from the display and then 2. Now connect the display connector to the display placed on the handlebars. (suitable for the EB-Bus connector. making sure that the two connectors remain parallel when pressed firmly together.k timeout. -
Page 9: Definition Of Keys
3.Then place the bracket on the bottom of the display and tighten it with the M3.0*8 screw. Required torque: Torque value: 1 N.m. Definition of keys down Switch on/ of system up/down Normal operation Switching the system on/off Press and hold the button (>2S) on the display, switch on the system. -
Page 10: Battery Capacity Indicator
will move at approximately 4.5 km/h. After releasing the button or no button is pressed during 5S, the motor automatically stops and switches back to level 0. SERVIS When a certain number of kilometres have been covered or the battery has been charged, "SERVICE" will appear on the display. - Page 11 When the display is switched on, press and hold simultaneously) for input to the offer settings, Press the orthodox button (<0,5 S) you can highlight and select the option Setupdisplays , Information or Exit. Then press the button(<0,5S) to confirm the selected option.
- Page 12 press briefly "TRIP Reset" Mileage reset Press or buttons (<0.5S) highlight "Trip Reset" in the display settings menu, and then button (<0.5S) for selection. Then using the button or button choose between "YES" (YES) or "NO" (NO). Once you have selected the desired option, press the button (<0.5S) to save and go to the "Display setting"...
- Page 13 "Automatic shutdown" Setting the time of automatic shutdown of the systém Press the button (<0,5S) highlight "Auto Off" in the menu settings display and then press button (<0,5S) choose. Then use the button choose between"OFF", "9"/"8"/"7"/"6"/"5"/"4"/"3"/"2"/"1", (Numbers are measured in minutes). Once you have selected the desired option, press the (<0,5S) to save and go to "Display settings".
- Page 14 When the display is switched on, press and hold (simultaneously) to enter the offer settings, press the button (<0.5S) select "Information", then press button (<0,5S) confirm and enter "Information". confirm and display the wheel size. To return, press the button 7.8.2.1 Wheel size Press the button (<0.5S) highlight "Wheel Size"...
-
Page 15: Driver Information
setting". Code Code definition units Code Code definition units Hardware Absolute SOC version Hardware versions Software ver Cyklus times Hardware versions Maximum non-charging Hour Current temperature ℃ time No time for char- Hour Total voltage ging lately. Average current Number of battery cells Remaining capacity mAh Voltage of cell 1... -
Page 16: Information Display
Information display Press the button (<0.5S) highlight "Display Info" and then press (<0,5S) confirm. Now press the button (<0.5S) to display the hardware version or software version. To go back, press the (<0.5S) and go back to "Information". Torque information (<0,5S) zvýrazněte položku "Torque Info"... -
Page 17: Error Code Definition
ERROR CODE DEFINITION The HMI can display faults on the Pedelec. When a fault is detected, the also displays one of the following error codes. Note: Read the description of the error code carefully. When the error code appears, reboot the system first. If the problem cannot be corrected, contact your dealer or technical staff. - Page 18 Error Statement Troubleshooting 1. Check that all connectors are disconnected from the battery Error temperature sensor inside are properly connected to the motor.13 baterie 2. If the problem persists, replace the battery. The protection Let the pedelec cool down and restart the temperature inside the system.
- Page 19 Error Statement Troubleshooting Torque sensor speed signal Check that all connections are properly has an error connected. Connect the pedelec to the BESST system to see if ÁL the BESST can read the speed signal. PR O Change the display and see if the problem is resolved.
- Page 20 Error Statement Troubleshooting The WDT circuit is defective Use BESST to update the controller and see if this resolves the issue. If not, replace the controller or contact your supplier. Total battery voltage is too Replace the battery. high Total battery voltage is too low Charge the battery.
- Page 21 01 Communication error Check cable connection 02 Control unit protection Check the three-phase power supply line. 03 Three-phase power supply error Check the three-phase power line connection. 04 Low battery Charge battery 05 Brake fault Check the brake connection. Check the rotation for connection. 08-99 Reserved Please contact the manufacturer for error definitions.
- Page 22 1、 Red wire: Anode(24v/36v) 2、 Blue wire: Power cord to the controller 3、 Black wire: GND 4、 Green wire: RxD (controller -> display) 5、 Yellow wire: TxD (display -> controller) The PAS level can be customised, the highest level is 9, see the table below for the commonly used PAS level:...
-
Page 23: Maintenance
Maintenance Regular maintenance: - keep all components of the e-bike clean - use only recommended and tested cleaning materials - regularly lubricate the chain with suitable oils - in winter, clean the e-bike and especially the battery contacts and other connectors of salt after each ride - take care not to damage the cables of the electrical system when handling the e-bike in any way. -
Page 24: Meaning Of Error Codes
- Check the motor cable connections (at the motor and at the control unit) - Check the connectors on the control unit and the display Meaning of error codes In case the e-bike is malfunctioning, the instrument may emit warning messages, an icon will appear on the LCD display and an error code will appear on the speed display;... - Page 25 You may need to remove the wheel with the motor engaged for transport or servicing (tube replacement). First, disconnect the motor connector by pulling slightly (approx. 20 cm from the motor inlet). Then loosen the brake shoe (if used) and reposition it on the smallest wheel. Remove the rubber caps from the wheel nuts.
- Page 26 Your team Leader Fox We wish you many pleasant and safe miles on your new electric bike. Czech brand of electric bicycles BOHEMIA BIKE Headquarters Na Pankráci 1724 14000 Praha 4 – Pankrác Development, design and production Okružní 697 České Budějovice 37001 Tel: 388 314 885 E-mail: info@leaderfox.cz...
Need help?
Do you have a question about the CARGO and is the answer not in the manual?
Questions and answers