
Related Manuals for Shark STRATOS XL Pet Pro Powered Lift-Away AZ913ANZ Series


Summary of Contents for Shark STRATOS XL Pet Pro Powered Lift-Away AZ913ANZ Series
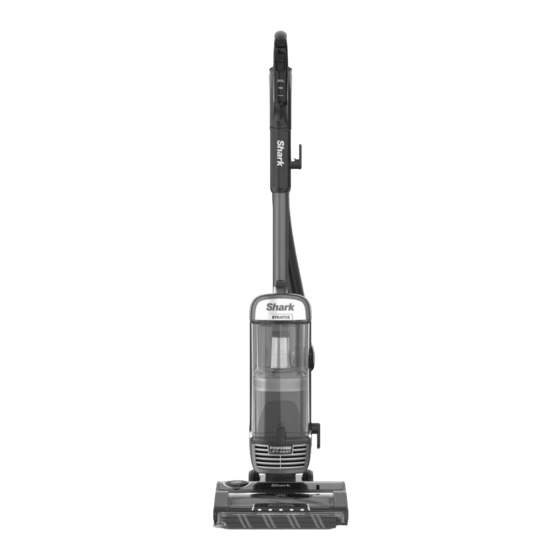
- Page 1 STRATOS ™ XL Pet Pro Powered Lift-Away ™ with Odour Neutraliser Technology AZ913ANZ SERIES INSTRUCTIONS...
- Page 2 THANK YOU for purchasing the Shark Stratos™ XL Pet Pro Powered Lift-away™ with Odour Neutraliser Technology REGISTER YOUR PURCHASE TO BENEFIT FROM YOUR PRODUCT'S EXTENDED GUARANTEE, SIMPLY REGISTER YOUR PURCHASE AT: sharkclean.com.au/apps/product-registration sharkclean.co.nz/apps/product-registration AU +61 2 8801 7666 NZ +64 800 112 660...
-
Page 3: Table Of Contents
Important Safety Instructions ........4 Getting to Know Your Shark® Lift-Away® ......6 Assembly . -
Page 4: Important Safety Instructions
Only use Shark® branded filters and the vacuum and remove the cord. accessories. Damage caused by the use of non-Shark® parts may not be covered by Your vacuum cleaner consists of a your guarantee. motorised floorhead, wand, hose, and/or vacuum pod. - Page 5 SAVE THESE INSTRUCTIONS SAVE THESE INSTRUCTIONS READ ALL INSTRUCTIONS BEFORE USE READ ALL INSTRUCTIONS BEFORE USE 19. If the supply cord is damaged, it must be Make sure the dust cup and all filters replaced by the manufacturer, its service are in place after routine maintenance.
-
Page 6: Getting To Know Your Shark® Lift-Away
GETTING TO KNOW YOUR SHARK XL PET PRO POWERED LIFT-AWAY™ ® WITH ODOUR NEUTRALISER TECHNOLOGY WELCOME! Congratulations on your purchase. Use this instruction manual to learn about your new vacuum’s great features. From assembly to use to maintenance, you will find it all in here. - Page 7 Dust Cup Release NOTE: The dust cup has to be removed to see the filter access button� s h a r kc l e a n . c o . n z...
-
Page 8: Assembly
ASSEMBLY (Click) (Click) (Click) 1. Place motorised Floorhead on floor and insert Wand, pressing it in until it clicks securely into place� 2. Place Pod onto wand and slide down to connect� 3. Insert Handle into wand, pressing it in until it clicks securely into place� 4. -
Page 9: Power Cord
ASSEMBLY (Click) (Turn to Click) POWER CORD UPPER CORD HOOK For cord access, rotate upper hook down and remove cord� s h a r kc l e a n . c o . n z... -
Page 10: Odour Neutraliser Technology
ODOUR NEUTRALISER TECHNOLOGY SETTINGS Shark's Odour Neutraliser Technology guards against bad odours inside your vacuum� ODOUR NEUTRALISER TECHNOLOGY DIAL Flip up the handle and rotate the Odour Neutraliser Technology Dial to adjust to adjust fragrance puk intensity or to remove cartridge�... - Page 11 ODOUR NEUTRALISER TECHNOLOGY ODOUR NEUTRALISER TECHNOLOGY FRAGRANCE PUK REPLACEMENT 1. REMOVE ODOUR NEUTRALISER TECHNOLOGY 2. REMOVE OLD DIAL FROM FLOORHEAD FRAGRANCE PUK Flip up the handle and rotate the Odour Rotate the fragrance puk anticlockwise in the Neutraliser Technology Dial clockwise until the Odour Neutraliser Technology Dial housing two teal arrows are aligned�...
-
Page 12: Settings
OPERATING THE VACUUM SETTINGS POWER SWITCH SURFACE SELECTOR Thick Carpet & Area Rug Cleaning Press power button to turn on vacuum� Please note the brush-rolls will not spin until you Slide the surface switch to the top position have stepped on the floorhead and tilted the to select Thick Carpet/Area Rug�... -
Page 13: Cleaning Modes
OPERATING THE VACUUM CLEANING MODES UPRIGHT To engage brush-rolls, step on floorhead and tilt handle back� ABOVE-FLOOR—HANDLE ABOVE-FLOOR—WAND Press the Handle Release latch to Press the Wand Release button to detach the handle from the wand� detach the wand from the pod� POWERED LIFT-AWAY™... -
Page 14: Emptying The Dust Cup
EMPTYING THE DUST CUP IMPORTANT: Unplug the cord before performing any maintenance� NOTE: Empty the dust cup when or before the debris reaches the max fill line� To remove Dust Cup, press release button on To empty debris into the bin, press lower top of the pod�... -
Page 15: Cleaning The Filters
CLEANING AND REPLACING THE FILTERS CLEANING FILTERS Regularly wash, dry and replace the filters to maintain your vacuum’s suction power. To prevent damage from cleaning chemicals, rinse filters with cold water only� Allow all filters to air-dry for at least 24 hours before reinstalling them to prevent liquid from being drawn into electric parts�... -
Page 16: Cleaning The Brushroll
MAINTENANCE FLOORHEAD MAINTENANCE SELF CLEANING BRUSHROLL If any hair is wrapped around the brushroll, continue vacuuming using Carpet/Low Pile mode on a bare floor surface, a low-pile carpet, or a small area rug� This will allow the Self Cleaning brushroll to remove the hair wrap and send it to the dust cup� If you run over a hard or sharp object or notice a noise change while vacuuming, check for blockages or objects caught in the brushroll�... -
Page 17: Checking For Blockages
CHECKING FOR BLOCKAGES HOSE BLOCKAGE WAND BLOCKAGE Detach hose from vacuum pod, Detach wand from floorhead and handle, and check hose and opening on and check both ends for blockages� back of pod for blockages� POD BLOCKAGE HANDLE/HOSE BLOCKAGE Detach wand from floorhead, tilt Detach handle from wand and the floorhead neck back, and check hose from the vacuum pod, and... -
Page 18: Available Accessories
AVAILABLE ACCESSORIES NOTE: Not all accessories come with all units� To order additional accessories, visit sharkclean.com.au sharkclean.co.nz Crevice Tool This slender tool offers extended reach to access corners, kick boards and skirting boards, tight spaces, and ceilings� Upholstery Tool Picks up hair, dust, and large debris from mattresses, sofas, curtains, lampshades, and other delicate upholstered fabrics�... -
Page 19: Troubleshooting Guide
TROUBLESHOOTING Power cord caught in brushroll or floorhead. • To minimise the risk of power cord damage, DO NOT run the vacuum over the power cord. If this occurs, immediately shut off power to the vacuum and remove the cord from the brushroll or floorhead. -
Page 20: Guarantee Terms And Conditions
TWO (2)YEAR LIMITED REPLACEMENT WARRANTY If your product becomes defective due to faulty material or workmanship within a period of 2 years from the date of purchase, we warrant to do the following: • For New Zealand Consumers: We will replace the product with a new product, free of charge, or repair the product at our cost, at our discretion. - Page 21 NOTES s h a r kc l e a n . c o . n z...
- Page 22 NOTES s h a r kc l e a n . c o m . a u...
- Page 23 NOTES s h a r kc l e a n . c o . n z...
- Page 24 This product may be covered by one or more U�S� patents� See sharkninja�com/patents for more information� © 2023 SharkNinja Operating LLC� LIFT-AWAY, and SHARK are registered trademarks of SharkNinja Operating LLC� HAIRPRO, POWERED LIFT-AWAY, and SHARK STRATOS are trademarks of SharkNinja Operating LLC� @sharkcleanau @sharkcleannz AZ913ANZ�Series�IB�MP�Mv16�221201...
Need help?
Do you have a question about the STRATOS XL Pet Pro Powered Lift-Away AZ913ANZ Series and is the answer not in the manual?
Questions and answers