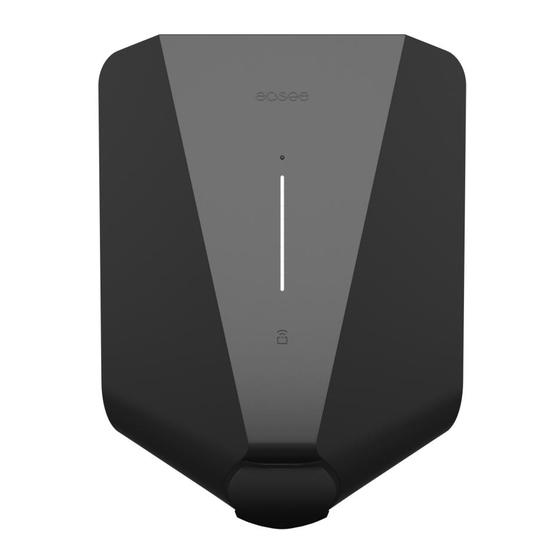
Easee Charge Lite Installer's Manual
Hide thumbs
Also See for Charge Lite:
- Important product information (33 pages) ,
- Important product information (32 pages)
Advertisement
Quick Links
Advertisement

Summary of Contents for Easee Charge Lite
- Page 1 Installer guide Charge Lite...
- Page 2 Lite chargers shall not be used for non-residential use. Residential use is to be understood as use in or around an individual’s own residence. The Charge Lite charger at all times must make use of an individual’s private connection to the electricity grid. Charge Lite...
-
Page 3: Product Overview
Product overview Front cover Chargeberry Lite Backplate (1.4–11 kW) (1.4–22 kW) Protects the electronics from external influences. Contains the electronics for For attaching and connecting to charging the vehicle. the charging infrastructure. Installation kit Strain relief Blind plug Sealing plug Strain relief and Wall screws Front cover tool... -
Page 4: Technical Specifications
Technical specifications General Type designation Easee AC Charger Platform CB-A3-2 Dimensions 256 x 193 x 106 mm (H x W x D) Drilling hole distance c/c 160 x 125 mm (H x W) Operating temperature -30 °C to +40 °C (indoor and outdoor use) Weight 1.5 kg... - Page 5 Connectivity WiFi 2.4 GHz b/g/n connection Easee Link RF Control charging via Easee App RFID/NFC reader OCPP 1.6 via Easee API Bluetooth BLE 4.2 Protection Integrated overload protection according to EN IEC 61851-1:2019 Built-in ground fault protection (30 mA AC/6 mA DC) External approved Type-A RCD (1 phase: 2P;...
-
Page 6: Planning The Installation
The external overcurrent device is not included Easee will continue to challenge the standards and fight to ensure that new and safer technology can gain ground. Until further notice, an external RCD is required. - Page 7 The type of installation as well as cable cross- sections must be determined by a qualified electrician in accordance with valid local, regional and national regulations for electrical systems. Load Chargeberry power (Charge Lite) Ampere (A) 1 phase (kW) 3 phase (kW) –...
-
Page 8: Installation Instructions
Installation Charging Robot Opening instructions Bend down the lower part of the rubber cover and WARNING insert the two ends of the front cover tool into the Always work with the power off and in two openings at the bottom of the front cover. accordance with local regulations. - Page 9 External Type A RCD protection is required for each using the 4 wall screws provided in the mounting kit. backplate with Charge Lite. The RCD must meet the Use suitable wall plugs for mounting and observe regulations and requirements stated in...
- Page 10 Shorten the sealing plug to fit the cable. The hole Backplate should be slightly smaller than the cable to ensure Preparing a good seal. Insert the cable through one of the 4 cable entries and secure it to the backplate with the strain relief provided.
- Page 11 Backplate Wiring TN/TT 3-phase IT/TT 3-phase (3x 230/400 V) (3x 230 V) Strip each wire, exposing 12 mm of copper on each. If the cable has flexible conductors, then you must use ferrules on stranded wires to make the connection. Use the correct tools to press them.
- Page 12 "Create new site". Enter the installation details, follow the on-screen instructions and return to this guide afterwards. Scan the QR code to download the Easee Installer Update existing site: If this site already has one or more App and create your free account.
- Page 13 Turn on the power. The terminals of the backplates Chargeberry are now electrically live. Attaching Remove the PIN code sticker and attach it to the inside of the fuse cabinet, or another safe location for storage. Position the Chargeberry to fit into the slots on the WARNING backplate located in the center of the installation.
- Page 14 Hang the front cover at the top of the backplate and Front cover let it fall into place. Closing Press the bottom of the front cover until you hear a click. Bend the lower part of the rubber cover down. Screw in the front cover screw at the bottom of the Before closing the front cover, it is possible to lock charger to secure the front cover.
- Page 15 RFID area: The integrated RFID reader enables access control of the Charging Robot and identification of different users. You can use it to unlock the charger with an Easee Key. Check our knowledge base at easee.support for more details on how to add and manage your Easee Keys.
- Page 16 Contact customer support. General error. Unplug the charging cable and replug it to the Red – constant light Charging Robot. If the red light persists, check the Easee App or our knowledge base for further information.
- Page 17 Red – pulsating light has entered in safe mode. Please go to our knowledge base further information. Yellow – flashing light, only at the bottom The Charging Robot is waiting to be configured. Easee public knowledge base can be found at easee.support.
- Page 18 Easee or its subsidiaries in writing. Any permitted use shall always be done in accordance with good practice and ensure that no harm may be caused to Easee or by misleading the consumer. Easee and Easee products, product names, trademarks and slogans, whether registered or not, are Easee’s intellectual...


Need help?
Do you have a question about the Charge Lite and is the answer not in the manual?
Questions and answers