Easee One User Manual
Hide thumbs
Also See for One:
- User manual ,
- Installer's manual (17 pages) ,
- Important product information (33 pages)
Table of Contents
Advertisement
Quick Links
Advertisement
Table of Contents

Related Manuals for Easee One


Summary of Contents for Easee One
- Page 1 User guide / Installation guide Easee One...
-
Page 2: Table Of Contents
Table of contents Introduction Introduction Product overview Features Technical specifications Safety Safety instructions Before the installation Planning the installation Installation Installation instructions Daily use and operation How do I charge? Apps and interfaces Charging Robot interface Maintenance Practical details IMPORTANT: Read carefully before use. -
Page 3: Introduction
Intended use This product is intended solely for charging electrically powered vehicles equipped with non-gassing batteries. Easee One is specifically intended for 1-phase installations in the UK fulfilling. The additional security requirements for detection of missing PEN conductor according to BS 7671:2018/A1:2020 when wired as a TN-S-C system (see page 12). -
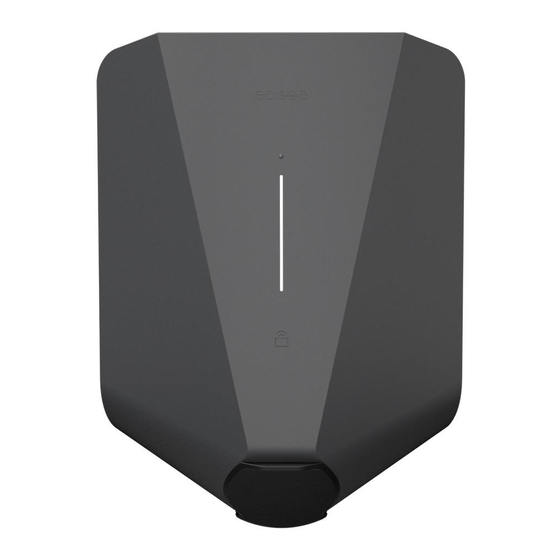
Page 4: Product Overview
Product overview Front cover Chargeberry Backplate Protects the electronics from Contains the electronics For attaching and connecting to external influences. for charging the vehicle. the charging infrastructure. Installation kit Tool... -
Page 5: Features
Charging Robot and identification of different users. You can use it to unlock the charger with an Easee Key. Check our knowledge base at easee.support for more details on how to add and manage your Easee Keys. -
Page 6: Technical Specifications
Connectivity specifications Built-in eSIM (LTE Cat M1/ 2G /GPRS) WiFi 2.4 GHz b/g/n connection Easee Link RF Control charging via Easee App General RFID/NFC reader (NFC / ISO 14443 and MIFARE Classic ® OCPP 1.6 via our API Dimensions (mm): 256 x 193 x 106 (H x W x D) Wall mounting (mm): c/c 160 x 125 (H x W) Operating temperature: -30 °C to +50 °C... -
Page 7: Safety Instructions
Safety instructions Safety instructions for operation — Danger to life due to high electrical voltage. Never make any changes to components, software or connecting cables. — Never use or touch the product if it is damaged or Read the entire manual carefully before installing does not function properly. -
Page 8: Planning The Installation
Easee One. The decision to install or does it need to be increased? Does a new cable an RCD upstream of the Easee One should be take in have to be laid? (An external approval may be accordance with local wiring regulations. - Page 9 Easee Link communication. Technical notes for Easee One — The circuit with one or more Charging Robots can be fused up to 40 A as long as the maximum short-circuit current (Ipk, max) of 10 kA is not exceeded.
-
Page 10: Installation Instructions
3. Grasp the Type 2 socket and push upwards with good caution and follow instructions carefully. force until the Chargeberry disconnects. In addition to the instructions presented on the next pages, we recommend that you watch the installation videos available on our website: easee.support. - Page 11 4 screws provided in should be slightly smaller to ensure a good seal. 2. Insert the cable through one of the 4 cable entries the mounting kit. Use suitable wall plugs for mounting and observe the recommended installation height and secure it to the backplate with the strain relief (see below).
- Page 12 Backplate TT / TN-S network Wiring 1. Strip the individual wires by 12 mm. If the cable has flexible conductors, it is recommended to use ferrules on stranded wires. Use correct tools to press them. 2. Tighten the screw terminal with a torque of 5 Nm. NOTICE! When connecting multiple backplates in parallel, each screw terminal serves as a coupling point...
- Page 13 Charging Robot, the backplate that is configured first becomes the master unit of the charging infrastructure. 2. Select one of the two site setups in the Installer App: To achieve the best communication flow, the centre backplate should be configured first.
- Page 14 Chargeberry Attaching WARNING! Turn on the power. The terminals of the backplates are now electrically live. 2. Position the Chargeberry to fit into the slots on the backplate located in the center of the installation. 3. When the Chargeberry is in the track, press it forcefully down until you hear a click.
- Page 15 Front cover 1. Hang the front cover at the top of the backplate and Closing let it fall into place. 2. Press the bottom of the front cover until you hear a click. 3. Bend the lower part of the rubber cover down. 4.
-
Page 16: How Do I Charge
— The software is up to date (see page 17). — If you have set up access control, unlock it by using a registered RFID tag or disable it from the Easee App Easee App or the local WiFi interface. -
Page 17: Charging Robot Interface
RFID-tag received (awaiting key verification) General error. Unplug the charging cable and replug it to the Red – constant light Charging Robot. If the red light persists, check the Easee App or our knowledge base for further information. Broken PEN lead detected or wires are connected incorrectly. -
Page 18: Maintenance
Standards Insulation testing should be performed before a Chargeberry is installed in the backplate. Hereby, Easee AS declares that this product, Easee One, Testing the circuit insulation with the is in compliance with the Electrical Equipment Safety Chargeberry installed in the backplate may... - Page 19 Data protection Product life cycle When the product connects to the Internet, personal data is sent to Easee AS. You will receive more Transportation: The charger should always be information about data protection during the transported within its original packaging. No other configuration of your Charging Robot.
- Page 20 Easee AS. Easee and all other Easee product names and slogans are trademarks or registered trademarks of Easee AS. Easee products can be protected by one or more patents. All other products and services mentioned may be trademarks or service marks of their respective owners.
- Page 21 Easee AS Grenseveien 19 4313 Sandnes, Norway .easee.com...
Need help?
Do you have a question about the One and is the answer not in the manual?
Questions and answers