
Related Manuals for Solwave 180MWAS12T


Summary of Contents for Solwave 180MWAS12T
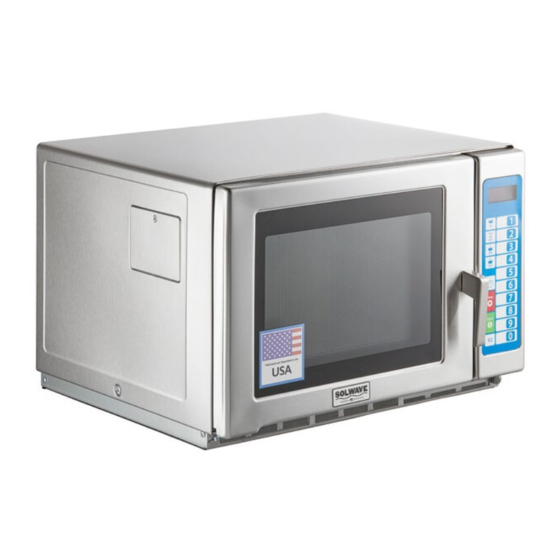
- Page 1 Commercial Microwave SERVICE MANUAL Models 180MWAS12T 180MWAS18T 180MWAS21T 16400049...
-
Page 2: Table Of Contents
Table of Contents Safety Information...................... 2-4 Installation........................6 Specifications....................... 7 Owner’s Information....................9-10 Components Locations....................12 Disassembly ......................14-15 Performance Testing Procedures................17 Component Testing Procedures ................19-20 Error Codes....................... 20 Service Test Mode ....................20 Troubleshooting. -
Page 3: Safety Information
Safety Information... - Page 4 Some types of failures immediately for further direction. will leave a charge in these capacitors and the SOLWAVE will contact the proper discharge could cause a reflex action which could Government Agency upon verification of make you injure yourself.
- Page 5 Recognize this symbol as a SAFETY message WARNING When using electrical equipment, basic safety precautions should be followed to reduce the risk of burns, electrical shock, fire, or injury to persons including the following. 1. READ all instructions before using equipment. 9.
- Page 6 WARNING WARNING To avoid risk of fire in the oven cavity: Liquids such as water, coffee, or tea are able to be overheated beyond the boiling point without a. DO NOT overcook food. Carefully attend oven appearing to be boiling due to surface tension of the when paper, plastic, or other combustible liquid.
- Page 7 Model Specifications Installation · Unpacking the oven · Radio Interference · Oven Placement Specification · Input- Power Source · Output- Power Source · Power Consumption · Cavity Dimension · Weight...
-
Page 8: Installation
Installation Unpacking Oven Oven Placement • Inspect oven for damage such as dents in door or • Do not install oven next to or above source of heat, dents inside oven cavity. such as pizza oven or deep fat fryer. This could cause •... -
Page 9: Specifications
Specifications Models 180MWAS12T 180MWAS18T 180MWAS21T Power Source Voltage AC 120V 208-240V 208-240V Amperage Frequency 60 Hz 60 Hz 60 Hz Single Phase, 3 wire grounded Plug Configuration / NEMA 5-20 NEMA 6-20 NEMA 6-20 Cord Power Output Nominal 1200W 1800W... -
Page 10: Owner's Information
Owner’s Information Clean Filter Control Panel · Manual Operation · Programming Items User Options · Changing Options... - Page 11 Owner’s Information CLEAN FILTER CLEAN FILTER This oven displays at user defined intervals. When the message displays SOLWAVE recommends cleaning the air filter thoroughly. Cleaning the air filter will not shut off Electronic Control the message. The message will stop displaying automatically after 24 hours.
- Page 12 Options such as single or double digit programming, beep volume, and maximum cooking time can be changed to suit individual preferences. To change options: 1. Open oven door. • If door is closed or RESET pad is pressed before programming is complete, changes are discarded and microwave exits programming mode.
-
Page 13: Components Locations
Components Location... - Page 14 Components Location...
-
Page 15: Disassembly
Disassembly Door Removal · Disassembly Control Removal · Wire terminals... - Page 16 Disassembly Door Removal 1. Disconnect power to oven. 2. Open oven door, remove top hinge cap, and slowly lift door to disengage the hinge pins at top and bottom. 3. To reinstall door, place top pin into slot first, then align bottom pin. 4.
- Page 17 Control Panel Removal 1. Disconnect power to oven and remove outer case. 2. Disconnect and label wires from controller/timer. 3. Open oven door. 4. Remove screw securing top of control panel to cavity. Lift control panel up and out to release tabs. Disconnecting Wire Terminals All wire terminals are locking-type terminals.
-
Page 18: Performance Testing Procedures
Performance Testing... - Page 19 To avoid risk of electrical shock, personal injury or death, disconnect power to oven and discharge capacitor before servicing, unless testing requires it. All SOLWAVE microwave oven power outputs are rated using the IEC705 standards. Using the IEC705 test method requires precision measurements and equipment that is not practical to be performed in the field. Using the test shown below will indicate if the oven performance is satisfactory.
- Page 20 Component Specifications...
- Page 21 Component Specifications To avoid risk of electrical shock, personal injury or death, disconnect power to oven and discharge capacitor before servicing, unless testing requires it. Illustration Component Testing Results Thermal Cutouts (TCO) Disconnect all wires from TCO. Measure resistance across terminals. Cavity TCO ..........
-
Page 22: Component Testing Procedures
Component Testing Procedures To avoid risk of electrical shock, personal injury or death, disconnect power to oven and discharge capacitor before servicing, unless testing requires it. Illustration Component Testing Results Fuse/Filter board Power In terminals ........120 VAC (SWA12) Power Out terminals ....... 120 VAC (SWA12) 15A TL Fuses for Power In terminals ........ -
Page 23: Troubleshooting
Troubleshooting... - Page 24 Troubleshooting 1. Check outlet for proper voltage and grounding before diagnosing. 2. Be careful of the high voltage circuit. 3. REMEMBER: Discharge the high voltage capacitor. 4. When making component tests, remove power, disconnect one lead wire from component and check continuity;...
-
Page 25: Schematic/Wiring Diagrams
Schematic/Wiring Diagrams... - Page 26 Schematic / Wiring Diagram 180MWAS12T AC 120V/60Hz SINGLE PHASE ON LY BLOWER MOTOR L.V.TRANSFORMER BTM STIRRER MOTOR OVEN LIGHT TOP STIRRER MOTOR TOP MAGNETRON SEE HV CIRCUI T BTM MAGNETRON SEE HV CIRCUI T NOTE: 1.DOOR IS OPENED 2.WIRE COLOR...
- Page 27 Schematic / Wiring Diagram 180MWAS18T & 180MWAS21T AC 208/220-240V/60Hz SINGLE PHASE ON LY NOISE FI L TER ASSEMBLY MAIN PCB T AB1 CURREN T TRANSFORMER OVEN TCO TOP MG T BTM MG T T AB2 MOTOR AUTO BLOWER VOLTAGE DETECTION BTM PRIMA RY POWER INTERLOCK...
Need help?
Do you have a question about the 180MWAS12T and is the answer not in the manual?
Questions and answers