
Related Manuals for Nikon R1


Summary of Contents for Nikon R1
- Page 1 Nikon Close-up Speedlight Commander Kit R1C1 Nikon Close-up Speedlight Remote Kit Wireless Speedlight Commander SU-800 Wireless Remote Speedlight SB-R200 Instruction Manual...
-
Page 2: For Your Safety
Allow the flash unit to cool down so that you can safely touch it and remove the batteries. Then bring the unit to your local Nikon dealer or authorized service center for repair. - Page 3 In such instances you should immediately remove the batteries from the speedlight and then bring the unit to your local Nikon dealer or authorized service center for repair. Note: electronic devices that are penetrated by water or moisture are often not economically repairable.
- Page 4 For your safety CAUTIONS for the Wireless Speedlight Commander SU-800 and the Wireless Remote Speedlight SB-R200 1 Do not touch the flash unit with wet hands, as this could cause an electric shock. 2 Keep the flash unit away from children to prevent them from putting the unit in or near their mouth, or otherwise touching a dangerous part of the product;...
- Page 5 6 If corrosive liquids seep from the batteries and come in contact with your skin or clothes, wash immediately with running water. Prolonged contact could injure your skin. 7 Always follow the warnings and instructions printed on the batteries to avoid activities that could cause the batteries to leak corrosive liquids, generate heat or catch on fire.
-
Page 6: Foreword
Foreword Thank you for purchasing the Nikon Wireless Speedlight system. To get the most out of your Speedlight system, please read this instruction manual thoroughly before use. Also read “Close-up Speedlight Photography Examples,” a separate booklet that provides an overview of Speedlight flash-shooting capabilities and contains photographic examples. - Page 7 This is useful when you want to use a wider aperture to ensure a shallow depth of field blurs the background (p. 96). See your CLS-compatible camera instruction manual for details on the Nikon Creative Lighting System (CLS).
- Page 8 Visit these sites to keep up-to-date with the latest product information, tips, answers to frequently asked questions, and to receive general advice on digital imaging and photography. Additional information may be available from the Nikon representative in your area. See the URL below for contact information: http://nikonimaging.com/ Notes •...
-
Page 9: Table Of Contents
Contents vary according to each kit • Speedlight parts, their functions, and accessories ... 18 SU-800’s LCD panel and icons ... 20 • Wireless multiple flash operation in the Nikon Creative Lighting System (CLS) ... 26 Flash operation using the Nikon Close-up Speedlight Commander Kit R1C1 (Used with Nikon CLS-compatible cameras) ... - Page 10 Contents Details on close-up flash operation and shooting procedures (Used with CLS-compatible cameras) • Close-up flash operation ... 66 • Overview of close-up flash operation... 68 • Procedures for close-up flash operation ... 70 Details on Commander flash operation and shooting procedures (Used with CLS-compatible cameras) •...
- Page 11 • Troubleshooting... 126 • Specifications ... 130 • Index... 132 Preparation Flash operation using the R1C1 Flash operation using the R1 Functions and use of the SU-800 Functions and use of the SB-R200 Details on close-up flash operation and shooting procedures...
-
Page 12: Tips On Using The Speedlight
Take test photos before photographing important events, such as weddings and graduations. Have Nikon regularly spot-check your Speedlight Nikon recommends that you have your Speedlight serviced by an authorized dealer or service center at least once every two years. Using your Speedlight correctly The Nikon Speedlight’s performance has been optimized for use with Nikon... -
Page 13: Recommended Cameras And Lenses
Micro Nikkor lenses Micro Nikkor lenses provide a maximum reproduction ratio of 1:1 or 1:2. These lenses offer high optical performance that is best suited to Nikon cameras, allowing you to take texture-quality pictures anywhere from close-up to infinity. AF Micro-Nikkor 60mm f/2.8D AF Micro-Nikkor 105mm f/2.8D... - Page 14 Recommended cameras and lenses Using lenses that extend and retreat during AF operation Nikkor lenses that extend and retreat in length during AF operation may not autofocus correctly, or may lead to damage of the lens or camera’s autofocus mechanism due to the weight of the flash head.
-
Page 15: Confirm Receipt Of Contents In Your Kit
Refer to the table below. Users of the Nikon Close-up Speedlight Commander Kit R1C1 should read through this instruction manual. Users of the Nikon Close-up Speedlight Remote Kit R1, Commander SU-800 and Remote Speedlight SB-R200 should read the sections necessary for each kit. Products... -
Page 16: Contents Vary According To Each Kit
Soft Case SS-R200 Speedlight for SB-R200 (x2) SB-R200 (x2) Speedlight Stand AS-20 (x2) Commander SU-800 Wireless Speedlight Commander SU-800 Nikon Close-up Speedlight Remote Kit R1 Soft Case Attachment Ring SS-SU800 for SX-1 SU-800 Soft Case SS-SX1 for IR Panel for SX-1... - Page 17 Diffuser SW-12 Close-up Speedlight Kit Case SS-MS1 Soft Case SS-SU800 for SU-800 Soft Case SS-R200 for SB-R200 Soft Case SS-SX1 for SX-1 Remote Speedlight SB-R200 Wireless Remote Speedlight SB-R200 Nikon Nikon Close-up Close-up Speedlight Speedlight Commander Remote Kit Kit R1C1 —...
-
Page 18: Speedlight Parts, Their Functions, And Accessories
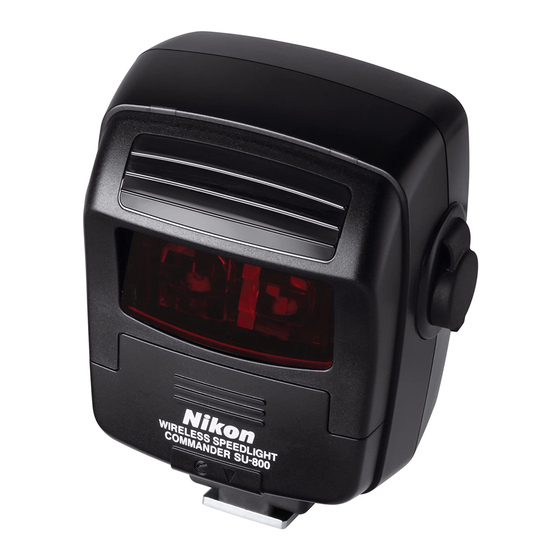
Speedlight parts, their functions, and accessories Wireless Speedlight Commander SU-800 D L I G P E E S S S E L E W I R 1 LCD Panel (p. 20) 2 Control Buttons 3 Ready-light Lights up when the Speedlight is fully recycled and ready to fire. - Page 19 MODE NO AF-ILL Control buttons on the SU-800 14 [ON/OFF] Button Press to turn the power on or off. To avoid accidental firing or a malfunction when carrying the SU-800 in your camera bag, turn off the flash unit. 15 [SEL](FUNC.) button •...
-
Page 20: Su-800'S Lcd Panel And Icons
Speedlight parts, their functions, and accessories SU-800’s LCD panel and icons Icons on the SU-800’s LCD panel show the status of the operations set. These icons vary depending on the settings and the combination of camera and flash units in use. •... - Page 21 Icons in Commander flash operation 1 Wireless Flash A control signal is sent from the SU-800 to the remote flash units such as the SB-R200. 2 Commander Mode Commander function is activated. 3 Low Battery-power Replace the battery. Icons in close-up flash operation (using cords) Display in TTL BL mode 1 Close-up Mode Close-up function is activated.
- Page 22 Speedlight parts, their functions, and accessories 8 Using Cords The SU-800 is connected to the SB-R200 using cords when mounted on cameras not compatible with CLS. This indicator blinks if the SB-R200 is not correctly connected. Displays when blinking • Icons blinking also indicate warning and errors. •...
- Page 23 Wireless Remote Speedlight SB-R200 9 10 1 [CHANNEL] select dial Sets the communication channel through which the Commander and SB-R200 units exchange data (p. 35). 2 [GROUP] select dial Sets the group of the SB-R200 (p. 36). 3 Target Light (Focus-Assist Illuminator) 4 Flash head 5 Release button...
- Page 24 IR Panel for Built-in Flash SG-3IR The SG-3IR can be attached to a camera’s hot shoe when a Nikon digital camera’s built-in flash (such as D70-Series) is used as a Commander (p. 50). Flexible Arm Clip SW-C1 The SW-C1 can be used to hold a Diffuser.
- Page 25 Soft Case SS-SU800 for SU-800 Soft Case SS-SX1 for SX-1 Close-up Speedlight Kit Case SS-MS1 The SC-30 is optional. Soft Case SS-R200 for SB-R200 SJ-R200 Caring for the Close-up Speedlight Kit Case SS-MS1 • Do not clean the case with a moistened cloth. Never use organic solvent or a bleaching agent such as thinner or benzene.
-
Page 26: Wireless Multiple Flash Operation In The Nikon Creative Lighting System (Cls)
Wireless multiple flash operation in the Nikon Creative Lighting System (CLS) When the SU-800 is used with Nikon CLS-compatible cameras, the remote flash units can be divided into a maximum of 3 groups, and the flash output level can be separately set for each group of Master/Commander and remote flash unit(s), providing wireless multiple flash operation (Advanced Wireless Lighting). -
Page 27: Commander Kit R1C1
(Used with Nikon CLS-compatible cameras) This section describes the necessary procedures for wireless close-up and Commander flash operations with a CLS- compatible camera when using the Nikon Close-up Speedlight Commander Kit R1C1. • For details on close-up flash operation, see page 65. -
Page 28: Procedures For Close-Up Flash Operation
Procedures for close-up flash operation Installing batteries in the SU-800. Battery chamber Slide open the battery chamber lid in the direction of the arrow. Install the battery, then close the battery chamber lid by sliding it back into place. Use CR123A (3V) lithium batteries. Confirming the close-up mode setting Make sure that the Commander/Close-up... - Page 29 Attaching the SU-800 to the camera. ON/OFF READY LOCK Mounting Foot-lock lever To lock the Speedlight in place, turn the lock lever clockwise approx. 90° until it stops. To unlock, turn the lever counterclockwise until it stops. LOCK Lock Ensure the SU-800 and camera body are turned off.
- Page 30 Procedures for close-up flash operation Installing batteries in the SB-R200. Slide open the battery chamber lid in the direction of the arrow. Install the battery, then close the battery chamber lid by sliding it into place. Use CR123A (3V) lithium batteries. Replacing the battery When the SB-R200’s battery power is weak, the green ready-light blinks after the...
- Page 31 Mounting Buttons on both sides to attach it to the Adapter Ring, then release. • Make sure that the Nikon logo (p. 24) on the SX-1 is on the under side facing down. • Use fingers of both hands to press the two Mounting Buttons on both sides to attach the SX-1 securely.
- Page 32 Procedures for close-up flash operation Using the SB-R200 off-lens Use the provided Speedlight Stand AS-20 to set up the SB-R200 at any location (p. 107). Adjust the SB-R200’s flash head. The flash head of the SB-R200 tilts 60° toward the optical axis and 45° in the opposite direction.
- Page 33 Turning on the camera, the SU-800 and SB-R200. MODE ON/OFF READY LOCK Press the [ON/OFF] buttons to turn on the camera, the SU-800 and SB-R200. Ensure that the ready-light on the SU-800 comes on. The ready-light on the SB-R200 lights up in green when the power is on, then turns red when the SB-R200 is fully recycled.
- Page 34 Procedures for close-up flash operation Setting the flash mode on the SU-800. MODE NO AF-ILL READY Press the [MODE] button on the SU-800 to set the flash mode to TTL. Use of TTL mode is recommended for normal flash shooting. ON/OFF Confirm the flash settings of the SB-R200.
- Page 35 Setting a channel number on the SU-800 and SB-R200. CHANNEL Set a channel number on the SU-800. Press the [SEL](FUNC.) button to display channel number (blinking). Press the [] or [] button to change the channel number. Press the [SEL](FUNC.) button again and the channel number will stop blinking.
- Page 36 Procedures for close-up flash operation Setting a group on the SB-R200. Set a group on each SB-R200. Rotate the [GROUP] select dial on each flash unit to set the group to A or B. Once GROUP set, the SB-R200 will operate according to the controls for each group as set on the SU-800.
- Page 37 Compose a picture and shoot with flash. READY LOCK If the red ready-light blinks immediately after shooting Compose the picture and shoot. Confirm that the red ready-lights on the SU-800 and SB-R200 are on then release the shutter. • For details on test firing, refer to page 88. In TTL mode, when the SB-R200 flash has fired at its maximum output and underexposure may have occurred, the red ready- light on the SB-R200 will blink for approx.
-
Page 38: Procedures For Commander Flash Operation
Procedures for Commander flash operation Setting Commander function on the SU-800. The Commander function enables the SU-800 to act as a Commander unit to trigger remote flash unit(s) without firing itself. Install the battery in the SU-800 in the same way as No. 1 in “Procedures for close-up flash operation.”... - Page 39 Setting up the SB-R200. Install the battery in the SB-R200 in the same way as No. 3 in “Procedures for close-up flash operation.” (p. 30) 3m (9.8ft.) Group C Group B (13.1ft.) Group A 3m (9.8ft.) • Be sure to place all SB-R200 units that are set in the same group close together. •...
- Page 40 Procedures for Commander flash operation Attaching the SB-R200 to the front of the lens The SB-R200 can be attached to the front of the lens through the Attachment Ring SX-1 (p. 31). Adjust the SB-R200’s flash head. The flash head of the SB-R200 tilts down to 60°...
- Page 41 Turning on the camera, the SU-800 and SB-R200. Press the [ON/OFF] buttons to turn on the camera, the SU-800 and MODE ON/OFF SB-R200. Ensure that the red ready-lights on the SU-800 and SB-R200 come on. READY LOCK...
- Page 42 Procedures for Commander flash operation Set the remote flash unit’s flash mode on the SU-800. MODE NO AF-ILL READY LOCK Press the [SEL](FUNC.) button to display the flash mode (blinking) of ON/OFF each group, then press [MODE] button to set the flash mode to TTL. Use of TTL mode is recommended for normal flash shooting.
- Page 43 Setting a channel number and a group on the SU-800 and SB-R200. Set a channel number and a group on the SU-800 and SB-R200 in the same way as No. 7 and 8 in “Procedures for close-up flash operation.” (pp. 35, 36)
- Page 44 Procedures for Commander flash operation Compose a picture and shoot with flash. READY LOCK If the red ready-light blinks immediately after shooting Compose the picture and shoot. Ensure that the red ready-lights on the SU-800 and SB-R200 are on, then release the shutter.
-
Page 45: (Used With Nikon Cls-Compatible Cameras)
Flash operation using the Nikon Close-up Speedlight Remote Kit R1 (Used with Nikon CLS-compatible cameras) This section describes the necessary procedures for wireless close-up flash operation with CLS-compatible cameras that feature a Commander function and the Nikon Close-up Speedlight Remote Kit R1. - Page 46 Flash operation using the R1 Installing batteries in the SB-R200. Slide open the battery chamber lid in the direction of the arrow. Install the battery, then close the battery chamber lid by sliding it into place. Use CR123A (3V) lithium batteries.
- Page 47 Mounting Buttons on both sides to attach it to the Adapter Ring, then release. • Make sure that the Nikon logo (p. 24) on the SX-1 is on the under side facing down. • Use fingers of both hands to press the two Mounting Buttons on both sides to attach the SX-1 securely.
- Page 48 Flash operation using the R1 Using the SB-R200 off-lens Use the provided AS-20 Speedlight Stand to set up the SB-R200 at any location (p. 107). Adjust the SB-R200’s flash head. The flash head of the SB-R200 tilts 60° toward the optical axis and 45° in the opposite direction.
- Page 49 Turning on the camera and SB-R200. Press the [ON/OFF] buttons to turn on the camera and SB-R200. Ensure that the red ready-lights on the camera and SB-R200 come on.
- Page 50 Flash operation using the R1 Setting the Commander function on the camera. Set the Commander function on the camera and flash mode on the SB-R200. • Be sure to read the instruction manual of the camera in use. Setting the D70-Series digital camera’s Commander mode With a D70-Series camera, go to “19: Flash Mode”...
- Page 51 SB-R200 to set the channel number. • Set the channel number of the SB-R200 to 3 when using a Nikon D70-Series digital camera, otherwise the flash will not fire. Rotate the [GROUP] select dial on the SB-R200 to set the group.
- Page 52 Flash operation using the R1 Compose a picture and shoot with flash. If the red ready-light blinks immediately after shooting Compose the picture and shoot. Ensure that the red ready-light on the SB-R200 is on, then release the shutter.
-
Page 53: Functions And Use Of The
Functions and use of the SU-800 This section describes the functions and use of the SU-800. SU-800’s available flash operations Using the SU-800 Functions of the SU-800... -
Page 54: Su-800'S Available Flash Operations
SU-800’s available flash operations The SU-800 has the following flash operations. Refer to the corresponding pages for details on each flash operation. Available flash Usable cameras operation Close-up (p. 65) CLS-compatible cameras Cameras not compatible with CLS Commander CLS-compatible cameras (p. -
Page 55: Using The Su-800
Using the SU-800 ON/OFF Slide open the battery chamber lid in the direction of the arrow. Install the battery, then close the battery chamber lid by sliding it into place. Use CR123A (3V) lithium batteries. Replacing the battery The low battery-power indicator blinks when the SU-800’s ready-light does not come on within about 30 seconds of the power being turned on or after the flash... - Page 56 Using the SU-800 READY Mounting Foot lock lever LOCK Lock MODE READY LOCK Rotate the Mounting Foot lock lever to the left, slide the SU-800’s Mounting Foot into the camera’s LOCK accessory shoe and turn the lock lever to the right. READY To lock the SU-800 in place, turn the lock lever clockwise approx.
- Page 57 The SU-800’s auto power-off function and camera’s exposure meter-off function With a camera body that is compatible with TTL auto flash, the SU-800 goes into standby mode when the camera’s exposure meter turns off. Without a camera body, if the SU-800 is not being used for approx. 40 seconds, the standby function activates and automatically turns the SU-800 off to conserve battery power.
-
Page 58: Functions Of The Su-800
Functions of the SU-800 The following functions can be set on the SU-800. Switching functions between close-up and Commander functions Use the Commander/Close-up select switch to toggle between close-up and Commander functions. Battery chamber Settings in each flash mode In close-up mode (p. 65) •... -
Page 59: Functions And Use Of The Sb-R200
Functions and use of the SB-R200 This section describes the functions and use of the SB-R200. SB-R200’s available flash operations Using the SB-R200 Functions of the SB-R200... -
Page 60: Sb-R200'S Available Flash Operations
SB-R200’s available flash operations The following flash operations are available with the SB-R200. Refer to the corresponding pages for details on each flash operation. Available flash operation Usable cameras and Speedlights Close-up (p. 65) Commander (p. 79) *1 The optional TTL Cord SC-30 is required (p. 123). Note: With CLS-compatible cameras, the TTL Cord SC-30 (optional) is not required. -
Page 61: Using The Sb-R200
Using the SB-R200 Attaching the SB-R200 to the front of the lens • The SB-R200 can be attached to the front of the lens using the Attachment Ring SX-1 (p. 31). Slide open the battery chamber lid in the direction of the arrow. Install the battery, then close the battery chamber lid by sliding it into place. - Page 62 Using the SB-R200 Group B (13.1 ft.) Set up the SB-R200. 3m (9.8ft.) Group C Commander unit 30˚ 30˚ Group A 3m (9.8ft.) With the SU-800 Adjust the SB-R200’s flash head. The flash head of the SB-R200 tilts down to 60°...
- Page 63 Press the [ON/OFF] button on the camera, or the SB-800, SU-800 and SB-R200 to turn on the power. Ensure that the red ready-light on the camera, the SB-800, SU-800 or on the SB-R200 comes on.
-
Page 64: Functions Of The Sb-R200
Functions of the SB-R200 The following functions can be set on the SB-R200. Switching the Target Light (focus assist lamp) on or off Use the Target Light button to illuminate or cancel the Target Light (p. 90). Items to be set •... -
Page 65: (Used With Cls-Compatible Cameras)
Details on close-up flash operation and shooting procedures (Used with CLS-compatible cameras) This section describes in detail wireless close-up flash operation and shooting procedures with CLS-compatible cameras. Also read “Close-up Speedlight Photography Examples,” a separate booklet that provides example photos. Be sure to read your camera instruction manual for specific information on camera settings and functions. -
Page 66: Close-Up Flash Operation
Close-up flash operation Wireless close-up flash operation is possible when the SU-800 and SB-R200 are used with CLS-compatible cameras. The SB-R200 can be attached to the front of the lens, held in your hand, or freely positioned by using the Speedlight Stand AS-20. - Page 67 Example E • Camera: D70 • Lens: AF-S DX Zoom-Nikkor 18-70mm f/3.5-4.5G IF-ED • Group A: SB-R200 (TTL) Example F Single-light close-up flash operation Comparison of lighting effects due to differences in shooting distances. The subject (F-4) is approx. 10 cm (3.9 in.) away from the camera, while subject (F-5) is 70 cm (2.3 ft.) from the camera.
-
Page 68: Overview Of Close-Up Flash Operation
Methods for setting up Set up the SU-800 and SB-R200 in the same way as “Flash operation using the Nikon Close-up Speedlight Commander Kit R1C1” (p. 28). Items to be set The following items can be set in the close-up flash operation. - Page 69 Flash modes In the close-up flash operation, the TTL and M (manual) flash modes are available. Every time you press the [MODE] button on the SU-800, the available flash mode changes. • The available flash modes vary, depending on cameras and lenses in use. •...
-
Page 70: Procedures For Close-Up Flash Operation
Procedures for close-up flash operation Procedures for dual-light close-up flash operation Display in dual-light close- up flash operation MODE NO AF-ILL READY MODE ON/OFF NO AF-ILL READY LOCK Press the [ON/OFF] buttons to turn on the camera, SU-800 and SB-R200. •... - Page 71 Setting the SB-R200’s flash output level ratio between groups A and B (in TTL mode). Press the [SEL](FUNC.) button to display flash output level ratio (blinking), then press the [] or [] button to increase or decrease the ratio. Press the [SEL](FUNC.) button once again and the flash output level ratio stops blinking.
- Page 72 Procedures for close-up flash operation CHANNEL GROUP READY Setting a channel number on the SU-800. Set the communication channel numbers of the SU-800 and SB-R200. Press the [SEL](FUNC.) button to display the channel number. Press the [] or [] button to set the channel number (blinking).
- Page 73 If the red ready-light blinks immediately after shooting In the M (manual) mode, set the manual flash output level for Groups A and B. In the TTL mode, when the SB-R200 flash has fired at its maximum output and underexposure may have occurred, the red ready-light on the SB-R200 blinks for approx.
- Page 74 Procedures for close-up flash operation Procedures for triple-light close-up flash operation Display in triple-light close- up flash operation MODE NO AF-ILL READY MODE ON/OFF NO AF-ILL READY LOCK Press the [ON/OFF] buttons to turn on the camera, the SU-800 and SB-R200. •...
- Page 75 Setting the SB-R200’s flash output level ratio between Groups A and B (in TTL mode). Press the [SEL](FUNC.) button to display flash output level ratio (blinking), then press the [] or [] button to increase or decrease the ratio. Press the [SEL](FUNC.) button once again and the flash output level ratio stops blinking.
- Page 76 Procedures for close-up flash operation CHANNEL Setting the manual flash output level for group C. Press the [SEL](FUNC.) button to display manual flash output level (blinking) for group C, then press the [] or [] button to increase or decrease the value. Press the [SEL](FUNC.) button once again and the flash output level stops blinking.
- Page 77 GROUP READY If the red ready-light blinks immediately after shooting Setting a group on the SB-R200. Rotate the [GROUP] select dial on the SB-R200 to set the group. Once set, the SB-R200 operates according to the controls as set on the SU-800. Compose a picture and shoot with flash.
-
Page 79: (Used With Cls-Compatible Cameras)
Details on Commander flash operation and shooting procedures (Used with CLS-compatible cameras) This section describes the details of available wireless Commander flash operation and necessary procedures with CLS-compatible cameras. Also read “Close-up Speedlight Photography Examples,” a separate booklet that contains example photos. Be sure to refer to your camera instruction manual for specific information on camera settings and functions. -
Page 80: Commander Flash Operation
Commander flash operation The Commander function enables the SU-800 to act as a Commander unit to trigger remote flash units without firing itself. By rearranging the remote flash setups, you can enjoy rendering a variety of lighting effects. Example D Triple-light flash operation Three flash units positioned at different locations are used in order to represent the... - Page 81 Example F Single-light flash operation (off-camera flash) With a single off-camera flash unit used behind the subject, distinct, intentional shadows appear, emphasizing the subject’s sturdiness. Usually, with an on-camera flash, a sense of flatness is unavoidable. However, in this situation, the position of the SB-R200 can be rearranged with ease, providing a variety of lighting and shadow effects.
-
Page 82: Overview Of Commander Flash Operation
Overview of Commander flash operation Example J Dual-light flash operation Ring-type lighting is used with a total of eight SB-R200 units attached to the Attachment Ring SX-1. Another SB-R200 is placed behind to bounce the light off the background wall to create a magical atmosphere. - Page 83 Methods for setting up Set up the Commander and remote flash units in the same way as in “Flash operation using the Nikon Close-up Speedlight Commander Kit R1C1” (p. 38). Items to be set The following items can be set in Commander flash operation.
-
Page 84: Procedures For Commander Flash Operation
Procedures for Commander flash operation Display in Commander mode Press the [ON/OFF] buttons to turn on the camera, the Commander and remote flash units. • Ensure that the red ready-lights come on and the flash units have been fully recycled. •... - Page 85 The last channel number to blink is the one that has been automatically set. unit(s) to 3 when using a Nikon D70-Series camera, otherwise the remote flash unit(s) will not fire. set the channel number.
- Page 86 Procedures for Commander flash operation READY If the red ready-light blinks immediately after shooting In the M (manual) mode, set manual flash output level. Compose a picture and shoot with flash Confirm that the red ready-lights are on then release the shutter.
-
Page 87: Other Functions
Other functions This section gives detailed information on each function of the SU-800 and SB-R200. Be sure to refer to your camera instruction manual for specific information on camera settings and functions. Test firing to confirm exposure Checking illumination before taking pictures (Modeling Illumination) Using the Target Light (Focus-Assist Illuminator) Autofocus flash operation in low light Flash output level compensation... -
Page 88: Test Firing To Confirm Exposure
Test firing to confirm exposure MODE ON/OFF NO AF-ILL READY LOCK In dual-light close-up flash operation When the [Test] button on the SU-800 is pressed, the SB-R200 in Group A fires in one second, followed by the flash unit in Group B in two seconds at an M1/64 flash output level. -
Page 89: Checking Illumination Before Taking Pictures (Modeling Illumination)
Checking illumination before taking pictures (Modeling Illumination) Press the Target Light button and the flash fires repeatedly at a reduced flash output level. This is useful for checking illumination and shadows cast on the subject before actually taking the picture. •... -
Page 90: Using The Target Light (Focus-Assist Illuminator)
Using the Target Light (Focus-assist Illuminator) By using the Target Light on the SB-R200, you can confirm the direction of flash light emitted. Illuminating and canceling the Target Light using the Target Light button on the SU-800 READY LOCK Illuminating and canceling the Target Light using the Target Light button on the SB-R200 Press and hold the Target Light button on the SU-800 for more than 1 second, all Target Lights on the... -
Page 91: Autofocus Flash Operation In Low Light
Autofocus flash operation in low light In Commander and Repeating flash operations, if light is too low for normal autofocus operation, the SU-800’s AF-Assist Illuminator comes on, enabling you to perform autofocus flash photography. This is activated by a signal from the camera. •... -
Page 92: Flash Output Level Compensation
Flash output level compensation You can make exposure compensation for the flash illuminated subject without affecting the background exposure by modifying the flash unit’s flash output level. Setting the flash output level compensation As a basic guide, some plus compensation may be necessary to make the main subject brighter. -
Page 93: Repeating (Rpt) Flash Operation
Repeating (RPT) flash operation What is Repeating flash operation In Repeating flash operation, the Speedlight fires repeatedly during a single exposure, creating stroboscopic multiple-exposure effects. This operation is useful when shooting fast-moving subjects. When using cameras compatible with CLS, the SU-800 controls the flash output of the remote flash units (such as the SB-800), which are divided into three groups (A, B, and C), independently for each group. - Page 94 Repeating (RPT) flash operation Setting a channel number on the SU-800 Press the [SEL](FUNC.) button on the SU-800 to display the channel number (blinking). Press the [] or [] button to change the channel number. Press the [SEL](FUNC.) button once again and the channel number will stop blinking. The last channel number to blink is the one that has been set automatically.
- Page 95 Setting the flash output level, the frequency (Hz), and the number of repeating flashes per frame Set the same manual flash output level, frequency, and number of repeating flashes per frame for each group. Press the [SEL](FUNC.) button to display the items to be set (blinking). Press the [] or [] button to change the values to be set.
-
Page 96: Auto Fp High-Speed Sync
Auto FP High-Speed Sync Available with compatible cameras. You cannot set the Auto FP High- Speed sync mode on the SU-800 or SB-R200 directly, but must set it on the camera. High-Speed flash synchronization at your camera’s highest shutter speed is now possible. In this mode, the Auto FP High-Speed Sync mode is automatically set when the shutter speed exceeds the camera’s sync shutter speed. - Page 97 In Manual flash mode In Auto FP High-Speed Sync in Manual flash mode, the SB-R200’s flash output level may be extremely low when the manual flash output level is set to a low value. However, this is not a malfunction.
-
Page 98: Flash Value Lock (Fv Lock)
Flash Value Lock (FV Lock) Available with compatible cameras. You cannot set the FV Lock function on the SU-800 or SB-R200 directly. Set it on the camera. Flash Value, or “FV,” is the amount of flash exposure for the subject. Using FV Lock with compatible cameras, you can lock in the appropriate flash exposure for the main subject. -
Page 99: Flash Operation Using Various Accessories
Flash operation using various accessories This section describes flash operation using various accessories. Be sure to read your camera instruction manual for specific information on camera settings and functions. Flash shooting with colored gel filters Flash shooting with the Extreme Close-Up Positioning Adapter SW-11 Flash shooting with the Diffuser SW-12 and Flexible Arm Clip SW-C1 Flash shooting with Speedlight Stand AS-20... -
Page 100: Flash Shooting With Colored Gel Filters
Flash shooting with colored gel filters The Color Filter Set SJ-R200 (for SB-R200 package) includes two filters for balancing the color of light: the FL-G1 for taking flash pictures under fluorescent light and the TN-A1 for use with incandescent/tungsten light, and the BLUE and RED filters for adding special colors to a scene. - Page 101 Balancing light from the flash With digital cameras, if you shoot flash pictures under fluorescent light with the camera’s white balance set to “Flash,” the main subject illuminated by the flash will look normal. However, the background will come out green. To compensate, use the FL-G1 (green gel filter) to convert the light coming from the flash to the same color as fluorescent light, then adjust the camera’s white balance to “Fluorescent.”...
- Page 102 Flash shooting with colored gel filters How to use colored gels filters White bal. Auto Incandescent Fluorescent Dir. sunlight Flash Using colored gel filters Purpose Balances the color of light from the flash to match that of fluorescent light Balances the color of light from the flash to match that of incandescent or tungsten light Creates interesting effects by...
-
Page 103: Flash Shooting With The Extreme Close-Up Positioning
Flash shooting with the Extreme Close-Up Positioning Adapter SW-11 With the Extreme Close-Up Positioning Adapter SW-11, you can curve the SB-R200’s flash light toward the optical axis to create lighting effects when taking close-up shots. • When using the SW-11, the lens-to-subject distance should be kept to within 15 cm (5.9 in.). - Page 104 Flash shooting with the Extreme Close-Up Positioning Adapter SW-11 0˚ 60˚ Using the Extreme Close-Up Positioning Adapter SW-11 effectively Use the SW-11 when taking flash pictures at close distance for more effective results. Be sure to tilt the flash head by 60° toward the optical axis. Tilt the SB-R200’s flash head down 60°...
-
Page 105: Flash Shooting With The Diffuser Sw-12 And Flexible Arm Clip Sw-C1
Flash shooting with the Diffuser SW-12 and Flexible Arm Clip SW-C1 By attaching the provided Nikon Diffuser SW-12 over the flash head, you can diffuse the SB-R200’s flash light even more, creating extremely soft light with virtually no shadows. Example C... - Page 106 Flash shooting with the Diffuser SW-12 and Flexible Arm Clip SW-C1 Attachment of the Flexible Arm Clip SW-C1 to the SX-1 SX-1 SW-12 Notes on using the SW-C1 • The maximum weight the SW-C1 can hold is approx. 70g (2.5 oz.). Align one of the Flexible Arm Clips with the Attachment Ring SX-1’s Mounting groove.
-
Page 107: Flash Shooting With Speedlight Stand As-20
Flash shooting with Speedlight Stand AS-20 Use the provided Speedlight Stand AS-20 to freely position the SB-R200. The Attachment Ring SX-1 can be attached to a tripod. Example H Dual-light flash operation When shooting clear glasses (H-4) with a single built-in flash unit, distinct shadows appear behind the subject, meaning the texture of the glass cannot be reproduced successfully. - Page 108 Flash shooting with Speedlight Stand AS-20 Attaching the AS-20 to the SX-1 Setting up the SB-R200 Set up the SB-R200 flash units as shown in the diagram below. Group B (13.1ft.) • The effective shooting distance between the Commander and the SB-R200 varies depending on the Commander unit (such as a camera or Speedlight) in use.
-
Page 109: Flash Shooting Using Slr Cameras Not Compatible With Cls
Flash shooting using SLR cameras not compatible with CLS Use the TTL Cord SC-30 (optional) to connect the SU-800 to the SB-R200 with SLR cameras not compatible with CLS. Overview of close-up flash operation (using cords) Procedures for close-up flash operation (using cords) -
Page 110: Overview Of Close-Up Flash Operation (Using Cords)
Setting up the SU-800 and SB-R200. Set up the SU-800 and SB-R200 in the same way as described in “Flash operation using the Nikon Close-up Speedlight Commander Kit R1C1” (p. 28). • The same set-up is applicable when using the Speedlight Stand AS-20. - Page 111 Available flash modes In close-up flash operation (using cords), the TTL BL, TTL and M flash modes are available. Every time you press the [MODE] button, the available flash mode changes. • Available flash modes vary depending on the cameras and lenses in use. •...
-
Page 112: Procedures For Close-Up Flash Operation (Using Cords)
Procedures for close-up flash operation (using cords) MODE NO AF-ILL READY Turn on the camera and SU-800. After turning on the camera, press the [ON/OFF] button on the SU-800 to turn on the SU-800 and SB-R200. • The red ready-lights on the SU-800 and SB-R200 come on when fully recycled. - Page 113 MODE ON/OFF NO AF-ILL READY LOCK READY If the red ready-light blinks immediately after shooting READY LOCK In the M (manual) mode, set manual flash output level. Press the [Test] button to test fire the flash units. Press the [Test] button on the SU-800 to test fire the SB-R200.
- Page 114 Procedures for close-up flash operation (using cords) Checking the illumination before actually taking pictures (Modeling Illumination) in close-up flash operation (using cords) READY LOCK Using the Target Light (Focus-assist Illuminator) in close-up flash operation (using cords) READY LOCK Press the Target Light button on the SU-800 and release within one second and the SB-R200’s flash fires repeatedly at a reduced flash output level.
-
Page 115: Reference Information
Reference information This section covers available flash modes, troubleshooting, Speedlight care, Specifications, and optional accessories. Usable lenses with limited functions with the SB-R200 Available flash modes Notes on continuous flash operation Optional accessories Tips on Speedlight care Notes on batteries Troubleshooting Specifications Index... -
Page 116: Available Flash Modes
Available flash modes The TTL and M (manual) flash modes are available with the SU-800 and SB-R200. Use of TTL mode is recommended for normal flash photography. • Be sure to read the instruction manual of the camera in use. TTL auto flash mode In this mode, the flash illumination that is reflected back from the subject is detected by the camera’s TTL auto flash sensor and the camera automatically... - Page 117 Determining proper flash operation distance range in dual-light close-up flash operation with lens in use Use the table below to determine applicable apertures at the desired reproduction ratio. The proper apertures depend on ISO sensitivity, lens focal length, and desired reproduction ratio.
- Page 118 Available flash modes Aperture to set on the lens and effective f-number Effective f-numbers of close-up lenses such as Micro-Nikkor lenses vary, while brightness of image on film decreases when reproduction ratio increases. The relationship between the reproduction ratio and the effective f-number is: Fe = F (1 + M) where Fe = Effective f-number (actual lens speed) F = Aperture to set on the lens...
- Page 119 Auto Aperture (AA) flash mode The SU-800’s built-in sensor measures the flash illumination reflected from the subject and controls the flash output in combination with data automatically transmitted from the camera and lens to the SU-800, including the ISO sensitivity value and exposure compensation value as well as the aperture and focal length of the lens.
-
Page 120: Usable Lenses With Limited Functions With The Sb-R200
Usable lenses with limited functions with the SB-R200 Maximum number of SB-R200 units to be attached to the front of the lens AF Nikkor lenses Lens AF Nikkor 28mm f/1.4D AF Micro-Nikkor 60mm f/2.8D AF Nikkor 85mm f/1.4D IF AF DC-Nikkor 105mm f/2D AF Micro-Nikkor 105mm f/2.8D AF DC-Nikkor 135mm f/2D AF Nikkor 180mm f/2.8D IF-ED... - Page 121 When using the SB-R200 attached to the lens Be careful not to knock and damage the lens when using the SB-R200 units attached to the front of the lens. Focal length at which vignetting occurs Digital SLR (Nikon DX 135 format (24- format) cameras 36mm) SLR cameras...
-
Page 122: Notes On Continuous Flash Operation (In Close-Up Flash Operation (Using Cords))
Notes on continuous flash operation (in close-up flash operation (using cords)) WARNING Max. number of continuous firings Flash mode TTL auto flash Manual flash (Flash output level: M1/1, M1/2) Manual flash (Flash output level: M1/4 to M1/64) Synchronization during continuous flash operation It is possible to take up to the number of frames during continuous operation as shown in the table below. -
Page 123: Optional Accessories
Optional accessories TTL Cord SC-30 Close-up flash operation (using cords) is possible in the TTL mode with the optional TTL Cord SC-30 to connect the SU-800 and the SB-R200. Color Filter Set SJ-2 A total of 20 filters in 8 models are provided. •... -
Page 124: Tips On Speedlight Care
Tips on Speedlight care WARNING Cleaning • Use a blower brush to remove dirt and dust from the Speedlight and clean it with a soft, clean cloth. After using the Speedlight near saltwater, wipe the flash unit with a soft, clean cloth moistened slightly with tap water to remove the salt, then dry it with a dry cloth. -
Page 125: Notes On Batteries
Notes on batteries Usable batteries Use CR123A (3V) lithium batteries. • Do not use any other type of batteries. • Non-rechargeable. Never attempt to recharge these batteries in a battery charger. Otherwise, they may explode. • Depending on battery specifications, when these batteries become hot, the safety circuits are activated, cutting off power. -
Page 126: Troubleshooting
If the Speedlight malfunctions or a warning indication appears on the Speedlight’s LCD panel, use the following items to determine the cause of the problem before taking your Speedlight to a Nikon service center for repair. Warning indications in the Commander SU-800 and the... - Page 127 Communication error warning with the SB-R200 In the Commander mode Using cords indicator Incompatible camera warning Incompatible lens warning If, due to a weak battery etc., data communication fails with either group A or B when using a camera not compatible with CLS, even though the SU-800 and the SB-R200 are properly connected, the corresponding group (A or B) indicator blinks.
- Page 128 Troubleshooting Flash malfunction warning While the SB-R200 is used as a wireless remote flash unit, the red ready-light rapidly blinks four times and stops for 0.5 sec. This cycle is repeated six times if the flash unit receives a signal such as Non-TTL auto flash or Repeating flash. Problems with the Commander SU-800 and the Remote Speedlight SB-R200 Problem...
- Page 129 Ready-light warning inside the camera’s viewfinder Problem The ready-light inside camera’s viewfinder blinks when the SU-800 is mounted on cameras not compatible with CLS and the flash mode is set to TTL in close-up flash operation (using cords). A note on microcomputer-controlled Speedlights The Speedlight incorporates a microcomputer to control flash operations.
-
Page 130: Specifications
Specifications Wireless Speedlight Commander SU-800 Infrared-pulse emitting communication using a flash discharge tube Transmission mode Approx. 20m (66 ft.) for SB-800/SB-600 Transmission Approx. 4m (13 ft.) for SB-R200 at normal settings range No. of channels No. of groups Approx. 1200 No. - Page 131 Wireless Remote Speedlight SB-R200 Automatic Insulated Gate Bipolar Transistor (IGBT) and series Electronic circuitry (for wireless remote flash unit only) construction 10/33 (ISO 100, m/ft.), 14/46 (ISO 200, m/ft.) Guide number Angle of coverage Covering light distribution of 24mm lens; 60° (vertical) and 78° (horizontal) i-TTL, D-TTL, TTL (film-based cameras) Flash mode...
-
Page 132: Index
Index • For Speedlight parts, icons etc. on the LCD panel, refer to “Speedlight parts, their functions, and accessories” (p. 18) and “SU-800’s LCD panel and icons” (p. 20). Symbol [](left) button ...19 [](right) button... 19 [AB] select button ... 19 [CHANNEL] select dial ... - Page 133 NO AF-ILL ... 91 Nikon Close-up Speedlight Commander Kit R1C1 ... 15 Nikon Close-up Speedlight Remote Kit R1... 15 Nikon Creative Lighting System (CLS)... 7 Number of flashes... 95 R1... 15 R1C1 ... 15 Ready-light... 18, 23 Recommended cameras ... 13 Recommended lenses ...
- Page 134 No reproduction in any form of this manual, in whole or in part (except for brief quotation in critical articles or reviews), may be made without written authorization from NIKON CORPORATION. TT5J00200101(11) 8MSA2211--...
Need help?
Do you have a question about the R1 and is the answer not in the manual?
Questions and answers