Table of Contents
Advertisement
Quick Links
Advertisement
Table of Contents

Related Manuals for V-ZUG CoffeeCenter V6000 45


Summary of Contents for V-ZUG CoffeeCenter V6000 45
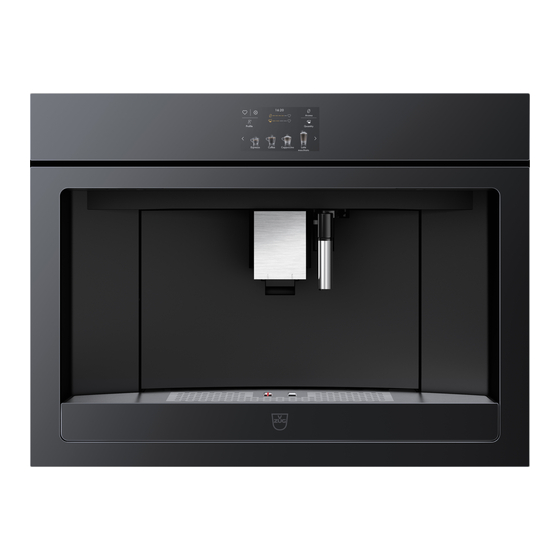
- Page 1 Operating instructions CoffeeCenter V6000 45 Automatic built-in coffee machine...
- Page 2 Validity These operating instructions apply to: Model designation Type Size system CoffeeCenter V6000 45 COC6T-25005 60-450 Variations depending on the model are noted in the text. © V-ZUG Ltd, CH-6302 Zug, 2022...
-
Page 3: Table Of Contents
Contents Customising drinks settings ....... 26 Safety warnings 5 Cancelling changes to settings...... 27 Symbols used............ 5 User settings 27 General safety precautions........ 5 Appliance-specific safety precautions .... 7 Overview of user settings........ 27 Instructions for use.......... 8 Customising user settings........ - Page 4 9.10 Cleaning the infuser .......... 35 9.11 Cleaning the milk frother........ 36 9.12 Cleaning the hot-water/steam spout.... 38 9.13 Cleaning the connection nozzle...... 38 9.14 Descaling .............. 38 Trouble-shooting 41 10.1 Displayed messages........... 41 10.2 Unsatisfactory results.......... 47 10.3 Other possible problems........ 48 Accessories 49 Technical data 50 Disposal 50 Service &...
-
Page 5: Safety Warnings
Safety warnings ▸ Indicates step-by-step instructions. Symbols used – Describes how the appliance reacts Important warnings are identified by these to the steps taken. symbols. ▪ Indicates a list. Failure to observe the Operating Instruc- tions could result in electric shock, serious General safety precautions injury, burns, fire or damage to the appli- ance. - Page 6 1 Safety warnings sidered improper and thus ▪ If the plug or power cable is dangerous. The manufacturer damaged, it must be replaced is not liable for damage deriv- by customer services only to ing from improper use of the avoid all risk.
-
Page 7: Appliance-Specific Safety Precautions
1 Safety warnings the appliance in a safe way ▪ In order to disconnect the ap- and understand the hazards pliance completely from the involved. power supply, set the main ▪ Children shall not play with switch on the side of the ap- the appliance. -
Page 8: Instructions For Use
1 Safety warnings Caution! Caution! ▪ Do not hold on to the coffee ▪ Do not use the appliance machine when it is out of the when pulled out. Make sure cabinet. the appliance is switched off before pulling it out. Excep- ▪... - Page 9 1 Safety warnings Cleaning and maintenance of ▪ If the power socket does not match the plug on the appliance, have the socket materials in contact with food replaced with a suitable type by a qual- ▪ The first time you use the appliance, or ified professional.
-
Page 10: Using For The First Time
Using for the first time Coffee has been used to factory test the appliance, and so it is possible that there may be traces of coffee in the mill. The appliance is, however, guaranteed to be completely new. Before operating the appliance for the first time, the following steps should be taken: Selecting language ▸... -
Page 11: Appliance Description
3 Appliance description Appliance description Construction With the service door closed 12 11 Service door Main switch ON/OFF button Connection nozzle Interior illumination Cup illumination Display Coffee spout Adjusting knob for coffee mill IEC plug Beans container Mains cable Lid for beans container Measure holder Ground coffee funnel Heatable tray for coffee cups... -
Page 12: Operating And Display Elements
3 Appliance description With the service door open Drip tray Service door Drip plate Coffee spout Grounds container Tray for milk jug Water tank Tray for hot-water/steam spout Lid for water tank Infuser assembly Operating and display elements Display 13:51 Aroma Beverage selection Profile 1... -
Page 13: Milk Frother
3 Appliance description Milk frother Thermal casing Milk jug INSERT Milk tube Milk spout CLEAN Lid for milk frother Adjusting knob Release button Adjusting knob positions Insert adjusting knob No milk froth A little milk froth A lot of milk froth Clean milk spout and milk frother Hot-water/steam spout Release button... -
Page 14: Operating The Appliance
4 Operating the appliance Operating the appliance Switching the appliance on Danger of burns! Hot water comes out of the coffee spout during rinsing. ▸ Slide the appliance out. ▸ Set the main switch to I. ▸ Slide the appliance in. ▸... -
Page 15: Filling The Beans Container
4 Operating the appliance Filling the beans container Do not use green, caramelised or candied coffee beans or the like. They could clog up the coffee mill and damage it. ▸ Twist open the lid 1 of the beans container. ▸... -
Page 16: Attaching The Milk Frother
4 Operating the appliance Attaching the milk frother ▸ Remove the lid 1 from the milk jug. ▸ Fill the milk jug 3 with milk up to the MAX level. ▸ Insert the milk tube 2 into the lid 1 of the milk jug. ▸... - Page 17 4 Operating the appliance ▸ Touch . ▸ Unpack the water filter 1. ▸ When the corresponding message appears in the dis- play: Turn the date indicator 2 until the next 2 months of use are displayed. ▸ Touch . ▸...
- Page 18 4 Operating the appliance ▸ Touch . ▸ When the corresponding message appears in the dis- play: Place a 0.5-litre receptacle under the coffee spout 5 and the hot-water/steam spout 6, then touch – Hot water comes out of the hot-water/steam spout When hot water stops coming out of the hot-water/ steam spout 6: –...
-
Page 19: Switching The Appliance Off
4 Operating the appliance Permanently removing the water filter ▸ Remove the water tank 1. ▸ Take off the lid and remove the water filter 2. ▸ Touch the button. – The user settings menu appears in the display. ▸ Touch repeatedly until the user setting pears in the display. -
Page 20: Making Beverages
5 Making beverages Making beverages Overview of options for making beverages Your appliance offers various options for making beverages. Coffee drinks can be made using either coffee beans (see page 21) or ground coffee (see page 22). The order in which all the beverages are displayed is based on the user's fre- quency of selection. -
Page 21: Making Coffee Using Coffee Beans
5 Making beverages Making coffee using coffee beans ▸ If the appliance is switched off: Switch the appliance on (see page 14). ▸ Place a cup under coffee spout 1. ▸ Lower the coffee spout so that it is as near as pos- sible to the cup. -
Page 22: Making Coffee Using Ground Coffee
5 Making beverages Making coffee using ground coffee Never add ground coffee when the appliance is switched off. The ground coffee can otherwise spread through the inside of the machine, damaging it. If ground coffee is used, only one cup of coffee can be made at a time. ▸... -
Page 23: Making Drinks With Milk
5 Making beverages Making drinks with milk Ensure that the temperature of the milk is 5 °C. ▸ If the appliance is switched off: Switch the appliance on (see page 14). INSERT ▸ Attach the milk frother 1 (see page 16). CLEAN ▸... -
Page 24: Customising The Aroma And Quantity
5 Making beverages Customising the aroma and quantity The aroma and quantity of each coffee drink can be customised before preparation. ▸ If the appliance is switched off: Switch the appliance on (see page 14). ▸ Place a cup under the coffee spout 1. ▸... -
Page 25: Milk Froth / Steam Delivery
5 Making beverages Milk froth / steam delivery Danger of burns! The appliance produces steam! Do not leave the appliance unattended while milk froth is being produced or liquids are being heated. ▸ If the appliance is switched off: Switch the appliance on (see page 14). -
Page 26: Favourites
6 Favourites Favourites The aroma and quantity of all drinks can be individually customised. Defining profile ▸ Touch the button. 13:51 Aroma – The profile menu appears in the display. ▸ Touch repeatedly until the desired profile ap- Profile 1 Quantity pears in the display. -
Page 27: Cancelling Changes To Settings
7 User settings Cancelling changes to settings Changes to settings can be cancelled at any time. While customising: ▸ Touch – The vertical bars go out. – In the display appears: «New settings not saved» ▸ Touch – The start screen appears in the display. After customising: –... -
Page 28: Descaling
7 User settings Descaling The appliance can be descaled with this user setting. ▸ Touch the button. – The user settings menu appears in the display. ▸ Touch repeatedly until the user setting appears in the display. ▸ Touch . ▸... -
Page 29: Energy Saving Mode
7 User settings 7.11 Energy saving mode When the user setting is enabled, energy consumption is reduced in compliance with European regulations; appears on the start screen. This user setting is enabled by de- fault. 7.12 Coffee temperature The temperature of the water used for making drinks can be changed. The following set- ting ranges for the temperature of the water can be selected: ▪... -
Page 30: Language
8 Demo mode 7.14 Language The language in the display can be changed. Different languages are available for selec- tion. 7.15 Acoustic signal When this user setting is enabled, an acoustic signal is emitted whenever a symbol is touched or a part of the appliance is removed or replaced. This user setting is enabled by default. -
Page 31: Reactivating
9 Care and maintenance – The demo mode is started. – The possible main functions appear one after the other in the display. The demo mode runs 12 hours or until the ON/OFF button is pressed. The ap- pliance enters the standby mode. Reactivating The demo mode can be reactivated if the appliance is in the standby mode. -
Page 32: Cleaning The Internal Circuit
9 Care and maintenance Appliance part Cleaning interval Ground coffee funnel ▪ 1× per month Infuser assembly ▪ 1× per month Milk frother ▪ After each use Hot-water/steam spout ▪ Each time after using milk Connection nozzle ▪ Each time after using the milk frother Descale the appliance ▪... -
Page 33: Cleaning The Grounds Container
9 Care and maintenance Cleaning the grounds container Danger of clogging up! When the following appears in the display: «Empty grounds container», it indicates that the grounds container must be emptied and cleaned. Otherwise the next time a coffee is made the grounds container may become overfull and clog up the ap- pliance. -
Page 34: Cleaning The Exterior
9 Care and maintenance Cleaning the exterior ▸ Remove any soiling or excess cleaning solution im- mediately. ▸ Clean the surfaces with a soft cloth dampened with water and a little washing-up liquid – for metallic sur- faces rub in the direction of the original polish lines. ▸... -
Page 35: Cleaning The Ground Coffee Funnel
9 Care and maintenance Cleaning the ground coffee funnel ▸ Open the lid 1 of the beans container. ▸ Remove any residues of coffee or grease from the funnel 2 using a cloth dampened with water. 9.10 Cleaning the infuser Removing the infuser Switch the appliance off before removing the infuser! ▸... -
Page 36: Cleaning The Milk Frother
9 Care and maintenance Inserting the infuser ▸ If necessary, compress the infuser 1 to the right size. ▸ Slide the infuser 1 on to the pin 2 of the support. ▸ At 3, depress the infuser until the infuser 1 clicks into place. - Page 37 9 Care and maintenance Disassembling the milk frother ▸ Remove the lid 1 from the milk jug. ▸ Extract the milk jug 2 from the thermal casing 3, hold- ing it by the side grips. ▸ Remove the milk spout 4 and milk tube 5. ▸...
-
Page 38: Cleaning The Hot-Water/Steam Spout
9 Care and maintenance 9.12 Cleaning the hot-water/steam spout Small parts may present a choking hazard! Keep the individual parts of the hot-water/steam spout away from children! ▸ Remove the hot-water/steam spout and disassemble the individual parts. ▸ Clean the individual parts in the dishwasher or with hot water and a mild detergent. - Page 39 9 Care and maintenance Starting descaling Incorrect descaling can result in damage to the appliance Do not turn the appliance off during the descaling process! When the «Descaling necessary. Press to start (~45 mins.)» message appears in the display: ▸ Touch to start descaling later.
- Page 40 9 Care and maintenance Discarding the rinsing solution ▸ When the corresponding message appears in the dis- play: Remove the water tank 2, rinse under running water, fill with water up to the MAX level and place back in the appliance. ▸...
-
Page 41: Trouble-Shooting
10 Trouble-shooting Trouble-shooting This section lists faults that can be solved simply by following the instructions given. If another fault is displayed or the fault cannot be remedied, please call Customer Ser- vices. 10.1 Displayed messages Displayed message Possible cause Solution Fill tank with fresh water ▪... - Page 42 10 Trouble-shooting Displayed message Possible cause Solution Insert grounds container ▪ The grounds con- ▸ Remove the drip tray. and drip tray tainer has not been ▸ Insert the grounds container put back. and drip tray again. Add pre-ground coffee, ▪...
- Page 43 10 Trouble-shooting Displayed message Possible cause Solution Ground too fine. Set mill 1 ▪ The grinding is set ▸ During the preparation of the level higher while in oper- too fine. coffee, turn the adjusting ation ▪ The coffee is de- knob for the coffee mill clock- livered a drop at a wise one position at a time...
- Page 44 10 Trouble-shooting Displayed message Possible cause Solution Insert infuser assembly ▪ The infuser assembly ▸ Insert the infuser assembly has not been inserted (see page 36). correctly. Water circuit empty. Press ▪ The water circuit is ▸ Touch to fill empty.
- Page 45 10 Trouble-shooting Displayed message Possible cause Solution Turn adjusting knob to a ▪ The adjusting knob of ▸ To make coffee with milk, turn milk position the milk frother was in the adjusting knob of the milk position frother to the pos- when the milk frother ition (see page 23).
- Page 46 10 Trouble-shooting Displayed message Possible cause Solution ▪ The appliance is ▸ Descale the appliance (see scaled up. page 38). ▪ The water filter is ex- ▸ Replace (see page 18) or re- hausted. move (see page 19) the wa- ter filter.
-
Page 47: Unsatisfactory Results
10 Trouble-shooting 10.2 Unsatisfactory results Problem Possible cause Solution The coffee is not hot. ▪ The cups were not ▸ Enable the user setting «Cup preheated. warmer» (see page 27). ▸ Place the cups on the heat- able coffee cup tray. ▸... -
Page 48: Other Possible Problems
10 Trouble-shooting Problem Possible cause Solution The milk contains large ▪ The milk is not cold ▸ Use skimmed or semi- bubbles and squirts out of enough. skimmed milk at a temperat- the milk spout or there is ▪ The milk used was ure of 5 °C. -
Page 49: Accessories
11 Accessories Problem Possible cause Solution The descaling process ▪ The hot-water/steam ▸ Clean the hot-water/steam does not come to an end spout is dirty. spout (see page 38). and the appliance re- ▸ Continue with the descaling peatedly requests that the process. -
Page 50: Technical Data
12 Technical data Technical data Type of appliance – Automatic built-in coffee machine Model designation – CoffeeCenter V6000 45 Voltage 220-240 Frequency 50/60 Current Max. 10 Power consumption 1350 Pressure 1.5 (15 bar) Capacity of water tank Dimensions 59.6×45.4×48 Weight Disposal 13.1... -
Page 51: Service & Support
Your repair order Call the free service number 0800 850 850 to contact your nearest V-ZUG service centre. You can arrange an on-site visit by us by phone if you wish. General queries, accessories and service agreement V-ZUG will be happy to help you with any general administrative or technical queries, to accept your orders for accessories and spare parts and to inform you about our pro- gressive service agreements. - Page 52 1097910-02 V-ZUG Ltd, Industriestrasse 66, CH-6302 Zug Tel. +41 58 767 67 67, Fax +41 58 767 61 61 info@vzug.com, www.vzug.com Service Centre: Tel. 0800 850 850...
Need help?
Do you have a question about the CoffeeCenter V6000 45 and is the answer not in the manual?
Questions and answers