Table of Contents
Advertisement
Advertisement
Table of Contents

Related Manuals for V-ZUG Supremo SL


Summary of Contents for V-ZUG Supremo SL
- Page 1 V-ZUG Ltd Coffee-Center Supremo SL/XSL Operating instructions...
- Page 2 The model number corresponds to the first three numbers on the identification plate. These operating instructions apply to the model: Type Model no. CCS-SL Variations depending on the model are noted in the text. © V-ZUG Ltd, CH-6301 Zug, 2008...
-
Page 3: Table Of Contents
Contents Safety precautions ..........Appliance description Operating and display elements . - Page 4 Safety precautions The appliance corresponds to recognised technology standards and the re- levant safety regulations. Proper use of the appliance is however essential to avoid damage and accidents. Please therefore follow the precautions given in these operating instructions. These operating instructions must be retained and passed onto future owners.
- Page 5 Safety precautions Dangers The appliance must not be used by children or persons not instructed in the use of the appliance. The appliance is dangerous to children. Keep children away from the appliance. Switch off the appliance when unattended. Keep packaging material out of the reach of children. Do not point the steam-/hot water nozzle at yourself or others (dan- ger of scalding).
-
Page 6: Operating And Display Elements
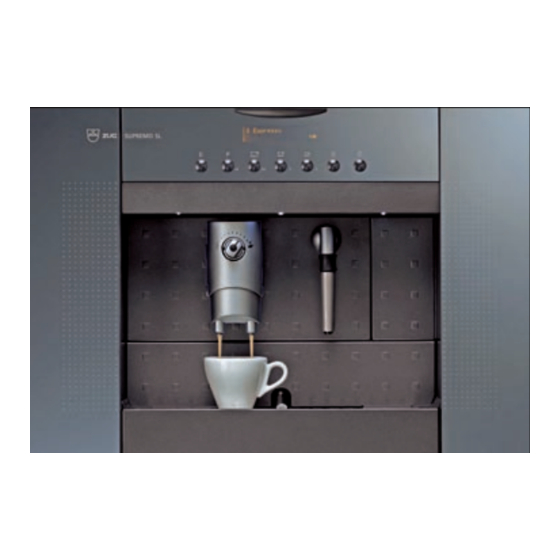
Appliance description Operating and display elements To open panel, press strip handle Select product Ready for use Strip handle Operating panel (can be folded out) AromaControl Nozzle Dispensing head Service door Drip tray Dregdrawer Drip grill Display «Drip tray» Operating panel (can be folded out) Select product Ready for use... -
Page 7: Behind The Operating Panel
Appliance description Behind the operating panel Coffee bean hopper Water tank Main switch Behind the service door Grinder setting Brew unit Accessories Brush Drip guard Water filter Water-hardness Detergent test strip tablets ‘Aqua Prima‘ Available from specialist retailers... -
Page 8: Water Hardness
Using for the first time Water hardness Range/User settings Hardness 1 Hardness 2 Hardness 3 Hardness 4 Water-hardness test strip 0–7 7–14 14–21 above 21 Corresponds to German degree of hardness [˚dH] Corresponds to French degree of hardness [˚fH] 0–12.5 12.5–25 25–37 .5 above 37 .5... -
Page 9: Switching On The Appliance
Using for the fi rst time Switching on the appliance Switch on appliance at Close operating panel. «Ventilate» main switch appears in plain text display For language settings, see ‘User Settings/Programming‘. Ventilating the system Hot water Dispensing... ... - Page 10 User Settings/Programming The fl ashing symbol in the plain text display denotes the user setting selected. Start Function Settings Cancel by pressing ‘ESC‘ Select Confi rm Select Confi rm Cancel Standby Energy saving Appliance switches over to energy-saving mode. Rinsing On - Off Rinsing...
- Page 11 User Settings/Programming Start Function Settings Cancel by pressing ‘ESC‘ Select Confi rm Select Confi rm Cancel Aroma espresso Mild - Normal - Strong Aroma of espresso Select amount of ground coffee for espresso. Aroma of coffee Aroma coffee Mild - Normal - Strong Select amount of ground coffee for coffee.
-
Page 12: Aromacontrol
Preparing coffee Espresso Energy saving Can be cancelled by Hot water and steam can scald! Point nozzle at drip tray! pressing the Place 1 or 2 cups under Espresso dispensing head Preheat cups For large cups: push dispensing head up Select pr Ready fo... -
Page 13: Cappuccino
Cappuccino After starting the steam function, some condensed water will be produced at fi rst. Put the milk into a suitable vessel. Cappuccino Cold milk froths better ■ Fill vessel no more than ⁄ full ■ Steam Start steam Dispensing... roduct or use Caution: steam spray! - Page 14 Drawing hot water/steam Danger: hot water and steam can scald! Point nozzle at drip tray. Place cup under nozzle Hot water Start hot water Hot water Dispensing... Press the Stop hot water Press the Hot water Adjusting the fi lling amount Programm.
-
Page 15: Water Tank/Coffee Bean Hopper
Care and maintenance If required, wipe the appliance with a damp cloth. Clean the brewing group and accessories on a weekly basis under fl owing water, without detergent. Never wash appliance parts in the dishwasher, and never dry them in the oven or micro- wave. -
Page 16: Dispensing Head
Care and maintenance Dispensing head Push back dispensing Open service door Push top button head, push drip guard to (push button is and pull dispensing AromaControl position. behind cover). head forwards. Clean without Remove drip tray detergent under the Nozzle tap. - Page 17 Descaling Decalcify Whenever plain text display shows or as required. Under no circumstances use vinegar, as appliance will otherwise be damaged. Use commercially available descaling agents that are suitable for this appliance. If the appliance is switched off during descaling, then descaling will continue after the appliance is switched on again.
- Page 18 Descaling Rinsing Press the button to cancel and to continue the procedure Rinse machine Press water key The cleaning process is completed as soon as the water tank is empty and Rinsing finished Press the key, Rinse water tank Press water key is displayed in the text Rinsing begins...
- Page 19 Rinsing cycle Every 14 days or after 250 cups Before starting the rinsing cycle, empty drip tray and have a spare vessel handy. Large amounts of water will be produced (approx. 8.5 dl), therefore watch vessel closely. Switch the appliance on prior to the cleaning cycle. Once started, a rinsing cycle cannot be interrupted.
- Page 20 Trouble-shooting Problem Solution page Turn on main switch Appliance does not switch ■ Check power connection Check fuse in house wiring system Preheat cups with hot water Coffee is not hot enough ■ Set brewing temperature correctly ...
- Page 21 Trouble-shooting Message Solution Brewunit blocked Insert brew unit correctly Dregdrawer missing Insert drip tray/dregdrawer correctly Close door Close service door Ventilate Ventilation system (on initial use). Press the Brewunit blocked Call Customer Services Grinder blocked ...
- Page 22 Disposal Packaging All packaging materials (cardboard, plastic film (PE) and polystyrene (EPS)) are marked and should, if possible, be collected for recycling and disposed of in an environmentally friendly way. Disconnection Disconnect the appliance from the mains. With a fixed appliance, this is to be carried out by a qualified electrician! Safety Disable the appliance to prevent accidents caused by improper use, especially through chil-...
- Page 23 The identification plate is situated on the right-hand side, next to the coffee bean hopper If the appliance is not working properly, contact your nearest V-ZUG Ltd service centre using freephone 0800 850 850 and stand in close proximity to the appliance.
- Page 24 V-ZUG Ltd Industriestrasse 66, 6301 Zug Tel. +41 (0)41 767 67 67 , Fax +41 (0)41 767 61 61 vzug@vzug.ch, www.vzug.ch J301.013- 1 Service-Center: Tel. 0800 850 850...
Need help?
Do you have a question about the Supremo SL and is the answer not in the manual?
Questions and answers