Table of Contents
Advertisement
Quick Links
Advertisement
Table of Contents

Related Manuals for Shark EZ ROBOT SELF-EMPTY 9000 Series


Summary of Contents for Shark EZ ROBOT SELF-EMPTY 9000 Series
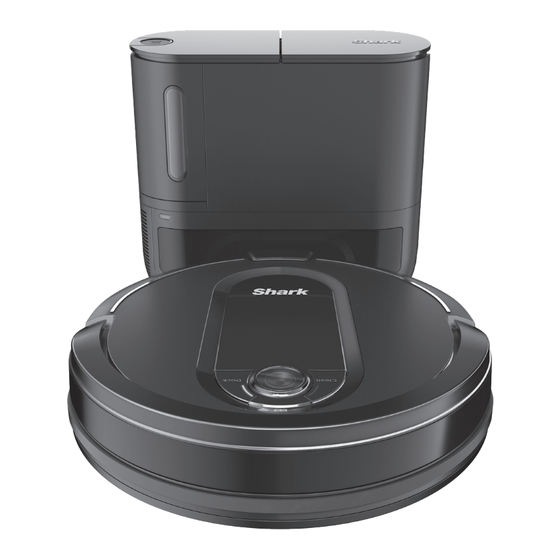
- Page 1 Robot Vacuum 900S Series OWNER’S GUIDE...
-
Page 2: Important Safety Instructions
IMPORTANT SAFETY INSTRUCTIONS PLEASE READ CAREFULLY BEFORE USE • FOR HOUSEHOLD USE ONLY If the charging cable plug does not fit fully into the outlet, reverse the plug. If it still does not fit, contact a qualified electrician. DO NOT force into outlet or try to modify to fit. WARNING To reduce the risk of fire, electric shock, injury, or property damage: GENERAL WARNINGS... -
Page 3: Battery Use
To purchase BotBoundary the power switch. strips, please visit sharkaccessories.com. 26. Use ONLY the Shark® self-empty base XSKDOCK130 and use only battery RVBAT850. Use of batteries or battery chargers other than those indicated may create a risk of fire. - Page 4 GETTING TO KNOW YOUR SHARK® EZ ROBOT Battery Indicator Light Error Indicator Light Wi-Fi Indicator Light Front Bumper Clean Button Dock Button Navigation Module Dust Bin Release Tabs Power Switch Docking Sensor Debris Discharge Opening Cliff and Boundary Sensors Side Brush...
- Page 5 GETTING TO KNOW YOUR SHARK® EZ ROBOT FRONT Base Dust Bin Pre-Motor Release Filter Housing Base Dust Bin Fill Window Charging Base Debris Intake Charging Contact Charging Contact Power Indicator Light Charging Indicator Light BACK Pre-Motor Base Dust Bin Filter Housing...
-
Page 6: Base Setup
BASE SETUP 3 ft. 3 ft. 5 ft. The Self-Empty Base charges your robot and holds dirt and debris from up to 30 days of cleaning. • Select a permanent location for the base. • Choose a level surface in a central area. Remove protective film from base. •... - Page 7 CHARGING IMPORTANT: The Shark® EZ Robot has a pre-installed rechargeable battery. Charge the battery completely before using the robot. It may take up to 6 hours to fully charge. When charging begins, the robot will beep. The BLUE To charge, place the robot with its BACK side against Charging Indicator Light on the base will PULSE, and the base.
-
Page 8: Base Indicator Lights
ROBOT BATTERY INDICATOR LIGHT ROBOT BATTERY INDICATOR LIGHT In Use Full Partial Charge Charge Charge (Blue) (Blue) (Red) While Charging (Blue) No Charge or Off The battery indicator light on the robot shows how much charge is remaining. When the robot is charging, the battery light will flash blue. -
Page 9: Buttons And Indicator Lights
BUTTONS AND INDICATOR LIGHTS BATTERY INDICATOR LIGHT Displays the amount of charge remaining in the battery. “!” ERROR INDICATOR See Troubleshooting section for full list of error codes. WI-FI INDICATOR Blue light: connected to Wi-Fi. Red light: not connected. Flashing blue: setup mode. No light: not set up yet. - Page 10 PREP YOUR HOME Your robot uses an array of sensors to navigate around walls, furniture legs, and other obstacles while it cleans. To prevent the robot from bumping into objects or navigating to areas you don't want it to, use the BotBoundary™...
- Page 11 MANUAL CLEANING MODE To manually start a cleaning cycle, press the Clean button on the robot or on the mobile app. To stop the robot before it finishes cleaning and automatically returns to the base, press the Dock button. NOTE: Be sure to charge the robot completely before its first cleaning so that it can explore and clean as much of your home as possible.
- Page 12 Search for SharkClean in the app store and download the app to your iPhone or Android SETTING UP VOICE CONTROL WITH THE GOOGLE ASSISTANT Visit sharkclean.com/app for setup instructions which include how to enable Shark Skill for using with Google Assistant. Google Assistant: “OK Google, tell Shark to start cleaning.”...
-
Page 13: Maintenance
MAINTENANCE CAUTION: Turn off power before performing any maintenance. EMPTYING THE ROBOT DUST BIN Press the Dust Bin Release Tabs and slide out the To avoid spills, be sure to hold the dust bin in an dust bin. upright position. Pinch and lift to open the lid. Empty debris and dust into trash. - Page 14 MAINTENANCE EMPTYING THE BASE DUST BIN The Base Dust Bin holds up to 30 days' worth of To empty the bin, hold it over the trash, then press dust and debris. Empty the bin when the debris the release button with the trash can icon on the level approaches the max fill line.
- Page 15 MAINTENANCE CLEANING AND REPLACING THE ROBOT FILTER For best results, regularly clean and replace the filter in the robot. See sharkaccessories.com for replacement filters. IMPORTANT: DO NOT use water to clean the robot filter. Pull filter out of the dust bin by the tabs. Lightly tap the filter to remove dust and debris.
- Page 16 MAINTENANCE CLEANING AND REPLACING THE BASE FILTERS For best results, regularly clean and replace the filters in the base. To clean filters, rinse with cold water ONLY to prevent damage from cleaning chemicals. Allow all filters to air-dry for at least 24 hours before reinstalling them to prevent liquid from being drawn into electric parts. IMPORTANT: DO NOT use soap when cleaning the filters.
-
Page 17: Brush Roll
MAINTENANCE BRUSHROLL If some debris remains wrapped around the brushroll, continue cleaning to allow the brushroll to clean itself. To manually clean the brushroll, follow the below steps: To access the brushroll, push up on the tabs on the Lift out the brushroll, and clean off any debris. brushroll access door, then lift off the door. -
Page 18: Cleaning Side Brush
MAINTENANCE CLEANING SENSORS AND CHARGING PADS CLEAN SENSORS AND CHARGING PADS AS NEEDED. With a dry cloth, gently dust off the sensors and pads located on the bottom of the robot and on the base. IMPORTANT: The robot uses cliff sensors to avoid stairs and other steep drops. Sensors may work less effectively when they are dirty. -
Page 19: Cleaning The Wheels
MAINTENANCE CLEANING THE WHEELS REMOVE AND CLEAN THE FRONT CASTER WHEEL AS NEEDED. See sharkaccessories.com for replacement parts. Clean the wheel housing, then reinsert the Pull the Front Caster Wheel from its housing and caster wheel. remove any debris buildup. NOTE: Tools may be required to pry off front caster wheel. -
Page 20: Replacement Parts
REPLACEMENT PARTS REPLACEMENT PARTS: ROBOT REPLACEMENT PARTS: BASE Filter Robot Dust Bin Base Dust Bin Brushroll Battery Self-Empty Base Brushroll BotBoundary® Pre-Motor Foam & Door Felt Filter Kit (not included) Side Brush Replacement Post-Motor Filter NOTE: To order replacement parts and filters, visit sharkaccessories.com. s h a r kc l e a n . -
Page 21: Troubleshooting
MAINTENANCE CAUTION: Turn off power before performing any maintenance. TROUBLESHOOTING If any error lights are illuminated or flashing on your Shark® EZ Robot, see the error code chart below: ERROR ERROR CODE SOLUTION NUMBER Robot may be stuck on an obstacle. Move robot to a new CLEAN (RED) flashing location on a level surface. - Page 22 2. Power off your phone. Wait 30 seconds, then power your phone back on. 3. Open Wi-Fi settings on your phone. Find the Shark network, then select Forget Network. 4. Reopen the SharkClean app and try the connection process again. For more help, please con- tact robot support at 1-888-228-5531.
- Page 23 Why isn't my robot charging? • Verify that the base is connected to power and the power switch on the back of the base is in the (I) ON position. When the base is plugged in and the power switch is turned on, the GREEN power indicator light on the base will illuminate.
- Page 24 END-USER LICENSE AGREEMENT FOR SHARKNINJA SOFTWARE IMPORTANT: PLEASE READ THE TERMS AND CONDITIONS OF THIS LICENSE AGREEMENT CAREFULLY BEFORE CONTINUING WITH THIS PROGRAM INSTALL OR USE OF THIS PRODUCT: SharkNinja Operating LLC’s (“SharkNinja”) End-User License Agreement (“EULA”) is a legal agreement between You (either a single entity or an individual) and SharkNinja for SharkNinja’s Software Applications, including those installed by You onto your SharkNinja products or already installed on your device, including all firmware (referred hereafter as “SN APPS”).
- Page 25 END-USER LICENSE AGREEMENT FOR SHARKNINJA SOFTWARE 5.6 You will not use the Ayla Application Libraries or Ayla Embedded Software to attempt to gain unauthorized access to or use of the systems/services of SharkNinja’s other licensors; nor will You transmit viruses, worms, Trojan horses, time bombs, spyware, malware, cancelbots, passive collection mechanisms, robots, data mining software, or any other malicious or invasive code or program into the systems/services of SharkNinja’s other licensors.
-
Page 26: One (1) Year Limited Warranty
ONE (1) YEAR LIMITED WARRANTY The One (1) Year Limited Warranty applies to purchases made from authorized retailers of SharkNinja Operating LLC. Warranty coverage applies to the original owner and to the original product only and is not transferable. SharkNinja warrants that the unit shall be free from defects in material and workmanship for a period of one (1) year from the date of purchase when it is used under normal household conditions and maintained according to the requirements outlined in the Owner’s Guide, subject to the following conditions and exclusions:... - Page 27 Expected runtime: at least 60 minutes Expected charging time: 6 hours PLEASE READ CAREFULLY AND KEEP FOR FUTURE REFERENCE. This Owner's Guide is designed to help you keep your Shark® EZ Robot Self-Empty running at peak performance. SharkNinja Operating LLC...
- Page 28 SharkNinja service center or to your local retailer for recycling. You may also contact your local recycling center for information on where to drop off the spent battery, or call 1-800-798-7398. © 2022 SharkNinja Operating LLC. BOTBOUNDARY, SHARK, SHARKCLEAN, and IQ NAV are registered trademarks of SharkNinja Operating LLC. RBRC is a trademark of Rechargeable Battery Recycling Corporation.
Need help?
Do you have a question about the EZ ROBOT SELF-EMPTY 9000 Series and is the answer not in the manual?
Questions and answers