Table of Contents
Advertisement
Available languages
Available languages
Quick Links
Advertisement
Chapters
Table of Contents

Related Manuals for Blomberg BKE 9270 X


Summary of Contents for Blomberg BKE 9270 X
- Page 1 Mode d’emploi User Manual BKE 9270 X...
- Page 2 Cher client, Protection de l'environnement Nous vous remercions d'avoir préféré notre produit. Nous sommes certains que ce four à Élimination de l'emballage micro-ondes moderne, fonctionnel et pratique, L'emballage est signalé d'un Point vert. fabriqué avec des matériaux de première qualité, Veuillez utiliser les conteneurs adéquats pour vous donnera toute satisfaction.
-
Page 3: Table Of Contents
Sommaire Instructions pour l'installation ......................... 3 Consignes de sécurité..........................4 Les avantages des micro-ondes ......................6 Description du four ........................... 7 Réglages de base ............................. 8 Réglage de l'heure ..........................8 Masquer/Afficher l'heure ......................... 8 Blocage de sécurité ..........................8 Fonctions de base ............................ -
Page 4: Instructions Pour L'installation
Instructions pour l'installation Avant l'installation Après l'installation Vérifiez que la tension de l'alimentation de Le four est équipé d'un câble d'alimentation et l'appareil, indiquée plaque d'une prise pour courant monophasé. caractéristiques correspond à celle de votre En cas d'installation permanente, le four doit installation. -
Page 5: Consignes De Sécurité
Consignes de sécurité Le four ne peut être réutilisé qu'après avoir été réparé par un technicien du Service d'assistance technique. Attention ! Lors de l’utilisation des micro- Au cours de l’utilisation, l’appareil devient chaud. ondes, veuillez retirer de l’appareil tout objet Il faut faire attention à... - Page 6 Consignes de sécurité Votre four est exclusivement destiné à un Le plateau rotatif et les grilles supportent usage domestique ! une charge maximum de 8 kg. Ne dépassez pas cette charge, pour éviter des dégâts. Utilisez votre four exclusivement pour la préparation des repas.
-
Page 7: Les Avantages Des Micro-Ondes
Les avantages des micro-ondes Avec une cuisinière traditionnelle, la chaleur créée Comment les aliments chauffent-ils? par les brûleurs de gaz ou par les résistances pénètre lentement de l'extérieur vers l'intérieur de Tous les aliments contiennent de l'eau dont les l'aliment. Il y a, par conséquent, une grande perte molécules vibrent sous l'action des micro-ondes. -
Page 8: Description Du Four
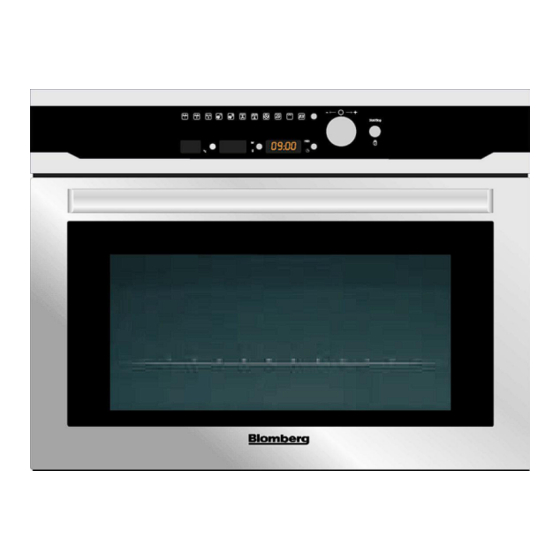
Description du four 1. – Porte vitrée 8. – Lampe 2. – Verrous 9. – Panneau de contrôle 3. – Manchon du moteur 10. – Plaque émaillée 4. – Support du plateau (ne pas utiliser avec la fonction micro-ondes) 11. – Cran pour support du plateau 5. -
Page 9: Réglages De Base
Réglages de base Réglage de l'heure Après une coupure d'électricité, ou si le four a été 2. Tournez le bouton giratoire pour configurer la rebranché, l’affichage de l'heure clignote pour valeur de l’heure. indiquer que cell-ci n'est pas correcte. Pour régler 3. -
Page 10: Fonctions De Base
Fonctions de base Micro-ondes Utilisez cette fonction pour cuire et chauffer légumes, pommes de terre, riz, poisson et viande. 1. Appuyez bouton Sélection 5. Appuyez sur le bouton de Sélection du Temps Fonctions. Un des deux indicateurs de fonction pour modifier le temps de fonctionnement. L’indicateur correspondant mettra... -
Page 11: Gril
Fonctions de base Gril Utilisez cette fonction pour dorer rapidement la surface des aliments. 1. Appuyez bouton Sélection 4. Sélectionnez le temps de fonctionnement Fonctions. Un des indicateurs de fonction se souhaité en tournant le Bouton Giratoire dans l’un des deux sens (par ex., 12 minutes). mettra à... -
Page 12: Convection
Fonctions de base Convection Utilisez cette fonction pour rôtir des aliments. 1. Appuyez sur le bouton Sélection de Fonctions. 4. Sélectionnez température souhaitée tournant le Bouton Giratoire dans l’un des deux Un des indicateurs de fonction se mettra à clignoter. sens. -
Page 13: Gril + Ventilateur
Fonctions de base Gril + Ventilateur Utilisez cette fonction pour rôtir uniformément tout en gratinant le dessus. 1. Appuyez bouton Sélection 4. Sélectionnez la température souhaitée en tournant le Bouton Giratoire dans l’un des Fonctions. Un des indicateurs de fonction se mettra à... -
Page 14: Décongélation En Fonction Du Temps (Manuel)
Fonctions de base Le tableau suivant vous présente les programmes de la fonction Décongélation en fonction du poids, en indiquant les temps de décongélation et de repos (afin que l'aliment soit uniformément chauffé) en fonction du poids de l'aliment. Programme Aliment Poids (grammes) Temps (minutes) -
Page 15: Fonctions Spéciales
Fonctions spéciales Fonction Spéciale P1 : Réchauffer de la nourriture Utilisez cette fonction pour réchauffer différents types d'aliments. 1. Appuyez bouton Sélection 5. Appuyez sur le bouton de Sélection du Poids pour définir le poids de l’aliment. L’indicateur Fonctions. Un des indicateurs de fonction se mettra à... -
Page 16: Fonction Spéciale P2 : Cuire
Fonctions spéciales Fonction Spéciale P2 : Cuire Utilisez cette fonction pour cuire des aliments frais. deux sens, par ex., « b 01 » (reportez-vous au 1. Appuyez bouton Sélection tableau ci-après). Fonctions. Un des indicateurs de fonction se mettra à clignoter. 5. -
Page 17: Fonction Spéciale P3 : Décongeler Et Gratiner
Fonctions spéciales Fonction Spéciale P3 : Décongeler et Gratiner Utilisez cette fonction pour décongeler et gratiner différents types d'aliments. 1. Appuyez bouton Sélection 5. Appuyez sur le bouton de Sélection du Poids pour définir le poids de l’aliment. L’indicateur Fonctions. Un des indicateurs de fonction se mettra à... -
Page 18: Utilisation Du Plat Gril
Utilisation du plat gril Normalement, quand on fait cuire des pizzas ou Comment cuisiner avec le plat gril : des gâteaux au gril ou au micro-ondes, la pâte 1. Préchauffez le plat gril en sélectionnant la reste humide et molle. Vous pouvez éviter cela en fonction Micro-ondes + Gril pendant 3 à... -
Page 19: Pendant Le Fonctionnement
Pendant le fonctionnement... Interruption d'une cuisson Annuler une cuisson Vous pouvez interrompre le fonctionnement du Si vous souhaitez annuler le processus de four à tout instant en appuyant une fois sur le cuisson, appuyez bouton Start bouton Start (Démarrer)/Stop ou en ouvrant la (Démarrer)/Stop pendant 3 secondes. -
Page 20: Décongélation
Décongélation Le tableau ci-dessous présente, d'une manière que l'aliment soit uniformément chauffé) en fonction générale, différents temps pour du type et du poids des aliments, et aussi les décongélation et pour le repos (de façon à ce respectives recommandations. Temps de Temps de repos Aliment Poids (g) -
Page 21: Indications Générales Pour La Décongélation
Décongélation Indications générales pour la décongélation 1. Pour décongeler, utilisez uniquement de la 8. Mettez les volailles dans un plat creux pour que vaisselle adaptée au micro-ondes (porcelaine, le jus de la viande s'écoule plus facilement. verre, plastique approprié). 9. Le pain doit être enveloppé dans une serviette 2. -
Page 22: Cuisiner Aux Micro-Ondes
Cuisiner aux micro-ondes Attention ! Lisez attentivement le chapitre Pour chauffer liquides, utilisez « Consignes de sécurité » avant de cuisiner récipients avec une grande ouverture, pour avec votre micro-ondes. mieux évacuer la vapeur. Quand vous cuisinez avec le micro-ondes, suivez Préparez les aliments en suivant les indications et les recommandations suivantes : restez vigilant aux temps de cuisson et aux... - Page 23 Cuisiner aux micro-ondes Tableaux et suggestions – Cuisiner les légumes Addition de Temps de Puissance Temps Aliment Quantité Indications liquides repos (Watt) Choux-fleur 100 ml 9-11 Couper en rondelles. Brocolis 50 ml Champignons Couvrir 25 ml Petits pois et 100 ml Couper en morceaux ou en rondelles.
-
Page 24: Cuisiner Au Gril
Cuisiner au gril Pour obtenir de bons résultats avec le gril, utilisez 4. Le thermostat sécurité fait la grille fournie avec le four. résistances s'éteignent temporairement lors d'une utilisation prolongée du gril. Positionnez la grille de façon à ce qu'elle n'entre pas en contact avec les surfaces 5. - Page 25 Cuisiner au gril Tableaux et suggestions – Micro-ondes + Gril La fonction Micro-ondes + Gril est idéale pour micro-ondes gril fonctionnent cuisiner rapidement et dorer en même temps les simultanément. Les micro-ondes cuisent et le gril aliments. Vous pouvez également les gratiner. gratine.
-
Page 26: Tableaux Et Suggestions
Tableaux et suggestions Cuire de la viande Puissance Température Temps Temps de Aliment Quantité (g) Indications (Watt) ºC (min) repos (min) Ragoût de Récipient sans couvercle. viande de 1000 160/170 80/90 bœuf Côtes de Récipient sans couvercle. 500/600 180/190 35/40 porc Poulet, Récipient avec couvercle. -
Page 27: Préparer Des Gâteaux
Tableaux et suggestions Préparer des gâteaux Aliment Récipient Niveau Température Temps (min.) Gâteau aux noix 170/180 30/35 Moule creux Tarte aux fruits 150/160 35/45 Moule creux Gâteaux aux fruits 170/190 30/45 Moule avec un trou au milieu Quiches 160/180 50/70 Moule creux Gâteau simple 160/170... -
Page 28: Quel Type De Vaisselle Utiliser
Quel type de vaisselle utiliser? Fonction Micro-ondes Récipients et papier aluminium N’oubliez pas que les micro-ondes sont réfléchies par Vous pouvez utiliser des récipients en aluminium ou les surfaces métalliques. Le verre, la porcelaine, la du papier aluminium dans le four, si vous suivez les terre cuite, le plastique et le papier laissent passer les consignes suivantes: micro-ondes. - Page 29 Quel type de vaisselle utiliser? Tableau – Vaisselle Le tableau suivant vous indique de manière générale quel type de vaisselle est adapté à chaque situation. Mode de Micro-ondes Fonctions fonctionnement Gril avec Combinée Décongeler / Air chaud Cuisiner (avec Micro-ondes) Type vaisselle réchauffer Verre et porcelaine 1)
-
Page 30: Nettoyage Et Entretien Du Four
Nettoyage et entretien du four Le nettoyage est l'unique entretien normalement Intérieur du four nécessaire. Après chaque utilisation, nettoyez les parois Attention ! Le four micro-ondes doit être nettoyé intérieures avec un chiffon humide. Il est ainsi régulièrement, éclaboussures petites plus facile d'enlever éclaboussures et particules. -
Page 31: Plafond Du Four
Nettoyage et entretien du four Plafond du four Ne retirez pas le couvercle en mica, pour Quand le plafond du four est sale, le gril peut être éviter tout risque. abaissé pour en faciliter le nettoyage. Le couvercle en verre de la lampe (4), situé dans Attendez que le gril ait refroidi avant de le plafond du four, peut être facilement retiré... -
Page 32: Que Faire En Cas De Mauvais Fonctionnement
Que faire en cas de mauvais fonctionnement ? ATTENTION ! Toute réparation ne peut être L'aliment excessivement chaud, effectuée que par des techniciens spécialisés. desséché ou brûlé ! Vérifiez que vous avez Toute réparation effectuée par des personnes sélectionné le temps de fonctionnement et le non certifiées par le fabricant peut se révéler niveau de puissance appropriés. - Page 33 Dear Customer: Environmental protection Before going any further, we want to thank you for preferring our product. We are sure that this Disposal of the packaging modern, functional and practical microwave oven, The packaging bears the Green Point mark. manufactured with top quality materials, will fully meet your expectations.
- Page 34 Contents Installation instructions ......................... 34 Before installation ..........................34 After installation ............................ 34 Microwave safety ............................ 35 The advantages of microwaves ......................37 Description of your oven ........................38 Basic settings ............................39 Setting the clock ........................... 39 Hiding/Displaying the Clock ........................39 Safety blocking .............................
-
Page 35: Installation Instructions
Installation instructions Before installation After installation Check that the input voltage indicated on the The oven is equipped with a power cable and a characteristics plate is the same as the voltage of plug for single phase current. the power outlet you are going to use. If the oven is to be installed on a permanent Open the oven door and take out all the basis it should be installed by a qualified... -
Page 36: Microwave Safety
Microwave safety During use the appliance becomes hot. Care should be taken to avoid touching heating Warning! Never leave the oven unwatched, elements inside the oven. especially when using paper, plastic or other Warning: Accessible parts may become hot combustible materials. These materials can during use. - Page 37 Microwave safety The turntable and the grills can bear a This oven is exclusively for domestic use! maximum load of 8 kg. To avoid damaging Use the oven only for preparing meals. the oven, do not exceed this load. Avoid damaging the oven or other dangerous Cleaning: situations by following these instructions: Warning! Your microwave oven must be...
-
Page 38: The Advantages Of Microwaves
The advantages of microwaves In conventional ovens, heat radiated by electrical Why food heats up elements or gas burners slowly penetrates the Most foods contain water and water molecules food from outside to inside. On account of this vibrate when subjected to microwaves. there is a major amount of energy is wasted heating the air, the oven components and the food The friction between molecules produces heat... -
Page 39: Description Of Your Oven
Description of your oven 1. – Door window glass 8. – Lamp bulb 2. – Catches 9. – Control panel 3. – Turntable support 10. – Enamelled tray 4. – Turntable ring (Don’t use with microwaves) 5. – Turntable plate 11. -
Page 40: Basic Settings
Basic settings Setting the clock After your microwave oven is first plugged in or 2. Turn the rotating knob to set the correct hour after a power failure, the clock display will flash to value. indicate that the time shown is not correct. To set 3. -
Page 41: Basic Functions
Basic Functions Microwave oven Use this function to cook and heat vegetables, potatoes, rice, fish and meat. 1. Press the Function Selector key. One of the 5. Press the Time Selection key to change the function lights will flash. operating time. The respective light will start to flash. -
Page 42: Grill
Basic Functions Grill Use this function to brown the top of food quickly. 1. Press the Function Selector key. One of the 4. Select the operating time wanted by turning the function lights will flash. Rotating Knob in either direction (for example, 12 minutes). -
Page 43: Microwave + Hot-Air
Basic Functions Hot-Air Use this function to bake food. 1. Press the Function Selector key. One of the 5. Press the Time Selection key to change the function lights will flash. operating time. The respective light will flash. 2. Turn the Rotating Knob in either direction until the 6. -
Page 44: Grill + Fan
Basic Functions Grill + Fan Use this function to bake evenly the food and at the same time brown their surface. 1. Press the Function Selector key. One of the 5. Press the Time Selection key to change the function lights will flash. operating time. -
Page 45: Defrosting By Weight (Automatic)
Basic Functions Defrosting by weight (automatic) Use this function to defrost meat, poultry, fish, fruit and bread quickly. 1. Press the Function Selector key. One of the 5. Press the Weight Selection key to define the function lights will flash. food weight. -
Page 46: Defrosting By Time (Manual)
Basic Functions Defrosting by time (manual) Use this function to defrost any type of food quickly. 1. Press the Function Selector key. One of the 4. Select the operating time wanted by turning the 7function lights will flash. Rotating Knob in either direction (for example, 10 minutes). -
Page 47: Special Functions
Special functions Special Function P1: Heating food Use this function to heat various types of food. 1. Press the Function Selector key. One of the 5. Press the Weight Selection key to define the function lights will flash. food weight. The respective light will flash. 2. -
Page 48: Special Function P2: Cooking 7
Special functions Special Function P2: Cooking 7 Use this function to cook fresh food. 1. Press the Function Selector key. One of the 5. Press the Weight Selection key to define the function lights will flash. food weight. The respective light will flash. 2. -
Page 49: Special Function P3: Defrosting & Toasting
Special functions Special Function P3: Defrosting & Toasting Use this function to defrost and toast various types of food. 1. Press the Function Selector key. One of the 5. Press the Weight Selection key to define the function lights will flash. food weight. -
Page 50: Using The Browning Plate
Using the Browning Plate Normally when cooking food, such as pizzas or How to cook with the browning plate: pies, on a grill or in a microwave oven, the dough 1. Preheat the browning plate by selecting the or pastry becomes soggy. This can be avoided by Microwave and Grill function for 3 to 5 using a browning plate. -
Page 51: When The Oven Is Working
When the oven is working... Interrupting a cooking cycle Cancelling a cooking cycle You can stop the cooking process at any time by If you wish to cancel the cooking process, press pressing the Start/Stop key once or by opening the Start/Stop key for 3 seconds. -
Page 52: Defrosting
Defrosting temperature is evenly distributed) for different The table below shows different defrosting and types and weights of food, plus recommendations. standing times (in order to ensure the food Standing time Food Weight (g) Defrosting time (min) Recommendation (min) Portions of meat, 5-10 Turn once veal, beef, pork... -
Page 53: General Instructions For Defrosting
Defrosting General instructions for defrosting 1. When defrosting, use only dishes that are 8. Place poultry on an upturned plate so that the appropriate for microwaves (china, glass, meat juices can run off more easily. suitable plastic). 9. Bread should be wrapped in a napkin so that it 2. -
Page 54: Cooking With A Microwave Oven
Cooking with a microwave oven Warning! Read the section “Microwave Safety” When heating liquids, use containers with a wide opening, so that steam can before cooking with your microwave. evaporate easily. Follow these recommendations when cooking with Prepare the foods as per the instructions and your microwave: keep in mind the cooking times and power levels Before heating or cooking foods with peel or... - Page 55 Cooking with a microwave oven Tables and suggestions – Cooking vegetables Addition of Power Time Standing Food Quantity (g) Instructions liquids (Watt) (min.) Time (min.) Cauliflower 100 ml 9-11 Cut into slices. Broccoli 50 ml Keep covered. Mushrooms 25 ml Peas &...
-
Page 56: Cooking With The Grill
Cooking with the grill For good results with the grill, use the grid iron 4. If the grill is used for extended period of time it supplied with the oven. is normal to find that the elements will switch themselves off temporarily due to the safety Fit the grid iron in such a way that it doesn’t thermostat. - Page 57 Cooking with the Grill Tables and suggestions – Grill without microwave Fish Quantity (g) Time (min.) Instructions Fish Bass 18-24 Spread lightly with butter. After half of cooking time turn spread with Sardines/gurnard 6-8 fish. 15-20 seasoning. Meat Sausages 6-8 units 22-26 Prick after half cooking time and turn.
- Page 58 Cooking with the Grill Tables and suggestions – Microwave + Grill The microwave + grill function is ideal for cooking The microwave and the grill work simultaneously. quickly and, at the same time, browning foods. The microwave cooks and the grill toasts. Furthermore, you can also grill and cook cheese covered food.
-
Page 59: Roasting
Tables and suggestions – Roasting Tables and suggestions – Roasting Quantity Power Temperature Time Standing Type Comments (Watt) ºC (min) Time (min) Do not put lid on Beef stew 1000 160/170 80/90 container Do not put lid on Pork loin 500/600 180/190 35/40... - Page 60 Tables and suggestions – Baking Tables and suggestions – Cakes Type Container Level Temperature Time (min) Walnut cake Spring-form type tin 170/180 30/35 Fruit tart Spring-form type tin 150/160 35/45 Cake tin with central Fruit cakes 170/190 30/45 hole Savoury tarts Spring-form type tin 160/180 50/70...
-
Page 61: What Kind Of Ovenware Can Be Used
What kind of ovenware can be used? Microwave function Aluminium containers and foil For the microwave function, keep in mind that Pre-cooked food in aluminium containers or in microwaves are reflected by metal surfaces. aluminium foil can be put in the microwave if the Glass, china, clay,... - Page 62 What kind of ovenware can be used? Table of Ovenware The table below gives you a general idea of what type of ovenware is suitable for each situation. Operating mode Microwave Grill and Combined Hot-Air functions (with Defrosting / Type of Cooking functions microwaves)
-
Page 63: Oven Cleaning And Maintenance
Oven Cleaning and Maintenance Cleaning is the only maintenance normally Oven interior required. After each time the oven is used, clean the inside Warning! Your microwave oven should be walls with a damp cloth since this is the easiest cleaned regularly, with all food remains being way to remove splashes or spots of food that may removed. -
Page 64: Oven Ceiling
Oven Cleaning and Maintenance Oven ceiling Accessories To avoid the danger of burning, wait until the Clean the accessories after each use. If they are grill is cold before starting to clean. very dirty, soak them first of all and then use a brush and sponge. -
Page 65: What Should I Do If The Oven Doesn't Work
What should I do if the oven doesn’t work? The food is too hot, dried out or burnt! WARNING! Any type of repair must only be Check if you selected the correct operating done by a specialised technician. Any repair time and power level. -
Page 66: Technical Characteristics
Technical characteristics Description of Functions Microwave Symbol Function Foods Power Output Slow defrosting for delicate foods; keeping food hot 200 W Cooking with little heat; boiling rice 400 W Rapid defrosting Melting butter 600 W Heating baby food Microwave Cooking vegetables and food Cooking and heating carefully, 800 W Heating and cooking small portions of food... -
Page 67: Dimensions Pour L'installation Du Four
Installation / Installation Introduisez le four dans le meuble jusqu'à ce que la partie avant de celui-ci butte sur le bois et alignez-le. Ouvrez la porte du four et fixez ce Plaats de oven in het meubelstuk dernier parois latérales zodat het frame het meubelstuk meuble au moyen des 4 vis fournies.