Advertisement
IMPORTANT SAFEGUARDS

The Elite Brand takes consumer safety very seriously. Products are designed and manufactured with our valued consumers' safety in mind. Additionally, we ask that you exercise a level of caution when using any electrical appliance by following all instructions and important safeguards.
READ ALL INSTRUCTIONS BEFORE USE AND SAVE FOR FUTURE REFERENCE

When using electrical appliances, basic safety precautions should always be followed as below:
- This appliance may be used by persons with physical or mental impairments or by inexperienced persons, if they are properly supervised or have been informed about how to use the appliance in a safe manner and understand the potential dangers.
- Children must not use this appliance or play with it. Keep this appliance and the power cord out of reach.
- The appliance is intended for household use and is designed for processing a standard amount of food in the household.
- Before connecting this appliance to a power socket, make sure the voltage stated on its rating label corresponds to the voltage in our power socket. We do not recommend using an extension cord.
- Do not use the appliance in an industrial environment or outdoors.
- Do not place the appliance on an electric or gas stove or in its vicinity, on a kitchen sink drain board, on the edge of a table or on an unstable surface. Only place the appliance on an even dry and stable surface.
- Only use the appliance with the original accessories that came with it.
- Do not use the appliance for any other purposes than those for which it is intended.
![]()
Improper use can lead to injury.- Make sure that the appliance is correctly assembled before putting it into operation.
- Pay increased attention when handling hot liquids because they may release steam or they could spray and cause burns. Allow hot liquids and foodstuffs to cool down to a temperature of at least 45°C before putting them into the blending jar and blending them.
- Do not leave the appliance in continuous operation for longer than 1 minute. Before turning it on again, allow it to cool down for at least 3 minutes
- The appliance is equipped with a thermal fuse protecting the motor from damage in case of overload. If automatic shut-off of the appliance occurs in consequence of motor overload, disconnect it from the network socket and let it cool for at least 30 minutes. Then bring the appliance back in operation.
- If ingredients stick to the blade assembly or inside walls of the blending jar, turn the appliance off and unplug it from the power supply. Make sure that the blade assembly has stopped rotating. Take the blending jar assembly off the motor unit and turn it over so that the blade assembly points upwards. Remove the blade assembly. Use a plastic spatula to clean the blade assembly and the walls of the blending jar. Reassemble the blending jar and mount it back on the motor unit. Plug the power cord into a power socket and continue blending.
- Do not submerge the motor unit and its power cord in water or any other liquid, or wash these parts under running water.
- When handling the blade assembly, taking it out of blending jar, and cleaning it, take special care to avoid injury on the blades. Always hold the blade unit by the bottom plastic part. Do not attempt to sharpen the blades.
- The blender accessories are not intended to be heated in a microwave oven. Do not expose the blending jar to extreme temperature changes.
- Do not turn on the appliance when it is empty. This may negatively affect its lifetime.
- Always turn off the appliance and disconnect it from the power socket if you will not be using it, leaving it without supervision, before assembly, disassembly, replacing accessories and before cleaning or moving it.
- Check that the motor unit is turned off, disconnected from the power socket and that the rotating parts have come to a complete stop before removing the blending jar from the motor unit.
DO NOT OPEN THE BLENDING JAR UNTIL THE BLADE ASSEMBLY COMES TO A STOP. - Ensure that the power plug does not come into contact with moisture. Do not place heavy items on the power cord. Make sure the power cord does not hang over the edge of a table or that it is not touching a hot surface.
- Do not disconnect the appliance from the power socket by pulling on the power cord. This could damage the power cord and the power socket. Disconnect by gently pulling on the plug of the power cord.
- If the power cord is damaged, have it replaced at a professional service center. Do not use the appliance if it has a damaged power cord or plug.
- Do not use the appliance when it is not functioning properly or showing any signs of damage.
- Do not repair the appliance yourself or modify it in any way. Have all adjustments/repairs performed at an authorized service center. By tampering with the appliance, you risk voiding your legal rights arising from unsatisfactory performance or quality warranty.
PURPOSE OF USE
This nutritional blender is ideal for making fresh fruit or fitness beverages, milkshakes and other cocktails, mixed drinks, outstanding salsas, creamy soups, sauces, blended baby food and it may also be used for blending ice. It is equipped with a single four-blade assembly made from quality stainless steel and two sizes of blending jars. The blending jars are made from quality durable plastic that does not contain the toxic hydrocarbon BPA (Bisphenol A) and can also serve as convenient drink bottles. Both bottles can be closed with a cap with or without a drinking spout for comfortable carrying without risking spilling the beverage. Its anti-slip feet provide excellent stability to the blender during its operation. The bottles, caps and the blade assembly can be safely washed in the top rack of a dishwasher.
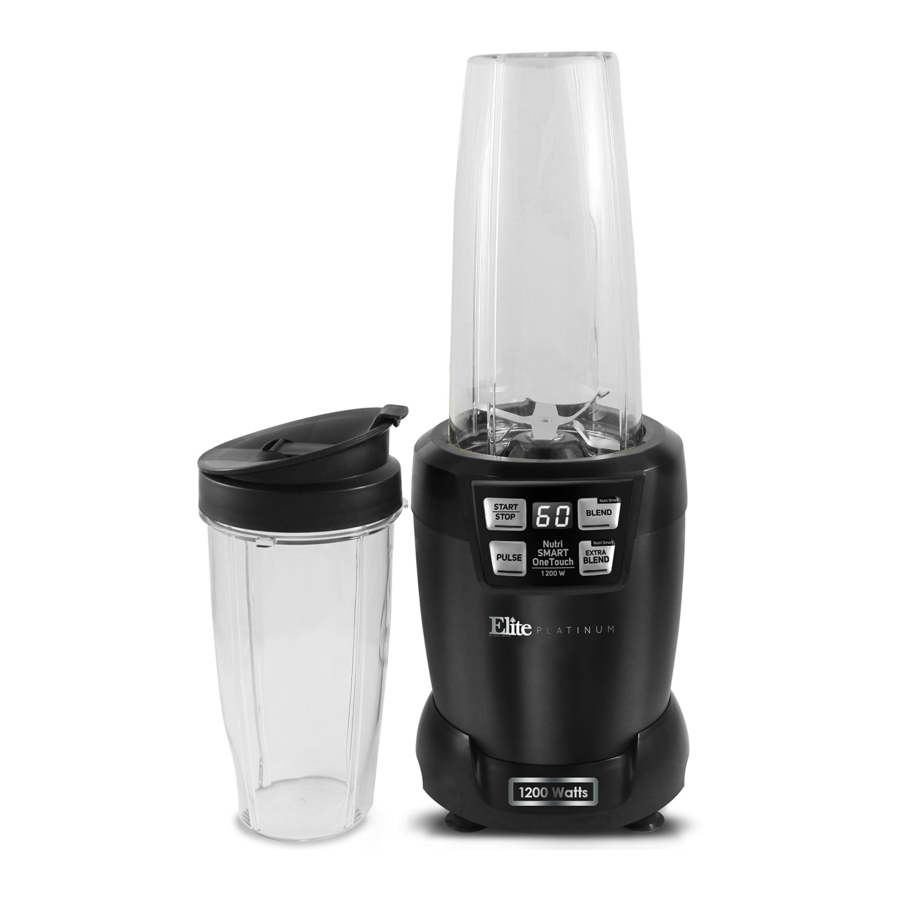
PARTS IDENTIFICATION

- Screw-on cap with a close-able drinking spout can be screwed onto both bottles.
- Screw-on cap without a drinking spout can be screwed onto both bottles.
- Small 24oz. blending jar made from quality BPA-free titan material. It also serves as a drinking bottle.
- Large 34oz. blending jar made from quality BPA-free titan material. It also serves as a drinking bottle.
- Blade assembly with 6 quality stainless steel blades.
- Motor unit
- Anti-slip feet are located on the bottom of the motor unit.
- START/STOP program suitable for grinding flour, spices and crushing nuts.
- PULSE program serves to chop/mix larger tough pieces of food and crushing ice.
- Backlit LED display showing the count-down blending time.
- BLEND program suitable for making fruit smoothies (45 seconds).
- EXTRA BLEND program suitable for making vegetable smoothies (60 seconds).
- Power switch to turn ON/OFF the blender.
BEFORE FIRST USE
- Take the appliance and its accessories out of the packaging materials.
- Thoroughly wash all parts intended for contact with food (large and small blending jars, caps and the blade assembly), using warm water and a neutral kitchen detergent. Then rinse with clean water and allow these parts to dry naturally or dry them out thoroughly using a wiping cloth. All removable parts can also be safely washed in the top rack of a dishwasher.
ATTENTION: When cleaning the blade assembly, take special care to avoid injury. The blades are sharp. The blade assembly has a gasket seal to ensure that the blending jar remains air-tight during the blending process. If the blade assembly is washed in a dishwasher, this gasket seal may come loose due to heat. After washing the blade assembly, always check that the gasket sea is in its place.
ASSEMBLING AND DISASSEMBLING
Before you start assembling or disassembling the appliance, check that the motor unit is turned off and disconnected from the power socket and that the rotating parts have come to a complete stop.
- Turn the blending jar over so that the neck points upwards.
- Check that the gasket seal on the blade assembly is in its place. Place the blade assembly on to the neck of the blending jar so that the blades point inwards and screw it clockwise on to the neck of the blending jar.
NOTE: Place the ingredients into the blending jar before attaching it to the blade assembly. When filling the blending jar do not exceed the MAX mark. - Turn the assembled blending jar over so that the blade assembly points downwards and insert it into the motor unit so that the tabs along the outer perimeter of the blending bottle slide into the slots on the motor unit.
- To disassemble, proceed in the reverse sequence.


HOW TO USE
- Make sure that the motor unit is disconnected from the power socket.
- Add the ingredients that you wish to blend into the blending jar. The maximum amount of ingredients that can be put into the blending jar is marked by the MAX mark. Do not overfill the blending jar with food or liquids.
- Assemble the blending jar according to the instructions in the section "ASSEMBLING AND DISASSEMBLING." Turn the assembled blending jar over so that the blade assembly points downwards and insert it into the motor unit so that the tabs along the outer perimeter of the blending bottle slide into the slots on the motor unit.
- Connect the motor unit to a power socket. To start the blender, rotate the assembled blending jar clockwise and then select your chosen program. The blender is equipped with a safety mechanism that will prevent it from being started unless the blending jar assembly is properly attached to the motor unit.
![]()
- If ingredients are getting stuck on the blade assembly or on the walls of the blending jar, turn the blender off by pressing the STOP button. Make sure that the blade assembly has stopped rotating. Take the blending jar assembly off the motor unit and turn it over so that the blade assembly points upwards. Screw off the blade assembly. Use a plastic spatula to clean the blade assembly and the walls of the blending jar. Reassemble the blending jar and insert it back into the motor unit. Plug the power cord into a power socket, turn the blending jar clockwise and select your chosen program and continue blending.
- To finish blending, press the STOP button and rotate the blending jar counter-clockwise. Press "o" to power OFF the blender. Disconnect the power cord from the power socket. Check that the blade assembly has stopped rotating and take the blending jar assembly off the motor unit.
- Turn the blending jar over so that the blade assembly points upwards. Take off the blade assembly and as required, close the blending jar with the cap or pour its contents into another suitable container.

NOTE:
- Some liquids gain volume during the blending process.
- There is a power switch located near the back right side of the blender. Press "-" to power ON the blender.
- To close the bottle you may use the cap. Always properly tighten the cap to prevent the bottle's contents from leaking out. When using cap, make sure that the drinking spout is properly closed so as not to spill the bottle's contents when carrying it.

- Allow hot liquids and foodstuffs to cool down to a temperature of at least 45°C before putting them into the blending jar and blending them.
- The maximum operating time is 1 minute. Do not leave the appliance in continuous operation for longer. Allow the appliance to cool down for 3 minutes.
- When processing dry ingredients, do not leave the appliance in continuous operation for longer than 30 seconds.
QUICK GUIDE TO PROCESSING INGREDIENTS
Cut food with a firm consistency, such as fruit and vegetables, into smaller pieces (1-1½ inches), then blend it.
| FOOD | RECOMMENDED BLENDING TIME |
| Fruits/vegetables (small pieces) | 30s |
| Smoothies/cocktails | 40s |
| Salsa | 30s |
| Soups | 30s |
| Baby food | 40s |
NOTE: The processing times are only a reference. The actual blending time depends on the size of the ingredients, their amount and the required consistency.
CLEANING & MAINTENANCE
- Before cleaning, make sure that the appliance is turned off and disconnected from the power socket. Make sure the rotating parts have stopped and remove the assembled blending jar from the motor unit.
- Remove the blade assembly from the blending jar and thoroughly wash the individual parts in warm water using neutral kitchen detergent. Then rinse them under clean running water and wipe them dry with a fine wiping cloth or allow them to dry naturally. If you used the cap, clean it out in the same way. Removable parts can also be safely washed in the top rack of the dishwasher. To thoroughly clean out the blade assembly, use a fine nylon brush.
- We recommend that you always wash the accessories immediately after use to prevent the ingredients from drying on. Ingredients that have dried on, are more difficult to remove. To remove dried on ingredients, you may start the blender with the blending jar filled up to 2/3 with hot water. If the dried on ingredients are not released, repeat the procedure.
- To clean the outer surface of the motor unit, use a cloth dipped in a weak detergent solution. After applying the kitchen detergent, wipe the surface with a cloth lightly dampened in clean water and then wipe dry.
- Never submerge the motor unit or the power cord in water or in any other liquid. Do not use thinners or solvents or cleaning agents causing abrasion to clean the appliance. Otherwise, the surface of the appliance may be damaged.
NOTE:
- When removing and cleaning the blade assembly take special care to avoid injury. The edges on the blade assembly are sharp.
- The blade assembly has a gasket seal to ensure that the blending jar remains air-tight during the blending process. If the blade assembly is washed in a dishwasher, this gasket seal may come loose due to heat. After washing the blade assembly, always check that the gasket seal is in its place.
- Certain foods may cause discoloration of the blending jar. However, this does not have any effect on the functionality of the appliance.
STORAGE
When not using the appliance, store it in a dry place out of children's reach. Keep the blade assembly attached to the blending jar to avoid injury.

TROUBLESHOOTING
| PROBLEM | POSSIBLE SOLUTION |
| The blender does not start. | The motor unit is not connected to a power source. Plug it into a power socket. The blending jar assembly is not correctly inserted into the motor unit. When inserting the blending jars into the motor unit, ensure that the tabs on the perimeter of the jar slide into the corresponding slots in the motor unit. To start the blender, rotate the blending jar assembly clockwise and then press the main switch to position 1 and select your chosen program. |
| The blending jar assembly is leaking. | Check that the gasket seal on the blade assembly is in its place. Seat the blade assembly on to the blending jar and screw it in properly in the clockwise direction |
| Ingredients are blended unevenly. | Too many ingredients are processed at one time. Blend the ingredients in smaller batches and run the blender repeatedly in short intervals. |
| Ingredients are blended too finely. | Blending time is too long. To achieve optimal results, blend the ingredients in short bursts and repeatedly. |
| The blending result is unsatisfactory. | Blend the ingredient in smaller batches and run the blender repeatedly in short intervals. Process frozen ingredients in 2 to 5 second intervals. |
| Unsuccessful in blending ice cubes. | Ice cubes must be blended immediately, otherwise, they will start melting, stick together, and cannot be blended. Make sure that the blending jar is completely dry before placing ice cubes into it. Blend the ice cubes in short bursts and repeatedly. |
Questions? Elite's customer service team is ready to help.
Call us toll-free at 800-365-6133 ext. 120/105.
For more Elite products, visit us at www.maxi-matic.com.
Recipes are included in this manual.

Documents / Resources
References

Download manual
Here you can download full pdf version of manual, it may contain additional safety instructions, warranty information, FCC rules, etc.
Download Elite Gourmet EPB-5455 - hi-Q Nutri Smart Blender Manual
Advertisement


Need help?
Do you have a question about the EPB-5455 and is the answer not in the manual?
Questions and answers