
Related Manuals for Zanussi ZCV69360BA


Summary of Contents for Zanussi ZCV69360BA
- Page 1 EN User Manual | Cooker ZCV69360WA ZCV69360BA ZCV69360XA zanussi.com\register...
-
Page 2: Table Of Contents
Welcome to Zanussi! Thank you for choosing our appliance. Get usage advice, brochures, trouble shooter, service and repair information: www.zanussi.com/support Subject to change without notice. CONTENTS 1. SAFETY INFORMATION................2 2. SAFETY INSTRUCTIONS................5 3. INSTALLATION....................7 4. PRODUCT DESCRIPTION................9 5. - Page 3 be kept away from the appliance unless continuously supervised. • Children should be supervised to ensure that they do not play with the appliance. • Keep all packaging away from children and dispose of it appropriately. • WARNING: The appliance and its accessible parts become hot during use.
- Page 4 • Never use water to extinguish the cooking fire. Switch off the appliance and cover flames with e.g. a fire blanket or lid. • CAUTION: The cooking process has to be supervised. A short term cooking process has to be supervised continuously.
-
Page 5: Safety Instructions
• The means for disconnection must be incorporated in the fixed wiring in accordance with the wiring rules. • WARNING: Use only hob guards designed by the manufacturer of the cooking appliance or indicated by the manufacturer of the appliance in the instructions for use as suitable or hob guards incorporated in the appliance. - Page 6 The isolation device must have a contact • Open the appliance door carefully. The opening width of minimum 3 mm. use of ingredients with alcohol can cause • Fully close the appliance door before you a mixture of alcohol and air. connect the mains plug to the mains WARNING! socket.
-
Page 7: Installation
• Replace immediately the door glass appliances, such as temperature, panels when they are damaged. Contact vibration, humidity, or are intended to the Authorised Service Centre. signal information about the operational • Be careful when you remove the door from status of the appliance. - Page 8 WARNING! The power cable must not touch the part of the appliance shaded in the illustration. Minimum distances Dimension 3.5 Covering terminal board 3.3 Levelling of the appliance • The recommended cross-section area is six square millimetres (6 mm²). • When you refit the mains terminal cover, make sure that the lower tabs are located Use small feet on the bottom of appliance to inside the bottom edge of the aperture,...
-
Page 9: Product Description
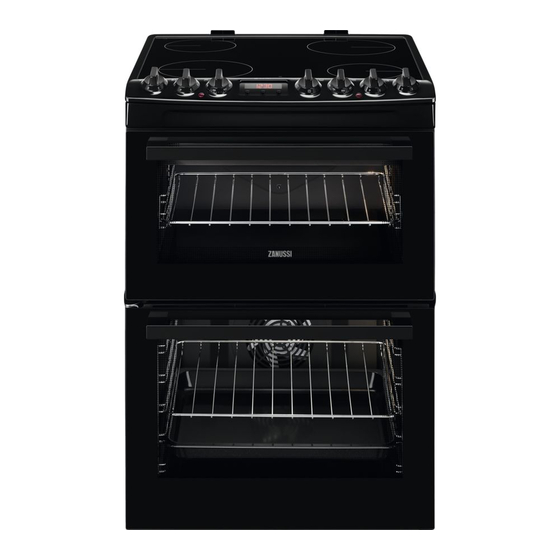
4. PRODUCT DESCRIPTION 4.1 General overview Control panel and hob Air vents for the cooling fan Heating element Lamp Shelf support, removable Cavity embossment Shelf positions 4.2 Hob overview Cooking zone Residual Heat Indicator 145 mm 180 mm 180 mm 145 mm ENGLISH... -
Page 10: Before First Use
4.3 Cooker control panel Knobs for the hob Knob for the top oven functions Display Knob for the main oven functions Knob for the main oven temperature Temperature indicator / symbol for the main oven Temperature indicator / symbol for the top oven 4.4 Accessories •... -
Page 11: Hob - Daily Use
5. Turn off the oven and let it cool down. 1. Set the function . Set the temperature Accessories can become hotter than usual. to 250ºC. The oven can emit an odour and smoke. 2. Let the oven operate for 1 hour. Make sure that the airflow in the room is 3. -
Page 12: Hob - Care And Cleaning
Cooking Cookware diam‐ Power (W) Cookware made of enamelled steel and zone eter (mm) with aluminium or copper bottoms can Right rear Φ 180 1700 cause a colour change on the glass- ceramic surface. Right front Φ 145 1200 To save energy and ensure that the hob Left front Φ... -
Page 13: Oven - Daily Use
9. OVEN - DAILY USE WARNING! Refer to Safety chapters. 9.1 Top oven functions Symbol Oven function Application Off position The oven is off. Oven Lamp To turn on the lamp without a cooking function. 100 - 250 Conventional Cooking To bake and roast food on one shelf position. - Page 14 Fill the cavity embossment with water only when the oven is cold. You can defrost food by choosing Moist 3. Turn the function knob: Plus Steam Fan Baking function without setting the 4. Turn the temperature knob to set a temperature.
-
Page 15: Oven - Clock Functions
1. Put the trivet into the deep pan. Make sure the supports of the wire shelf point AirFry tray: Place the AirFry tray on the third shelf position. Place the baking tray on the first 2. Put the deep pan into the oven on the recommended shelf position. -
Page 16: Oven - Hints And Tips
A. Minute minder indicator C. Time of day indicator B. Time display 10.2 Buttons Button Function Description MINUS To set the time. CLOCK To set a clock function. PLUS To set the time. 10.3 Clock functions Clock function Application TIME OF DAY To set, change or check the time of day. - Page 17 11.2 Main oven Cakes and pastries at different heights do not always brown equally. There is no need to The main oven is particularly suitable for change the temperature setting if an unequal cooking larger quantities of food. browning occurs. The differences equalize during baking.
- Page 18 Food Temperature (°C) Time (min) Shelf position Casseroles: Beef / Lamb 160 - 170 150 - 180 Casseroles: Chicken 160 - 180 80 - 90 Convenience Foods Follow manufacturer`s instructions. Fish 170 - 190 20 - 30 Fish Pie (Potato Topped) 190 - 200 20 - 30 Fruit Pies, Crumbles...
- Page 19 Food Temperature (°C) Time (min) Shelf posi‐ tion Cakes: Small & Queen 150 - 170 18 - 25 1 – 3 Cakes: Sponges 160 - 170 20 - 25 Cakes: Madeira 140 - 160 60 - 80 Cakes: Rich Fruit 130 - 140 120 - 150 Cakes: Christmas...
- Page 20 Food Temperature (°C) Time (min) Shelf position Sponge flan base 20 - 30 Victoria sandwich 25 - 35 Fish Food Temperature (°C) Time (min) Shelf position Fish in pouches 300 g 25 - 35 Whole fish 200 g 25 - 35 Fish fillet 300 g 25 - 35 Meat...
- Page 21 Food Temperature Water in the Preheating Time (min) Shelf (°C) cavity em‐ time (min) posi‐ bossment tion (ml) Focaccia 20 - 25 Homemade pizza 15 - 20 Cookies, scones, 10 - 20 croissant Plum cake, cinna‐ 70 - 80 mon rolls Frozen foods Food Temperature...
- Page 22 Food Tempera‐ Water in the Preheating Time (min) Shelf ture (°C) cavity em‐ time (min) position bossment (ml) Roast beef 1 - 1,5 kg 50 - 55 Rare 60 - 65 Medium 65 - 75 Well done Roast turkey 70 - 85 11.9 Tips on Roasting Turn the roast after 1/2 - 2/3 of the cooking time.
- Page 23 11.12 Dual Grill - Top Oven Food Time (min) Shelf position Bacon Rashers 5 - 6 Chicken Joints 20 - 40 Chops - Lamb 15 - 25 2 - 3 Chops - Pork 20 - 25 2 - 3 Fish - Whole / Trout / Makarel 10 - 12 Fillets - Plaice / Cod 4 - 6...
- Page 24 Other Food Quantity Temperature Time (min) Shelf po‐ (°C) sition Escalopes, frozen approx. 300 g 180 - 220 15 - 25 Shrimps in baking dough, frozen approx. 200 g 180 - 220 15 - 25 Calamari rings, frozen approx. 250 g 180 - 220 15 - 25 Chicken nuggets, frozen...
-
Page 25: Oven - Care And Cleaning
Top oven Food Function Tempera‐ Time (min) Accesso‐ Shelf po‐ ture (°C) ries sition Small cakes (20 small Conventional Cooking 25 - 35 Tray cakes per tray) Apple pie, 2 tins (ø 20 cm) Conventional Cooking 60 - 80 Grid on the grid, diagonally shif‐... - Page 26 Cleaning in the dishwasher is also possible. 2. Set the function. 3. Set the oven temperature to 250 °C and 12.3 Catalytic cleaning let the oven operate for 1 hour. 4. When the appliance is cool, clean it with a CAUTION! soft and moist sponge.
- Page 27 12.9 Removing and cleaning the door glasses - main oven The door glass in your product can be different in type and shape from the example you see in the image. The number of glasses can also be different. 1. Push the door trim at one side to remove Install the shelf supports in the opposite sequence.
-
Page 28: Troubleshooting
2. Clean the glass cover. The back lamp 3. Replace the oven lamp with a suitable 300 °C heat-resistant oven lamp. Use the same oven lamp type. The lamp glass cover is at the back of 4. Install the glass cover. the cavity. -
Page 29: Energy Efficiency
14. ENERGY EFFICIENCY 14.1 Product Information according to EU and UK Ecodesign Regulations for hob Model identification ZCV69360WA ZCV69360BA ZCV69360XA Type of hob Hob inside Freestanding Cooker Number of cooking zones Heating technology Radiant Heater... - Page 30 14.3 Product Information and Product Information Sheet according to EU and UK Ecodesign and Energy Labelling Regulations for ovens Supplier's name Zanussi ZCV69360WA 948904318 Model identification ZCV69360BA 948904319 ZCV69360XA 948904320 Top oven: 105.6 Energy Efficiency Index Main oven: 95.3 Top oven: A...
-
Page 31: Environmental Concerns
Use the residual heat to warm up other Moist Fan Baking dishes. Function designed to save energy during cooking. Keep food warm Choose the lowest possible temperature setting to use residual heat and keep a meal warm. 15. ENVIRONMENTAL CONCERNS the household waste. - Page 32 867363631-D-392023...
Need help?
Do you have a question about the ZCV69360BA and is the answer not in the manual?
Questions and answers