Table of Contents
Advertisement
Quick Links
Advertisement
Table of Contents

Related Manuals for Zanussi ZCV66370WA


Summary of Contents for Zanussi ZCV66370WA
- Page 1 User Manual GETTING STARTED? EASY. ZCV66370WA ZCV66370XA EN User Manual Cooker...
-
Page 2: Safety Information
VISIT OUR WEBSITE TO: Get usage advice, brochures, trouble shooter, service and repair information: www.zanussi.com/support SAFETY INFORMATION Before the installation and use of the appliance, carefully read the supplied instructions. The manufacturer is not responsible for any injuries or damage that are the result of incorrect installation or usage. - Page 3 This appliance is intended for use up to an altitude of 2000 m • above sea level. This appliance is not intended to be used on ships, boats or • vessels. Do not install the appliance behind a decorative door in order •...
-
Page 4: Safety Instructions
If the mains power supply cable is damaged, it must be • replaced by the manufacturer, its Authorised Service Centre or similarly qualified persons to avoid an electrical hazard. To remove the shelf supports first pull the front of the shelf •... -
Page 5: Care And Cleaning
• The electrical installation must have an isolation – do not put aluminium foil on the appliance device which lets you disconnect the appliance or directly on the bottom of cavity. from the mains at all poles. The isolation device –... -
Page 6: Internal Lighting
• Do not clean the catalytic enamel (if applicable) • Use original spare parts only. with any kind of detergent. DISPOSAL INTERNAL LIGHTING WARNING! Risk of injury or WARNING! Risk of electric shock. suffocation. • Contact your municipal authority for information •... - Page 7 LEVELLING OF THE APPLIANCE COVERING TERMINAL BOARD • The recommended cross-section area is six Use small feet on the bottom of appliance to set the square millimetres (6 mm²). appliance top surface level with other surfaces. • When you refit the mains terminal cover, make sure that the lower tabs are located inside the ELECTRICAL INSTALLATION bottom edge of the aperture, before you fix the...
-
Page 8: Product Description
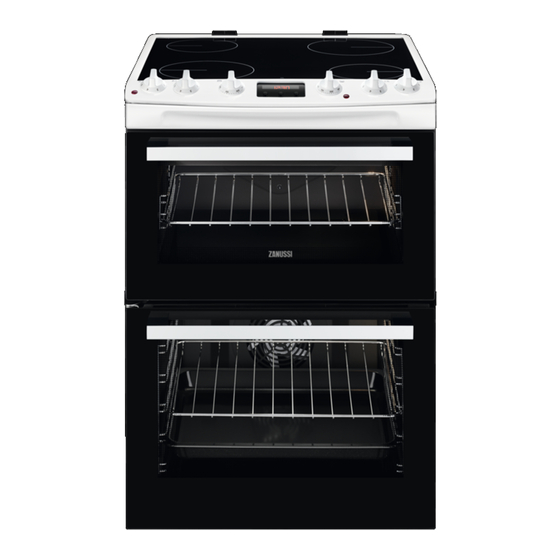
PRODUCT DESCRIPTION GENERAL OVERVIEW Control panel and hob Air vents for the cooling fan Heating element Lamp Shelf support, removable Shelf positions HOB OVERVIEW Cooking zone Control Panel 145 mm 180 mm 180 mm 145 mm COOKER CONTROL PANEL Knobs for the hob Knob for the top oven functions Display Knob for the main oven functions... -
Page 9: Before First Use
Use the trivet only with the Grill- / roasting pan. BEFORE FIRST USE After approximately five seconds, the flashing stops WARNING! Refer to Safety chapters. and the display shows the time of day you set. CHANGING THE TIME INITIAL CLEANING You cannot change the time of day if Remove all accessories and removable shelf any of the functions operates. -
Page 10: Hob - Hints And Tips
• when the hob is deactivated but the cooking The indicator disappears when the cooking zone zone is still hot. has cooled down. HOB - HINTS AND TIPS MINIMUM COOKWARE DIAMETER WARNING! Refer to Safety chapters. Cooking Cookware diame- Power (W) zone ter (mm) COOKWARE... -
Page 11: Oven - Daily Use
CLEANING THE HOB metallic discoloration. Clean the hob with a moist cloth and a non-abrasive detergent. After • Remove immediately: melted plastic, plastic cleaning, wipe the hob dry with a soft cloth. foil, sugar and food with sugar, otherwise, the •... - Page 12 Symbol Oven function Application Defrost To defrost food (vegetables and fruit). The defrosting time depends on the amount and size of the frozen food. 100 - 250 Thermaflow® To bake on up to two shelf positions at the same time and to dry food.
-
Page 13: Oven - Clock Functions
2. Put the deep pan into the oven on the necessary shelf position. OVEN - CLOCK FUNCTIONS DISPLAY A. Clock functions B. Timer The display works only with the main oven. BUTTONS Button Function Description MINUS To set the time. CLOCK To set a clock function. -
Page 14: Oven - Hints And Tips
SETTING THE DURATION 2. Press to set the necessary time. 1. Set an oven function and temperature. The Minute Minder starts automatically after 5 seconds. 2. Press again and again until starts to 3. When the set time ends, an acoustic signal flash. -
Page 15: Conventional Baking - Top Oven
Baking results Possible cause Remedy The cake sinks and be- The oven temperature is too Next time set slightly lower oven comes soggy or streaky. high. temperature. The oven temperature is too Next time set a longer baking time high and the baking time is and lower oven temperature. -
Page 16: Thermaflow® Baking - Main Oven
Food Temperature (°C) Time (min) Shelf position Pasta Lasagne etc. 170 - 180 40 - 50 Pastry: Choux 180 - 190 30 - 40 Pastry: Eclairs, Profiteroles 180 - 190 30 - 40 Pastry: Flaky / Puff Pies 210 - 220 30 - 40 Shortcrusts: Mince Pies 190 - 200... -
Page 17: Thermaflow® - Main Oven
Food Temperature (°C) Time (min) Shelf position Fish 160 - 180 30 - 40 Fruit Pies, Crumbles 170 - 180 30 - 50 Milk Puddings 140 - 160 60 - 90 Pastry: Choux 180 - 190 30 - 40 Pastry: Shortcrust 180 - 190 25 - 35 Pastry: Flaky... - Page 18 Food Temperature (°C) Time (min) Pheasant 170 - 190 35 - 40 minutes per 0.5 kg (1 lb) and 35 - 40 mi- nutes over Rabbit 170 - 190 20 minutes per 0.5 kg (1 lb) and 20 minutes over GRILLING IN GENERAL •...
-
Page 19: Information For Test Institutes
INFORMATION FOR TEST INSTITUTES Main oven Tempera- Shelf posi- Food Function Time (min) Accessories ture (°C) tion Small cakes (20 small Conventional 25 - 35 Tray cakes per tray) Cooking Small cakes (20 small Thermaflow® 25 - 35 Tray cakes per tray) Small cakes (20 small Thermaflow®... -
Page 20: Oven - Care And Cleaning
Tempera- Shelf posi- Food Function Time (min) Accessories ture (°C) tion Apple pie, 2 tins (ø 20 Conventional 60 - 80 Grid cm) on the grid, diag- Cooking onally shifted Fatless sponge cake, Conventional 20 - 30 Grid 1 tin (ø 26 cm) on the Cooking grid Shortbread/Pastry... -
Page 21: Catalytic Cleaning
CATALYTIC CLEANING CAUTION! Do not clean the catalytic surface with oven sprays, soap or other cleaning agents. It will damage the catalytic surface. CAUTION! Always turn the oven light on while using the catalytic cleaning (if applicable). WARNING! Keep children away when Install the shelf supports in the opposite sequence. -
Page 22: Troubleshooting
REMOVING AND CLEANING THE DOOR 2. Pull up the trim. GLASSES - MAIN OVEN 3. Remove the glass panels. The door glass in your product can be To replace the glass panels, do the different in type and shape from the same steps in reverse. -
Page 23: Service Data
Product number (PNC) ......... Serial number (S.N.) ......... ENERGY EFFICIENCY PRODUCT INFORMATION FOR HOB ACCORDING TO EU 66/2014 Model identification ZCV66370WA ZCV66370XA Type of hob Hob inside Freestanding Cooker Number of cooking zones Heating technology Radiant Heater Diameter of circular cooking Left front 18.0 cm... -
Page 24: Hob - Energy Saving
• If it is possible, always put the lids on the cookware. PRODUCT INFORMATION FOR OVENS AND PRODUCT INFORMATION SHEET* Supplier's name Zanussi ZCV66370WA Model identification ZCV66370XA Top oven: 105.6 Energy Efficiency Index Main oven: 95.4 Top oven: A... -
Page 25: Environmental Concerns
Cooking with fan Use the residual heat to warm up other dishes. When possible, use the cooking functions with fan Keep food warm to save energy. Choose the lowest possible temperature setting to Residual heat use residual heat and keep a meal warm. When the cooking duration is longer than 30 min, reduce the oven temperature to minimum 3 - 10 min before the end of cooking. - Page 28 WWW.ZANUSSI.COM/SHOP...