Table of Contents
Advertisement
Quick Links
Advertisement
Table of Contents

Related Manuals for Sartorius Picus 2


Summary of Contents for Sartorius Picus 2
- Page 1 Operating Instructions Original Operating Instructions Picus ® LH-747021 | LH-747041 | LH-747061 | LH-747081 | LH-747101 | LH-747111 | LH-747321 | LH-747341 | LH-747361 | LH-747391 | LH-747421 | LH-747441 | LH-747461 | LH-747491 Electronic Pipette 1000125943...
-
Page 3: Table Of Contents
4.9.11 Parameters in the Sartorius Mobile App ......12 “Settings”/“User ID” Menu ... 26 Symbols on the Device and on the Package . - Page 4 16 Sartorius Service . . . . . . . . . . . . . . . . . . .
-
Page 5: About This Manual
This manual is part of the device and must be read in full and kept safe. The manual applies to the following versions of the device: Device Item number Picus 2 electronic pipette, 1-channel model 0.2 -10 µL LH-747021 5 -120 µL LH-747041 10-300 µL... -
Page 6: Symbols Used
About This Manual Target group Knowledge and qualifications Operator The operator is familiar with the device and the associated work processes. The operator is aware of the dangers that can occur when working with the device, and can avoid these dangers.* Administrator The administrator is responsible for integrating the device into the production process. -
Page 7: Safety Instructions
2 pipette is a general purpose laboratory device. The device is ® intended, designed and manufactured for dispensing liquids in a variety of applications, and to be used in combination with Sartorius Optifit Tips or Safetyspace Filter Tips. The product range of the device covers a volume ®... -
Page 8: Electrical Equipment
Damage to the electrical equipment of the device, e.g. damage to the insulation, can lead to unforeseeable hazards. If there are defects in the electrical equipment, disconnect the device from the power supply and contact Sartorius Service. Keep moisture away from live parts. The moisture can cause short circuits. -
Page 9: Device Description
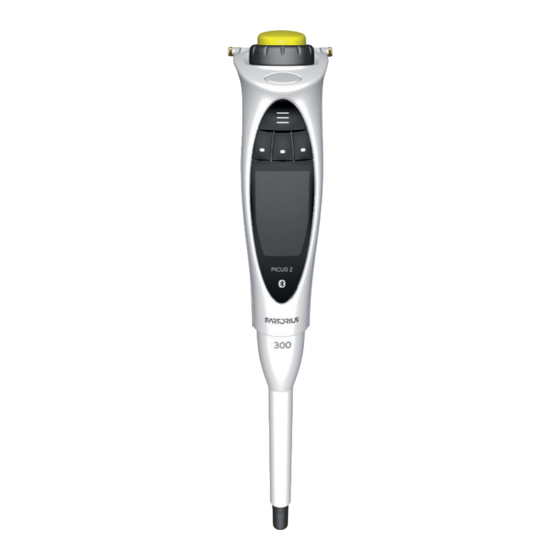
Device Description Device Description Device Overview Fig. 1: 1-channel model and multi-channel model (example) Pos . Name Description Finger Hook For resting the device on your finger. User display Displays all the relevant information. Control head To control the device and trigger individual pipetting steps Dispensing head Consists of: —... -
Page 10: Controls And Connection
Device Description Controls and Connection Fig. 2: Controls and connection (example) Pos . Name Description Micro USB port For connection to the mains plug or a to PC Charging contact Is intended to charge the device with the charging stand or carousel. Volume range Indicates the volume range. -
Page 11: Pipette Tips And Safe-Cone Filters
The pipette tip must be adapted to the volume range of the device and the degree of purity. The colour of the operating button and the colour of the tip trays must match. We recommend using Sartorius Optifit Tips or Safetyspace Filter Tips. -
Page 12: Sartorius Mobile App
Sartorius Mobile App The device can also be used with companion app (Chapter “7.2 Using the Device with the Sartorius Pipetting Mobile- App”, page 31). In the app you will have multiple options to speed up your routine workflows and customize your pipettes. -
Page 13: Operating Design
Operating Design Operating Design Controls Fig. 4: Controls on the device Pos . Name Description Hotkey Save and activate frequently used or favorite pipette settings. Softkeys — For controlling the device. — The functions of the individual keys vary according to the display. Picus 2 Operating Instructions ®... -
Page 14: Operating Mode Display
Operating Design Operating Mode Display Fig. 5: Operating mode display (example) Pos . Name Description Softkey function Indicates which function is assigned to the overlying softkey. Pipetting volume — Indicates what volumes are being taken up or dispensed.. — In Multi Dispense mode: Indicates partial volumes dispensed per dispensing process. -
Page 15: Displays In Menus
Operating Design 4.2.1 Displays in Menus Fig. 6: Displays in menus (example) Pos . Name Description Menu entry Yellow background: Currently selected. Main menu Contains available operating modes and settings menu. Advanced functions Number and type of advanced functions. The number varies according to the activated operating mode. -
Page 16: Messages
Operating Design Messages Dispense Clear this preset? Pre-Out Ejecting . . . Fig. 7: Messages (example) Pos . Name Description Prompt — Shows what the device will do next. — Initiation via the operating button is required. Query — Shows the operator options. —... -
Page 17: Indicators In The Display
Operating Design Symbol Designation Description [NO] softkey — Does not apply the changes. — Does not execute the action. [YES] softkey — Applies the changes. — Does execute the action. [PREV] softkey With activated protocol: returns to the previous protocol step. PREV [NEXT] softkey With activated protocol: skips to the next protocol step. -
Page 18: Navigating In Menus
Operating Design Navigating in Menus Procedure To call up the main menu: press the [MENU] softkey. MENU When scrolling in menus: turn the scrollwheel in the desired direction. — Anti-clockwise: scroll down. — Clockwise: scroll up. To select a menu option or save settings: Press the operating button (1) or the [OK] softkey. - Page 19 Operating Design Text input When entering text, navigate between the positions, e.g. to create the user ID: In view mode: For one position to the left, turn the scrollwheel anticlockwise, and for one position to the right, turn the scrollwheel clockwise.
-
Page 20: Menus In The Device
Operating Design 4.5.1 Menus in the Device Navigating in menus (see Chapter “4.5 Navigating in Menus”, page 18). Level 1 Level 2 Description Device Main menu — Select the operating mode. — Make settings on the device. Advanced functions Activate advanced functions for a operating mode. Memory slots Save and activate recently used or preferred pipetting settings. -
Page 21: Menu Structure In The "Settings
Operating Design Level 1 Level 2 Description Menu Manual When aspirating and dispensing liquid volumes, control the piston movement manually with the scrollwheel. This mode is suitable for the following applications: — Measuring reagents — Applications in which the pipetting speed must be controlled manually. -
Page 22: Menu Structure In The "Advanced Functions" Menu
Operating Design Level 1 Level 2 Description Settings Pip.lock Lock the device until the next maintenance measure or cleaning process. The lock prevents any use of the device and the message “Pipette locked, maintenance required” is displayed. We recommend this function when there are device errors or the device is contaminated. -
Page 23: List Of Parameters
Operating Design List of Parameters 4.9.1 Parameters in the “Advanced Functions” Menu Parameter Settings Settings Explanation Counter 0–999 Activates “Counter”. Counter wraps back to 0 if 999 is exceeded. OFF* Deactivates the “Counter” advanced function. Mix. pre.asp. Manual Activates the pre-aspiration mixing function. When Cyclic (1 –... -
Page 24: Settings"/"Languages" Menu
Operating Design 4.9.2 Parameters in the “Settings”/“Languages” Menu Parameter Settings Explanation Languages Reset Resets the menu language to the default. English* Sets the menu language of the display to the selected Deutsch language. Zhōngwén Français Русский * Default 4.9.3 Parameters in the “Settings”/“Theme” Menu Parameter Settings Explanation... -
Page 25: Settings"/"Sound" Menu
Operating Design 4.9.6 Parameters in the “Settings”/“Sound” Menu Parameter Settings Explanation Scrollwheel Switches the sound on when the scrollwheel is turned. Switches the sound off when the scrollwheel is turned. Buttons Switches the sound on when a softkey is pressed. Switches the sound off when a softkey is pressed. -
Page 26: Parameters In The "Settings"/"Adjustment" Menu
Operating Design 4.9.10 Parameters in the “Settings”/“Adjustment” Menu Parameter Parameter Settings Explanation Adjustment Factory Resets the device adjustment to the default. Empty Slot 1 1 point Set the 1-point adjustment. Set the adjustment point and Empty Slot 2 the adjustment volume. Empty Slot 3 2 points Set the 2-point adjustment. -
Page 27: Settings"/"Reset" Menu
Operating Design 4.9.13 “Settings”/“Reset” Menu Parameter Settings Explanation Reset Does not reset the device to the defaults. Resets the device to the defaults. Picus 2 Operating Instructions ®... -
Page 28: Installation
Qualitiy Control Certificates Unpacking Procedure Unpack the device. Sartorius recommends keeping the original packaging so that the device can be returned properly, e.g. for repairs or maintenance. Acclimatization When a cold device is brought into a warmer area: The temperature difference can lead to condensation from humidity in the device (moisture formation). -
Page 29: Commissioning
Commissioning Commissioning Clean the Device It is possible that the device becomes dirty during transport. We recom- mend cleaning and decontaminating the device before first use (see Chap- ter “9 Cleaning and Maintenance”, page 41). Charging the Device The device is delivered with the battery partially charged. We recommend fully charging the device for 1 hour before first use. -
Page 30: Switching The Device On Or Off
Pressing the On | Off button lets return to active mode. — If the device is not used for more than 4 hours: the device switches itself off. Rinsing Tips Sartorius recommends to rinse the tips before operating. Requirements Tips are attached to the cone. Procedure Open the main menu. -
Page 31: System Settings
Download the Sartorius Pipetting MobileApp. To do this, select one of the following options: Scan the QR code on the Quick Start Guide. Open the App Store on the device and find the Sartorius Pipetting MobileApp. 7.2.2 Adding the Device in the app Requirements Bluetooth is activated on the device (see Chapter “4.9.4 Parameters in the... -
Page 32: Creating The Pipette Set
Performing a Software Update A software update can be performed via the Sartorius Pipetting mobile app. In the Sartorius Pipetting mobile app, you can see which devices have not yet been updated to the current software version. The current software version of the device is specified under the parameter “Settings”/“Information”. -
Page 33: Managing User Data
System Settings Procedure Open the Sartorius Pipetting mobile app and log in with your Sartorius Open the menu ”PIPETTES ADMINISTRATION” . The App searches for devices nearby. A list of found devices opens. Select the desired device and tap on the [UPDATE] button. -
Page 34: Logging Into Or Out Of The Device
System Settings Procedure Open the main menu. Open the “Settings” sub-menu. Open the “Password” menu option. Select the “Login” parameter and set to “ON”. Select the parameters “User” and “Administrator” one after the other and assign a password. Confirm the entry with the [OK] soft key. Save the changes made with the [SAVE] soft key. -
Page 35: Adjusting The Device
The adjustment function enables the device to be set to one or more adjustment points. The more adjustment points are selected, the greater the accuracy over the entire volume range of the device. Sartorius recommends the following settings: — 1-point adjustment: pipetting a constant volume within a range —... - Page 36 System Settings Set the target volume for adjustment points (1-point adjustment) Procedure For 1-point adjustment: set the target volume and press [EDIT] . Set the target volume for adjustment points (2-point or 3-point adjust- ment) Procedure Confirm the automatically set target volume. Setting the measured volume Procedure Enter the volume actually measured and confirm.
-
Page 37: Activating The Adjustment Setting
System Settings 7.5.1 Activating the Adjustment Setting Procedure If password protection is activated: log in with the admin password. Open the main menu. Open the “Settings” sub-menu. Open the “Adjustment” menu option. Pick the desired parameter. The top of the menu (1) indicates which parameter is activated. Return to operating mode. -
Page 38: Deactivating Reminders
System Settings Procedure If password protection is activated: log in with the admin password. Open the main menu. Open the “Settings” sub-menu. Open the “Reminder” menu option. Select and confirm the reminder type, e.g. calibration. Set the reminder functions one after the other: Set the date of the last calibration. -
Page 39: Operation
Operation Operation Using Operating Modes (Examples) 8.1.1 Multi Dispensing Requirements Tips are attached to the cone. Procedure Open the main menu. Select the “Multi Disp.” pipetting mode and confirm. The display shows the last pipetting settings for the “Multi Disp.” pipetting mode. -
Page 40: Locking And Unlocking The Device
Operation Aspirate the liquid. To do this, use one of the following options: Press and hold the operating button. The aspiration speed is constant. Turn the scrollwheel anti-clockwise. The further the scrollwheel is turned, the higher the aspiration speed. To interrupt the process: release the operating button or the scrollwheel. To switch to dispensing: turn the scrollwheel briefly clockwise. -
Page 41: Cleaning And Maintenance
— Clean the surface of the device daily. — For 1-channel models: decontaminate, clean and grease the lower section regularly. — For multi-channel models: send the device to your local Sartorius Service Centre for maintenance. — If Safe-Cone-Filter are used: Replace them regularly. -
Page 42: Removing The Safe-Cone Filter
Cleaning and Maintenance The cleaning steps described below only apply to 1-channel models. Materials: — Gloves — Cleaning agents — Grease Tool: — Tweezers — Soft, lint-free cloth — Cotton swabs — Brush 9.2.1 Removing the Safe-Cone Filter Procedure Remove the Safe-Cone Filter from the tip cone using the tweezers supplied and dispose of it. -
Page 43: Cleaning Individual Components
Cleaning and Maintenance For models with a volume range = 5,000 µL Hold the tip cone holder (2) with one hand and use the other hand to turn the tip cone cylinder (1) clockwise and pull it off. The piston (3) is exposed. For models with a volume range = 10,000 µL Hold the tip cone cylinder (1) with one hand and use the other hand to turn the locking ring (2) clockwise and pull the tip cone off. -
Page 44: Assembling The Lower Section
Cleaning and Maintenance 9.2.4 Assembling the Lower Section (1-channel Models) Models up to 1,000 µL Procedure Slide the spring over the piston. Place the tip cone in the tip cone holder. Slide the tip cone holder together with the tip cone over the piston. To secure the tip cone holder and tip cone: turn the tip cone holder anti- clockwise to tighten. -
Page 45: Sterilising The Lower Assembly
Cleaning and Maintenance Sterilising the Lower Assembly The lower assembly of the device can be sterilised using the following measures: — Autoclaving (excluding 1,200 µL models) — UV radiation — Approved cleaning agent 9.3.1 Autoclaving The lower assembly of the device is autoclavable, except on multi-channel models with a nominal volume of 1,200 µL. -
Page 46: Performance Check
Sartorius specifications are achieved in strictly controlled conditions (ISO 8655-6). We recommend defining an acceptable error range that reaches the application area and the accuracy conditions under which the device is operated. -
Page 47: Maintenance Schedule
Maintenance Schedule Interval Component Activity 6 to 24 months, depend- Device Contact Sartorius Service. ing on the operating con- ditions Regularly | depending on Tip cone Grease the components the operating conditions (see 9.6, 47). -
Page 48: Trouble
Troubleshooting Fault Cause Remedy Chapter, page Droplets remain in the The tip is not compatible. Use original Sartorius tips. tip. Check that the tip is securely seated and, if necessary, tighten. The device is Clean the device. 9, 41 contaminated. -
Page 49: Resetting To Defaults
Trouble 10.2 Resetting to Defaults When resetting to defaults, the stored settings and the other information contained in the memory are not changed. Requirements — The device is not connected to the charger. — The device is not connected to the USB cable. Procedure Press and hold the On | Off button and the right softkey button simulta- neously for a few seconds. -
Page 50: Decommissioning
Transport damage and measures for retrospective cleaning and disinfection of the device or parts by Sartorius shall be charged to the sender. Devices contaminated with hazardous substances, e.g. harmful biological or chemical substances, will not be accepted for repair and disposal. -
Page 51: Disposal
Disposal Procedure Decommission the device. If necessary: decontaminate the device. Contact Sartorius Service for information on how to return devices or parts (see www.sartorius.com). Pack the device and its parts properly for return. 13 Disposal 13.1 Disposing of the Device and Parts The device and its accessories must be disposed of properly by disposal facilities. -
Page 52: Technical Data
Technical Data 14 Technical Data 14.1 Dimensions and Weights 14.1.1 1-channel models Unit Value Value Value Value Value Value Length Weight 14.1.2 Multi-channel models with 8 Unit Value Value Value Value Length Weight 14.1.3 Multi-channel models with 12 Unit Value Value Value Value... -
Page 53: Ambient Conditions
100 – 240 (± 10 %) Frequency Current consumption, maximum 0.125 Power supply only permitted through mains connection cable provid- ed by Sartorius Protection class, as per IEC60950-1, (reinforced insulation between mains and secondary circuit) Surge category according to IEC 60664-1 Connection cable... -
Page 54: Safety Of Electrical Equipment
Technical Data 14.3.2 Safety of Electrical Equipment Safety provisions in accordance with EN 61010-1 / IEC 61010-1 Safety requirements for electrical equipment for measurement, control, and laboratory use – Part 1: General requirements Safety of electrical equipment, in accordance with EN 61326-1 / IEC 61326-1 Electrical equipment for measure- ment, control and laboratory use –... -
Page 55: Advanced Functions
Technical Data 14.5 Operating Modes with Advanced Functions Pipetting Reverse Pipetting Manual Pipetting Multi Dispensing Diluting Sequential Dispensing Multi Aspiration Titration 14.6 Acceleration Sensor Unit Value Type: LIS331DLH Quantity Measuring range: 3 axes 14.7 RFID Tag Unit Value Type: HTS 2048 RFIC IC Quantity Frequency Picus... -
Page 56: Materials
Technical Data 14.8 Materials Housing 1.4404, aluminium Plastic PBT | PA User display Plastic PBT | PP Float glass Tip ejector For devices with 10 µL | 120 µL | 300 µL: polyvinylidene fluoride (PVDF) For devices with 5,000 µL | 10,000 µL: polypropylene (PP) Tip cone holder For devices with 10,000 µL: polyetherimide (PEI) For all other devices: polyamide (PA) -
Page 57: Cleaning Agents And Cleaning Methods
Technical Data 14.9 Cleaning Agents and Cleaning Methods 14.9.1 Cleaning Agents Approved cleaning agent Mild cleaning agent (e.g. 70% ethanol solution | 65% isopropanol solution) Disinfectant and decontamination solution (e.g. 70% ethanol, 65% isopropanol) 14.9.2 Cleaning Methods Approved cleaning methods Wiping the device surfaces with a slightly damp cleaning cloth Wiping the device surfaces dry Replacing the Safe-Cone Filters with the tweezers... -
Page 58: Z Scores (Μl /Mg) For Performance Review
Technical Data 14.11 Z Scores (µL /mg) for Performance Review Temperature Air pressure 101 .3 Unit Unit Unit Unit Unit °C Value Value Value Value Value 20.0 1.0028 1.0028 1.0029 1.0029 20.5 1.0029 1.0029 1.0030 1.0030 21.0 1.0030 1.0031 1.0031 1.0031 21.5 1.0031... -
Page 59: Performance Specification
** Note: the values listed for the systematic and random measurement deviations can only be achieved under strictly controlled conditions during type examinations in accordance with ISO 8655. Due to continuous product development, Sartorius reserves the right to change these values without prior notification. Picus 2 Operating Instructions ®... - Page 60 ** Note: the values listed for the systematic and random measurement deviations can only be achieved under strictly controlled conditions during type examinations in accordance with ISO 8655. Due to continuous product development, Sartorius reserves the right to change these values without prior notification. Picus 2 Operating Instructions ®...
-
Page 61: Models Lh-747321 | Lh-747341
** Note: the values listed for the systematic and random measurement deviations can only be achieved under strictly controlled conditions during type examinations in accordance with ISO 8655. Due to continuous product development, Sartorius reserves the right to change these values without prior notification. Picus 2 Operating Instructions ®... -
Page 62: Speed Table
Technical Data 14.13 Speed Table 14.13.1 1-channel Pipette 10 µL 120 µL 300 µL 1,000 µL 5,000 µL 10,000 µL Speed* Unit Value Value Value Value Value Value 10.1 10.2 10.2 * The speed is measured in pipetting mode with maximum volume. The speed is graduated from 1 (slow) to 9 (fast). In all main operating modes, the speed can be set separately for aspiration and dispensing. -
Page 63: Accessories And Consumables
Charging stand for 1 pipette with universal charger 730981 Charging carousel for 4 pipettes with universal charger 730991 USB charging adapter LH-735001 Storage option (non-charging) Pipette stand for all Sartorius pipettes 725620 Holder for 1 pipette LH-727640 Reagent container (capacity 120 mL) 783500 15.2 Consumables This table contains an excerpt of the consumables that can be ordered. -
Page 64: Sartorius Service
Sartorius Service 16 Sartorius Service Sartorius Service would be happy to help with any queries about the device. For information on the Service addresses, Service services and on the local contact, see the Sartorius website (www.sartorius.com). If you have queries about the system or are getting in touch in the event of malfunctions, have the device information to hand and give it to Sartorius Service, e.g. - Page 65 Documents on Conformity UK Declaration of Conformity Manufacturer Sartorius Biohit Liquid Handling Oy Laippatie 1, 00880 Helsinki, Finland We hereby declare under our sole responsibility that the following product Name Picus ® Modell(s) LH-747021, LH-747041, LH-747061, LH-747081, LH-747101, LH-747111, LH-747321, LH-747341,...
-
Page 66: For Users For Radio Equipment
Trademark Information 17.1 Compliance Information and Information for Users for Radio Equipment 47 CFR 2 . 1 077 This device complies with part 15 of the FCC Rules. Operation is subject to the following two conditions: (1) This device may not cause harmful interference, and (2) this device must accept any interference received, including interference that may cause undesired operation.”... - Page 67 The information and figures contained in these instructions correspond to the version date specified below. Sartorius reserves the right to make changes to the technology, features, specifications and design of the equipment without notice. Masculine or feminine forms are used to facilitate legibility in these instructions and always simultaneously denote all genders.
Need help?
Do you have a question about the Picus 2 and is the answer not in the manual?
Questions and answers