Table of Contents
Advertisement
Quick Links
FORNO DA INCASSO
HORNO EMPOTRABLE
FORNO DE ENCASTRAR
ΕΝΤΟΙΧΙΖΟΜΕΝΟΣ ΦΟΥΡΝΟΣ
FOUR ENCASTRABLE
BUILT-IN OVEN
Manuale d'uso e manutenzione
IT
Manual de uso y mantenimiento
ES
Manual de utilização e manutenção
PT
Εγχειρίδιο χρήσης και συντήρησης
GR
Guide d'utilisation et d'entretien
FR
User and maintenance manual
EN
Advertisement
Table of Contents

Related Manuals for Whirlpool AKZM 8380 IXL


Summary of Contents for Whirlpool AKZM 8380 IXL
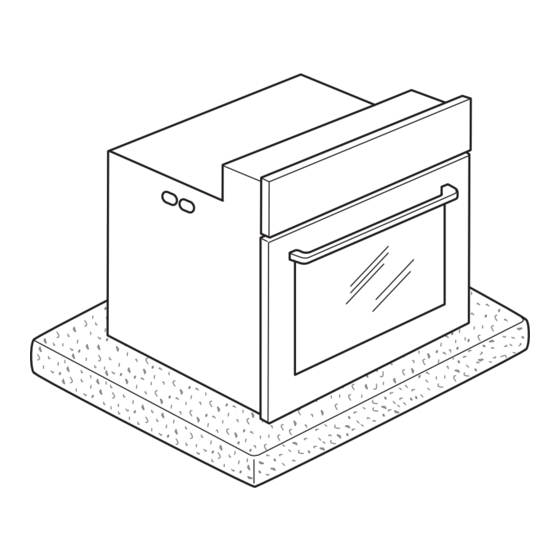
- Page 1 FORNO DA INCASSO HORNO EMPOTRABLE FORNO DE ENCASTRAR ΕΝΤΟΙΧΙΖΟΜΕΝΟΣ ΦΟΥΡΝΟΣ FOUR ENCASTRABLE BUILT-IN OVEN Manuale d’uso e manutenzione Manual de uso y mantenimiento Manual de utilização e manutenção Εγχειρίδιο χρήσης και συντήρησης Guide d’utilisation et d’entretien User and maintenance manual...
- Page 3 solo modelli con funzione di pirolisi sólo para hornos con función de pirólisis apenas fornos com função de limpeza pirolítica μόνό για φούρνο με λειτουργία πυρόλυσησ uniquement pour les fours dotés de la fonction pyrolyse only for models with pyrolitic cleaning function...
- Page 4 Min 550 mm 500 mm Max 30 mm 600 mm Min 550 mm Min 560 mm 583 + 2 mm Min 560 mm 500 mm Max 30 mm...
-
Page 7: Table Of Contents
ENGLISH LANGUAGES IT PAGE ES PAGE PT PAGE GR PAGE FR PAGE EN PAGE TABLE OF CONTENTS INSTALLATION INSTRUCTIONS ....... 2 special Functions ............13 Fast preHeatinG ............13 IMPORTANT SAFETY INSTRUCTIONS ..... 2 automatic oVen cleaninG ........14 Declaration oF conFormity ......5 pyro cleaninG cycle .......... -
Page 8: Installation Instructions
SAFETY RECOMMENDATIONS EN 2 IMPORTANT SAFETY INSTRUCTIONS these instructions are also available on the website: www.whirlpool.eu YOUR SAFETY AND THAT OF OTHERS IS VERY IMPORTANT this manual and the appliance itself provide important safety warnings, to be read and observed at all times. - Page 9 SAFETY RECOMMENDATIONS EN 3 - Do not pull the power supply cable. - the electrical components must not be accessible to the user after installation. - if the surface of the induction plate is cracked, do not use it and switch off the appliance to avoid the possibility of electric shock (only for models with induction function).
- Page 10 SAFETY RECOMMENDATIONS EN 4 - Do not use containers made of synthetic materials. - overheated oils and fats catch fire easily. always remain vigilant when cooking foods rich in fat and oil. - never leave the appliance unattended during food drying. - if alcoholic beverages are used when cooking foods (e.g.
-
Page 11: Declaration Of Conformity
BEFORE USE EN 5 DECLARATION OF CONFORMITY this oven, which is intended to come into contact with foodstuffs, complies with european regulation ) n. 1935/2004 and has been designed, manufactured and sold in conformity with the safety requirements of the “low Voltage” directive 2006/95/ce (which replaces 73/23/cee and subsequent amendments), the protection requirements of “emc”... -
Page 12: Installation
BEFORE USE EN 6 INSTALLATION After unpacking the oven, make sure that it has not been damaged during transport and that the oven door closes properly. In the event of problems, contact the dealer or your nearest After-sales Service. To prevent any damage, only remove the oven from its polystyrene foam base at the time of installation. -
Page 13: The Appliance
USING THE OVEN EN 7 THE APPLIANCE control panel circular heating element (not visible) lateral grids (the number of shelves is indicated on the front of the cavity) Door lower heating element (not visible) turnspit (if present) meat probe insert point (if present) Data plate (not to be removed) 10. -
Page 14: Inserting Wire Shelves And Other Accessories Into The Oven
USING THE OVEN EN 8 INSERTING WIRE SHELVES AND OTHER ACCESSORIES INTO THE OVEN insert the wire shelf horizontally, with the raised part “a” upwards (Fig. 1). Fig. 1 other accessories, such as the drip tray and baking tray, are inserted in the same way as the wire shelf (Fig. -
Page 15: Control Panel Description
USING THE OVEN EN 9 CONTROL PANEL DESCRIPTION toucH Keys KnoB toucH Keys riGHt Display leFt Display KNOB AND TOUCH KEYS rotary sWitcH KnoB sense Button KnoB turn this to navigate through the press to select, set, access or confirm functions and adjust all of the cooking functions or parameters and eventually parameters. -
Page 16: Setting The Clock
USING THE OVEN EN 10 1.1 SETTING THE CLOCK 1.3 ON/OFF When the oven is switched ON for the first time, the When the appliance is turned off only the 24 hour clock must be set. clock is displayed. turn to set hours. -
Page 17: Quick Start
USING THE OVEN EN 11 3 QUICK START 4.1 SETTING THE GRILL LEVEL To skip the mode-setting wizard and to quickly to set the power level for Grill and turbo Grill launch a cooking cycle. cooking functions. there are 3 defined power levels for grilling: press to rapidly start any function. -
Page 18: Setting Duration
USING THE OVEN EN 12 5 SETTING DURATION 5.2 TIMED COOKING CYCLE To set the duration of a function after setting the During a timed cooking cycle, the right display temperature. shows the duration counting down minute by minute and “:” flashes. icon flashes. -
Page 19: Th Sense Functions
USING THE OVEN EN 13 SENSE FUNCTIONS 8 SPECIAL FUNCTIONS To choose between 6 different specific cooking cycles To choose between different specific cooking cycles. with pre-set values. For the full list and description of For the full list and description of functions, see the functions, see the table on page 17. -
Page 20: Automatic Oven Cleaning
USING THE OVEN EN 14 9 AUTOMATIC OVEN CLEANING (ONLY IN SOME MODELS) The automatic cleaning function, where present, may vary according to which model is purchased. PYRO CLEANING CYCLE SMARTCLEAN CLEANING CYCLE (IF PRESENT) (IF PRESENT) For the description of this function, see also the For the description of this function see also the functions table on page 18 and the chapter functions table on page 18. -
Page 21: Meat Probe
USING THE OVEN EN 15 MEAT PROBE (ONLY IN SOME MODELS) press to confirm. The meat probe supplied allows to measure the exact internal temperature of food during cooking. turn to set oven cavity temperature. the meat probe is allowed only in some cooking press to confirm and start the cooking cycle. -
Page 22: Cavity Light
USING THE OVEN EN 16 10 CAVITY LIGHT 11 KEY-LOCK To lock the control panel buttons. press to switch the cavity lamp on or oFF. Hold for at least 5 seconds. During the eco Forced air function the lamp will be switched off after 1 minute. During the pyro cycle (if present) the cavity lamp cannot be switched on. -
Page 23: Function Descriptions Table
USING THE OVEN EN 17 FUNCTION DESCRIPTIONS TABLE to cook any kind of dish on one shelf only. use the 3 shelf. to cook pizza, CONVENTIONAL savoury pies and sweets with liquid fillings, use the 1 or 2 shelf. preheat the oven before placing food inside. - Page 24 USING THE OVEN EN 18 FUNCTION DESCRIPTIONS TABLE to preheat the oven rapidly. at the end of preheating, the oven automatically selects the conventional function. Wait for the end of preheating before placing food inside. FAST PREHEATING to roast large joints of meat (legs, roast beef, chickens). position the food on the middle shelves.
-
Page 25: Cooking Table
USING THE OVEN EN 19 COOKING TABLE Shelf Time Recipe Function Preheating (from Temp. (°C) Accessories and notes (min) bottom) 160 - 180 30 - 90 cake tin on wire shelf Sponge cakes shelf 4: cake tin on wire shelf 1 - 4 160 - 180 30 - 90... - Page 26 USING THE OVEN EN 20 COOKING TABLE 190 - 200 20 - 30 Drip tray/baking tray Vol-au-vents/ puff pastry shelf 4: oven tray on wire shelf savouries 1 - 4 180 - 190 20 - 40 shelf 1: Drip tray/baking tray Lasagna / Flans / Drip tray or oven tray on wire...
- Page 27 USING THE OVEN EN 21 COOKING TABLE Roast chicken shelf 2: turnspit (if present) 60 - 80 1-1.3 kg (High) shelf 1: Drip tray with water Drip tray/baking tray (turn Roast 35 - 55 food two thirds of the way potatoes (mid) through cooking if necessary)
-
Page 28: Tested Recipes
USING THE OVEN EN 22 TESTED RECIPES (IN COMPLIANCE WITH IEC 60350-1:2011-12) Shelf Temp. Time Recipe Function Preheating (from Accessories* and notes (°C) (min) bottom) IEC 60350-1:2011-12 § 7.5.2 35 - 50 Drip tray/baking tray 25 - 40 Drip tray/baking tray shortbread shelf 4: Baking tray 1 - 4... -
Page 29: Recommended Use And Tips
USING THE OVEN EN 23 RECOMMENDED USE AND TIPS How to read the cooking table Meat the table indicates the best function to use for any - use any kind of oven tray or pyrex dish suited to given food, to be cooked on one or more shelves at the size of the piece of meat being cooked. -
Page 30: Cleaning
AFTER USE EN 24 CLEANING - Never use steam cleaning equipment. WARNING - Only clean the oven when it is cool to the touch. - Disconnect the appliance from the power supply. Oven exterior Cleaning cycle - Pyrolysis function • clean the surfaces with a damp microfibre cloth. WARNING if it is very dirty, add a few drops of washing up detergent to the water. -
Page 31: Maintenance
AFTER USE EN 25 MAINTENANCE - Use protective gloves. WARNING - Ensure the oven is cold before carrying out the following operations. - Disconnect the appliance from the power supply. REMOVING THE DOOR REPLACING THE OVEN LAMP open the door fully. to replace the rear lamp: lift the catches and push them forwards as far Disconnect the oven from the power supply. -
Page 32: Troubleshooting Guide
AFTER USE EN 26 TROUBLESHOOTING GUIDE The oven does not work The door will not open • check for the presence of mains electrical • turn off the oven and restart it to see if the fault power and that the oven is connected to the persists. - Page 34 4 0 0 0 1 0 7 8 2 4 0 4 printed in italy manufacturer: Whirlpool europe s.r.l. socio unico, Viale G. Borghi 27, 21025 comerio (Va) italy...