Table of Contents
Advertisement
Quick Links
Advertisement
Table of Contents
Troubleshooting

Related Manuals for sol-ark 60K-3P-N


Summary of Contents for sol-ark 60K-3P-N
- Page 1 COMMERCIAL 60K-3P-N 480V INSTALLATION GUIDE | USER MANUAL...
-
Page 2: Table Of Contents
60K-3P 480V OUTDOOR UL Model “60K-3P-480V” INSTALL GUIDE & OWNER’S MANUAL UPON RECEIVING SHIPMENT ..........................4 SPEC SHEET ................................5 WIRE GAUGE GUIDE (COPPER) ..........................7 WIRING DIAGRAMS ............................... 8 PHYSICAL INSTALLATION ............................. 18 ..............................18 NVERTER OMPONENTS ’ ..........................18 ECIDING THE ACKUP IRCUITS... - Page 3 CONSEQUENTIAL, OR INCIDENTAL, WHICH MIGHT ARISE OUT OF THE USE OF SUCH INFORMATION. THE USE OF ANY SUCH INFORMATION WILL BE ENTIRELY AT THE USER'S RISK. Sol-Ark cannot be responsible for system failure, damages, or injury resulting from improper installation of their products.
- Page 4 Solar PV+/PV- are UNGROUNDED. Note, you may ground PV Racking/Mounts, but doing so directly to the Sol-Ark will likely result in damage in the case of a direct lightning strike to the PV array. We recommend grounding the frames outside of the Sol-Ark circuit.
-
Page 5: Upon Receiving Shipment
B. If damaged, contact us immediately at 972-575-8875 Ext. 3 Component Guide— the following items are included in the package: A. Sol-Ark 60K-3P-480V inverter (x 1) B. Mounting Bracket: For wall mounting the Sol-Ark 60K-3P-480V (x 1) C. Bolts M12x60 (x 4) D. Bolts M4x12 (x 9) E. -
Page 6: Spec Sheet
Spec Sheet February 24 , 2023 Spec Sheet... - Page 7 Neutral / Ground Busbars 62 IN Lbs 7 NM Cover Screws 15.5 IN Lbs 1.75 NM Battery Connection Hand-Pressed Actuation Lever Hand-Pressed Actuation Lever Do Not Use Impact Drivers to Tighten Any Fasteners on the Sol-Ark. February 24 , 2023...
-
Page 8: Wire Gauge Guide (Copper)
Wire Gauge Guide (copper) 34.93mm (1 3/8in) 50.8mm (2in) PV input: - 10 AWG AC Inputs/Outputs: 1/0 AWG - 4/0 AWG All Sensors: 20 – 24 AWG CT Sensors: 10' Wire Included Batt Temp Sensor: 6' Wire Included RJ45 Cable: 7' Included (Extendable up to 20') Regular Battery input: 6 –... -
Page 9: Wiring Diagrams
Wiring Diagrams These Wiring Diagrams are examples of common-use cases for Sol-Ark inverters. Sol-Ark does not provide custom diagrams; however, you may contact support@sol-ark.com for any questions about existing Wiring Diagrams. Diagram 1 February 24 , 2023... - Page 10 February 24 , 2023...
- Page 11 Diagram 3 January 9 , 2022...
- Page 12 Diagram 4 January 9 , 2022...
- Page 13 Diagram 5 January 9 , 2022...
- Page 14 Diagram 6 January 9 , 2022...
- Page 15 Diagram 7 Diagram 7 January 9 , 2022...
- Page 16 Diagram 8 January 9 , 2022...
- Page 17 Diagram 9 January 9 , 2022 Note: Before powering up Parallel System installs, please see Pg. 41...
- Page 18 Diagram 10 January 9 , 2022 Note: Before powering up Parallel System installs, please see Pg. 41...
-
Page 19: Physical Installation
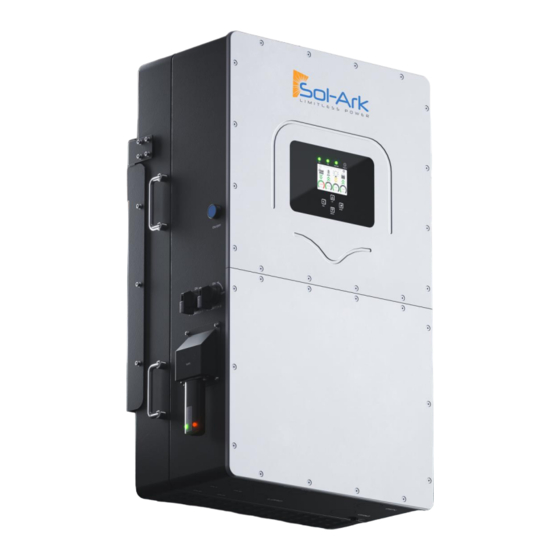
Physical Installation Inverter Components Inverter Indicators LCD Display (Touch) Function Buttons ON/OFF Button 2 x PV Disconnect Meter Port (optional) Parallel Port CAN Port Ground / Neutral Bars BMS Port RS485 Port Generator Input Grid Connection Function Port PV Input MPPTs Wi-Fi Interface Load Connection Battery Connections... -
Page 20: Single System Installations (Small Commercial Backup)
Single System Installations (Small Commercial Backup) A. Use the output from 200A Fused Disconnect (from the grid) for the Grid input connection to the Sol-Ark B. Connect the Load output from the Sol-Ark directly to the Main Service Panel (at least 2/0 AWG) C. -
Page 21: Connecting Solar Panels
Integration: www.sol-ark.com/support/ Connecting Solar Panels A. Sol-Ark has QUADRUPLE (4) MPPTs for four separate PV input pairs (~8 strings) B. MAX PV input = 78kW (± 5%) / system | 19.5kW / MPPT | MAX 1000V PV | MAX I... -
Page 22: Integrating A Generator
A. ONLY supports 208V (3-phase) generators | 200A Terminal Block [Limited to 180A@120Vx3] B. Connect the generator output to the "GEN" input terminal block in the Sol-Ark 60K-3P-480V user area. GEN input doesn’t support Split-Phase Generators. C. THD of less than 15% is preferred but not required Standby Generators >... -
Page 23: Sensors Integration And Accessory Placement
GEN terminals to charge the battery bank. Sol-Ark will NOT charge batteries from a generator until the batteries reach this value. Gen Start A (Grid Start A if Gen is on Grid terminals) This is how many amps (DC) you can push specifically from the generator to charge the batts. - Page 24 RSD power supply when triggered, thus stopping the inverter AC output. Pins 7 and 8 in the sensor pinboard 2 provide the 12V / 100mA signal power lost when the Sol-Ark shuts down using the front button.
-
Page 25: Powering-Up & Testing The Sol-Ark 60K-3P-480V
PARALLEL SYSTEMS: Emergency Stop should be connected to the Master with address 01 and will initiate emergency stop for all paralleled systems from the one button • The Built-in 12V power supply in the user area of the Sol-Ark (Pins 7 and 8) is rated for 100mA (1.2W). •... - Page 26 Normal A. Green = Sol-Ark is working properly B. Off = Sol-Ark is not working properly Alarm A. Red = Alarm, check the alarms menu B. Off = No alarms OUTPUT Maximum combined 72kW (AC Coupled+DC inverted 54kW AC +...
-
Page 27: Wi-Fi / Internet Connection
Wi-Fi (Via Cell Phone or computer) A. Plug the Wi-Fi dongle into the Wi-Fi port on the LEFT side of the Sol-Ark B. Using your device, look for an "EAP" network containing the last five digits of the dongle S/N C. - Page 28 Create an Account and Sign In After filling the form click “Create Account” Scan the QR code on the dongle while plugged in On Plant Type, ALWAYS Make sure to pick a unique select Energy Storage (DC plant name. (I.E.“Last Name, coupling).
- Page 29 You will receive confirmation once connection is established It takes about 60sec for the lights to turn on after setup LED: Connected to Sol-Ark and has power Green LED: Connected to Internet and Server Flashing Green LED: Connected to router but not...
-
Page 30: Ip Address Setup Instructions (Pc Or Smartphone)
Start Monitoring The Data Attention This screen If you are installing parallel is the real systems, DO NOT create a time view plant for each inverter. Create one plant for the Master unit and then use the browser version of PowerView (mysol-ark.com). - Page 31 If successful, you should see a Red and Green Light on the Dongle showing a successful connection. Red light may blink at a ~ 1s rate LED: Connected to Sol-Ark and has power. Green LED: Connected to Internet and Server...
-
Page 32: Gui Screens
GUI Screens Main Menus Basic Setup February 24 , 2023... - Page 33 Battery Setup Limiter / Grid Setup February 24 , 2023...
-
Page 34: Programming Guide
Programming Guide Sol-Ark Menus February 24 , 2023... -
Page 35: Main Screens (Touchscreen)
Main Screens (Touchscreen) Detailed Volts View (Press Batt Icon) • Top row = Total power for the column • Solar Column: Displays voltage and amps per MPPT (note: PV Voltage not to exceed 1000V) • Grid Column o If selling to the Grid, Grid Watts = negative o If buying from the Grid, Grid Watts = positive o HM = power detected by the external current sensors on the entire home L1 / L2 / L3... -
Page 36: Basic Setup
B. Set up to three (3) seasons for Time of Use to follow Load Limit Power Set the total AC Output of the Sol-Ark; curtails excess power. The default value is always the Maximum output of the Inverter. Grid Peak Shaving Set the Sol-Ark's threshold to begin contributing power to keep the power drawn from the grid below the threshold. -
Page 37: Battery Setup
Inverter shuts down to prevent battery damage) Parallel bat1&bat2 : Select this to parallel the two battery terminals of the Sol-Ark 60K-3P-480V BMS Lithium Batt: Closed-Loop Communications and ensure correct Serial Number (01,02, etc.) for the battery... - Page 38 Discharge Shutdown V : battery voltage at which the Inverter will shut down (battery symbol on the home screen will turn red) Low Batt : Low battery voltage (battery symbol on the home screen will turn yellow) Restart : battery voltage at which AC output will resume after a shutdown Batt Empty V : sets reserve capacity and improves % SOC...
-
Page 39: Limiter Tab / Grid Setup
A. You must select "AC couple on load side" B. The Gen terminals is not used (even though the GEN terminals are not physically being used for this mode, AC coupling on the LOAD side prevents the use of the GEN terminals) C. - Page 40 Selecting Power Mode (Limiter Tab Details) Sol-Ark 60K-3P-480V will simultaneously use various power sources available to meet the load demand. The following power modes allow the user to determine the power sources available to the Sol-Ark 60K-3P-480V. Limited Power to Load / Self Consumption A.
- Page 41 Grid Selection Tab General Standard : uses Protect Parameters in table UL 1741 & IEEE1547 : Enables sell compliant functionality UL1741SA : Enables wider Freq, Voltage, and Power Factor Grid Frequency : Select the Grid Frequency connection Grid Reconnect Time : Time to reconnect to the grid after grid loss Grid Level: Several voltage levels for the inverter output voltage...
- Page 42 F(W) Tab The Sol-Ark 60K-3P-480V can adjust inverter output power according to the grid frequency Droop F : The percentage of nominal power per Hertz (Hz) Example: Start freq F Stop freq F > 50.2Hz | < 51.5Hz Droop F =40%P/HZ If the grid frequency reaches 50.2Hz, the Inverter...
-
Page 43: Limiter Sensors (Ct Sensors)
Parallel 277V /480V Three-Phase Note* Contact Sol-Ark , BEFORE designing / installing parallel systems, for operation details. Limiter Sensor Automatic Setup Requires Batteries and AC coupled panels must be off while detecting. If you do not have batteries: verify CT sensor placement manually. - Page 44 A. Touch the gear icon → Touch the Basic Setup button → Select the Advanced tab C. Select "Auto detect Home Limit Sensors" and press “OK” D. Wait for the Sol-Ark to finish its learning process (Sol-Ark will alternate sell-back magnitude between legs, automatically determining the correct settings for the sensors) E.
-
Page 45: Install Tips
Grid Peak Shaving with a Gen connected to the Grid input terminal B. The Grid input Terminal Block on the Sol-Ark should be used as the Generator input (up to 54kW generators) so that you may maintain Smart Load output capability when off-grid. -
Page 46: Batteries
The float stage provides a meager rate of maintenance charging while reducing the heating and gassing of a fully charged battery. The purpose of float is to protect the battery from long-term overcharge. Find our full list of currently supported battery communications www.sol-ark.com/battery-partners February 24 , 2023... -
Page 47: Troubleshooting Guide
Check to make sure your generator is compatible with Auto Start • Make sure that the Auto Gen Start wire is adequately connected to the Sol-Ark and the generator • Ensure the generator connected is a three-phase gen and that its phasing is correct Normal LED isn't on •... - Page 48 Battery cable sparks when connected • Put the external battery disconnect in the off position before connecting or disconnecting the batteries The battery symbol on the home screen is red • The battery is under-Voltage or over-Voltage The battery symbol on the home screen is yellow The battery is low, or the charge/discharge current is close to the programmed limit (which is ok) The grid symbol on the home screen is yellow •...
-
Page 49: Troubleshooting Phasing Issues
Troubleshooting Phasing Issues If the Sol-Ark screen shows Grid Phase Wrong, there is a phasing issue with your wiring, and it may cause overload faults (F18, F26, F34) and WILL CAUSE DAMAGE if left unchecked. Single Sol-Ark: To locate the improperly wired phases, measure L1 to L1 (Top Screws) between the Grid and Load terminals;... -
Page 50: Sol-Ark 60K-3P-480V Error Codes
20%, or Lithium BMS has shut down. If battery settings are incorrect, this can also happen. BMS communication fault Sol-Ark is programmed to BMS Lithium Battery Mode but cannot communicate with a BMS Gen_Volt_or_Fre_Fault Generator Voltage or Frequency went outside the allowable range... -
Page 51: Install Verification Checklist
1. Was a diagram of your installation submitted to Sol-Ark for review? A. If not, Sol-Ark is not liable for any issues with system performance as a result of the installation, nor is Sol-Ark liable for any changes to installation that are needed to ensure proper system operation. -
Page 52: 60K-3P-480V Limited Warranty
This warranty applies to the original Sol-Ark Product purchaser and is transferable only if the Product remains installed in the original use location. Please call Sol-Ark to let us know if you are selling your home and give us the name and contact of the new owner.
Need help?
Do you have a question about the 60K-3P-N and is the answer not in the manual?
Questions and answers