Snom 821 User Manual
Snom 821: user guide
Hide thumbs
Also See for 821:
- User manual (92 pages) ,
- Quick start manual (60 pages) ,
- Manual (17 pages)
Table of Contents
Advertisement
Quick Links
Advertisement
Table of Contents

Related Manuals for Snom 821


Summary of Contents for Snom 821
- Page 1 User Manual...
- Page 2 ISCLAIMERS © snom technology AG 2008 All Rights Reserved. snom, the names of snom products, and snom logos are trademarks owned by snom technology AG. All other product names and names of enterprises are the property of their respective owners.
-
Page 3: Safety Instructions
CE and FCC certifications. In case of malfunction contact authorized service personnel, your seller, or snom. © snom technology AG 2008 MPORTANT... - Page 4 If you do not know where you may dispose of the device at the end of its lifespan, contact your municipality, your local waste management provider, or your seller. © snom technology AG 2008 MPORTANT NFORMATION...
- Page 5 3. Account information provided by your network administrator or a VoIP account with a VoIP provider who supports the VoIP SIP standard. With your snom 820 you can use up to 12 VoIP accounts with one or more VoIP providers. You need to obtain your access number (“phone num- ber”) and the necessary access data to register your phone and make...
-
Page 6: Setting Up The Phone
“ ” on the back of the phone . Place the handset cord into the groove in the right lower corner on the back of the phone. © snom technology AG 2008 HONE ETTING UP THE... - Page 7 “EHS”. 7. Place the phone on an even, horizontal surface. NITIALIZATION snom phones are plug-and-play. In most cases your phone will register and initialize automatically. 1. Connect the phone to your network or your router. 2. Do not touch any keys while registration and initialization are taking place.
- Page 8 - see page 45. c. A number of IP telephony service providers and a number of SIP PBXs require settings that are different from snom’s standard factory © snom technology AG 2008 ETTING UP THE...
- Page 9 820 M SNOM ANUAL V settings. snom’s web page lists numerous providers and PBXs that have been tested for interoperability with our phones and specific settings that may be required. Do not change the standard configu- ration unless you know what you are doing. Expert help may be required.
- Page 10 3. Clock options are 24-hour clock (radio button “on”) and 12-hour clock AM/PM (radio button “off”). 4. Click on appropriate buttons and press Save. A reboot may be neces- sary before the changes will take effect. © snom technology AG 2008 HOWN ON ETTING UP THE HONE...
-
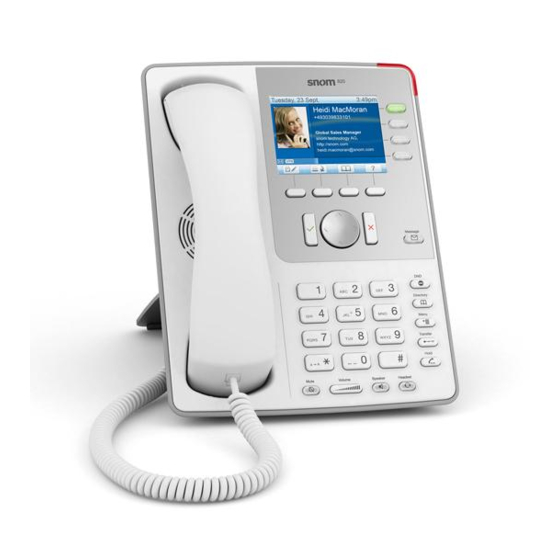
Page 11: Know Your Phone
ARDWARE OMPONENTS Freely programmable function keys with LEDs Customizable function keys Display Call Indication LED © snom technology AG 2008 HONE See page 41 See page 41 See page 13 and page 14 See page 13 ETTING TO HONE... - Page 12 See page 26 See page 23, 30, and 27 See “Phone Directory” on page 38 Press to show phone’s IP address and snom’s web & support addresses Press to confirm actions and selections. From idle screen use to initiate redial - see page 28...
-
Page 13: Led Indications
Display Layout Green phone symbol: Active identity 3. Darker line: Identity selected for outgoing calls 4. Gray phone symbol: Inactive identity; cannot be called - see page 25 © snom technology AG 2008 to turn it off. ETTING TO HONE... -
Page 14: Navigation Key
2. Right and left arrows. a. In idle mode press b. In idle mode press c. In other contexts © snom technology AG 2008 to select identities. to scroll up and down lists pre- to call up the LDAP directory, if available. -
Page 15: Alphanumeric Keypad
3. To enter the special characters listed in the following table, use input modes upper or lower case and press 1 quickly as many times as indi- cated. & > © snom technology AG 2008 ETTERS UMERALS ETTING TO PECIAL HARACTERS <... -
Page 16: Volume Key
Press the Menu key to open the main menu on the display. To open a sub- menu and subsequent sub-submenus, press its number on the alphanu- meric keypad. © snom technology AG 2008 ETTING TO HONE . When the handset is... - Page 17 Language Timezone Tone Scheme Backlight Ringer Call Features Call Forwarding Outgoing Calls Incoming Calls © snom technology AG 2008 ETTING TO Forward All Forward when Busy Forward After Timeout Auto Dial Number Guessing Call Completion Hide own outgoing ID Call Waiting...
- Page 18 IP Setting Webserver VLAN Maintenance in user mode) System Info User/Adminis- trator Mode Reboot Reset Values © snom technology AG 2008 Identity Webserver Type HTTP Admin HTTP Password VLAN ID (0-4095) VLAN Priority (0-7) Reset VLAN ETTING TO HONE See page 46...
-
Page 19: The Phone ' S Web Interface
22) or turn off the warning later at Advanced > QoS Security > Security > Ignore security advices > radion button “on”. © snom technology AG 2008 NTERFACE to obtain the phone’s IP address. Open the web browser of... -
Page 20: How The Web Interface Works
EMEMBER ALWAYS TO PRESS ITEM OR CLOSE THE WEB INTERFACE IF YOU WANT TO HAVE THE CHANGES YOU HAVE MADE TO TAKE EFFECT © snom technology AG 2008 VERRIDING ANUAL AVE BEFORE YOU CLICK ON A DIFFERENT MENU... -
Page 21: User Mode/Administrator Mode
To return the phone and its web interface to administrator mode, enter the administrator password in Administrator Login and press Save. The default password is 0000 (4 x zero). © snom technology AG 2008 ETTING TO HONE... - Page 22 Click on Behavior tab. d. Find section Phone Behavior. e. Find entry Number Guessing. © snom technology AG 2008 ERMS USED THROUGHOUT THIS : Press the left edge of the navigation key. : Press the right edge of the navigation key...
-
Page 23: Display Symbols And Indications
Press to allow presence signaling Press to retrieve messages from mailbox Press to open main menu Shows the IP address of the phone and snom’s web and Sup- port addresses on the display Press to confirm a selection or an action... - Page 24 820 M SNOM ANUAL V © snom technology AG 2008 Press to switch input mode to capital letters Press to switch input mode to numerals Press to delete character to the left of the cursor Press to move down lists in various contexts...
- Page 25 820 M SNOM ANUAL V ISPLAY NDICATIONS © snom technology AG 2008 Press to delete currently selected phone book or call list entry Press to turn off call forwarding Press to turn casing speaker on Press to turn casing speaker off...
-
Page 26: Using Different Audio Devices
4. C ASING a. Press the Speaker key to turn on the casing speaker/microphone. b. Use Method 1 or 2, above. © snom technology AG 2008 to move the dark line to one of the available identities. PEAKER ICROPHONE PEAKER... -
Page 27: Using Auto Dial
Press LDAP D vice has been set up for your organization. See http://wiki.snom.com/ Features/LDAP/V7 f.or LDAP configuration. a. Press b. Type a letter (small or caps, this is not case-sensitive) or number key. -
Page 28: Emergency Numbers
2. With the handset off the hook or ready to dial with headset or speaker- phone:. a. Press b. Continue as in 1, above. © snom technology AG 2008 to show “On” on display. to turn on call completion, press to show callee and caller numbers, time, and duration of pre- to dial. -
Page 29: Number Guessing (Auto Completion)
Use Method 1 or 2 to accept the call. b. Press c. Press © snom technology AG 2008 to enlarge the guessed number and name; OR to dial the guessed number; OR. to turn off number guessing for this call. -
Page 30: Missed Calls
2. Pick up the held call by pressing its line key or by pressing Hold again. If the other party hangs up while on hold the call terminates on your phone as well and the indicators are turned off. © snom technology AG 2008 XTENSION SING THE... -
Page 31: Attended And Blind Transfer
When the phone is answered, announce the call you intend to trans- fer. e. Press the Transfer key. © snom technology AG 2008 to turn on the casing speaker, if needed. to end the conference. The other participants will be put... -
Page 32: Call Waiting
SING THE HANDSET a. Hang up the handset b. or press Note: The snom 820 does not have a hook switch. When the handset is placed in the cradle, a magnetic field sensor terminates the connection. 2. W SING A... -
Page 33: Rejecting Or Redirecting Incoming Calls
Press b. Press key again to deactivate. 3. Call Forwarding. See next section. © snom technology AG 2008 ASING SPEAKER NCOMING ALLS . The caller will hear a busy signal. -
Page 34: All Forwarding
Press 1 Forward All. e. Press 2 Target when Forwarding. f. Type number g. Press h. Press 1 Enable Forwarding. Press Press © snom technology AG 2008 to show “On” on display. to show “Yes” on display. SING THE HONE... - Page 35 Press ESC to return to idle screen which now shows the call for- warding symbol and the number calls are being forwarded to in the information line. © snom technology AG 2008 to show “No” on display. Press to show “Yes” on display.
- Page 36 Press ESC to return to idle screen which now shows the call for- warding symbol and the number calls are being forwarded to in the information line. © snom technology AG 2008 to show “No” on display. Press to show “Yes” on display.
-
Page 37: Turning Off Call Forwarding
4. Press 1, 2, or 3, depending which call forwarding event is currently set. 5. Press 1 Enable Forwarding. 6. Press 7. Press 8. Press ESC to return to idle screen. © snom technology AG 2008 to show “No” on display. Press to show “No” on display. SING THE HONE... -
Page 38: Contact Types
On the phone: Menu key > 1 Preferences > 5 Ringer. The identities are shown on the display. Press ringtones is shown and the currently marked tone is played back. © snom technology AG 2008 for anyone of them. The list of IRECTORIES... -
Page 39: Adding/Editing Entries On The Phone
If editing, click on Edit symbol in entry’s row. Current information will be displayed in text fields of A necessary. b. If new entry, type data in text fields of A © snom technology AG 2008 to mark and play other tones. Press and click on P INGTONE up to go straight to it. - Page 40 5. Click on S Delete whole directory Deletes entire directory irretrievably! Import/Export Directory See our Wiki at http://wiki.snom.com/Web_Interface/V7/Directory. © snom technology AG 2008 CONTACT TYPE , select one from the drop-down IRECTORIES...
-
Page 41: Function Keys
“hard keys”... - Page 42 Setting “on”: The phone’s display shows the status (idle, ringing, talking) of 158. b. Setting “show only on activity”: The phone’s display shows the sta- tus of 158 only when it is busy or ringing. © snom technology AG 2008 , select E in the drop-down list. XTENSION , enter the phone number whose calls you wish to pick up.
-
Page 43: Call Forwarding
We will reprogram the setting so that by pressing the function key under- neath forwarding of all calls will be turned on (and off): 1. Click on Function Keys in the menu on the left. 2. Open the drop-down list under © snom technology AG 2008 ONFIGURING THE and select Directory... - Page 44 4. Press the function key underneath the symbol to turn call forwarding on. When it is on, the call forwarding symbol and the target phone number will cover the display area. 5. Press the function key underneath © snom technology AG 2008 ONFIGURING THE UNCTION to turn call forwarding off.
-
Page 45: Customizing Phone Settings
If you want more information on a web interface setting, click on the radio button with the question mark that you see to the right of each item. It links to a page on snom’s Wiki with detailed information about that particular item. -
Page 46: Editing An Existing Identity/Account
Open the Configuration page of the identity and make the changes in the text fields. See page 45. b. If you have changed the account or the registrar, click on R r. If you have made other changes, clicking on S © snom technology AG 2008 USTOMIZING HONE ETTINGS EGIS suffices. -
Page 47: Language Settings Of Phone And Web Interface
1. Click on Preferences. 2. Open drop-down list of General Information > Webinterface language. 3. Select a language. 4. Press Save. © snom technology AG 2008 HONE AND . The setting is saved, and the display now shows the Pref- USTOMIZING... -
Page 48: Dial Tones
4. Select location. See page 23 for collapsing/expanding the list. 5. Press . The setting is saved, and the display now shows the Prefer- ences menu. 6. Press ESC to return to idle screen. © snom technology AG 2008 USTOMIZING HONE ETTINGS... -
Page 49: Date And Time Formats
Example: If you want to set the emergency phone number 911 and the phone numbers of your doctor (986543) and a friend (234578), the entry would look this: 911 986543 234578. 3. Click on Save. © snom technology AG 2008 ADMINISTRATOR MODE ONLY USTOMIZING HONE... - Page 50 3. In the case of Timeout, also enter the number of seconds in the Timeout (sec) text field. 4. Click on Save. 5. Whenever you wish to turn call forwarding on, click on the radio-button “on” of the call forwarding event and press Save. © snom technology AG 2008 USTOMIZING HONE ETTINGS...
-
Page 51: Reject Anonymous Calls
2. Under Privacy Settings > Call Line Identification Restriction (CLIR) click on the radio button “Reject”. 3. Click on Save. © snom technology AG 2008 IN CASE OF A CONFLICT THE PHONE WILL THE CONTACT ’ F YOUR RINGTONES DON... -
Page 52: Speed Dial
2. Enter one phone number with any required prefixes in the text field to a number or special character. D NUMBER 3. Click on Save. © snom technology AG 2008 USTOMIZING O NOT ADD A NAME BEFORE OR AFTER THE HONE... -
Page 53: Troubleshooting
ONTACT SNOM UPPORT 1. Open snom’s web page at www.snom.com. Click on the Support tab to open the Support window. Click on the link to the contact form. Com- plete the contact form and add the required attachments in text format ©... - Page 54 Click on the Browse button and place the saved file’s path in the text field to the left of it. 3. snom Support may need you to do a SIP Trace and/or a PCAP Trace to help them analyze your problem.
-
Page 55: Software Update
OFTWARE PDATE ANUAL PDATE 1. Open snom’s web page at www.snom.com. 2. Click on Support > Download > Firmware. 3. Click on the phone to be updated. 4. Click on the firmware version currently running on your phone. 5. Click on the firmware version you want to update to. - Page 56 Name and address of manufacturer: snom technology AG Charlottenstr. 68-71 10117 Berlin Germany snom technology AG assures that the product Type: VoIP phone Model: snom 820 conforms with the following standards: Product Standard EN 55 022: 05:2008 Product Standard EN 55 024: 10:2003...
Need help?
Do you have a question about the 821 and is the answer not in the manual?
Questions and answers