Table of Contents
Advertisement
Quick Links
Advertisement
Table of Contents

Related Manuals for Samsung CQ1570L


Summary of Contents for Samsung CQ1570L
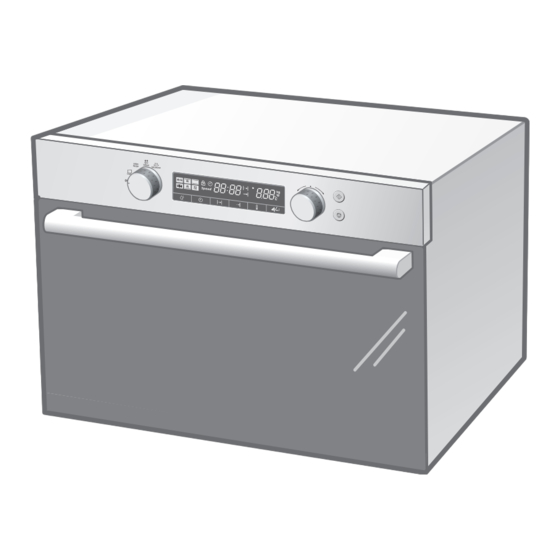
- Page 1 Operating Instructions and Cooking Guide SPEED COOK OVEN CQ1570L Owner’s Manual...
-
Page 3: Table Of Contents
Contents Using This Manual ........2 Important Safety Instructions. -
Page 4: Using This Manual
Using This Manual Thank you for purchasing a SAMSUNG speed cook oven. Your Owner’s Manual contains important safety instructions and essential infor- mation on using and caring for your new speed cook oven. Before using your oven, please read all the information in this manual and keep it for future reference. - Page 5 Important Safety Instructions (Continued) IMPORTANT SAFETY INSTRUCTIONS. READ CAREFULLY AND KEEP FOR FUTURE REFERENCE. Before cooking food or liquids in your oven, please check that the following safety precautions are taken. ● Only use utensils that are suitable for use in microwave ovens; DO NOT use any metallic containers, Dinnerware with gold or silver trimmings, Skew- ers, forks, etc.
- Page 6 Important Safety Instructions (Continued) ● Eggs in their shell and whole hard-boiled eggs should not be heated in microwave ovens since they may explode, even after microwave heating has ended; Also do not heat airtight or vacuum-sealed bottles, jars, containers, nuts in shells, tomatoes etc.
- Page 7 Important Safety Instructions (Continued) IMPORTANT ● Young children should NEVER be allowed to use or play with the microwave oven. Nor should they be left unattended near the microwave oven when it is in use. Items of inter- est to children should not be stored or hidden just above the oven. ●...
-
Page 9: Setting The Clock
Setting the Clock When the appliance is first plugged in, the DISPLAY lights up. After three sec- onds, the Clock symbol and “12:00” blink on the DISPLAY. Setting the Clock Press CLOCK . The “12” starts Turn MULTI-FUNCTION SELECTOR blinking. to set hour. -
Page 10: Oven Features
Oven Features Contro Panel Top Heating Elements Oven Light Level 5 Level 4 Oven Levels Level 3 Level 2 Microwave Level 1 Safety Door Lock Door Door Handle Note ● Shelf levels are numbered from the bottom up. ● The levels 4 and 5 are mainly used for grill function. ●... -
Page 11: Accessories
Accessories The following accessories are provided with your microwave oven: Ceramic Tray Two Baking Trays (Useful for Microwave Mode) (DO NOT use for Microwave Mode.) Grill insert Ceramic Tray Grill Insert for Ceramic Tray Oven Rack (Useful for Indian Recipe and Grill (DO NOT use for Microwave Mode.) Mode) Rotisserie... -
Page 12: Control Panel
Control Panel 2 3 4 5 1. OFF 9. CLOCK 2. OVEN MODE 10. COOK TIME 3. INDIAN RECIPE MODE 11. END TIME 4. SPEED DEFROST MODE 12. TEMPERATURE 5. MICROWAVE MODE 13. POWER LEVEL/ENTER 6. MODE SELECTOR 14. MULTI-FUNCTION SELECTOR 7. -
Page 13: Types Of Heating
Types of Heating The following chart summarizes the various heating modes and settings avail- able on your oven. Use the Cooking Guides in the pages that follow to determine the appropriate mode and setting for all your recipes. OVEN MODE Dual Convection Setting Food is heated by hot air from the left and right sides of the oven. -
Page 14: Using Oven Mode
Using Oven Mode Five settings are available under this mode. Check Cooking Guides on pages 14 - 19 to determine appropriate setting. Setting Oven Mode Turn MODE SELECTOR Dial to oven Turn MULTI-FUNCTION SELECTOR mode position. Dial to desired oven mode. The oven mode and recommended temperature will be displayed. - Page 15 Using Oven Mode (Continued) Press START. ► The TEMPERATURE indicator on display will be lit and the indicator will blink after the temperature is reached. Note 1) During cooking, COOK TIME and TEMPERATURE are available to change the setting. 2) In Oven Mode settings, the convection heater and top and bottom heating elements switch off and on throughout cooking to regulate the temperature.
-
Page 16: Dual Convection Setting
Using Oven Mode (Continued) Dual Convection ( ) Setting Food is heated by hot air from the left and right sides of the oven. This setting provides uniform heating and is ideal for baking. When you cook on two baking trays at the same time, place the trays on level , and level * Please ensure that glass baking dishes are suitable for 40 ~ 250 °C cooking temperatures. -
Page 17: Convection + Top Heat Setting
Using Oven Mode (Continued) Convection + Top Heat ( ) Setting Hot air and top heating element combine, making this setting ideal for crisping and browning. This setting is especially recommended for cooking meats. When cooking meat, place on rack on Level set baking tray on Level to catch drippings. -
Page 18: Conventional Heat Setting
Using Oven Mode (Continued) Conventional Heat ( ) Setting Heat comes from top and bottom heating elements. This setting is suitable for baking and roasting. Baking tray or oven rack is usually placed on Level * Please ensure that glass baking dishes are suitable for 40 ~ 250 °C cooking temperatures. Cooking Guide Use temperatures and times in this table as guidelines for baking. -
Page 19: Grill & Rotisserie Setting
Using Oven Mode (Continued) Grill & Rotisserie ( ) Setting Food is heated by the top heating elements. For grilling, ceramic tray with grill insert is usually placed on Level * Please ensure that glass baking dishes are suitable for 40 ~ 250 °C cooking temperatures. Cooking Guide Use temperatures and times in this table as guidelines for grilling. - Page 20 Using Oven Mode (Continued) Grill & Rotisserie ( ) Setting Food is heated by the top heating elements. For grilling with the rotisserie, the rotis- serie holder is placed on level 5. The rotis- serie is placed in the holder, the central spit must be inserted in the slot in the back of the oven.
-
Page 21: Convection + Bottom Heat Setting
Using Oven Mode (Continued) Convection + Bottom Heat ( ) Setting Hot air and the bottom heating element combine to heat food. This is a useful setting for crisping and browning. Baking tray or oven rack is often used on Level * Please ensure that glass baking dishes are suitable for 40 ~ 250 °C cooking temperatures. -
Page 22: Setting Cook Time
Setting Cook Time Select the desired oven function Press COOK TIME. and temperature. (See also section “Changing the oven function and temperature) Note If there is no further entry on the control panel for 5 seconds, start key will blink. Turn MULTI-FUNCTION SELECTOR to Press START the oven will start set desired cook time. -
Page 23: Setting End Time
Setting End Time Select the desired oven function and Press END TIME. temperature. The current time will be shown blinking on the DISPLAY. Example Current time is 13:00 The current time’s digit “13:00” will blink. Turn MULTI-FUNCTION SELECTOR to Press END TIME again. set desired hour and minute. -
Page 24: Cooking Time Reservation Function
Cooking Time Reservation Function Example : Current time : 12:00 Cook time :2:00 if you wish to end cooking at 18:00 Select Oven Mode and desired Select Cook Time and enter the desired function. cook time. (2:00) Press END TIME. Press END TIME. -
Page 25: Using Indian Recipe Mode
Using Indian Recipe Mode Indian Recipe Mode allows you to choose from twenty pre-programmed set- tings to conveniently cook, roast or bake your favourite foods. Cooking time and power level are automatically set. Simply select one of the twelve settings and set the weight to start cooking. -
Page 26: Guide To Auto Indian Recipe Settings
Using Indian Recipe Mode (continued) Guide to Auto Indian Recipe Settings The following table presents 20 Auto Programmes for Speed Cooking, Roasting and Baking. It contains its quantities, standing times and appropriate recommendations.These auto pro- grammes contain special cook modes, which have been developed for your convenience. Acces- Ingredients sory... - Page 27 Using Indian Recipe Mode (continued) Acces- Ingredients sory Food Standing Time Serving Shelf Recommendation Level Ready made pizza base-1, onion -1 sliced, red bell pepper-1/2 chopped, yellow bell pepper-1/2 chopped, cottage cheese- 50 Oven gms crumbled, tomato- 1 sliced, mozrella cheese- 50 gms Rack for topping, mushroom, baby corn-2 tbspn sliced (optional), Ceasar’...
- Page 28 Using Indian Recipe Mode (continued) Acces- Ingredients sory Food Standing Time Serving Shelf Recommendation Level Cottage Cheese-150 gms ½ inch cubes, shelled peas- ½ inch(frozen), beans- 4-5 finely chopped, cumin seeds -1 tspn, mushroom- ½ cup cut into halves, carrot- ½ cup ½ inch chopped, cauliflower- 3-4 florets cut into ½...
- Page 29 Using Indian Recipe Mode (continued) Acces- Ingredients sory Food Standing Time Serving Shelf Recommendation Level Chicken(with bone)-500 gms, thick curd-1 cup, coriander powder- 2 tspn, mixed spices- ½ tspn, meat masala-1/2 tspn, Ceramic green cardamom powder-1 tspn, cinnamon-1inch powdered, Tray black cardamom powder, nutmeg powder-1tspn,salt- 1 tspn, Murg musal- red chilli powder-1 tspn,turmeric powder-1/2 tspn, oil-2 tspn.
- Page 30 Using Indian Recipe Mode (continued) Acces- Ingredients sory Food Standing Time Serving Shelf Recommendation Level Ceramic Descicated coconut powder-20 tbspn, milkmaid-200 Tray gms(nestle ½ tin). Coconut Laddoo 2 mins Mix 16-17 tbspn of coconut powder with milk maid in 15-18 balls microwave safe bowl.
-
Page 31: Using Speed Defrost Mode
Using Speed Defrost Mode Setting Speed Defrost Mode Choose from four pre-programmed microwave settings for defrosting. Defrosting time and power level are automatically set. Simply select the setting and weight to start defrosting. Open the door. Place the frozen food in the centre of the ceramic tray. Position is level 1. -
Page 32: Guide To Auto Speed Defrost Settings
Using Speed Defrost Mode (Continued) Guide to Auto Speed Defrost Settings The following table presents the various Auto Defrost programmes, quantities, standing times and appropriate recommendations. These programmes use microwave energy only. Remove all packaging material before defrosting. Place poultry and fish on the ceramic tray. Food Weight Acces-... -
Page 33: How A Microwave Oven Works
How a Microwave Oven Works Microwaves are high-frequency electromagnetic waves; the energy released enables food to be cooked or reheated without changing either the form or the colour. You can use your microwave to: • Defrost • Cook Cooking Principle The microwaves generated by the magnetron are dis- tributed uniformly by using stirrer distribution system. -
Page 34: Using Microwave Mode
Using Microwave Mode Microwaves are high frequency electromagnetic waves. In microwave cooking, microwave energy penetrates food, attracted and absorbed by its water, fat and sugar content. The microwaves cause the molecules in the food to move rapidly. The rapid movement of these molecules creates friction and the resulting heat cooks the food. -
Page 35: Guide To Microwave Power Levels
Using Microwave Mode (Continued) Guide to Microwave Power Levels PERCENTAGE OUTPUT POWER LEVEL REMARK POWER (W) HIGH For heating up liquids. HIGH LOW For heating up and cooking food. MEDIUM HIGH For heating up and cooking food. MEDIUM For cooking meat and heating up delicate foods. -
Page 36: Microwave Cookware Guide
Using Microwave Mode (Continued) Microwave Cookware Guide Cookware used for Microwave Mode must allow microwaves to pass through and penetrate food. Metals such as stainless steel, aluminum and copper reflect microwaves. Therefore, do not use cookware made of metallic materials. Cookware marked microwave-safe is always safe for use. - Page 37 Using Microwave Mode (Continued) MICROWAVE- COOKWARE COMMENTS SAFE Paper • Plates, cups, nap- For short cooking times and warming. Also ✔ kins and Kitchen to absorb excess moisture. paper • Recycled paper May cause arcing. ✘ Plastic • Containers Particularly if heat-resistant thermoplastic. ✔...
-
Page 38: Microwave Cooking Guide
Using Microwave Mode (Continued) Microwave Cooking Guide GENERAL GUIDELINES Food Suitable for Microwave Cooking Many kinds of food are suitable for microwave cooking, including fresh or frozen vegetables, fruit, pasta, rice, grains, beans, fish, and meat. Sauces, custard, soups, steamed puddings, preserves, and chutneys can also be cooked in a microwave oven. - Page 39 Using Microwave Mode (Continued) COOKING GUIDE FOR FRESH VEGETABLES Use a suitable glass Pyrex bowl with lid. Add 30 - 45 ml cold water (2 - 3 tbsp) for every 250 g unless another water quantity is recommended (see table). Cook covered for the minimum time (see table).
- Page 40 Using Microwave Mode (Continued) COOKING GUIDE FOR RICE AND PASTA Rice Use a large glass Pyrex bowl with lid. (Note that rice doubles in volume during cooking.) Cook covered. After cooking time is over, stir before letting stand. Add salt or herbs and butter. Note that rice may not have absorbed all water after the cooking time is finished.
- Page 41 Using Microwave Mode (Continued) REHEATING LIQUIDS Take special care when heating liquids. To prevent eruptive boiling and possible scalding, place a spoon or glass stick in the beverage. Stir during heating and always stir after heating. Allow a standing time of at least 20 seconds after the oven has been switched off to allow the temperature to even out.
- Page 42 Using Microwave Mode (Continued) Time Standing Food Portion Instructions (Min) Time (Min) Meat Minced Beef 250 g 6 - 7 15 - 30 Place the meat on the ceramic plate. Shield thinner edges with aluminium foil. 500 g 10 - 12 Turn over after half of defrosting time.
- Page 43 Using Microwave Mode (Continued) QUICK & EASY Melting Butter Put 50 g of butter into a small deep glass dish. Cover with plastic lid. Heat for 30 - 40 seconds using 900 W. Melting Chocolate Put 100 g of chocolate into a small deep glass dish. Heat for 3 - 5 minutes using 450 W.
-
Page 44: Switching Off The Beeper
Switching Off the Beeper The oven beeps at the end of cooking, “End” blinks 4 times on the display. To switch beeper off, press STOP/ To switch beeper back on, press CANCEL ( ) and START ( STOP/CANCEL ( ) and START ( ) at the same time and hold for one second. -
Page 45: Child Safety Lock
Child Safety Lock The oven’s Child Safety Lock allows you to lock the control panel to protect the oven against unintended use. To Lock Oven Press STEAM CLEAN and CLOCK at Lock symbol appears on DISPLAY the same time and hold for 3 seconds. indicating all functions locked. -
Page 46: Using The Steam Clean Feature
Using the Steam Clean Feature The Steam Clean feature allows you to sanitize your oven in just 15 minutes. The STEAM CLEAN process takes three and a half minutes, and the standby time for the process is eleven and a half minutes. Turn MODE SELECTOR to “Off”... -
Page 47: Cleaning Your Microwave Oven
Storing and Repairing Your Microwave Oven Repairs should only be made by a qualified service technician. If oven requires servicing, unplug the oven and contact the nearest Samsung Customer Service Center. When calling, please have the following information ready: ●... -
Page 48: Troubleshooting
Troubleshooting If you have problems with your oven, try the solutions suggested below. They may save you the time and inconvenience of an unnecessary service call. ◆ Food remains uncooked. ● Ensure timer has been set correctly and START button pressed. ●... -
Page 49: Error Code
Error Code Error Code General Functions TEMP SENSOR OPEN In case the value of a temperature sensor is more than 250 °C during operation / cancellation. TEMP SENSOR SHORT In case the value of a temperature sensor is less than 5 °C during operation / cancellation. -
Page 50: Technical Specifications
Technical Specifications “Samsung strives to improve its products at all times. Both the design specifica- tions and these user instructions are thus subject to change without notice.” Model CQ1570L Power Source 230V ~ 50 Hz Power Consumption Maximum power 3150 W... - Page 51 Note...
- Page 52 QUESTIONS OR COMMENTS COUNTRY CALL OR VISIT US ONLINE AT 0845 SAMSUNG (7267864) www.samsung.com EIRE 0818 717 100 www.samsung.com/ie 3030 8282 INDIA www.samsung.com 1800 110011 GREECE www.samsung.com/gr AUSTRALIA 1300 362 603 www.samsung.com New zealand 0800SAMSUNG(726-7864) www.samsung.com/nz SOUTH AFRICA 0860-SAMSUNG(726-7864 ) www.samsung.com...