Advertisement
Quick Links
Instructions for installation and use of the
spinning bike
Pro-R
Please read this manual before installing and using the spinning bike. Following the principle of
continuous development, the product may be updated when necessary, and no further notice will be
given at that time. If the manual does not match the product, the actual product shall prevail.
Advertisement

Related Manuals for YOSUDA Pro-R


Summary of Contents for YOSUDA Pro-R
- Page 1 Instructions for installation and use of the spinning bike Pro-R Please read this manual before installing and using the spinning bike. Following the principle of continuous development, the product may be updated when necessary, and no further notice will be...
- Page 2 Customer Service If you have any concerns, please feel free to contact our customer service: Email address: service@yosudabikes.com Search "YOSUDA Exercise Bike" on YouTube to get the assembly video Our website: www.yosudabikes.com Contact Us Assembly Video...
-
Page 3: Table Of Contents
Catalog I. Product introduction ..........................1 II. Safety Precautions and Warning Notes ..................2 III. BOM and Parts List ........................5 IV. Installation Instructions ........................8 V. Daily Maintenance .......................... 17... -
Page 4: Product Introduction
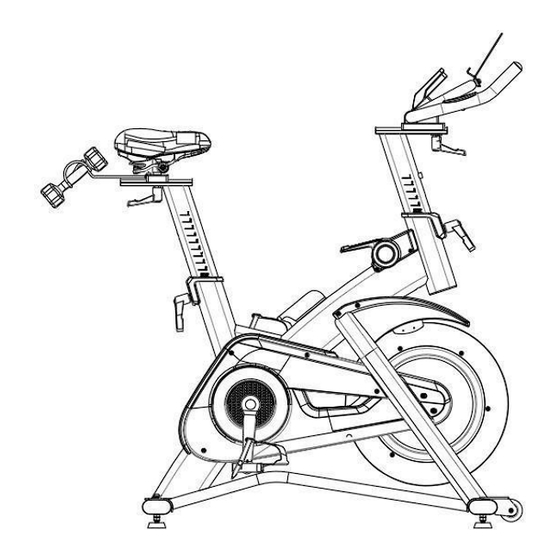
I. Product introduction Part description: Serial Name Serial Name Quantity Quantity Main supports Flywheel Armrest Left and right cranks Armrest adjusting tube Left and right pedals Seat cushion adjusting tube Seating washer Seat cushion slider Brake lever Forefoot tube Chain guard (of a bicycle) Hind leg tube Bow cap Mobile phone bracket... -
Page 5: Safety Precautions And Warning Notes
II. Safety Precautions and Warning Notes Please read the instruction carefully before use and pay attention to the following safety precautions: Before exercise, please wear appropriate sports clothes and sneakers to avoid accidents caused by contact between clothes, shoes and hats and spinning bikes. Strict ban on barefoot sports on spinning bikes, and do a whole body stretching exercise before exercise. - Page 6 3) Patients with abnormal osteoporosis. 4) Circulatory system disorders (heart disease, vascular disorders, hypertension, etc.). 5) Respiratory organ dysfunction. 6) Those who are using artificial heart rate regulators to implant in-vivo medical electronic instruments. 7) Those with malignant tumors. 8) Have thrombosis or severe aneurysm, acute venous aneurysm and other blood circulation disorders or various skin infections and other symptoms.
- Page 7 FORBIDDEN Do not use it when the shell is cracked, cracked or detached (the internal structure is exposed) or when the welding part is cracked. -Accidents or injuries may occur if you don’t follow the suggestion. Do not use and keep the cycling bike outdoors or in wet places near the bathroom. ...
-
Page 8: Bom And Parts List
III. BOM and Parts List... - Page 9 Serial Name Quantity Serial Name Quantity Main supports Armrest Armrest adjusting tube Seat cushion adjusting tube Seat cushion sliding Forefoot tube Hind leg tube Brake pads Brake lever Mobile phone bracket Dumbbell rack Flywheel Flywheel aluminium sheet Celestial core Left and right cranks Belt pulley Left and right pedals Middle axle...
- Page 10 Spring pad M10 Hexagon socket head cap screws Hexagon socket head cap screws Hexagon socket head cap screw Hexagon socket head cap screws Hexagon socket head cap screws Countersunk head Phillips screw Pan head drill tail M4.2*22 Pan head drill tail M4.2*16 Pan head drill tail M4.2*13 Cross round head tapping screw Cross round head tapping screw...
-
Page 11: Installation Instructions
IV. Installation Instructions Step 1. Install the front and rear foot tubes Required accessories: rear foot tube (7), front foot tube (6), 4 gaskets (66), 4 spring pads (75), 4 semi- circular hexagon socket head screws (76), using hexagon wrench (91). (please refer to the figure below) Locate the rear foot tube (7), and the front foot tube (6) lift the frame up by hand and move the foot tube to the butt joint of the frame hole for alignment and installation. - Page 12 Step 2. Install the left and right pedals Required accessories: left and right pedals (17), multi-function wrench (92) (please refer to the following figure) Install the right pedal, take out the right pedal (17) (Note: R is marked on the pedal), and then make the right pedal horizontally aligned with the thread hole of the right crank (15) (the crank is marked with the word R) clockwise, and the thread can not be rotated with a multi-function wrench (92).
- Page 13 Step 3. Install the seat cushion adjustment tube Required accessories: seat cushion adjustment tube (4) (see figure below) Locate the seat cushion adjusting tube (4) and unscrew the L-shaped quick release (22) counterclockwise. Insert the seat cushion adjusting tube into the frame as shown in the figure, adjust it to a position suitable for its own height, and then tighten the L-shaped quick release clockwise.
- Page 14 Step 4. Install the seat cushion Required accessories: seat cushion (28), seat cushion sliding part (5), dumbbell (90), flat cushion (87), L-shaped quick release(89) (please refer to the figure below) Clamp the seat cushion sliding part (5) to the seat cushion adjusting tube (4), and then tighten with the flat cushion (87) and the L-shaped quick release (89).
- Page 15 Step 5. Install the armrest adjustment tube Required accessories: armrest adjustment tube (3) (see figure below) Locate the armrest adjustment tube (3) and connect the sensor cables(54)(94) of the armrest adjustment tube and the main frame, then unscrew the L-shaped quick release (22) counterclockwise. Insert the armrest adjusting tube into the frame as shown in the picture, adjust it to a position suitable for your height, and then tighten the L-shaped quick release clockwise.
- Page 16 Step 6. Install the armrest and electronic watch Required accessories: armrest (2), electronic watch (53), flat pad (87), L-shaped quick release (89), battery (93). (please refer to the figure below) The handrail (2) is fixed on the handrail adjusting pipe (3) and is tightly fixed by a flat pad (87) and an L-shaped quick release.
- Page 17 Step 7. Install the IPAD holder Required accessories: IPAD holder (10), umbrella head cross screw (88)2, spring pad (73)2, multifunctional spanner (92). (please refer to the figure below) Take out the IPAD holder (10) and fix it to the armrest with the umbrella head cross screw (88) and the spring pad (73) with the multi-function wrench (92).
- Page 18 IV. Sports Suggestions and Guidelines Warm-up and soothing exercise A successful exercise program consists of three parts: warm-up exercise, aerobic exercise and soothing exercise. Warm-up exercise is a very important part of exercise. Warm-up exercise must be performed before every exercise. Warm-up exercises can warm up the body, stretch the muscles, and allow the body to adapt to more intense exercises.
- Page 19 With both hands supporting the wall, the body forms a 45 degree angle with the ground, and the left and right feet are alternately stretched backwards to do walking exercises.
-
Page 20: Daily Maintenance
V. Daily Maintenance Suggestions for maintenance and care of each part of the equipment 1. Before using this equipment, please check whether all the screws and nuts are locked and in a safe condition. Please check your equipment regularly, if you find any damaged parts, please replace them immediately, and do not exercise until the relevant worn parts are repaired.
Need help?
Do you have a question about the Pro-R and is the answer not in the manual?
Questions and answers