Advertisement
Advertisement

Summary of Contents for YOSUDA L-001A
-
Page 2: Table Of Contents
Catalog Customer Service…………………………………………....1 Safety Attentions & Warning Descriptions…………………………2 Sticking Diagram of Safety Warning Label ………………………..4 Product Profile…………………………………………......5 Installation Instructions ……………………………………………..7 Maintenance…………………………………………......13 Sports Advice & Guideline…………………………………………..16... -
Page 3: Customer Service
Customer Service If you have any questions or concerns, please feel free to contact us. Email address: service@yosudabikes.com You can also search "YOSUDA exercise bike" on YouTube to get an assembly video. Contact Us... -
Page 4: Safety Attentions & Warning Descriptions
Safety Attentions & Warning Descriptions Please properly keep this instruction book, so that you can refer to it. 1. Before starting any exercise program, you should consult your physician to determine if you have any medical or physical conditions that could put your health and safety at risk or prevent you from using the equipment properly. - Page 5 household appliance. Maximum user weight limit is 270 lbs. 11. When lifting up or moving this instrument, please operate carefully to avoid hurting your back. Please use the correct lifting methods, if necessary, please ask assistance. 12. All the movable parts are needed to be maintained regularly (such as crank, flywheel etc). Please check them carefully before use it, if some parts are found loosen or damaged, please repair or replace them immediately, it can’t be used until it restore to the good condition.
-
Page 6: Sticking Diagram Of Safety Warning Label
STICKING DIAGRAM OF SAFETY WARNING LABEL... -
Page 7: Product Profile
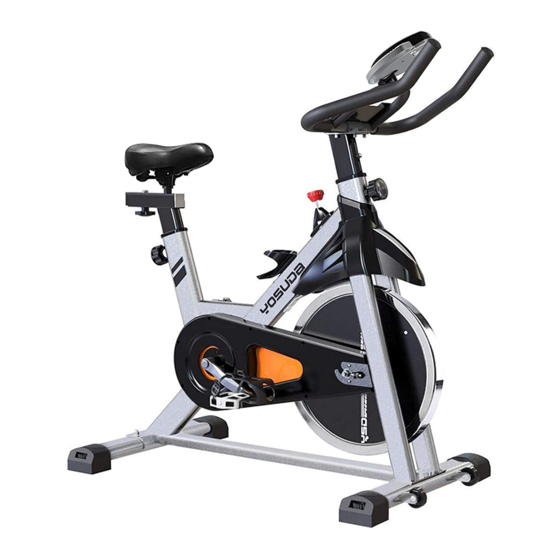
Product Profile Main configure list Name Name Seat Belt Cover Seat Slider Flywheel Plum Blossom Knob Flywheel Cover Seat Post Main Frame Adjustment Pull Pin IPAD Holder Left Pedal Handlebar Post Left Crank Inner Bush Rear Stabilizer Monitor Right Crank Handlebar Right Pedal Brake Knob... -
Page 9: Installation Instructions
Installation Instructions Step1: Install the Front and Rear Stabilizer Required parts: #8 -Rear Stabilizer #11-Front Stabilizer #22 - Bolts 4Pcs #23- Washer 4Pcs #24-Carriage Screw 4Pcs #15-Main Frame #28-Allen Wrench Attach the #8 -Rear Stabilizer and #11-Front Stabilizer to the #15-Main Frame, use 4 #22 - Bolts , 4 #23- Washer, 4 #24-Carriage Screw. - Page 10 COUNTER-CLOCKWISE as tightly as you can with your hand. Then use #28- Allen Wrench to tighten and secure. 3. Align the #10- Right Pedal with the #9- Right Crank at 90°. Turn the pedal bolt on the #9- Right Crank CLOCKWISE as tightly as you can with your hand. Then use #28- Allen Wrench to tighten and secure.
- Page 11 Step 4: Install the Seat Required parts: #1- Seat #2- Seat Slider #3- Plum blossom knob #28- Allen wrench 1. Put #2- Seat Slider on the #4-Seat Post. Adjust the #2- Seat Slider to the desired position, re-insert and tighten #3- Plum blossom knob to secure the slider in place. 2.Place the #1- Seat on the #2- Seat Slider.
- Page 12 Step 5: Install the Handlebar Post Required parts: #5- Adjustment Pull Pin 1PC #17 - Handlebar Post #63 - Plum Blossom Screw 1.The #5 - Adjustment Pull Pin holds the seat at the correct height. It has two mechanisms, a pull pin and a screw lock.
- Page 13 Step 6: Install the Handlebar and IPAD Holder Required parts: #20-Handlebar #16-IPAD Holder #25-Roundhead Inner Hexagon Screws 4PCS #26-Spring Washer 4PCS #27- Inner Hexagon Spanner 1. Secure #20-Handlebar to #17-Handlebar Post, using 4 #25-Inner Hexagon Screws and 4 #26-Spring Washers. Tighten and secure with #27-Inner Hexagon Spanner. 2.
- Page 14 Attentions: After completing the installation of exercise bike as the above steps, lock all bolts and check them again, ensure all bolts are firmly locked, then you can use the exercise bike.And we have an extra brake pad in the package. Please keep it.
-
Page 15: Maintenance
Maintenance This is general information for daily, weekly, and monthly maintenance to be performed on your bike. 1. Daily Maintenance After each exercise session, wipe down all the equipment: seat, frame, and handlebars. Pay special attention to the seat post, handlebar post, and belt guard. Sweat is very corrosive and may cause problems that require parts replacement later. - Page 17 Name Name Seat Seat Slider Plum Blossom Knob Seat Post Adjustment Pull Pin Left Pedal Left Crank Rear Stabilizer Right Crank Right Pedal Front Stabilizer Belt Cover Flywheel Flywheel Cover Main Frame IPAD Holder Handlebar Post Inner Bush Monitor Handlebar Brake Knob Bolt M8*55 8*16 Washer...
-
Page 18: Sports Advice & Guideline
Sports Advice & Guideline...


Need help?
Do you have a question about the L-001A and is the answer not in the manual?
Questions and answers