
Related Manuals for Samsung OfficeServ 7000's


Summary of Contents for Samsung OfficeServ 7000's
- Page 1 Version 1.1 November 2014 SMT-i5343 and SDM Guide_______________ OfficeServ 7000’s system Supports phone software version V1.21 and SDM software version V1.21...
- Page 2 Publication Information SAMSUNG TELECOMMUNICATIONS AMERICA reserves the right without prior notice to revise information in this publication for any reason. SAMSUNG TELECOMMUNICATIONS AMERICA also reserves the right without prior notice to make changes in design or components of equipment as engineering and manufacturing may warrant.
-
Page 3: Safety Concerns
Version 1.1 November 2014 SAFETY CONCERNS The purpose of the Safety Concerns section is to ensure the safety of users and prevent property damage. Please read this document carefully for proper use. Conventions Warning Provides information or instructions that you should follow in order to avoid personal injury or fatality. -
Page 4: Warning
Version 1.1 November 2014 Warning WARNING Power Do not use damaged power cord or For the power connection port of loose outlets. the product, use the provided optional power adapter. Use of a power adapter that does not meet the specifications may cause the product to become damaged, to overheat, or to explode. -
Page 5: Caution
Safety is not guaranteed if should be connected to the LAN expendable items or additional port of the product, NOT to the PC goods unauthorized by Samsung connection port. are used. Do not place heavy objects on top Do not attempt to disassemble, of the product. -
Page 6: Table Of Contents
Version 1.1 November 2014 TABLE OF CONTENTS SAFETY CONCERNS Conventions ................1 Symbols ..................1 Warning ..................2 Caution ..................3 BEFORE USE Check the Contents of the Package ........8 Phone Installation ..............9 Connection to Back Ports .............. 9 Assembling the Wall-Mount Bracket ........... - Page 7 Version 1.1 November 2014 Text Input Method ..............23 BASIC FUNCTIONS Easy Installation ..............24 Main screen ................27 Main screen type setup ............... 27 Program Keys ................28 List of Missed Calls ..............30 Dialing................... 31 Dialing an Extension Number ............31 Dialing a Trunk Line Number ............
- Page 8 Version 1.1 November 2014 Volume Control of Ringtone ............46 HOW TO USE MENUS Menu Structure ............... 47 Contacts .................. 51 History ..................56 Message ................. 57 Browser ................... 62 Language ................63 System Options ..............64 Call ....................64 Absent Message Settings ............
- Page 9 Version 1.1 November 2014 uReady Settings................85 Wi-Fi 5G Only Setting ..............85 Wi-Fi Hotspot ................85 INTEROPERATION SERVICE Smartphone Interoperation (SDM) ........87 Supported Smart Phones and Tablets ........87 System Configuration Diagram ........... 87 Key Functions ................88 Registration Methods ..............
-
Page 10: Before Use
Version 1.1 November 2014 BEFORE USE Check the Contents of the Package Check if the product package box includes all the components. Phone (black model) Handset Phone Cradle LAN Cable Quick Guide Adapter Camera (optional) Wall-Mount Bracket (optional) (optional) - If any components are damaged or missing, contact the retailer. - The camera and power adapter are options. -
Page 11: Phone Installation
Version 1.1 November 2014 Phone Installation Connection to Back Ports If a headset is used, connect it to the headset port. Connect a handset to the handset port of the phone. Connect one end of the PC connection LAN cable provided to the PC connection port of the phone. - Page 12 Version 1.1 November 2014 Connect the LAN cable connected to the network to the LAN connection port of the phone. - When power is supplied from the LAN port (PoE), the phone is booted up upon LAN connection. If PoE is not supported, connect the power adapter to the power connection port.
-
Page 13: Assembling The Wall-Mount Bracket
Version 1.1 November 2014 Assembling the Wall-Mount Bracket Assemble the wall-mount bracket in the intended usage location. The wall-mount bracket is an optional item. If necessary, please contact your retailer. First, choose the location where you want to install the phone, and then determine the required positions of the screws by placing the phone at the target location on the wall. -
Page 14: Detachment From The Wall-Mount Bracket
Version 1.1 November 2014 Detachment from the Wall-Mount Bracket This section describes how to detach the phone from the wall-mount bracket. You can detach the phone from the bracket by pressing the [Push] section at the bottom of the bracket. - Detach the phone more easily by pulling the entire bottom of the bracket instead of only the [Push] section. -
Page 15: Things You Should Now
Version 1.1 November 2014 THINGS YOU SHOULD Key Functions Network The SMT-i5343 phone enables voice telecommunication through an already-installed data network, without requiring the installation of an additional telephone line. Therefore, it does not require the additional expense of maintaining telephone numbers, and can save on telephone costs for businesses and individuals that make international phone calls frequently. - Page 16 Version 1.1 November 2014 Video Call By connecting a USB camera to the phone, you can make and receive video calls with other video-call enabled counterparts. Call Hold If you need to interrupt a call, you can put the call on hold or transfer it to another person using the Call Hold or call transferring function.
-
Page 17: Part Names And Functions
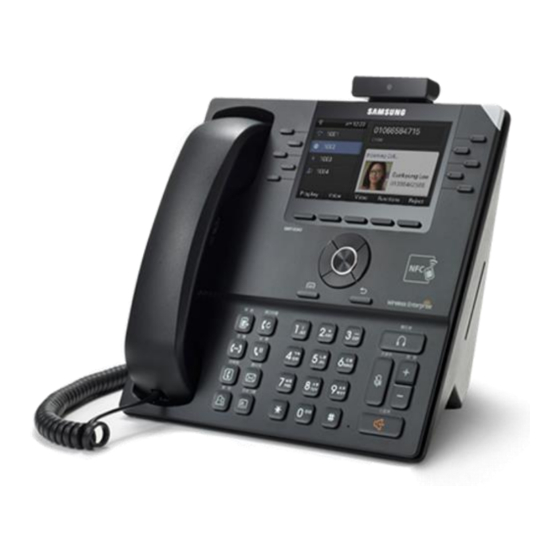
Version 1.1 November 2014 Part Names and Functions Front Black Model The color or image of the product in this manual may be different from the actual ones. Page | 15... -
Page 18: Name And Function
Version 1.1 November 2014 Name and Function Button Function Phone Status An LED shows the phone status (busy, ringing, receiving an Indicator internal message, etc.). Right Program These buttons are used to select desired functions from the Keys menus displayed on the LCD screen. Soft Buttons These buttons are used to select desired functions from the menus displayed on the LCD screen. - Page 19 Version 1.1 November 2014 Button Function Hold Button This button is used to hold a call temporarily without hanging Transfer Button This button is used to transfer a call to another number. Call Switch If a UE is connected to a smartphone via FMC subscriber, NFC Button or Bluetooth (smartphone mode), a call can be switched between connected devices using the Move button.
- Page 20 Version 1.1 November 2014 Navigation Buttons The SMT-i5343 phone has navigation buttons that allow easy use of its functions. OK button Direction key Button Function Navigation Direction These buttons are used to edit the content on the screen or Keys navigate between menu items.
-
Page 21: Phone Information Display
Version 1.1 November 2014 Phone Information Display Phone Status Indicator Indicator light is on or off depending on the phone status. Situation Indicator Status In a call Red indicator light stays on. When the phone is ringing to alert the Red indicator light blinks. -
Page 22: Phone Status Icons
Version 1.1 November 2014 Phone Status Icons Icon shows the phone setting status, being displayed on the top right side. Icon Description Signal strength of the wireless network Type of headset in use (general/ear jack/EHS/Bluetooth) Bluetooth headset (connected/not connected) Bluetooth smartphone (connected/not connected) Smartphone connection status AOM connection status (Galaxy Tab 10.1) PC client connection status... -
Page 23: Call Status Information
Version 1.1 November 2014 Call Status Information This section describes the icons displayed depending on the phone communication service setup status and communication status. Animation Image Description General (registered) Auto Answer Call Forwarding Not Registered Outgoing call Incoming call In a call In a private call On hold Page | 21... -
Page 24: Supplementary Functions Menu
Version 1.1 November 2014 Supplementary Functions Menu Supplementary functions are additional functions provided for user convenience according to the current status of the phone. The functions are provided through interworking with the system, and displayed as a menu on the right side of a screen. The supplementary functions menu varies depending on the system version. -
Page 25: Text Input Method
Version 1.1 November 2014 Text Input Method Using the dial buttons and navigation buttons on the phone, the user can easily enter or modify the Korean or English text, numbers, and other special characters. Whenever the user presses the dial button [*] on a text input screen, the input mode is changed. -
Page 26: Basic Functions
Version 1.1 November 2014 BASIC FUNCTIONS Easy Installation In the phone initialization status, the user can easily register on the system. If incorrect information is entered during easy installation, the phone may not be properly registered or a network fault may occur. Make sure to enter the information provided by the system administrator. - Page 27 Version 1.1 November 2014 After selecting a language to use for the phone, press the [>] soft button. - When the phone is connected to the system after easy installation, the language may be changed depending on the administrator’s settings. Set up the mode.
- Page 28 Version 1.1 November 2014 Enter the VLAN information. - Make sure to contact the system administrator because the network connection may fail if incorrect information is entered. Enter the 802.1x information and press the [>] soft button. - Make sure to contact the system administrator because the network connection may fail if incorrect information is entered.
-
Page 29: Main Screen
Version 1.1 November 2014 Main screen You can set up the phone main screen as per your preferences. Main screen type setup Go to [Menu] [Settings] [Screen] [Main Screen Type]. When you select a main screen type other than ‘Line + Program Key’, ‘Program Key’, you can select a background screen option. -
Page 30: Program Keys
Version 1.1 November 2014 Program Keys You can assign a frequently used function to each program key. When you press a specified button, the assigned function is executed. You can register up to ten keys. The program key button setup function may not be available depending on system. - Page 31 Version 1.1 November 2014 Select a function to register. After entering the name and value, press the [Save] button. Editing/Deleting Program Keys Press the left/right program key button of a button to edit. After editing in the program key setup screen, press the [Save] button.
-
Page 32: List Of Missed Calls
Version 1.1 November 2014 List of Missed Calls You can easily check the missed calls, messages, or voice messages on the main screen. Items shown may vary depending on the features supported by the system. Missed calls, SMS, and voice messages are shown with numbers indicating their respective counts. -
Page 33: Dialing
Version 1.1 November 2014 Dialing This section describes how to make a call to an extension number or outbound number. An extension line is the telephone line through which a call can be placed to another internal phone connected to the phone network of the office. An outbound line is the telephone line where the user can make or receive a call to/from outside (e.g. -
Page 34: Dialing A Trunk Line Number
Version 1.1 November 2014 Dialing a Trunk Line Number Pick up the handset, and check whether the dial tone is audible. Press a key specified by the manufacturer to make a general call (e.g. ‘9’), and enter an external phone number. When you enter a phone number, the call will be connected automatically. -
Page 35: Dialing Via Speaker Phone
Version 1.1 November 2014 Dialing via Speaker Phone Press the [Speaker] button without picking up the handset. When you enter a phone number, the call will be connected automatically. Start the conversation when the other party answers the call. - If the handset is picked up during the call, the speaker is turned off, and the conversation can be continued through the handset. -
Page 36: Quick Search Function
Version 1.1 November 2014 Quick Search Function You can make a call by searching for a phone number saved in the contacts or call log. This feature is enabled only when [Menu] [System Options] [Call] [Dial Mode] is set to Cellular. If set to [Normal Phone], the Quick Search Function is disabled. - Page 37 Version 1.1 November 2014 Move to the phone number of the person you want to call by using the navigation button. Then press the [Call] soft button, and a call is made to the selected number. Page | 35...
-
Page 38: Answering Calls
Version 1.1 November 2014 Answering Calls This section describes how to answer a call. Receiving a Call via the Handset Pick up the handset when the phone rings. Converse with the other party. Hang up the handset when the call ends. Receiving a Call via Speaker Phone When the phone rings, press the [Speaker] button. -
Page 39: Video Call
Version 1.1 November 2014 Video Call If a USB camera is connected to the phone, you can make a video call. - A USB camera required for video call is not included with this product, and must be purchased separately. - For the types of USB camera which can be used in the phone, contact the system administrator. -
Page 40: Receiving A Video Call
Version 1.1 November 2014 Receiving a Video Call By answering an incoming video call, you can start a video call with the caller. When there is an incoming call, check whether it is a video call by looking at the call mode icon. Then, pick up the handset or press the [Speaker] button to answer the call. -
Page 41: Functions Available During Call
Version 1.1 November 2014 Functions Available during Call The following functions are provided for user convenience while in an extension call or a trunk call. Call Hold This feature allows you to put a call on hold and then resume it when you are ready. This feature may work differently on some systems. -
Page 42: Mute
Version 1.1 November 2014 MUTE This function is used to mute the user’s voice during a call via an extension line, but the user can still hear the voice of the other party. To mute your voice during a call, press the [Mute] button. -
Page 43: Call Transfer
Version 1.1 November 2014 Call Transfer The current call can be transferred to another extension or outbound line. To transfer a call, press the [Transfer] button. After hearing a dial tone, dial the phone number to which the call is intended to be transfer. -
Page 44: Conference Function
During a call, go to [Function] [Record] and press the right selection button to start recording. To stop recording, go to [Function] [Stop Recording] and press the right selection button. - You can check the recorded files using the [View Recordings] function of Samsung Communicator. Page | 42... -
Page 45: During Video Calls
Version 1.1 November 2014 During Video Calls Video Swap During a video call, press the [Function] soft button and select [Video Swap] to switch your video with the other party’s video. Video Off During a video call, press the [Video Off] soft button to turn the video off. - Press [Video On] at the bottom of the screen to disable the video off function. -
Page 46: Volume Control
Version 1.1 November 2014 Volume Control You can adjust the volume of the handset, speaker, or ringtone. Volume Control of Handset You can adjust the volume in the following way while in a call using the handset. Press the upper part (+) of the [Volume] button to turn up the handset volume. -
Page 47: Volume Control Of Speaker
Version 1.1 November 2014 Volume Control of Speaker You can adjust the volume of the speaker in the following way during a call. Press the upper part (+) of the [Volume] button to turn up the speaker volume. Press the lower part (-) of the [Volume] button to turn down the speaker volume. -
Page 48: Volume Control Of Ringtone
Version 1.1 November 2014 Volume Control of Ringtone Press the upper part (+) of the [Volume] button while the ringtone is ringing to turn up the ringtone volume. Press the lower part (-) of the [Volume] button while the ringtone is ringing to turn down the ringtone volume. -
Page 49: How To Use Menus
Version 1.1 November 2014 HOW TO USE MENUS This section describes the menu functions. The menu shows call, phone, and setup functions. Menu Structure Press the [Menu] soft button when the phone is in standby mode to show the menu on the screen. - Page 50 Version 1.1 November 2014 Button Submenu Function Browser You can search and use the information provided from the browser server. Language You can set up the system language. System Call You can set up various functions provided by the Options system such as phone name and dial method.
- Page 51 Version 1.1 November 2014 Button Submenu Function Phone You can restart the phone. Restart Page | 49...
- Page 52 Version 1.1 November 2014 Button Submenu Function Settings Administrator You can enter the administrator menu. Mode (Requires administrator password). uReady You can enable/disable uReady. Settings Wi-Fi 5G Only You can enable/disable the Wi-Fi 5G only mode. Settings * Wi-Fi You can set up the Wi-Fi Hotspot function. Hotspot Page | 50...
-
Page 53: Contacts
Version 1.1 November 2014 Contacts [Phone Contacts] Using the contacts, you can easily manage phone numbers, email IDs, fax numbers, and photos, etc. stored on your phone. In addition, you can make calls quickly using the address book. [System Contacts] You can search for users on the system. - Page 54 Version 1.1 November 2014 Retrieving Phone Numbers You can view the phone numbers saved in the contacts. Select [Menu] [Contacts]. The list of saved phone numbers is displayed. Select a contact and press the [OK] button to view the detailed information. - [Call]: You can make a call to the selected phone number.
- Page 55 Version 1.1 November 2014 Adding Phone Numbers You can add phone numbers for up to 500 contacts. Press the [Menu] [Contacts] [Edit Mode] [Add Contact] soft button. Enter the name, phone number, etc. and press the [Save] soft button. - You can set up numbers (office, mobile phone, home, fax, others), e-mail, notes, ringtone, buddy ID, and photo.
- Page 56 Version 1.1 November 2014 Deleting Phone Numbers You can delete registered phone numbers from the contacts. Go to [Menu] [Contacts] [Edit Mode] , select a phone number to delete and press the [Delete] soft button. Press the [Delete] soft button to delete the phone number.
- Page 57 Version 1.1 November 2014 Deleting Groups You can delete existing groups. Go to [Menu] [Contacts] [Groups] , select a group to delete, and press the [Delete Group] soft button. Press the [Delete] soft button to delete the group. - The members of the deleted group are moved to the Unassigned group.
-
Page 58: History
Version 1.1 November 2014 History The recent incoming/outgoing calls, missed calls and all the received/sent messages are displayed. Up to 500 records can be saved. Select [Menu] [History]. Use the navigation buttons to navigate between All, Inbox, Outbox, Missed, and Message history. - [All]: The recent incoming/outgoing calls and messages are displayed. -
Page 59: Message
Version 1.1 November 2014 Message You can manage voice messages by connecting to Voice Mail. You can also exchange text messages with other users and save draft messages. Voice Message You can save and check voice messages. Select [Menu] [Message] [Voice Message] to access Voice Mail. - Page 60 Version 1.1 November 2014 Composing Messages You can compose and save messages that you want to send. Press the [Menu] [Message] [New] soft button. After creating a message, specify a recipient by pressing the [+] soft button on the right.
- Page 61 Version 1.1 November 2014 Inbox You can save and check received messages. Select [Menu] [Message] [Inbox]. The list of received messages is displayed. - [Delete]: You can delete a selected message. - [Delete All]: You can delete all the messages. Select a message and press the [OK] button to view the entire message.
- Page 62 Version 1.1 November 2014 Outbox You can save and check sent messages. Select [Menu] [Message] [Outbox]. The list of sent messages is displayed. - [Delete]: You can delete a selected message. - [Delete All]: You can delete all the messages. Select a message and press the [OK] button to view the entire message.
- Page 63 Version 1.1 November 2014 Draft You can save draft messages. Select [Menu] [Message] [Draft]. The list of draft messages is displayed. Select a message and press the [OK] button to view the entire message. - [Forward]: Press the soft button at the bottom to forward the message to another person.
-
Page 64: Browser
Version 1.1 November 2014 Browser The user can browse and use the information provided by the browser server. Information provided and related services may vary according to the server. NOT SUPPORTED IN US MARKET Select [Menu] [Browser]. - Use the navigation buttons to navigate between the various items shown on the page. -
Page 65: Language
Version 1.1 November 2014 Language Select [Menu] [Language]. You can set up the phone language. When you select a language, the phone restarts in the selected language. Languages supported may vary by phone version and system. Page | 63... -
Page 66: System Options
Version 1.1 November 2014 System Options You can configure call settings, absent message settings, subscriber settings, etc. Available settings may vary by system. Call Select [Menu] [System Options] [Call]. - This is used to set the optional functions related to calls. - You can change settings for CID display, phone number, dial mode, answer mode, extension line button (AOM) display, headset mode, etc. -
Page 67: Station On/Off
Version 1.1 November 2014 Station On/Off Select [Menu] [System Options] [Station On/Off]. - You can configure settings related to subscriber service such as automatic hold and automatic call time display. Extension Login Select [Menu] [System Options] [Extension Login]. When not using extension login, press [Use] to deregister the phone and show the ID/password input screen. -
Page 68: Call Forward
Version 1.1 November 2014 Call Forward You can enable/disable call forwarding. You can set calls to be forwarded to a specific number at all times, when you are busy, or when you do not answer the calls. Available settings may vary by system. Select [Menu] ... -
Page 69: Program Keys
Version 1.1 November 2014 Program Keys You can retrieve or edit program key information. The number of program keys may vary by system, and the editing function may not be supported by some systems. For information about using the functions mapped to program keys, consult the system administrator. - Page 70 Version 1.1 November 2014 Enter the information and press the [Save] soft button. - If the information entered is not correct, the program key cannot be registered. - [Delete]: You can delete registered function buttons. [Editing Program Keys] After moving to a desired program key by using the navigation button, press the [OK] or [Edit] button.
-
Page 71: Settings
Version 1.1 November 2014 Settings You can configure screen, sound, language, password and lock settings and retrieve the phone information. Sound Volume Select [Menu] [Settings] [Sound] [Volume]. Press the navigation buttons to adjust volume for handset (receiver), speaker, ringtone, key tone, headset, message notification, and alarm respectively. -
Page 72: Screen
Version 1.1 November 2014 Screen Screen Brightness Select [Menu] [Settings] [Screen] [Brightness]. Press the navigation buttons to adjust the LCD screen brightness. The screen brightness may affect the LCD lifespan. Background Image Select [Menu] [Settings] [Screen] [Background Image]. Press the navigation buttons to select a background image and a time display method. - Page 73 Version 1.1 November 2014 Page | 71...
- Page 74 Version 1.1 November 2014 Dim LCD - Brightness Select [Menu] [Settings] [Screen] [LCD Power Settings] [Dim LCD-Brightness]. Select screen brightness to use when [Dim LCD] is enabled. Turning LCD Off Select [Menu] [Settings] [Screen] [LCD Power Settings] [LCD Off].
- Page 75 Version 1.1 November 2014 Standby Screen Button Settings You can set up actions of the buttons on the left/right when on the standby screen. Select [Menu] [Settings] [Screen] [Standby Screen Button Settings]. Select a button action. When the main screen type is a widget (calendar, clock, background), the left/right keys have the following functions when on the standby screen.
-
Page 76: Alarm
Version 1.1 November 2014 Alarm Editing/Adding Alarms Select [Menu] [Settings] [Alarm]. Add an alarm or select an alarm and edit it. - [Edit]: You can edit existing alarms. - [Add]: You can add a new alarm. At the alarm time, the alarm message is displayed and the alarm sound goes off. -
Page 77: Presence
Version 1.1 November 2014 Presence This feature allows you to set up additional functions for each presence status so that the additional functions are performed automatically as your presence status changes. If you use SDM, you can change status and set up additional functions remotely. - Page 78 Version 1.1 November 2014 Additional Status Functions You can set up additional functions to perform under each presence status. For example, call forwarding is set for your mobile phone and phone lock is enabled for the [Meeting] status, call forwarding and phone lock functions are enabled when your status changes to [Meeting].
- Page 79 Version 1.1 November 2014 Default You can reset all additional functions for each presence status. Press the [Menu] [Presence] [Default] soft button. Press the [OK] soft button in the popup window to delete all the actions configured for a selected status. Page | 77...
-
Page 80: Password And Lock
Version 1.1 November 2014 Password and Lock You can set up a password which is required when changing various settings of the phone and lock the phone so that it cannot be used by others. - The default password is [1234]. - The call lock function may not be supported by some systems. -
Page 81: Bluetooth & Headset
Version 1.1 November 2014 Bluetooth & Headset You can set up functions related to the headset and Bluetooth. Using Phone Headset Key This feature keeps the user from accidentally pressing the headset key located on the front of the phone. Enable [Menu] ... - Page 82 Version 1.1 November 2014 [If Bluetooth mode is ‘Headset’] The phone scans for nearby Bluetooth devices and displays their connection information. After selecting a Bluetooth headset to connect to the phone, press the [Pairing] button. After confirming that the correct device is selected, press the [Register] button.
- Page 83 Version 1.1 November 2014 Bluetooth is the name for a short-range radio networking technology that operates at 2.4 GHz to support wireless connections of various devices within a specific distance. - Bluetooth may cause RF interference between low-power devices using the same frequency band such as the devices for industrial, scientific and medical use, microwave oven and wireless LAN units.
-
Page 84: Deskphone Manager Information
Retrieving Deskphone Manager Information and Disconnecting Select [Menu] [Settings] [Deskphone Manager Information] to view connection information of the mobile device. - SDM (Samsung Deskphone Manager) App connection information is displayed. - [Disconnect]: Disconnect the mobile device. Simple Connection Mode If SDM is installed on your smartphone, SDM registration can be done simply using the NFC function of your smartphone. -
Page 85: Video Call
Version 1.1 November 2014 Video Call Select [Menu] [Settings] [Video Call Settings]. You can choose between video call and voice call. - Voice: Outgoing calls will be made as voice calls. - Video: Outgoing calls will be made as video calls. If the other party is unavailable for video call, the call is made as a voice call. -
Page 86: Clear User Data
Version 1.1 November 2014 Clear User Data You can clear all user settings and data on the phone. Select [Menu] [Settings] [Clear User Data]. Enter your user password. Select [Yes] in the clear phone confirmation window. Phone Restart You can restart the IP phone. -
Page 87: Uready Settings
Version 1.1 November 2014 uReady Settings Select [Menu] [Settings] [uReady Settings]. Enable/disable the feature and enter detailed information. This feature is available only in an environment where uReady connections are supported. Wi-Fi 5G Only Setting If the Wi-Fi 5G only mode is selected, only the Wi-Fi APs in the 5GHz frequency band are searched. - Page 88 - Default values are 2.4G and 802.11b. - 2.4G: 802.11b/g/n support - 5G: 802.11a support Set up an SSID and a password to use with the hotspot and press the [Save] button. - Default settings are as follows. SSID: SMT-i5343_(phone number) Password: Samsung*# Page | 86...
-
Page 89: Interoperation Service
INTEROPERATION SERVICE Smartphone Interoperation (SDM) The Samsung Deskphone Manager (SDM) is a smartphone application that allows a user to use the contacts, call log, or program keys and also configure various settings by interoperating with SMT-i5343. Supported Smart Phones and Tablets ... -
Page 90: Key Functions
Version 1.1 November 2014 Key Functions Menu Description Dashboard You can check or change the name or status (presence) of the currently connected user and also use contacts, call log, or AOM menu. Contacts You can manage the contacts saved on your smartphone and deskphone (IP phone). - Page 91 Version 1.1 November 2014 Using Wi-Fi 1. Using NFC (Cellular phone number authentication) Use the NFC feature of the smartphone to register SDM with your IP phone. To register using NFC: - The NFC feature of the smartphone must be available. - The mobile phone number must be registered with the system.
- Page 92 Version 1.1 November 2014 If NFC is off, turn on the NFC by selecting NFC setting at the bottom. Enable NFC and S Beam in ‘Settings’ of the smartphone and use the ‘Back’ button to return to SDM. Page | 90...
- Page 93 Version 1.1 November 2014 If Wi-Fi is off, activate it. Use the Wi-Fi settings below to connect to an AP and then use the ‘Back’ button to return to SDM. - It must be possible for the IP phone to connect to the selected wireless network.
- Page 94 Version 1.1 November 2014 If the screen on the right appears, it means that the Wi-Fi and NFC features of the smartphone are ready for use. Tag the smartphone on the NFC logo of the IP phone. When the screen shrinks, tap the screen.
- Page 95 Version 1.1 November 2014 If the NFC data transfer is successful, authentication is performed and the Dashboard screen is shown. If authentication fails, ask the administrator whether the mobile phone number of your smartphone is correctly registered in the system. -You can choose to Press User ID instead and input the User ID and Password for the phone.
- Page 96 Version 1.1 November 2014 2. User ID Authentication (without NFC) Auto Login Try authenticating with the IP phone over the wireless network. Since auto login automatically obtains and authenticates the network IP address of the IP phone to communicate with the IP phone, no manual work needs to be done to obtain network information of the IP phone.
- Page 97 Version 1.1 November 2014 Enter the account information and select ‘Deskphone IP input’. Enter the desk phone IP information and select OK. Page | 95...
- Page 98 Version 1.1 November 2014 If the authentication is successful, the Dashboard screen is shown. If the account information or the IP phone address entered is incorrect, registration will fail. Contact the administrator. NFC Simple Connection You can register a smartphone with your IP phone simply using the NFC feature. Simple connection launches SDM and establishes Wi-Fi connections and Bluetooth connections automatically without complicated settings.
- Page 99 Version 1.1 November 2014 systems. - The wireless AP connected to the smartphone must be able to communicate with the IP phone. Go to [Menu] [Settings] [Deskphone Manager Information] and enable Simple Connection Mode. - The setting will be preserved until changed by the user. Go to ‘Advanced Settings’...
- Page 100 Version 1.1 November 2014 Tag the smartphone on the NFC logo of your IP phone. - To use the NFC feature of the smartphone, the smartphone must be unlocked. If successfully connected, the registration success message will appear. Using USB Tethering The smartphone and the IP phone can communicate with one another via USB tethering using a USB data cable.
-
Page 101: Deregistration
Version 1.1 November 2014 Deregistration You can deregister a smartphone which has been registered with the IP phone. Deregistering in Settings Go to ‘Settings’ and ‘IP phone connection settings’ on the Dashboard screen and select the ‘Deregistration’ button. When deregistration popup is displayed, press the ‘Yes’... -
Page 102: Dashboard
Version 1.1 November 2014 Dashboard This is the first screen where you can change presence status or access key functions. Function Description Dashboard Presence You can change your presence status. Contacts icon Go to the Contacts screen. Call Log icon Go to the Call Log screen. -
Page 103: Contacts
Version 1.1 November 2014 Contacts Contacts List You can manage the list of contacts (smartphone, IP phone) per device. When deleting or copying, selection mode is enabled for the list. Function Description Contacts List View contacts per View all contacts or contacts on the IP phone device View groups View groups in each device... - Page 104 Version 1.1 November 2014 Viewing Contact Details You can view or manage detailed information of the selected contact. Function Description Viewing Contact Favorites Set the contact as a favorite. Details Dial Make an outgoing call using the IP phone or the smartphone. Edit Edit the contact.
- Page 105 Version 1.1 November 2014 Add/Edit Contacts When adding a contact, a popup window appears, asking you to select a location to save the contact. Supported fields vary for each device. Function Description Add/Edit Select location to save Select IP phone or Smartphone. Contacts Register/change/remove Register, change, or remove a photo.
- Page 106 Version 1.1 November 2014 Selecting/Adding Groups Press the Add Group button on the Contact Add/Edit screen to bring up the screen shown below. You can select multiple groups for the contact or create a new group. Function Description Select Group Create new group Create a new group.
- Page 107 Version 1.1 November 2014 Group List You can see the list of groups in each device. When deleting, selection mode is enabled for the list. Function Description Group List View contacts View the list of contacts. Create group Add a new group. Delete Delete a group.
- Page 108 Version 1.1 November 2014 Editing Group Name Long touch on the groups list and select Edit Group Name to bring up the popup window below where you can enter a group name. Enter a name and press OK to finish editing. Page | 106...
- Page 109 Version 1.1 November 2014 Add group Like contacts, you can select a device and then enter a name and select members. Function Description Add group Select location to save Select IP phone or Smartphone. Enter name Enter a group name. (If already exists, the warning popup window will appear.) Add member Open the member selection screen.
- Page 110 Version 1.1 November 2014 Contacts in Group Select a group to view the contacts belonging to the group. When deleting, selection mode is enabled for the list. If you add a contact to a group, the device selection window is not displayed. (The contact automatically belongs to the group.) Function Description Contacts in Group...
- Page 111 Version 1.1 November 2014 Adding Members You can add/remove group members. The top bar indicates the currently selected contact. Function Description Adding Select/remove group Add members to the group or remove existing Members members group members. Search contact Search contacts by entering a keyword. Page | 109...
- Page 112 Version 1.1 November 2014 Search/Directory Search You can search contacts by pressing the Search button (magnifier button). By default, results are displayed in real-time. This feature also supports searching by initials and phone numbers. After entering a keyword, you can search for directory names or phone numbers.
-
Page 113: Call Log
Version 1.1 November 2014 Call Log Call Log List You can view call logs for each device. You can view call logs each category. You can also delete selected call log entries or delete all call logs. The call log of IP phone is synchronized in real time. - Page 114 Version 1.1 November 2014 Viewing Call Log Details You can view detailed information of a call log entry. You can view all call history of the selected number. You can also dial the number or access contact information of the number. Function Description Viewing Call...
-
Page 115: Program Keys
Version 1.1 November 2014 Program Keys The only difference with the pad is the layout. Functionality is identical. Program Key Main Screen You can use program keys and the AOM function. Function Description Program Change device Select a device name to change the device. Keys Change page Swipe the top title bar left/right to navigate... - Page 116 Version 1.1 November 2014 Editing/Deleting Functions You can edit or delete program keys. Multiple actions may be assigned to a program key. After editing/deleting, press Done to apply changes. This feature may work differently on some systems. Function Description Edit/Delete Edit Go to the Edit screen.
- Page 117 Version 1.1 November 2014 Add/Edit Function Screen You can add or edit functions. Select a function and enter settings for the function. For descriptions of available functions, contact the administrator. Function Description Add/Edit Select function Go to the function selection screen where a desired Function function can be selected.
-
Page 118: Settings
Version 1.1 November 2014 Settings Settings Main Screen Function Description Settings IP Phone Settings This setting shows the IP phone setting web page. Contact view setting You can view the address book of the smartphone from the IP phone. Connection Info Optional settings for IP phone connection Setting IP phone call setting... - Page 119 Version 1.1 November 2014 IP Phone Settings You can bring up the IP phone function setup screen (web). General settings and advanced settings are available. May not be supported on some systems. Contact View Setting You can enable the contact viewing option. If turned on, contacts of the smartphone can be viewed in contacts of the IP phone.
- Page 120 Version 1.1 November 2014 Presence Scenario You can set up whether to use the IP phone presence or detail settings. You can add, delete, or change functions for each presence status. IP Phone Auto Login When the IP phone is logged out, you can log it in again using NFC tagging. In order to use this feature, the user must register SDM at least once to receive automatic login account information from the IP phone or enter the login account information manually.
-
Page 121: Troubleshooting
Version 1.1 November 2014 TROUBLESHOOTING Listed below are some problems which may occur while using the phone and their solutions. Please check the list of solutions before requesting repair services from the service center. Please call the service center if the problem is not resolved using the following solutions. - Page 122 Version 1.1 November 2014 Page | 120...
- Page 123 Version 1.1 November 2014 Screen Problem Possible Solutions Nothing is displayed on the LCD Check that the phone cables are properly connected to the ports. (Please refer to the section on ‘Phone screen while using the phone. Installation’ under ‘Preparations’ in this user manual.) General Problem Possible Solutions...
-
Page 124: Annex
Version 1.1 November 2014 ANNEX Product Specifications The features and specifications of the SMT-i5343 phone are as follows. Category Specifications Model SMT-i5343 Weight (kg) 1.445 kg ± 5 % (full set, including the unit box), Single unit: 1.147 g ± 5 % Dimensions (mm) 223 (width) ×... - Page 125 Model name SMT-i5343 Model name SMT-i5343 Certificate KCC-CMM-SCT- Certificate YL10004-13003 number SMT-i5343 number Certifier Samsung Electronics Certifier J-Technology Co., (Manufacturer) Co., Ltd. (Manufacturer) Ltd. Rating 12 V; 2 A (Adapter), Rating 12 V; 2 A (Adapter), 48 V; 0.3 A (PoE) 48 V;...