
Related Manuals for ESAB EMP 210


Summary of Contents for ESAB EMP 210
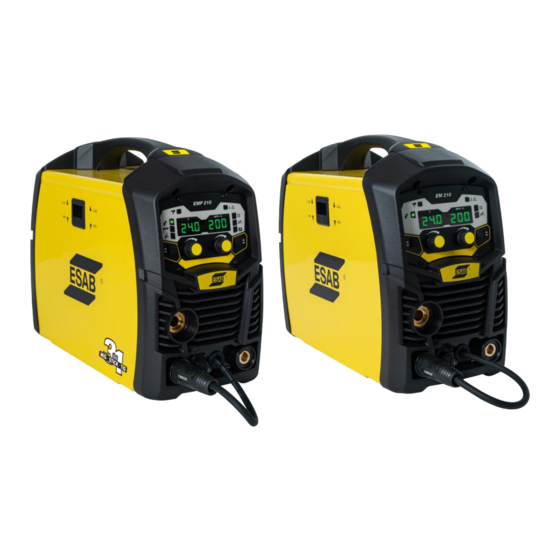
- Page 1 ESAB EMP 210 3-In-1 Multiprocess Welding System ESAB EM 210 MIG/MAG Welding System Instruction manual 0463 815 101 GB 20210923...
-
Page 2: Table Of Contents
Setup for spool gun MIG (GMAW) welding with gas shielded MIG wire ......44 5.13 Setup for LIFT TIG (L-GTAW) welding (only for ESAB EMP 210) ........45 5.14 Setup for MMA (SMAW) welding (only for ESAB EMP 210) ..........46 BASIC WELDING GUIDE ........................ - Page 3 TROUBLESHOOTING ........................69 Power source problems ......................69 MIG (GMAW/FCAW) welding troubleshooting ..............70 MMA (SMAW) welding troubleshooting (only for ESAB EMP 210) ........74 TIG (L-GTAW) welding problems (only for ESAB EMP 210) ..........76 Error Codes ..........................77 ORDERING SPARE PARTS ......................
-
Page 4: Safety
6. Protect other personnel from arc rays and hot sparks with a suitable non-flammable partition or curtains. 7. Use goggles over safety glasses when chipping slag or grinding. Chipped slag maybe hot and can fly far. Bystanders should also wear goggles over safety glasses. - 4 - 0463 815 101 © ESAB AB 2021... - Page 5 8. Put on dry, hole-free gloves before turning on the power. 9. Turn off the power before removing your gloves. 10. Refer to ANSI/ASC Standard Z49.1 for specific grounding recommendations. Do not mistake the work lead for a ground cable. - 5 - 0463 815 101 © ESAB AB 2021...
- Page 6 4. When not in use, keep cylinder valves closed. Have valve protection cap in place if regulator is not connected. Secure and move cylinders by using suitable hand trucks. - 6 - 0463 815 101 © ESAB AB 2021...
- Page 7 5. Keep all safety devices and cabinet covers in position and in good repair. 6. Use equipment only for its intended purpose. Do not modify it in any manner. - 7 - 0463 815 101 © ESAB AB 2021...
- Page 8 NFPA Standard 51B, “Fire Prevention During Welding, Cutting, and Other Hot Work" • CGA Standard P-1, “Precautions for Safe Handling of Compressed Gases in Cylinders” • ANSI Z87.1, "Occupational and Educational Personal Eye and Face Protection Devices" - 8 - 0463 815 101 © ESAB AB 2021...
-
Page 9: User Responsibility
1 SAFETY User responsibility Users of ESAB equipment have the ultimate responsibility for ensuring that anyone who works on or near the equipment observes all the relevant safety precautions. Safety precautions must meet the requirements that apply to this type of equipment. The following recommendations should be observed in addition to the standard regulations that apply to the workplace. - Page 10 • Do not touch parts bare handed. • Allow cooling period before working on equipment. • To handle hot parts, use proper tools and/or insulated welding gloves to prevent burns. - 10 - 0463 815 101 © ESAB AB 2021...
-
Page 11: California Proposition 65 Warning
CAUTION! This product is solely intended for arc welding. ESAB has an assortment of welding accessories and personal protection equipment for purchase. For ordering information contact your local ESAB dealer or visit us on our website. California proposition 65 warning... -
Page 12: Introduction
Equipment ESAB EMP 210 is supplied with: • EMP 210 power source with 6 ft (1.8 m) gas hose fitted, NEMA 6-50P, the style of MIG Gun connector is TWECO connector • Ground clamp with #6 AWG (16 mm ) lead and 50mm OKC cable connector, 9 ft (3m) long •... -
Page 13: Technical Data
3 TECHNICAL DATA TECHNICAL DATA ESAB EMP 210 120 V ±15% 1~ 230 V ±15% 1~ 50/60 Input voltage 50/60 Hz Primary current MIG (GMAW/FCAW) 26 A 38 A Lift TIG (L-GTAW) 22 A 29 A MMA (SMAW) 26 A... - Page 14 3 TECHNICAL DATA ESAB EMP 210 Effective input current (I1 MIG (GMAW) 13 A 14.7 A Lift TIG (L-GTAW) 11 A 11.2 A MMA (SMAW) 13 A 14.7 A 0.38 in. (9.52 mm) Max weld thickness +14 to 104 °F (-10 to +40 °C) Operating temperature -4 to 131 °F (-20 to +55 °C)
- Page 15 200% of the rated input amperage of the welding power source (based on article 630, National Electrical Code). ESAB continuously strives to produce the best product possible and therefore reserves the right to change, improve or revise the specifications or design of this or any product without prior notice.
-
Page 16: Installation
Use care in handling the spooled wire as it will tend to “unravel” when loosened from the spool. Grasp the end of the wire firmly and don’t let go of it. - 16 - 0463 815 101 © ESAB AB 2021... -
Page 17: Installing 2 Lb Spool (4 In. Diameter)
Use care in handling the spooled wire as it will tend to “unravel” when loosened from the spool. Grasp the end of the wire firmly and don’t let go of it. - 17 - 0463 815 101 © ESAB AB 2021... -
Page 18: Inserting Wire Into The Wire Feed Mechanism
Figure 14: MIG welding wire - Installation 1 Wire drive tension knob 3 Outlet wire guide 2 Pressure arm 4 Inlet wire guide Figure 15: MIG welding wire - Installation 1 MIG welding wire - 18 - 0463 815 101 © ESAB AB 2021... -
Page 19: Operation
(i.e. system relief valve). Make sure the pressure rating of the downstream equipment is compatible with the maximum delivery pressure of the regulator. - 19 - 0463 815 101 © ESAB AB 2021... - Page 20 Stand to the side of the cylinder opposite the regulator when opening the cylinder valve. Keep the cylinder valve between you and the regulator. For your safety, never stand in front of or behind a regulator when opening the cylinder valve! - 20 - 0463 815 101 © ESAB AB 2021...
-
Page 21: Leak Testing The System
If a leak has been detected anywhere in the system, discontinue use and have the system repaired. DO NOT use leaking equipment. Do not attempt to repair a leaking system while the system is under pressure. - 21 - 0463 815 101 © ESAB AB 2021... -
Page 22: When You Finish Using The Regulator
The inlet and outlet should be capped to protect against internal contamination and prevent insects from nesting. Controls and indicators 5.4.1 ESAB EMP 210 - 22 - 0463 815 101 © ESAB AB 2021... - Page 23 5 OPERATION 1. Spool gun indicator When the correct ESAB Spool-Gun* is connected, the LED will illuminate. (*Optional Accessory). 2. Thermal overload indicator (fault indicator) This welding power source is protected by a self resetting thermostat. The LED indicator will illuminate if the duty cycle of the power source has been exceeded.
- Page 24 5. MIG gun adapter (TWECO style) The MIG gun adapter is the connection point for the MIG gun. Refer section 5.6 Attaching the ESAB fusion 180 A MIG gun for installation of MIG gun to the power source. 6. Positive welding output terminal...
- Page 25 Peripheral resistor, 10 K Spool gun 1 Trigger switch 4 Pot V-A-WFS 2 Max (CW) 5 Peripheral sense 3 Min (CCW) MIG Gun (F180TH103035) / TIG Torch (W4013802) 1 Trigger switch - 25 - 0463 815 101 © ESAB AB 2021...
- Page 26 (dip versus spray transfer). Where exact settings are required (in the case of procedural work), it is recommended that alternate measurement methods be utilized to ensure output values are accurate. - 26 - 0463 815 101 © ESAB AB 2021...
- Page 27 Encoder and is measured in seconds. Existing the sub-menu is easily completed. The operator can choose between pressing and holding Left-hand side Button for 2 seconds or alternatively, by pressing the torch trigger. - 27 - 0463 815 101 © ESAB AB 2021...
- Page 28 Right-hand side LED Display Indicates set welding amperage value (A). Rotating Right-hand side Encoder CW (Clockwise) will increase welding amperage value. Rotating Right-hand side Encoder CCW (Counter-Clockwise) will reduce welding amperage value. (Min and Maximum range see table) - 28 - 0463 815 101 © ESAB AB 2021...
- Page 29 (dip versus spray transfer). Where exact settings are required (in the case of procedural work), it is recommended that alternate measurement methods be utilized to ensure output values are accurate. - 29 - 0463 815 101 © ESAB AB 2021...
- Page 30 NOTE! In MMA mode the fan operates continuously. - 30 - 0463 815 101 © ESAB AB 2021...
-
Page 31: Esab Em 210
ESAB EM 210 1. Spool gun indicator When the correct ESAB Spool-Gun* is connected, the LED will illuminate. (*Optional Accessory) 2. Thermal overload indicator (fault indicator) This welding power source is protected by a self resetting thermostat. The LED indicator will illuminate if the duty cycle of the power source has been exceeded. - Page 32 5. MIG gun adapter (TWECO style) The MIG gun adapter is the connection point for the MIG gun. Refer section 5.6 Attaching the ESAB fusion 180 A MIG gun for installation of MIG gun to the power source. 6. Positive welding output terminal...
- Page 33 5 Pot positive, Max CW 2 Spool gun trigger 6 Pot negative, Min CCW 3 Spool gun trigger 7 Pot wiper 8 Peripheral resistor, 10 K 4 Spool gun motor positive, +24 V - 33 - 0463 815 101 © ESAB AB 2021...
- Page 34 2 Max (CW) 5 Peripheral sense 3 Min (CCW) MIG Gun (F180TH103035) / TIG Torch (W4013802) 1 Trigger switch MIG Gun / TIG Torch 1 Trigger switch 2 10k Peripheral sense - 34 - 0463 815 101 © ESAB AB 2021...
- Page 35 Left-hand side LED displays "DIS", Rotate Right-hand side Encoder Switch current and wire delivery speed, namely WFS and AMP. Press Left-hand side Button short or trigger the welding gun switch to exit the unit selection menu - 35 - 0463 815 101 © ESAB AB 2021...
- Page 36 In this mode, the torch trigger must remain depressed for the welding output to be active. Press and hold the torch trigger to activate the power source (weld). Release the torch trigger switch to cease welding. - 36 - 0463 815 101 © ESAB AB 2021...
- Page 37 The fan and the power source work synchronously, when the power source is switched on, the fan switches on too, but if there is no load the fan switches off, unless the unit is in overtemp condition. - 37 - 0463 815 101 © ESAB AB 2021...
-
Page 38: Esab Emp 210 And Esab Em 210 Features
5 OPERATION ESAB EMP 210 and ESAB EM 210 features Wiredrive motor circuit breaker The 4A circuit breaker protects the unit from electrical faults and will operate in the event of a motor overload. NOTE! If a circuit breaker trips, a short cooling period must be allowed before an attempt is made to reset the unit by pressing the circuit breaker reset button. -
Page 39: Attaching The Esab Fusion 180 A Mig Gun
5 OPERATION Attaching the ESAB fusion 180 A MIG gun Figure 27: Attaching MIG gun 1 MIG gun adapter 2 MIG gun connector 1) Open side panel and loosen thumb screw. 2) Fit the MIG gun to the power source by pushing the MIG gun connector into the MIG gun adapter. -
Page 40: Changing The Feed Roll
Figure 28: Dual groove feed roller 1 Groove A 3 Groove A size 2 Groove B 4 Groove B size Figure 29: Changing the feed roll 1 Feed roll retaining knob - 40 - 0463 815 101 © ESAB AB 2021... -
Page 41: Wire Reel Brake
Overtension of the brake will cause rapid wear of mechanical wire feeder parts, overheating of electrical components and possibly more incidences of contact tip burnback. Figure 30: Wire reel brake 1 Spool hub tension thumb screw - 41 - 0463 815 101 © ESAB AB 2021... -
Page 42: Setup For Mig (Gmaw) Welding With Gas Shielded Mig Wire
3) Fit the MIG gun to the power source, see "Attaching the ESAB fusion 180 A MIG gun" section. 4) Connect the work lead to the positive welding terminal (+). If in doubt, consult the electrode wire manufacturer. -
Page 43: Setup For Mig (Fcaw) Welding With Flux Core (Gasless) Wire
5.11 Setup for MIG (FCAW) welding with flux core (gasless) wire 1) Select MIG mode with the process selection control see "ESAB EMP 210, ESAB EM 210 controls, indicators and features" section. 2) Connect the MIG polarity lead to the negative welding terminal (-). If in doubt, consult the electrode wire manufacturer. -
Page 44: Setup For Spool Gun Mig (Gmaw) Welding With Gas Shielded Mig Wire
2. Insert the back end of the spool gun into the MIG gun connector and tighten the locking nut to secure the spool gun in the MIG gun adapter. 3. Connect gas supply fitting and tighten with a wrench. 4. Align control plug to panel fitting and tighten securely. - 44 - 0463 815 101 © ESAB AB 2021... -
Page 45: Setup For Lift Tig (L-Gtaw) Welding (Only For Esab Emp 210)
5.13 Setup for LIFT TIG (L-GTAW) welding (only for ESAB EMP 210) 1) Select LIFT TIG mode with the process selection control, see section 5.4.1 "ESAB EMP 210" 2) Connect the TIG torch to the negative welding terminal (-). Welding current flows from the power source via dinse type terminals. -
Page 46: Setup For Mma (Smaw) Welding (Only For Esab Emp 210)
3) Select MMA mode with the process selection control, see section 5.4.1 "ESAB EMP 210". WARNING! Before connecting the work clamp to the workpiece make sure the electricity supply is switched off. -
Page 47: Basic Welding Guide
1 Solidified weld metal 6 Nozzle (optional) 2 Slag 7 Flux cored electrode 3 Molten slag 8 Arc 4 Molten metal 9 Base metal 5 Shielding gas (optional) - 47 - 0463 815 101 © ESAB AB 2021... -
Page 48: Position Of Mig Gun
1 5° to 15° Longitudinal angle 3 Direction of travel 2 90° Transverse angle 1 30° to 60° Transverse angle 3 Direction of travel 2 5° to 15° Longitudinal angle - 48 - 0463 815 101 © ESAB AB 2021... -
Page 49: Distance From The Mig Gun Nozzle To The Workpiece
Type of electrode wire • Size of electrode wire • Type of gas (not applicable for FCAW self shielding wires) • Gas flow rate (not applicable for FCAW self shielding wires) - 49 - 0463 815 101 © ESAB AB 2021... - Page 50 Figure 46: Transverse and longitudinal nozzle axes 1 Longitudinal angle 3 Axis of weld 2 Transverse angle - 50 - 0463 815 101 © ESAB AB 2021...
- Page 51 These are the wire speed control (see "Victor regulator" section) and the welding voltage control, see "ESAB EMP 210, ESAB EM 210 controls, indicators and features" section. The welding current is determined by the wire speed control, the current will increase with increased wire speed, resulting in a shorter arc.
-
Page 52: Mma (Smaw) Basic Welding Technique
Electrodes are generally connected to the electrode holder. The electrode holder is connected to the positive polarity. The work lead is connected to the negative polarity and it is connected to the workpiece. If in doubt consult the electrode data sheet or your nearest accredited ESAB distributor. - Page 53 In general, surfaces being welded should be clean and free of rust, scale, dirt and grease. Slag should be removed from oxy-fuel cut surfaces. Typical joint designs are shown below. - 53 - 0463 815 101 © ESAB AB 2021...
- Page 54 C: Maximum 1/16 in. (1.6 mm) D: 1/16 in. (1.6 mm) E: Not less than 45° F: Not less than 70° G: Maximum 1/16 in. (1.6 mm) H: Maximum 1/16 in. (1.6 mm) - 54 - 0463 815 101 © ESAB AB 2021...
- Page 55 If this should happen, give the electrode a quick twist back over the weld to detach it. Contact or "touch-weld" electrodes such as E7014 do not stick in this way, and make welding much easier. - 55 - 0463 815 101 © ESAB AB 2021...
- Page 56 If a backing bar is used, it is - 56 - 0463 815 101 © ESAB AB 2021...
- Page 57 Figure "Multi run vertical fillet weld" illustrates multi run technique and figure "Examples of vertical fillet welds" shows the effects of pausing at the edge of weave and of weaving too rapidly. - 57 - 0463 815 101 © ESAB AB 2021...
- Page 58 You will notice that the weld deposit is rather convex, due to the effect of gravity before the metal freezes. - 58 - 0463 815 101 © ESAB AB 2021...
- Page 59 (distortion), or the weld may crack, in any case "locked up" stresses will remain in the workpiece. Figures below illustrate how distortion is created. - 59 - 0463 815 101 © ESAB AB 2021...
- Page 60 By correct presetting of the components to be welded, constructional stresses can be made to pull the parts into correct alignment. A simple example is shown in the figure below. - 60 - 0463 815 101 © ESAB AB 2021...
- Page 61 By removing the heating source from B and C as soon as welding is completed, the sections B and C will contract at a similar rate, thus reducing distortion. - 61 - 0463 815 101 © ESAB AB 2021...
- Page 62 Figure 72: Step back sequence Block sequence. The spaces between the welds are filled in when the welds are cool. Figure 73: Chain intermittent welding Figure 74: Staggered intermittent welding - 62 - 0463 815 101 © ESAB AB 2021...
-
Page 63: 6.6 Tig (L-Gtaw) Basic Welding Technique
1/16 in. (1.6 mm) 60-115 A 3/32 in. (2.4 mm) 100-165 A 1/8 in. (3.2 mm) 135-200 A 5/32 in. (4.0 mm) 190-280 A 3/16 in. (5 mm) 250-340 A - 63 - 0463 815 101 © ESAB AB 2021... - Page 64 Narrower more magnesium and concentrated arc. their alloys. NOTE! The ESAB EMP 210 inverter is not suited for AC TIG welding. TIG Welding filler rods Base metal DC current DC current Tungsten Filler rod Argon gas...
-
Page 65: Electrode Wire Size Selection
Capacity of the wire feed unit and power source • The amount of penetration required • The deposition rate required • The bead profile desired • The position of welding • Cost of the wire - 65 - 0463 815 101 © ESAB AB 2021... -
Page 66: Maintenance
Insulation resistance Minimum insulation resistance for in-service ESAB inverter power sources shall be measured at a voltage of 500 V between the parts, see "Minimum insulation resistance requirements: ESAB inverter power sources" section. Power sources that do not meet the insulation resistance requirements set out below shall be withdrawn from service and not returned until repairs have been performed such that the requirements outlined below are met. - Page 67 Output voltage (V) to be checked to ensure it falls within applicable ESAB power source specifications Motor speed (RPM) of wire drive motors to be checked to ensure it falls within required ESAB power source / wire feeder specifications Accuracy of digital meters to be checked to ensure it falls within applicable ESAB power source...
-
Page 68: Cleaning The Welding Power Source
6 months Bring the unit to an authorized Tweco service provider to remove any accumulated dirt and dust from the interior. This may need to be done more frequently under exceptionally dirty conditions. 0463 815 101 © ESAB AB 2021... -
Page 69: Troubleshooting
(burnback MIG gun conduit liner or jam). worn contact tip. Replace faulty components. Internal fault in the power Contact an authorised ESAB source service technician. Welding wire continues to The trigger mode selection Change the trigger mode feed when the torch trigger switch is in 4T latch mode. -
Page 70: Mig (Gmaw/Fcaw) Welding Troubleshooting
Dirty from welding, oily, painted, oxidized Clean contaminates off the workpiece. or greasy plate. Distance between the MIG gun nozzle Keep the distance between the MIG gun and the workpiece. nozzle and the workpiece to a minimum. 0463 815 101 © ESAB AB 2021... - Page 71 Bent liner This will cause friction between the wire and the liner thus reducing wire feed ability 0463 815 101 © ESAB AB 2021...
- Page 72 Excessive weld stresses. Increase weld metal strength or revise design. Excessive voltage. Decrease voltage. Cooling rate is too fast. Slow the cooling rate by preheating part to be welded or cool slowly. 0463 815 101 © ESAB AB 2021...
- Page 73 Check all welding cable connection. connections. Low primary voltage. Contact supply authority. Fault in power source. Have an accredited ESAB service provider test then replace the faulty component. The arc does not have a The MIG gun has been Connect the MIG polarity...
-
Page 74: Mma (Smaw) Welding Troubleshooting (Only For Esab Emp 210)
8 TROUBLESHOOTING MMA (SMAW) welding troubleshooting (only for ESAB EMP 210) Table 26: MMA (SMAW) metal welding troubleshooting Type of fault Cause Corrective action Welding current is varying ARC FORCE is set at a value Reduce the ARC FORCE until... - Page 75 1 Lack of side fusion, scale dirt, small electrode, 3 Lack of inter-run fusion amperage too low 2 Lack of fusion caused by dirt, electrode angle, 4 Lack of root fusion incorrect, rate of travel too high 0463 815 101 © ESAB AB 2021...
-
Page 76: Tig (L-Gtaw) Welding Problems (Only For Esab Emp 210)
8 TROUBLESHOOTING TIG (L-GTAW) welding problems (only for ESAB EMP 210) Table 27: TIG (L-GTAW) welding problems Type of fault Cause Corrective action Excessive bead build up or poor The welding current is too low. Increase the weld current penetration or poor fusion at and/or faulty joint preparation. -
Page 77: Error Codes
Input voltage is inconsistent with selected voltage. Ovr Cur Over current has happened and over current protection is active. Err Sht Output short circuit has happened and output short circuit protection is active. 0463 815 101 © ESAB AB 2021... -
Page 78: Ordering Spare Parts
Use only ESAB original spare and wear parts. ESAB EMP 210 and ESAB EM 210 are designed and tested in accordance with the Canadian standards CAN/CSA-E60974-1. On completion of service or repair work, it is the responsibility of the person(s) performing the work to ensure that the product still complies with the requirements of the above standards. -
Page 79: Appendix
Therefore they are replaced with * here. Make sure to use a manual with a serial number or software version that corresponds with the product, see the front page of the manual. Technical documentation is available on the Internet at: www.esab.com 0463 815 101 © ESAB AB 2021... - Page 80 For contact information visit http://esab.com ESAB AB, Lindholmsallén 9, Box 8004, 402 77 Gothenburg, Sweden, Phone +46 (0) 31 50 90 00 http://manuals.esab.co m...
Need help?
Do you have a question about the EMP 210 and is the answer not in the manual?
Questions and answers
Emp 210 no arc when tig welding screen code RL5 TRI