Table of Contents
Advertisement
Advertisement
Table of Contents

Related Manuals for Dreame R10


Summary of Contents for Dreame R10
- Page 1 Dreame R10 Cordless Stick Vacuum User Manual...
- Page 2 • The word "dreame" is the abbreviation of Dreame Technology Co., Ltd. and its subsidiaries in China. It is the transliteration of the company's Chinese name "追觅", which means striving for excellence in every endeavor and reflects the company's vision of continuous pursuit, exploration and search in technology. For more information & after-sales support, contact us via aftersales@dreame.tech or https://global.dreametech.com Manufactured by: Dreame Trading (Tianjin) Co., Ltd. Made in China VTV22B-EU-A00 16/02/2023...
- Page 3 THANK YOU FOR PURCHASING THIS DREAME VACUUM CLEANER. Registration Quick Start Welcome to register a Dreame account by scanning the QR code. You are available for the User Manual and Special Offers. With it you are obtaining a high quality product that is engineered for optimal performance.
-
Page 4: Safety Instructions
Safety Instructions To prevent accidents including electric shock or fire caused by improper use, please read this manual carefully before use and retain it for future reference. Warning This product can be used by children aged from 8 years and above and persons • with physical, sensory, intellectual deficiencies, or limited experience or knowledge under the supervision of a parent or guardian to ensure safe operation and to avoid any risk of hazards. Cleaning and maintenance shall not be made by children without supervision. The vacuum is not a toy. Children shall not play with or operate this product. Please • exercise caution when using the vacuum near children. Do not allow children to clean or maintain the vacuum unless supervised by a parent or guardian. Do not use the vacuum outdoors or on wet surfaces. Only use the vacuum on dry • indoor surfaces. Do not touch the plug or any part of the vacuum with wet hands. To reduce the risk of fire, explosion, or injury, check to make sure the lithium battery • and charging adapter are undamaged before use. Do not use the vacuum if either the lithium battery or charger is damaged. The multi-surface brush, motorized mini-brush, battery, metal connector pin, and • vacuum are electrically conductive and should not be immersed in water or other liquid. Make sure to dry all filters after cleaning. Prevent injury caused by moving parts. Turn off the vacuum before cleaning the • multi-surface brush. The multi-surface brush, dust compartment and filter must all be properly installed before using the vacuum. Only use the original charging adapter. Never use an unoriginal adapter, as this may • cause the lithium battery to catch fire. Do not use the vacuum to pick up flammable or combustible liquids, such as • gasoline, or bleach, ammonia, drain cleaners or other liquids. Do not use the vacuum to pick up sharp or hard objects, such as glass, nails, screws, • or coins, which may damage the machine.Do not use the vacuum to pick up drywall particles, ashes like fireplace ash, or smoking or burning materials such as coal, cigarette butts or matches. Check the area to be cleaned before use. To prevent the openings from being •... - Page 5 Only use accessories and replacement parts recommended by the manufacturer. • Please be extra careful when using the vacuum to clean stairs. • Make sure the vacuum is unplugged when not used for extended periods as well as • prior to performing any maintenance or repairs. Do not install, charge, or use this product outdoors, in bathrooms, or around a pool. • Fire Hazard Warning: Do not apply any type of fragrance to the vacuum's filter. These • types of products are known to contain flammable chemicals which may cause the vacuum to catch fire. Only use the original charger (Model YLS0251B-E300080). Failing to do so may cause • the lithium-ion battery to catch fire. Only use the approved battery type (Model V2309-7S1P-BCA). Failing to do so may • cause the lithium-ion battery to catch fire. If the battery material is released, remove personnel from area until the batteries • cool down and fumes dissipate. Provide maximum ventilation to clear out hazardous gases and avoid skin and eye • contact or inhalation of vapors. Remove spilled liquid with absorbent and incinerate waste. • Do not use and store in extremely hot or cold environments (below 0℃ /32°F or • above 40℃ /104°F). Please charge the cordless vacuum in temperature above 0℃ /32°F and below 40℃ /104°F. This product is designed for home use only. • We, Dreame Trading (Tianjin) Co., Ltd., hereby, declares that this equipment is in compliance with the applicable Directives and European Norms, and amendments. The full text of the EU declaration of conformity is available at the following internet address: https://global.dreametech.com For detailed e-manual, please go to https://global.dreametech.com/pages/user- manuals-and-faqs...
-
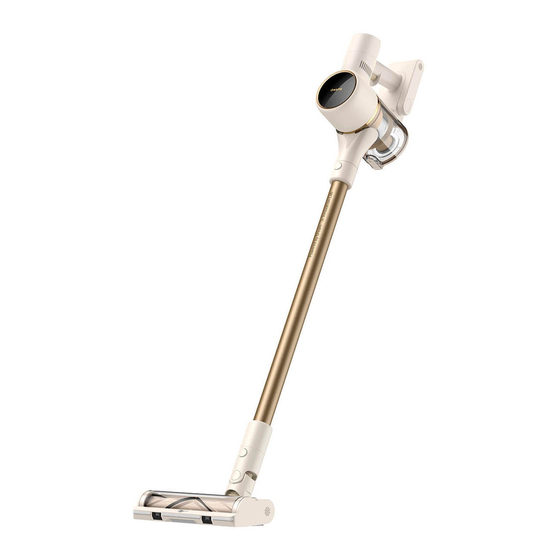
Page 6: Product Overview
Product Overview Component Names On/Off Switch • Press to turn on • Release to turn off Trigger Switch Lock When the vacuum is running, Antistatic Contact press briefly to switch to discontinuous/continuous cleaning mode Charging Port Lock Indicator LED Battery Status Suction Level Switch Indicator Turbo... - Page 7 Product Overview Accessories Wide Combination Tool Motorized Mini-Brush Extension Rod Multi-Surface Brush Flexible Combination Tool Charger Wall Mount (Including screw × 2, wall plug × 2, and mounting template sticker ) Note: The images in this manual are for illustrative purposes only. The actual product may differ.
-
Page 8: Installation
Installation Click Click... - Page 9 Installation Wall Mount Installation Diagram 1. Paste the mounting template sticker on the wall. The bottom edge of the mounting template sticker should be parallel to and about 107 cm from the ground. 2. Use a power drill with an 8 mm drill bit to drill a hole into each marker on the mounting template sticker, then insert a wall plug into each hole.
-
Page 10: Charging Methods
Charging Fully charge the vacuum before using it for the first time. Note: • A full charge will take approximately 3.5 hours. • Using Turbo mode for a prolonged period will cause the battery to heat up, which increases charging time. Allow the vacuum to cool down for 30 minutes before charging it. Charging Methods Charging the Vacuum with the Charger LED Battery Status Indicator Low battery Half battery Nearly full Fully charged Off Blinking Note: Once the vacuum is fully charged, the indicator will turn off after 5 minutes, and the vacuum will enter the energy-saving mode. -
Page 11: How To Use
How to Use Working Methods Select from two working methods for the vacuum, based on your needs. Method 1: Discontinuous Cleaning Mode Press and hold the on/off switch to power it on, and release it to stop immediately. Method 2: Continuous Cleaning Mode (Trigger Switch Lock) Click the trigger switch lock to switch to Continuous Cleaning Mode when the vacuum is running. - Page 12 How to Use Using Different Accessories Multi-Surface Brush Motorized Mini-Brush Suitable for vacuuming on the med/low pile For vacuuming dirt, pet hair, and other carpets, tiles and floors. stubborn debris from sofas, bedding, and other fabric surfaces. For vacuuming large particles by turning Note: It is not recommended to vacuum on on the switch on the brush, such as coffee fragile surfaces, such as silk.
- Page 13 How to Use Wall Mount The vacuum cleaner can be placed on the wall mount when it is not in use. Note: • Do not put the vacuum cleaner alone on the wall mount. • Place it on the wall mount after connecting it with the extension rod and the multi-surface brush.
-
Page 14: Care And Maintenance
Care & Maintenance Tips: 1. Always use genuine parts to keep your warranty from being void. 2. If the filter or nozzle becomes clogged, the vacuum will stop working shortly after being turned on. Clear the tube to restore functionality. 3. If the vacuum is not used for an extended period, fully charge it, unplug its charger, and store it in a cool, low-humidity environment away from direct sunlight. - Page 15 Care & Maintenance 3. Remove the pre-filter first, then lift the handle of the cyclone assembly and turn it counterclockwise until it stops, then pull to lift out the cyclone assembly. 4. Wipe the dust cup with a soft wet cloth. Pay attention to wringing out the cloth before using.
- Page 16 Care & Maintenance Installing the Dust Cup, Pre-Filter, and Cyclone Assembly 1. Insert the cyclone assembly vertically into the dust cup, and make sure that the handle of the cyclone assembly line up with the slot on the left side of the dust cup. Turn the handle clockwise until it locks, then flip the handle down.
-
Page 17: Cleaning The Filter
Care & Maintenance Cleaning the Filter It is recommended to clean the filter once every 4 to 6 months. 1. Remove the dust cup as shown in the 2. Remove the filter from the vacuum by figure. pulling it down in the direction shown in the figure. -
Page 18: Installing The Filter
Care & Maintenance Installing the Filter 1. Insert the filter into the vacuum and 2. Reinstall the dust cup. gently press down, as illustrated. - Page 19 Care & Maintenance Cleaning the Multi-Surface Brush 2. Use scissors to cut off the hairs and 1. Turn the lock counterclockwise until it fibers that get stuck on the brush roller. stops, then remove the roller from the roller Wipe the dust from the notch and brush. transparent cover with a dry cloth or paper towel. Thoroughly dry before use. 3. When it is dirty, rinse the brush roller 4. Stand the brush roller upright for at least with clean water until it is clean.
- Page 20 Care & Maintenance Cleaning the Motorized Mini-Brush 1. Use a coin as illustrated to rotate the lock 2. After unlocking the motorized mini-brush, counterclockwise until you hear a click. remove the brush roller, then rinse and clean it. 3. Stand the brush roller upright in a well- 4.
-
Page 21: Battery Pack
Care & Maintenance Battery Pack The vacuum contains a removable rechargeable lithium-ion battery pack which has a limited number of recharge cycles. After extended use, the battery pack may no longer hold a charge. If this happens, it means the battery pack has reached the end of its life cycle and needs to be replaced. -
Page 22: Specifications
Specifications Vacuum Cleaner Model VTV22B Charging Voltage 30 V Rated Voltage 25.2 V approximately 3.5 Rated Power 350 W Charging Time hours Motorized Mini-Brush Model VMM4 Rated Power 20 W Rated Voltage 25.2 V Multi-Surface Brush Model VMB3 Rated Power 40 W Rated Voltage 25.2 V Charger Model... - Page 23 If the vacuum is not working properly, please refer to the table below. Errors Possible Causes Solutions Vacuum is out of battery or Fully charge the vacuum, low on power. then resume use. Clean the suction openings Overheat protection mode or air duct. Wait until the Vacuum does not work.
-
Page 24: Weee Information
Errors Possible Causes Solutions Check whether the charger The charger does not plug is properly plugged into into the vacuum well. the vacuum. The battery indicator The battery is charged The vacuum runs does not light up when and switches to Sleep normally.
Need help?
Do you have a question about the R10 and is the answer not in the manual?
Questions and answers