Table of Contents
Advertisement
Quick Links
Advertisement
Table of Contents

Related Manuals for COFFEtek NEO +


Summary of Contents for COFFEtek NEO +
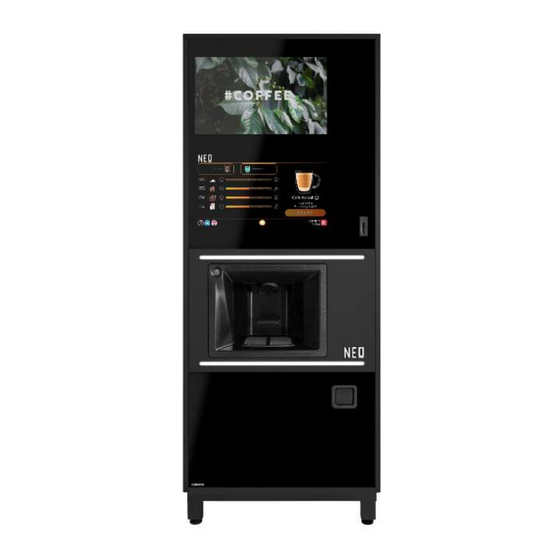
- Page 1 NEO + VENDING MACHINE OPERATORS GUIDE – Revision 1...
-
Page 2: Table Of Contents
NEO + VENDING MACHINE CONTENTS page SPECIFICATIONS ....................4 SERVICES REQUIRED ..................4 Electrical Supply ......................4 Water Supply ........................4 SAFETY WARNINGS .................... 5 FROST WARNING ....................6 HOT WATER WARNING ..................6 INSTALLATION ..................... 7 Location .......................... 7 Levelling ......................... - Page 3 FOREWORD The information contained in this technical manual is applicable to Neo +. Due to customer requirements some units may vary from the one described in the manual. Only personnel who have undergone relevant equipment training must undertake maintenance of the dispensing machine. The Manufacturer reserves the right to make changes, without notice, to the design of the dispensing machine, which may affect the information, contained in this manual.
-
Page 4: Specifications
NEO + BEVERAGE MACHINE SPECIFICATIONS Weight: 160kg Height: 183cm Width: 69.8cm Depth: 69.8cm Temp. Range: 1ºC to 40ºC (ambient) SERVICES REQUIRED Electrical Supply Supply voltage: 230V~, 50Hz, single phase fused supply Current rating: The fused electrical supply must be terminated at a safety isolator switch, which provides a contact separation of at least 3mm. -
Page 5: Safety Warnings
SAFETY WARNINGS The vending machine contains moving parts and utilizes very hot water both of which have the potential to cause injury. The machine should be switched off before undertaking any activity on the mixing or brewing systems, which requires the removal of any component part from the machine. -
Page 6: Frost Warning
closer to the right hand wall than 400mm (16in) to accommodate the opening of the door. The unit should not be situated in an area where a water jet could be used. The vending machine is a heavy item. Ensure sufficient persons and suitable equipment are available when attempting to move it. -
Page 7: Installation
INSTALLATION WARNINGS THE BEVERAGE MACHINE IS A HEAVY ITEM. CARE MUST BE TAKEN WHEN LIFTING IT. THE BEVERAGE MACHINE MAY TOPPLE IF THE MOUNT IS WEAK OR INSECURE. ENSURE THAT THE MOUNT IS SECURE AND THAT IT CAN SUPPORT THE WEIGHT OF THE MACHINE. ENSURE THAT THE MAINS ELECTRICAL SUPPLY IS ISOLATED BEFORE CONNECTING THE SUPPLY CABLE TO THE MACHINE. -
Page 8: Connecting The Water Services
CONNECTING THE WATER SERVICES Refer to the current requirements of The Model Water Bylaws 1986 Statutory Instrument (SI) No.1147. IF THE EQUIPMENT WAS SUPPLIED WITH A MAINS WATER HOSE, THIS HOSE SHOULD BE USED. DO NOT USE A HOSE FROM A PREVIOUSLY INSTALLED PRODUCT EVEN IF IT WOULD FIT. -
Page 9: Connecting The Electrical Services
Connecting the Electrical Services WARNINGS THE MACHINE MAINS CABLE MUST BE CONNECTED TO THE SUPPLY VIA A SAFETY ISOLATOR SWITCH WHICH PROVIDES A CONTACT SEPARATION OF AT LEAST 3mm. REPLACEMENT OF THE Y TYPE MAINS CABLE REQUIRES SPECIAL TOOLS. SHOULD THE CABLE BECOME DAMAGED, REPLACEMENT MUST ONLY BE CARRIED OUT BY A TRAINED PERSON FROM AN APPROVED SERVICE AGENT. -
Page 10: Hygiene
HYGIENE WARNINGS (THE NEO TOUCH IS FITTED WITH A GRINDER) THE COFFEE GRINDER HAS SHARP BLADES THAT MAY CAUSE SEVERE INJURY TO ANY BODY PARTS THAT COME INTO CONTACT WITH THEM WHILST THEY ARE ROTATING. COFFEE CANISTER MAKES THE BLADES INACCESSIBLE IN NORMAL OPERATION. -
Page 11: Daily Hygiene
DAILY HYGIENE FLUSHING THE MACHINE Ensure that the following flushing instructions are carried out at least once a day and that mixing system and brewer cleaning is carried out at least once a week. To Flush Machine: (1) Open machine as instructed and ensure machine is switched on. (2) Press the flush button. -
Page 12: Cleaning The Mixing Systems
CLEANING THE MIXING SYSTEMS (1) Open the door of the machine and switch machine off using the main switch. (2) Rotate the canister nozzles then remove the ingredient canisters. Wipe clean the exterior surfaces of the canister assembly and dry thoroughly. (3) Disconnect the pipes from the mixing bowls and remove the dispense nozzles from the dispense head. - Page 13 (6) Remove the impellor disk by pulling it in the direction shown. (7) Remove the whipper seal and PTFE Washer ensure that the running surface is smooth and free of ingredient residues. (8) Inspect whipper seal for damage and replace as necessary.
-
Page 14: Weekly Hygeine
WEEKLY HYGEINE CLEANING THE TEA BREWER (1) Open the door of the machine and switch machine off using the main switch. (2) Turn tea canister dispense chute upwards to prevent ingredients being spilled onto the floor of the machine. (3) Remove the tealeaf waste chute by lifting it upwards and towards you. - Page 15 (5) Raise the brewer release lever to unlock the carriage assembly. (6) Gently slide carriage assembly towards you and remove it from the machine. (7) Remove mixing bowl (8) Remove the brewer cylinder swinging it upwards and then gently pulling forward in the direction indicated.
-
Page 16: Refitting The Tea Brewer
REFITTING THE TEA BREWER (10) Refit brewer cylinder. (11) Refit the mixing chamber. (12) Refit brewer carriage onto machine. If it does not locate correctly, gently turn filter belt using the studded roller until it slides into place. (13) Lock the carriage in place by returning the release lever to the horizontal position;... - Page 17 (19) Wash and dry the carriage and brew chamber assembly. (20) Inspect the filter belt and if necessary, remove and clean or replace it. Anticipated belt life is 2000 operations depending on the coffee grind, water hardness and frequency of washing. Belts may be washed in clean warm water or a de tanning agent to prolong their life.
- Page 18 (24) Wipe clean all accessible inner and outer surfaces of the machine. Wipe dry. (25) Refit the whipper bases, paddles, mixing bowls, tubes and dispense nozzles and brewer parts. The assembly procedure for the brewer is the reverse of the disassembly procedure. Ensure that both brewer- locking levers are in the locked, (horizontal position) before proceeding to the next section.
- Page 19 (1) Using fore finger and thumb compress the tensioning rollers as shown in A. With the rollers compressed push and turn the red lever to the locked position as shown in B. (3) With the rollers locked in the compressed position the belt can now be removed.
- Page 20 both used during this process. The total process will take approximately 5 minutes to complete. • Press the “FLUSH BREWERS” button on the internal keypad. • The machine will continually beep, and the internal display will show: (if there is a Tea brewer present this will flush at the same time) •...
- Page 21 • The internal display will now show: • The cleaning of the “Espresso” brewer will now continue, at the end of the cycle the machine will do three black coffees to ensure all of the residue from the tablet has be purged from the system. NEO TOUCH OPERATOR MANUAL...
-
Page 22: Extract Duct Cleaning
EXTRACT DUCT CLEANING (1) Open the door of the machine and switch machine off using the main switch. (2) Turn the ingredient nozzles upwards to prevent ingredient spillage and remove all canisters and extract hoods. (3) When all the canisters and hoods have been taken out, the extract duct cover can be removed by lifting it upwards and then forwards toward the front of the machine. -
Page 23: Filling
FILLING Instant Products (1) Turn the ingredient dispense chutes to face upwards to prevent ingredient spillage. Remove the instant product ingredient canisters from the machine. Remove the lid from each one in turn and fill it with the correct ingredient refitting the lid afterwards. -
Page 24: Accessing The User Programs
ACCESSING THE USER PROGRAMS The programs are accessed by pressing key 5 (PROG) on the INTERNAL keypad. The EXTERNAL display will then prompt for input of a four-digit entry code. The code is input using the numbers printed on the keys of the INTERNAL keypad. After pressing the PROG key, the display will change to: PLEASE ENTER ACCESS CODE... - Page 25 ENTER again. Entering ALL NORMAL PRICES or ALL CHEAP PRICES provides access to a list of drinks with corresponding prices. The price of a displayed drink can be changed by pressing ENTER, altering the value shown, and pressing ENTER again. Entering OWN CUP DISCOUNT allows the programmer to select the price of a plastic cup (and is preset at 0 pence).
- Page 26 NOTES: …………………………………………………………………………………………… …………………………………………………………………………………………… …………………………………………………………………………………………… …………………………………………………………………………………………… …………………………………………………………………………………………… …………………………………………………………………………………………… …………………………………………………………………………………………… …………………………………………………………………………………………… …………………………………………………………………………………………… …………………………………………………………………………………………… …………………………………………………………………………………………… …………………………………………………………………………………………… …………………………………………………………………………………………… …………………………………………………………………………………………… …………………………………………………………………………………………… …………………………………………………………………………………………… …………………………………………………………………………………………… …………………………………………………………………………………………… …………………………………………………………………………………………… …………………………………………………………………………………………… …………………………………………………………………………………………… …………………………………………………………………………………………… …………………………………………………………………………………………… …………………………………………………………………………………………… ……………………………………………………………………………………………...
Need help?
Do you have a question about the NEO + and is the answer not in the manual?
Questions and answers