
Related Manuals for Theben TR 610 top3


Summary of Contents for Theben TR 610 top3
-
Page 1: Table Of Contents
307253 02 03.05.2023 Time switch TR 610 top3 6100130 TR 612 top3 6120130 1. General information 3. Proper use 4. Installation and connection 5 Mounting the time switch Connecting the time switch Connecting the cable Disconnecting the cable 5. Device description Display &... - Page 2 Initial operation 6. Settings and functions Set switching time Change switching times Delete switching program Setting holiday function Activating PIN code Setting manual or permanent switching Hour counter Using Bluetooth OBELISK top3 Connect time switch, Bluetooth OBELISK top3 and smartphone (via app) Resetting the time switch...
- Page 3 7. Technical data 9. Contact...
-
Page 4: General Information
1. General information • The device is designed for installation on DIN rails (in accordance with EN 60715) • The device corresponds to type 1 STU in accordance with IEC/EN 60730-2-7 • Power reserve (10 years) is reduced if memory card is inserted (using battery power) 2. -
Page 5: Proper Use
3. Proper use • The time switch is used for lighting, ventilation and flushing applications etc. • Interface for Bluetooth OBELISK top3 (app) • Only for use in closed, dry rooms Do not use on safety devices, e.g. escape route doors, fire safety equipment etc. -
Page 6: Connecting The Time Switch
45° cable DuoFix plug-in terminal Test tap Plug-in screwless terminal NC contact Bluetooth OBELISK top3 (9070130) Check the depth of the control cabinet when OBELISK top3 is connected. The depth must be > 94 mm. Connecting the time switch 4 5 6 L 1 2 3 1 2 3... -
Page 7: Connecting The Cable
Connecting the cable Strip cable to 8 mm (max. 9). † Insert cable in the open DuoFix plug-in terminal at 45°. † L 2 cables per terminal position possible. To open the DuoFix plug-in terminal, press screwdriver † downwards. Disconnecting the cable Use the screwdriver to push the spring plug-in terminal †... -
Page 8: Device Description
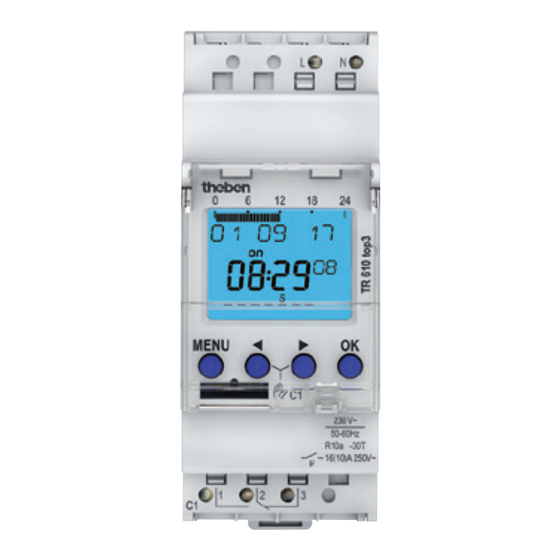
5. Device description Display & buttons Programmed switching times Date display Time display Channel status Days of the week C1, C2 from 1 to 7 Display of the active buttons with the relevant function MENU ƒ MENU „ –... -
Page 9: Operating Instructions
Operating instructions 1. Read text line text/symbol represents query 2. Make a decision Modify/ Confirmation Change Press Press... -
Page 10: Overview Of Navigation Menu
Overview of navigation menu MENU PROGRAM TIME/DATE MANUAL CHANNEL C1 TIME CHANNEL C1 SET DATE PERM ON CHECK SU--WI PERM OFF MODIFY WEEK OVERR ON DELETE HOLIDAY FORM DATE FORM TIME OPTIONS OPERATING HOUR LCD ILLU- MINATION LANGUAGE FACTORY SETTINGS INFO... -
Page 11: Initial Operation
Initial operation DEUTSCH ENGLISH FORM DATE ESPANOL YEAR FRANCAIS MONTH FORM TIME HOUR MINUTE SU-WI EUROPE 28 02 16 C1 off C2 off 9:40 Set language, date, time as well as summer/winter time † (SU-WI). Press any button and display follows on screen (see figure). †... -
Page 12: Settings And Functions
6. Settings and functions Set switching time MENU PROGRAM CHANNEL C1 MEM FREE CHECK MODIFY HOUR DELETE MINUTE MONDAY same switching COPY SAVE time for several days = TUESDAY block SAVE Switching time for one day L A switching time always consists of a start time and an end time. - Page 13 Press MENU. † Select PROGRAM and press OK to confirm. † Select CHANNEL C1 or C2, confirm with OK. † Select NEW and press OK to confirm. † Select ON (for turn-on time) or OFF (for turn-off time), † confirm with OK. Set required turn-on time (Mo–Fr, 7:30), confirm with OK.
-
Page 14: Change Switching Times
Change switching times MENU PROGRAM CHANNEL C1 CHECK MODIFY MONDAY DELETE MODIFY HOUR MODIFY MINUTE MODIFY MODIFY BLOCK SINGLE L You can either change or delete a block, i.e. a switching time copied for several days (e.g. Mon-Fri) or a single switching time. -
Page 15: Delete Switching Program
Delete switching program MENU PROGRAM CHANNEL C1 CHECK MODIFY DELETE SINGLE DELETE MONDAY DELETE DELETE BLOCK SINGLE DAY L You can either delete a block, i.e. a switching time copied for several days (e.g. Mon-Fri) or a single switching time. Press MENU. -
Page 16: Setting Holiday Function
Setting holiday function MENU MANUAL CHANNEL C1 PERM ON PERM OFF OVERR ON HOLIDAY BEGIN HOLIDAY END HOLIDAY Press MENU. † Select MANUAL and press OK to confirm. † Select CHANNEL C1 or C2, confirm with OK. † Select HOLIDAY and press OK to confirm. †... -
Page 17: Activating Pin Code
Activating PIN code The PIN code is set in OPTIONS via the menu. L If you have forgotten your PIN, call the Theben Hotline. L Have the serial number ready. MENU OPTIONS OPERATING HOURS LCD ILLU- MINATION LANGUAGE NO PIN... -
Page 18: Hour Counter
chan- chan- Activating manual control Briefly press both buttons simultaneously. † Activating permanent switching Press both buttons simultaneously for 2 seconds. † Cancelling manual/permanent switching Press both buttons simultaneously. † Hour counter The operating hours of the channel (relay) are displayed and deleted in the OPTIONS menu. -
Page 19: Using Bluetooth Obelisk Top3
Using Bluetooth OBELISK top3 All functions can also be transferred to the time switch using the Bluetooth OBELISK top3 memory card (9070130). Copying OBELISK → TIME SWITCH This copies the switching program and optionally all time switch settings (e.g. external input, time format etc.) from the memory card in the time switch. -
Page 20: Connect Time Switch, Bluetooth Obelisk Top3 And Smartphone (Via App)
OBELISK BLUETOOTH COPY COPY TSWI CHECK OBELISK -> -> OBELISK OBELISK OBELISK TSWI OVERWRITE COPY ALL DATA COPY PROGRAM Connect time switch, Bluetooth OBELISK top3 and smartphone (via app) The devices in the top3 range can be programmed using an app (for Android, iOS) on a mobile end device. - Page 21 Press „Connect“. † Press OK on the time switch. † ▻ The display shows BLUETOOTH ACTIVE. Press „Close“ in the app within 30 s. †...
-
Page 22: Resetting The Time Switch
Now, for example, projects can be created and uploaded. Resetting the time switch Press the 4 buttons simultaneously. † ▻ You can choose between KEEP PROGRAM and DELETE PROGRAM. - Page 23 0,6) Min. switching capacity: 10 mA/230 V AC 100mA/ 24 V AC/DC Switch output: Switching of any phase is permitted (TR 612 top3). TR 610 top3: Suitable for switching SELV (Safe Extra-Low Voltage). Shortest switching time: 1 min Switching accuracy:...
- Page 24 Halogen lamp load: 2600 W Fluorescent lamp load: uncor- 2600 VA rected: 2600 VA Series corrected: 1300 VA (130 µF) parallel-corrected: Compact fluorescent tubes (EVG): 1100 W LED lamps (< 2 W): 50 W LED lamps (> 2 W): 600 W Bluetooth OBELISK top3: –...
- Page 25 8. Dimensional drawings 69,2 35,8 63,7 52,9* 76,2* 9. Contact Theben AG Hohenbergstr. 32 72401 Haigerloch GERMANY Phone +49 7474 692-0 Fax +49 7474 692-150 Hotline Phone +49 7474 692-369 hotline@theben.de Addresses, telephone numbers etc. www.theben.de...
Need help?
Do you have a question about the TR 610 top3 and is the answer not in the manual?
Questions and answers