
Related Manuals for Barco MDNG-6221


Summary of Contents for Barco MDNG-6221
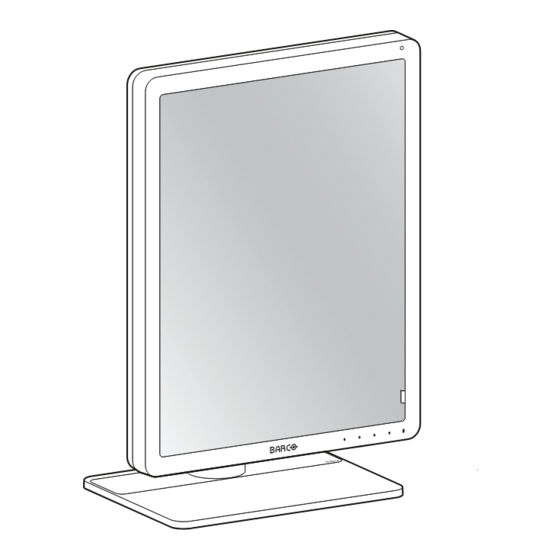
- Page 1 Nio 5MP 5.8MP high-bright display User Guide MDNG-6221 (option NC EM) ENABLING BRIGHT OUTCOMES...
- Page 2 Barco NV Beneluxpark 21, 8500 Kortrijk, Belgium www.barco.com/en/support www.barco.com Registered office: Barco NV President Kennedypark 35, 8500 Kortrijk, Belgium www.barco.com/en/support www.barco.com...
-
Page 3: Table Of Contents
Table of contents 1 Welcome!.......................................... 5 What's in the box ....................................6 At a glance ......................................6 2 Installation ........................................9 Display controller installation..............................10 Display position adjustment ..............................10 Cable connections..................................11 MXRT driver and Intuitive Workflow Tools installation ....................13 QAWeb registration ..................................14 VESA-mount installation ................................14 3 Daily operation ......................................17 Recommendations for daily operation ..........................18... - Page 4 4.16.1 About Embedded QA..............................28 4.16.2 DICOM status report ..............................28 4.16.3 DICOM compliance check .............................29 4.16.4 DICOM calibration ..............................29 4.16.5 Reset DICOM calibration............................29 4.16.6 DICOM error threshold.............................29 4.17 Display orientation..................................30 4.18 Image scaling ....................................30 4.19 Image source selection................................30 4.20 Grayscale conversion modes..............................32 4.21 EDID format .......................................32 4.22...
-
Page 5: Welcome
Welcome! K5902142 /04 Nio 5MP... -
Page 6: What's In The Box
• USB cable If you ordered a Barco display controller, it's also in the box together with its accessories. A dedicated user guide is available on the documentation disc. Keep your original packaging. It is designed for this display and is the ideal protection during transport and storage. - Page 7 Welcome! Slow blinking amber: Display in suspend mode (requires DPMS mode to be enabled in the OSD menu, “DPMS mode”, page Fast blinking amber: Display in standby mode (requires DPMS mode to be enabled in the OSD menu, “DPMS mode”, page Steady amber: Display switched off via the standby key, or display in hibernate mode (requires DPMS mode and Hibernate to be enabled in the OSD menu, see “DPMS mode”, page 23...
- Page 8 Welcome! K5902142 /04 Nio 5MP...
-
Page 9: Installation
Installation K5902142 /04 Nio 5MP... -
Page 10: Display Controller Installation
2. You can now safely tilt, swivel, pivot, raise and lower the display as desired. For a list of compatible display controllers, please refer to the compatibility matrix available on my.barco.com (MyBarco > My Support > Healthcare > Compatibility Matrices > Barco Systems Compatibility Matrices) -
Page 11: Cable Connections
Installation Image 2–2 WARNING: The display must be in its highest position before it can be properly pivoted. Store the foot lock clip in the storage hole in case the display needs to be transported later. Image 2–3 If, after installing the display of the system, you change the panel orientation while an image is on the screen, the result depends on the graphic board and the resolution of the image. - Page 12 2. Connect one or more video sources from your workstation(s) to the corresponding video inputs on the display. Note: The MDNG-6221 can have multiple video inputs connected at once, and switching between these inputs can be easily done in the OSD menu. See “Image source selection”, page 30...
-
Page 13: Mxrt Driver And Intuitive Workflow Tools Installation
About When you are using a Barco MXRT display controller, you can start up your Nio 5MP display system and install the MXRT driver and Intuitive Workflow Tools . Barco’s Intuitive Workflow Tools are designed to increase visibility of subtle details, improve focus during reading sessions, and accelerate workflow. -
Page 14: Qaweb Registration
Learn more at www.barco.com/qaweb. To register your display system to your QAWeb Enterprise organization, the QAWeb Enterprise Agent must be installed and running on your workstation and it must be able to communicate with the QAWeb Enterprise cloud service. - Page 15 Installation Image 2–11 4. Slide the plastic cover over the neck of the foot. Image 2–12 5. Remove the four screws fixing the foot while supporting the foot. Image 2–13 6. Attach the arm stand firmly to the panel using 4 screws M4 x 8 mm. K5902142 /04 Nio 5MP...
- Page 16 Installation K5902142 /04 Nio 5MP...
-
Page 17: Daily Operation
Daily operation K5902142 /04 Nio 5MP... -
Page 18: Recommendations For Daily Operation
LCD displays use technology based on pixels. As a normal tolerance in the manufacturing of the LCD, a limited number of these pixels may remain either dark or permanently lit, without affecting the diagnostic performance of the product. To ensure optimal product quality, Barco applies strict selection criteria for its LCD panels. -
Page 19: Standby Switching
Daily operation The key auto-dim function can be disabled in the OSD menus. Please refer to “Key indicator lights”, page 23 for detailed instructions on how to do this. 3.3 Standby switching About standby switching The connected power supply also provides a switch that can be used to turn the power completely off. -
Page 20: Viewing Mode
Daily operation Enter Cancel Standby (IEC 60417–5009) 3.6 Viewing mode About viewing modes The Nio 5MP can be used in two viewing modes: • Diagnostic: This mode provides the full calibrated luminance and is intended for using the display for diagnostic purposes. -
Page 21: Advanced Operation
Advanced operation About This section describes all settings available in the OSD menu and how to change and configure them. Certain OSD menu settings affecting calibration can be managed by QAWeb. Manually changing these settings in the OSD menu is still possible but the changes will be overwritten at each sync with QAWeb. -
Page 22: Osd Menu Language
Advanced operation 4.1 OSD menu language About the OSD menu language By default, the OSD menu comes up in English. However, there’s a wide range of other languages available for the OSD menu of your Nio 5MP. To change the language of the OSD menu: Bring up the OSD main menu. -
Page 23: Key Indicator Lights
By default, DPMS mode is enabled on your display, but it also needs to be activated on your workstation. To do this, go to the “Power options” of your workstation. Barco recommends setting DPMS activation after 20 minutes of non-usage. When DPMS mode is enabled, an additional power saving function becomes available: hibernate. -
Page 24: Hibernate
Advanced operation 4.7 Hibernate About hibernate When hibernate is enabled, not only the backlight, but also other functions will be disabled to reduce power consumption to a minimum. This happens after an adjustable period of time. DPMS mode must be enabled before hibernate can be enabled. See “DPMS mode”, page Connect your keyboard, mouse, touchpad, etc. -
Page 25: Quick Dry Mode
Advanced operation 4.9 Quick Dry mode About Quick Dry mode Quick Dry mode prevents condensation from forming in the display. Immediately after Quick Dry mode is enabled, the display fans spin fast for 1 hour to increase airflow in and around the display. After 1 hour, the fan speed returns to normal regime and Quick Dry mode is disabled again. -
Page 26: Display Functions
DICOM: DICOM (Digital Imaging and Communications in Medicine) is an international standard that was developed to improve the quality and communication of digital images in radiology. In short, the DICOM display function results in more visible grayscales in the images. Barco recommends selecting the DICOM display function for most medical viewing applications. -
Page 27: Ambient Light Compensation (Alc)
Advanced operation Enter the Color Presets submenu. Select one of the available Color Presets and confirm. 4.14 Ambient Light Compensation (ALC) About ALC Ambient Light Compensation (ALC) can only be enabled on your display when the display function is set to DICOM. Please refer to “Display functions”, page When ALC is enabled, the DICOM display function will be recalculated taking a preset ambient light correction value into account. -
Page 28: Embedded Qa
Embedded QA is not a replacement for the Barco QAWeb solution. Although Embedded QA is a reliable option to perform a simple calibration or compliance test, Barco still highly recommends QAWeb as the solution of choice for calibration and QA. QAWeb brings many benefits... -
Page 29: Dicom Compliance Check
Advanced operation 4.16.3 DICOM compliance check About DICOM compliance check The DICOM compliance check will measure the DICOM curve of your display in different steps. After measurement, the DICOM status report is shown. To start DICOM compliance check: Bring up the OSD main menu. Navigate to the Configuration >... -
Page 30: Display Orientation
Advanced operation Enter the DICOM Preferences submenu. Set Error Threshold as desired and confirm. 4.17 Display orientation About Display orientation Your display automatically detects its physical orientation (portrait or landscape) and, by default, automatically adjusts the image orientation to this. This means that when your display is physically rotated, the image will rotate along. - Page 31 Advanced operation • Expert image source selection mode enables the dual input channel mechanism. This will make inputs 1 (DisplayPort 1 together with DVI 1) and inputs 2 (DisplayPort 2 together with DVI 2) to be handled as two separate channels. Switching between channel 1 and channel 2 can in its turn be done automatically or manually: Automatic channel selection will automatically detect the connected video input(s) and show it on the screen.
-
Page 32: Grayscale Conversion Modes
Advanced operation Enter the Image Source Selection submenu and select Expert. Enter the Input 1 or Input 2 Image Source submenu and select one of the image sources. 4.20 Grayscale conversion modes Your Nio 5MP display automatically detects the connected video input signals and applies the correct grayscale conversion settings. -
Page 33: Display Info
Advanced operation To manually set EDID timings: Bring up the OSD main menu. Navigate to the Configuration > Image Sources > Input Settings > DisplayPort 1/2, DVI 1/2 menu. Enter the EDID submenu. Select one of the available settings and confirm. 4.23 Display info About display info Your display serial number, native resolution, firmware versions, etc. - Page 34 Advanced operation K5902142 /04 Nio 5MP...
-
Page 35: Cleaning Your Display
Cleaning your display K5902142 /04 Nio 5MP... -
Page 36: Cleaning Instructions
Cleaning your display 5.1 Cleaning instructions To clean the display Apply a cleaning/disinfecting product to a soft lint-free cloth, such as a microfiber or gauze and rub the display surface thoroughly. In order to be effective, all surfaces must be cleaned for a certain amount of time (ranging from 30 seconds to 2 minutes). -
Page 37: Important Information
Important information K5902142 /04 Nio 5MP... -
Page 38: Safety Information
Important information 6.1 Safety information General recommendations Read the safety and operating instructions before operating the device. Retain safety and operating instructions for future reference. Adhere to all warnings on the device and in the operating instructions manual. Follow all instructions for operation and use. Electrical Shock or Fire Hazard To prevent electric shock or fire hazard, do not remove cover. -
Page 39: Cybersecurity
Important information • Mains lead protection (U.S.: Power cord): Power cords should be routed so that they are not likely to be walked upon or pinched by items placed upon or against them, paying particular attention to cords at plugs and receptacles. - Page 40 Electronic Products ” (Also called RoHS of Chinese Mainland), the table below lists the names and contents of toxic and/or hazardous substances that Barco’s product may contain. The RoHS of Chinese Mainland is included in the MCV standard of the Ministry of Information Industry of China, in the section “Limit Requirements of toxic substances in Electronic Information Products”.
-
Page 41: Regulatory Compliance Information
Mainland, marked with the Environmental Friendly Use Period (EFUP) logo. The number inside the EFUP logo that Barco uses (please refer to the photo) is based on the “General guidelines of environment-friendly use period of electronic information products” of Chinese Mainland. - Page 42 The manufacturing country of the product is indicated on the product label (“Made in …”). Importers contact information To find your local importer, contact one of Barco’s regional offices via the contact information provided on our website (www.barco.com). FCC class B This device complies with Part 15 of the FCC Rules.
-
Page 43: Emc Notice
Important information 6.5 EMC notice General information This device is for use in professional healthcare facility environments only. With the installation of the device, use only the delivered external cables and power supply or a spare part provided by the legal manufacturer. Using another can result in a decrease of the immunity level of the device. WARNING: Use of this equipment adjacent to or stacked with other equipment should be avoided because it could result in improper operation. - Page 44 Important information Electromagnetic Immunity test IEC 60601-1-2 test levels Compliance level environment – guidance Electrostatic discharge ± 8 kV contact ± 8 kV contact Floors should be wood, (ESD) concrete or ceramic tile. If ± 2 kV, ± 4 kV, ± 8 kV, ± 15 ±...
-
Page 45: Explanation Of Symbols
Important information Test Immunity Maximum Distance frequency Band (MHz) test level (V/ Service Modulation power (W) (MHz) 800 – 960 GSM 800/ Pulse 900, TETRA modulation 800, iDEN 18 Hz 820, CDMA 850, LTE Band 5 1720 1700 – 1990 GSM 1800, Pulse CDMA 1900,... - Page 46 Important information Indicates the device is approved according to the UL Demko regulations. Indicates the device is approved according to the CCC regulations. Indicates the device is approved according to the VCCI regulations. Indicates the device is approved according to the KC regulations. Indicates the device is approved according to the BSMI regulations.
- Page 47 Important information Indicates the entity importing the medical device into the locale. Indicates the temperature limitations for the device to safely operate within specs. Indicates that the device is a Medical Device. Indicates the device Serial Number. Indicates the device part number or catalogue number. Indicates the Unique Device Identifier.
-
Page 48: Legal Disclaimer
Important information Equipotentiality Protective earth (ground) Symbols on the box On the box of the device, you may find the following symbols (nonrestrictive list): Indicates a device that can be broken or damaged if not handled carefully when being stored. Indicates a device that needs to be protected from moisture when being stored. -
Page 49: Technical Specifications
Barco software products are the property of Barco. They are distributed under copyright by Barco NV or Barco Inc., for use only under the specific terms of a software license agreement between Barco NV or Barco Inc. and the licensee. No other use, duplication, or disclosure of a Barco software product, in any form, is authorized. - Page 50 Important information DICOM calibrated luminance 500 cd/m² Contrast ratio (panel typical) 1400:1 Response time ((Tr + Tf)/2) 12.5 ms (typical) Housing color RAL 9003 / RAL 9004 Video input signals DVI-D Dual Link (2x) DisplayPort (2x) USB ports 1x USB 2.0 upstream (endpoint) 2x USB 2.0 downstream Power rating 24 VDC, 5 A;...
- Page 51 Important information IEC 60950-1:2005 + A1:2009 EN 60950-1:2006 + A1:2010 + A11:2009 + A12:2011 + A2:2013 IEC 62368-1:2018 EN IEC 62368-1:2020 IEC 60601-1:2005 + A1:2012 EN 60601-1:2006 + A1:2013 + A12:2014 ANSI/AAMI ES 60601-1:2005 + R1:2012 CAN/CSA C22.2 No. 60601-1:14 EMI specific: IEC 60601-1-2:2014 (ed4) EN 60601-1-2:2015 (ed4)
- Page 52 Important information K5902142 /04 Nio 5MP...
- Page 54 Barco NV President Kennedypark 35 8500 Kortrijk Belgium K5902142 /04 | 2022-01-10 www.barco.com...
Need help?
Do you have a question about the MDNG-6221 and is the answer not in the manual?
Questions and answers