
Related Manuals for Holy Stone HS440D


Summary of Contents for Holy Stone HS440D
- Page 1 Instructions For Use Gebrauchsanweisung HS440D +1(855) 888-6699 www.holystone.com usa@holystone.com (USA) eu@holystone.com (EU) ca@holystone.com (CA)
- Page 2 English 01-44 Deutsch 45-86...
-
Page 3: Table Of Contents
Contents Disclaimer & Warning ................Safety Guidelines ..................Maintenance ....................Package Contents ..................Diagram of Drone..................Diagram of Transmitter................Joystick Mode ....................Preparation Before Flight Charging Drone Battery ..............Install Transmitter Batteries .............. App Download and Installation ............. Drone Arms ..................Drone Battery .................. - Page 4 App Operation Instruction The Interface ..................Beginner Mode ................Follow Me ..................Orbit Flight ..................Headless Mode ................. Photo/Video ..................TapFly ....................Specifications..................... Contact Us ....................General Information ................
-
Page 5: Disclaimer & Warning
DISCLAIMER & WARNING 1. Please read this Disclaimer & Warning and Safety Guidelines carefully before using our product. This product is not recommended for people under the age of 14. By using this product, you hereby agree to this disclaimer and signify that you have read it fully. You agree that you are responsible for your own conduct and any damage caused while using this product, and any consequence. - Page 6 SAFETY GUIDELINES ④ Please perform a thorough check of the product before each use. Inspect the integrity of the parts, any signs of cracks and wear off on the propellers, battery power and effectiveness of the indicator, etc. If there is any problem found after checking the drone, please refrain from using it until the problem is resolved.
- Page 7 SAFETY GUIDELINES Operation Requirements ① DO NOT use this product to follow any moving vehicles. ② During the flight, turn off the motors only in case of an emergency. ③ When the battery runs low, return the drone back to your starting point.
- Page 8 SAFETY GUIDELINES ⑦ Only use the USB charging cable that comes with the drone to charge the battery. ⑧ DO NOT connect the battery directly to wall outlets or car cigarette -lighter sockets as this will damage your battery since they have different voltages.
-
Page 9: Maintenance
MAINTENANCE ① Clean the drone after each use with a clean, soft cloth. ② Avoid prolonged exposure to direct sunlight and avoid buildup of heat on the drone or batteries. ③ This device is not waterproof and must not be submerged or subjected to water under any circumstance. -
Page 10: Package Contents
PACKAGE CONTENTS Drone Transmitter Drone Battery USB Charging Propeller Screwdriver Cable Instructions For Use Gebrauchsanweisung HS440D +1(855) 888-6699 www.holystone.com usa@holystone.com (USA) eu@holystone.com (EU) ca@holystone.com (CA) Instructions For Use... -
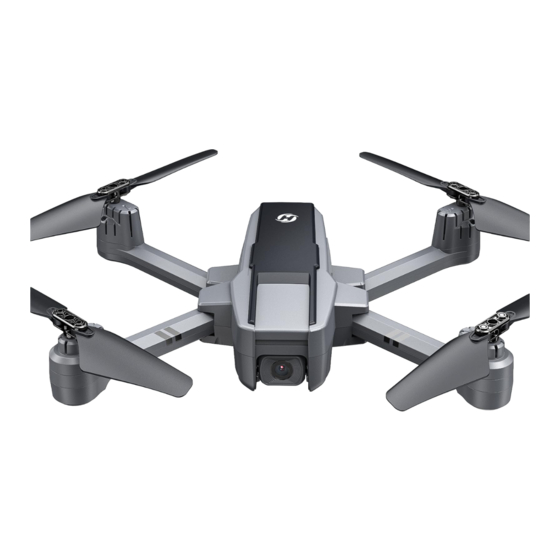
Page 11: Diagram Of Drone
DIAGRAM OF DRONE Propeller A TF Card Slot Camera Power Switch/ Propeller B Drone Battery Drone Status LED Power on/off: Long press the power button “ ” to turn on the drone. Long press again to turn it off. -
Page 12: Diagram Of Transmitter
DIAGRAM OF TRANSMITTER Phone Holder Right Joystick Power Switch Short Press- Take Photo Short Press- Speed Switch Unlock/Lock Record Video Long Press- Long Press- Camera Angle Left Joystick Emergency Stop Adjustment Short Press- Takeoff/Landing Return to Home Short Press- Trimmer Long Press- GPS Switch Long Press-... - Page 13 DIAGRAM OF TRANSMITTER • Speed Switch This drone comes with two speed levels (high/low). Slide the " " to switch between the two speed levels. When pushing, the transmitter will beep once to indicate low speed, twice to indicate high speed. •...
-
Page 14: Joystick Mode
JOYSTICK MODE MODE 2 (Left joystick as the throttle joystick) Left Joystick Right Joystick Forward Ascend Down Backward Descend Down Left Right Left Right Rotate Rotate Fly to Fly to Left Right Left Right MODE 1 To enter MODE 1, turn on the transmitter while holding the “ ”... -
Page 15: Preparation Before Flight
PREPARATION BEFORE FLIGHT Charging Drone Battery USB adapter (5V/2A) Power Bank ① Connect the drone battery to the charging cable. ② Plug the charging cable into a USB adapter (5V/2A) or a power bank to charge the drone battery. ③ During charging, one indicator on the cable is solid red, the other flashes green. -
Page 16: Install Transmitter Batteries
PREPARATION BEFORE FLIGHT Install Transmitter Batteries Slide the battery cover out, insert three AAA batteries (not included) into the battery compartment. Then slide the battery cover back to complete the installation. - When inserting or changing the batteries, please pay attention to the correct polarities! - Do not mix old and new batteries, or different types of batteries. -
Page 17: App Download And Installation
PREPARATION BEFORE FLIGHT App Download and Installation Android APP on Google play Scan the QR code, connect to the App Store™ or Google™ Play and download the HolyStone-FPV application for free. Required Operating Systems: iOS 9.0 or later/Android 5.0 or later. Drone Arms First unfold the rear drone arms, then unfold the front drone arms. -
Page 18: Drone Battery
PREPARATION BEFORE FLIGHT Drone Battery Installation: Push the battery into the battery compartment at the rear of the drone. Make sure that you hear a click sound, which indicates that the battery is firmly installed. Remove: Press the lock button on the battery and pull it back to remove the battery from the battery compartment. -
Page 19: Propellers
PREPARATION BEFORE FLIGHT Propellers Head Installation: ① An “A” “B” is printed on the propeller. ② Lock the propellers to the corresponding the arms of drone (the motor shafts are also marked) with screws. ③ Rotate each screws clockwise. Removal: For propeller removal, use a screwdriver (provided) to rotate them counter-clockwise. -
Page 20: Tf Card
PREPARATION BEFORE FLIGHT TF Card To store your photos and videos, insert the TF card (not included) into the slot as shown above before turning on the drone. The drone supports TF card up to 64GB Phone Holder Expand the phone holder and place your mobile phone in it. Adjust the clamp to secure your mobile phone. -
Page 21: Flight
FLIGHT Pairing All of the following operations on this manual uses MODE 2. ① Long press the power “ ” button on the drone. The drone status LED begins to flash, which means the drone is powered on. HEAD ② Make sure the head of the drone is pointing forward, and it is placed on a level surface. -
Page 22: Connecting To Drone's Wi-Fi
FLIGHT Connecting to Drone’s Wi-Fi HolyStoneGPS-****** Connect your phone to the Wi-Fi network generated by the drone. You can check the drone’s status in the HolyStone-FPV app. ① Make sure to turn off Bluetooth, Mobile Data, and VPN. Enter your phone’s Wi-Fi settings and click Wi-Fi to search for the Wi-Fi of the drone. -
Page 23: Compass Calibration
FLIGHT Compass Calibration The drone will perform a mandatory compass calibration before the initial flight. So you can skip step 1 if this is the first time you fly your drone. STEP 1: Push both the right and left joysticks simultaneously to the bottom right corner. -
Page 24: Gps Signal Search
FLIGHT GPS Signal Search Please don't use the GPS mode when you are indoors. HEAD After calibrating the compass, put the drone on a flat surface. Make sure there are no external sources of signal interference around. The drone will automatically perform a search for GPS signals. The search will last for about 1 minute. -
Page 25: Gyro Calibration
FLIGHT Gyro Calibration Push the two joysticks to the bottom left corner. The drone status LED will go from flashing to solid, which means that the gyro calibration is done. To enusre flight safety, we recommend that the pilot performs a gyro calibration after every pairing or crash of the drone. -
Page 26: Takeoff/Landing
FLIGHT Takeoff/Landing Please turn on the GPS mode before the flight to prevent the drone from flying away and getting lost! Takeoff: After unlocking the motors, short press the " " button. The drone will ascend to an altitude of 4 ft. You can now use the two joysticks to control the drone's movements in the air. -
Page 27: Return To Home
RETURN TO HOME This function can only be activated when the drone is in GPS mode. The RTH (Return to Home) function can bring the drone back to the last recorded Home Point. There are three kinds of RTH: Smart RTH, Failsafe RTH, and Low Voltage RTH. - Page 28 RETURN TO HOME Low Voltage RTH * RA: the Return Altitude set in the app setting. ① The First Stage of Low Voltage RTH: The drone status LED starts to flash red slowly and the transmitter keeps beeping. The drone enters the first stage of Low Voltage RTH.
- Page 29 RETURN TO HOME The Second Stage of Low Voltage RTH: When the drone status LED starts to flash red quickly, and the transmitter keeps beeping, the drone will enter the second stage of Low Voltage RTH. There are two possible returning procedures: a.
-
Page 30: Trimmer
TRIMMER You can only use this function when the drone is NOT in GPS mode. There is no need to trim when the drone is in GPS mode. The Forward Trim If the drone tends to drift forward: 1. Press down the ” ”... -
Page 31: Altitude-Hold
AlTITUDE HOLD FUNCTION The drone is designed with an altitude-hold function so the drone can maintain its altitude after you release the left joystick. (The left joystick will automatically spring back to the middle) -
Page 32: App Operation Instruction The Interface
APP OPERATION INSTRUCTION The Interface Return: Tap to return to the home screen. System Status: Displays the current flying status of the drone and warnings. GPS mode Signal Strength (GPS): Display the strength of the GPS signal. Battery Level (drone): Realtime display of the current battery level of the drone. - Page 33 APP OPERATION INSTRUCTION Flight Setting: Tap to enter the setting interface. Alter settings for flight height/distance, etc. Multifunction: Tap to choose from various flight functions. Return to Home: Tap to activate the RTH function. The drone will fly automatically back to the Home Point. Take off/Land: Tap once, the drone will take off to a height of 4 ft.
-
Page 34: Beginner Mode
APP OPERATION INSTRUCTION Beginner Mode The beginner mode is the default operating mode.When in beginner mode: 1. Default orbit flight radius: 16 ft. 2. The flight distance is limited to: 0~98 ft. 3. The flight height is limted to: 0~98 ft. 4. -
Page 35: Follow Me
APP OPERATION INSTRUCTION Follow Me When the Follow Me function is enabled, the drone will track your movement by following the GPS signal on your mobile phone. (Before using this function, please make sure that the connection between the drone and the transmitter is strong and stable.) 1. -
Page 36: Orbit Flight
APP OPERATION INSTRUCTION Orbit Flight 1.Tap the " " icon first. Then tap the " " icon. Follow the instructions in the prompt box to activate the Orbit Flight function. 2.The drone will record its current position when this function is activated as the circle's center. -
Page 37: Headless Mode
APP OPERATION INSTRUCTION Headless Mode The Headless Mode is a great training tool for beginner pilots. It is also useful when the drone is too far from the pilot (which makes it difficult to tell its orientation). It keeps the drone traveling forward, backward, left, or right when you move the right joystick in those directions, regardless of which way the front of the drone is pointed. -
Page 38: Photo/Video
APP OPERATION INSTRUCTION * Why is the orientation of the drone important? In normal flying mode, the control of the drone movement can sometimes be counter-intuitive for beginners. For instance, when the drone is in the air with its head pointing to your right, if you push the right joystick forward, the drone will fly to your right, instead of flying forward. -
Page 39: Tapfly
APP OPERATION INSTRUCTION TapFly * We strongly recommend that you maximize the map before drawing the flight path. 1. Tap on the Map” ” first, then tap the ” ” icon. Follow the instructions in the prompt box to enter the TapFly function. Fl f Tapfly 1: Tap the ”... -
Page 40: Specifications
SPECIFICATIONS DRONE Model: HS440D Weight: 195g/6.8oz Max Flight Time: 19 minutes (per battery) Operating Temperature Range: 32° to 104°F 123× 93 × 60 mm (Folded) - - - - - - - - - - - - - - - - - - - - - - - - - - - - - - - - - - - - - - - - - - - - - - - - - - - - - - - - - - -... - Page 41 SPECIFICATIONS CAMERA Operating Frequency: 5180MHz Photo Resolution: 4K:3840×2160P 2.5K:2560×1440P Video Resolution: 4K:3840×2160P@15fps (in TF card) 1920×1080P@25fps (in mobile phone) 2.5K:2560×1440P@25fps (in TF card) 1920×1080P@25fps (in mobile phone) Lens: FOV 120° Max Transmission Distance: 656 ft/200 m (outdoor and unobstructed) Photo Formats: JPEG Video Formats: MP4 Supported TF Cards: Supports a TF Card (Class10 above) with capacity of up to 64 GB...
-
Page 42: Contact Us
CONTACT US Please do not hesitate to contact us if you need further support. usa@holystone.com (America) ca@holystone.com (Canada) eu@holystone.com (Europe) +1(855) 888-6699 Scan the code and chat live for online support Scan the code to start a WhatsApp chat with us... -
Page 43: General Information
GENERAL INFORMATION FCC Notice: This device complies with part 15 of the FCC Rules. Operation is subject to the following two conditions: (1) This device may not cause harmful interference, and (2) This device must accept any interference received, including interference that may cause undesired operation. - Page 44 GENERAL INFORMATION WARNING: Changes or modifications not expressly approved by the party responsible for compliance could void the user's authority to operate the equipment. RF Exposure The equipment complies with FCC radiation exposure limits set forth for an uncontrolled environment. This device should be installed and operated with minimum distance 20cm between the radiator &...
- Page 45 GENERAL INFORMATION (2) l'utilisateur de l'appareil doit accepter tout brouillage radioélectrique subi, même si le brouillage est susceptible d'en compromettre le fonctionnement. CAN NMB-003 (B) RF Exposure Radiation Exposure Statement: The device is compliance with RF exposure guidelines, users can obtain Canadian information on RF exposure and compliance.
- Page 46 GENERAL INFORMATION BATTERY WARNING: 1. Failure to follow all the instructions may result in serious injury, irreparable damage to the battery and may cause a fire, smoke or explosion. 2. Always check the battery’s condition before charging or using it. 3.
- Page 47 We, Xiamen Huoshiquan Import & Export CO., LTD hereby, declare that the essential requirements compliance with the Directive 2014/53/EU, the RoHS Directive 2011/65/EU and Safety Directive 2009/48/EC have been fully fulfilled on our product with indication below: Product Name: REMOTE CONTROL MODEL/RADIO CONTROLLED Model/Mark: HS440D/HOLYSTONE...
- Page 48 GENERAL INFORMATION The Statement of compliance is available at the following address: http://www.holystone.com/Download/CE/HS440D_EU_DOC.pdf This product can be used across EU member states. MANUFACTURER INFORMATION Manufactured by Xiamen Huoshiquan Import & Export CO.,LTD Address: Unit 1, Room 501, Hongxiang Building, No.258 Hubin Nan Road, Siming District, Xiamen, China +1(855) 888-6699 MADE IN CHINA(CN)
Need help?
Do you have a question about the HS440D and is the answer not in the manual?
Questions and answers