
Related Manuals for Holy Stone HS420


Summary of Contents for Holy Stone HS420
- Page 1 Instructions For Use Gebrauchsanweisung V 1.0 HS420 +1(855) 888-6699 www.holystone.com usa@holystone.com (USA) eu@holystone.com (EU) ca@holystone.com (CA) jp@holystone.com (jp...
- Page 3 01-31 English 32-57 日本語 58-89 Deutsch...
-
Page 4: Table Of Contents
Contents 1.0 Disclaimer & Warning ................2.0 Safety Guidelines ..................3.0 Maintenance ....................4.0 Package Contents ..................5.0 Drone Details ....................6.0 Transmitter Details ..................7.0 Joystick Mode ..................... 8.0 Installation 8.1 Drone Battery ..................8.2 Phone Holder ..................9.0 Low Battery Warning ................10.0 Charging .................... -
Page 5: Disclaimer & Warning
< Haftungsausschluss & Warnung > 1.0 DISCLAIMER & WARNING 1. Please read this Disclaimer & Warning and Safety Guidelines carefully before using our product. This product is not recommended for people under the age of 14. By using this product, you hereby agree to this disclaimer and signify that you have read it fully. - Page 6 < Haftungsausschluss & Warnung > ④ Ensure to do a thorough check of the product before each use. Inspect the integrity of the parts, any signs of cracks and wear of the propeller, battery power and effectiveness of the indicator, etc. If after doing a complete check of the drone any problems are found, please refrain from using it until the problem has been resolved.
- Page 7 2.3 Operation Requirements ① DO NOT use this product to follow any moving vehicles. ② During the flight, turn off the motors only in case of an emergency. ③ Fly the drone back to you as soon as you are notified that the battery is running low.
- Page 8 < Haftungsausschluss & Warnung > ⑦ Only use the USB charging cable that comes with the drone to charge the battery. ⑧ DO NOT connect the battery directly to wall outlets or car cigarette -lighter sockets as this will damage your battery as they are a different voltage.
-
Page 9: Maintenance
3.0 MAINTENANCE ① Clean the product after each use with a clean, soft cloth. ② Avoid prolonged exposure to direct sunlight and avoid buildup of heat on the drone or batteries. ③ This device is not waterproof and must not be submerged or subjected in water under any circumstance. -
Page 10: Package Contents
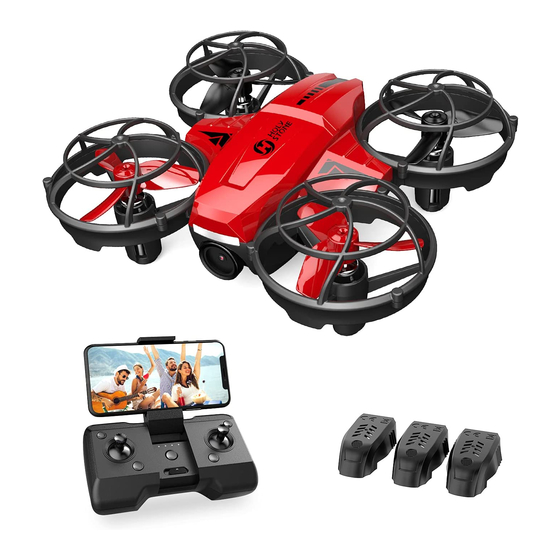
×1 ×1 Drone Transmitter Drone Battery ×1 ×4 ×1 USB Charging Propellers Propeller Spanner Cable Instructions For Use Gebrauchsanweisung V 1.0 HS420 +1(855) 888-6699 www.holystone.com usa@holystone.com (USA) eu@holystone.com (EU) ca@holystone.com (CA) jp@holystone.com (jp) ×1 ×1 Screwdriver Instructions For Use -06-... -
Page 11: Drone Details
5.0 DRONE DETAILS Propeller A Propeller B Propeller B Propeller A Camera Power Switch Drone Battery (Long Press) -07-... -
Page 12: Transmitter Details
< Haftungsausschluss & Warnung > 6.0 TRANSMITTER DETAILS Photo Holder Auto-Rotate/ Take Photo/ Circle Fly Record Video (Long Press) (Long Press) Left Joystick Right Joystick Headless Mode One Key Takeoff /Trimmer & Landing/ (Long Press) Emergency Stop (Long Press) Power Switch Speed Switch Battery Cover 3×AAA Battery... -
Page 13: Joystick Mode
7.0 JOYSTICK MODE 7.1 MODE 2 (Default Setting) Left Joystick Right Joystick Forward Ascend Descend Down Down Backward Right Left Left Right Fly to Fly to Rotate Rotate Left Right left Right 7.2 MODE 1 To enter Mode 1, long press the Trimmer button while turn on the transmitter. -
Page 14: Installation
< Haftungsausschluss & Warnung > 8.0 INSTALLATION 8.1 Drone Battery Installation: ② ① As shown in the figure above, install the battery to the buckle on the back of the drone and push it forward. When you hear a click, the battery is installed. -
Page 15: Phone Holder
8.2 Phone Holder ② ① ③ Pic.1 Pic.2 As the shown above, open the phone holder completely (Pic.1). Adjust the mobile phone holder upward and downward according the size of your mobile phone (Pic.2). 9.0 LOW BATTERY WARNING ① When the drone battery runs low, the indicator lights on the drone will blink continuously, and the transmitter will send out beeps continuously. -
Page 16: Charging
< Haftungsausschluss & Warnung > 10.0 CHARGING USB Adapter (5V/0.5-2.0A) Power Bank Charging Interface Computer USB Port 1) Connect the battery with the USB charging cable. 2) Plug the USB charging cable into a USB charging port on the computer, power bank or USB adapter (5V/0.5-2.0A 3) When the battery is charging, the indicator light on the USB charging cable is red. -
Page 17: Operation Guide
11.0 OPERATION GUIDE 11.1 Download APP Android APP on Google play Scan the QR code, connect to the App Store™ or Google™ Play and download the “HolyStone-FPV” application for free. 11.2 Connect Wi-Fi Connect your smart phone to the Wi-Fi of the Drone and check the drone’s status on the ”HolyStone-FPV”... -
Page 18: Pairing
< Haftungsausschluss & Warnung > 11.3 Pairing All of the following operations on this manual takes MODE 2 for example. ① Long press the Power Switch to turn on the drone, the indicator light of the drone will keep flashing. Long Press Head ②... -
Page 19: Calibrating The Gyro
11.4 Calibrate the Gyro Simultaneously push the left joystick and the right joystick to the bottom right corner to calibrate the gyro. The indicator lights on the drone will blink quickly and turn solid that indicates the calibration is completed. Tips: To ensure a stable flight, we suggest that the pilot calibrates the gyro every time after pairing the drone and after a crash. -
Page 20: One Key Landing
Method 2: After pairing/calibration, pick up the drone and lay it flat on your palm. Gently toss the drone into air, and it will hover in place. 11.6 One Key Landing Landing During the flight, press the One Key Takeoff/Landing button, the drone will land on the ground automatically. -
Page 21: Functions Details
12.0 FUNCTIONS DETAILS 12.1 Trimmer Long Press F/B Sideways Drift Trim: If the drone tends to drift forward, hold down the Trimmer button and do not release it while pushing the direction joystick down to re-balance the drone. If the drone tends to drift backwards, hold down the Trimmer button and do not release it while pushing the direction joystick up to re-balance the drone. -
Page 22: Speed Switch
< Haftungsausschluss & Warnung > 12.2 Speed Switch This drone comes with 2 speed modes (Low/High). As shown above, push the Speed Switch button to the left, the transmitter sends out “Di” sound, indicating Low Speed. Push the Speed Switch button to the right, the transmitter sends out “DiDi”... -
Page 23: Auto-Rotating
12.4 Auto-Rotating During the flight, short press the Auto-Rotating button, the transmitter will make a “Di” sound, which indicates that the drone enters the Auto-Rotating. The drone will exit the Auto-Rotating function auto- matically 10 seconds after, and you can also push the direction joystick to any direction to stop the rotation. -
Page 24: Altitude-Hold Function
< Haftungsausschluss & Warnung > 12.6 Altitude-hold Function The drone is designed with altitude-hold function so the drone can maintain its altitude after you release the left joystick. (The left joystick will automatically spring back to the middle) 12.7 Take Photo/Record Video Take Photo: Short press the Take Photo/Record Video button, the transmitter sends out “Di”... -
Page 25: 360° Flip
12.8 360° Flip 10 Feet When you get familiar with all the functions of the drone, you can try this amazing flip mode. When you fly the drone at least 10 feet, press the Right Joystick on the transmitter, then push the right joystick Forward/Backward or Left/Right, and the drone will do a flip towards the corresponding direction. -
Page 26: Headless Mode
< Haftungsausschluss & Warnung > 12.9 Headless Mode Please after you are fully familiar with the Headless Mode function then use this mode, otherwise it is easy to lose the drone and cause unnecessary loss. Head Tail 1. After pairing/calibration, short press the Headless Mode button on the transmitter. - Page 27 Head Tail Tail Head Tail Head Please make the pilot stays facing the same direction as the direction that the head of the drone faces at take-off. Under Headless Mode, the forward direction is the direction that the head of drone faces when the drone takes off. In order to make sure the pilot can tell drone's direction, we recommend that pilots to stay in the same orientation as the drone head faces when the drone takes off.
-
Page 28: Specifications
13.0 SPECIFICATIONS DRONE Model: HS420 Weight: 31g/1.1oz Max Flight Time: 6 minutes (per battery) Motor Model: 615 Operating Temperature Range: 32° to 104°F (0° to 40°C) Dimensions: 84 x 90 x 34 mm DRONE BATTERY Capacity: 300mAh Voltage: 3.7 V Battery Type: Li-Po Battery Charging Temperature Range: 41°... - Page 29 CAMERA Operating Frequency: 2.4GHz Lens Angle: 65° Adjustable lens: -90°~0° Video/Photo Resolution: HD1280 x 720P Max Transmission Distance: 98 feet/30 m (Outdoors and unobstruct- Live View Quality: 720p@20fps Photo Formats: JPEG Video Formats: MP4 Operating Temperature Range: 32° to 104°F (0° to 40°C) USB CHARGING CABLE Voltage: 5 V Rated Power: ≤10 W...
-
Page 30: Contact Us
< Haftungsausschluss & Warnung > 14.0 CONTACT US Please do not hesitate to contact us if you need further support. usa@holystone.com (America) ca@holystone.com (Canada) eu@holystone.com (Europe) jp@holystone.com (Japan) +1(855) 888-6699 For online support, please scan this code with Facebook Messenger -26-... -
Page 31: General Information
15.0 GENERAL INFORMATION FCC Notice: This device complies with Part 15 of the FCC Rules. Operation is subject to the following two conditions: (1) This device may not cause harmful interference. (2) This device must accept any interference received, including interference that may cause undesired operation. - Page 32 < Haftungsausschluss & Warnung > RF Exposure The equipment complies with FCC radiation exposure limits set forth for an uncontrolled environment. This device should be installed and operated with minimum distance 20cm between the radiator & your body. IC Notice: This device complies with Canada Industry licence-exempt RSS standard (s).
- Page 33 operated with minimum distance 20cm between the radiator & your body. Déclaration d'exposition aux radiations: Cet équipement est conforme aux limites d'exposition aux rayonne- ments IC établies pour un environnement non contrôlé. Cet équipement doit être installé et utilisé avec un minimum de 20 cm de distance entre lasource de rayonnement et votre corps.
- Page 34 < Haftungsausschluss & Warnung > 5. The battery temperature must never exceed 60°C(140°F) otherwise the battery could be damaged or ignited. 6. Never charge the battery on a flammable surface, near flammable products or inside a vehicle(preferably place the battery on a non-flam- mable and non conductive surface).
- Page 35 Directive 2009/48/EC have been fully fulfilled on our product with indication below: Product Name: Remote control four axis series Model/Mark : HS420/HOLYSTONE The Statement of compliance is available at the following address: http://www.holystone.com/docs/HS420_EU_DOC.pdf This product can be used among EU member states.
Need help?
Do you have a question about the HS420 and is the answer not in the manual?
Questions and answers