
Related Manuals for Toro Power Plex 35cm 40V MAX


Summary of Contents for Toro Power Plex 35cm 40V MAX
- Page 1 Form No. 3408-811 Rev C Power Plex ™ 35cm 40V MAX Chainsaw Model No. 51138—Serial No. 317000001 and Up Model No. 51138T—Serial No. 317000001 and Up *3408-811* C Register at www.Toro.com. Original Instructions (EN)
- Page 2 The term “power tool” in all the warnings refers to You may contact Toro directly at www.Toro.com for your corded power tool or battery-operated (cordless) product and accessory information, help finding a power tool.
- Page 3 wrench or a key left attached to the power cutting edges are less likely to bind and are tool may result in personal injury. easier to control. Do not overreach. Keep proper Use the power tool, accessories, footing and balance at all times. This tool bits, etc.
-
Page 4: Sound Pressure
Carry the chain saw by the front handle Use only the following type and size of with the chain saw switched off and battery(ies): Toro battery Model 88525 or away from your body. When transporting 88526 and battery charger Model 88527. -
Page 5: Safety And Instructional Decals
Important: The vibration emission during actual used. The operator should take safety measures use of the power tool can differ from the declared based on an estimation of exposure in the actual total value depending on the way the tool is conditions of use. - Page 6 decal136-2538 136-2538 1. Do not contact objects 2. Always use 2 hands when with the guide bar tip; tip operating the chain saw. contact can cause serious injury. decal136-2539 136–2539 decal136-2534 1. Charge the battery where the temperature is between 0°C 136-2534 and 40°C (32°F and 104°F).
-
Page 7: Filling The Chain Saw With Bar And Chain Oil
Setup Note: The battery pack is not fully charged when you purchase it. Before using the tool for the first time, refer to Charging the Battery Pack (page 15). Filling the Chain Saw with Bar and Chain Oil Important: Use only bar and chain oil. Place the chain saw on a level surface. -
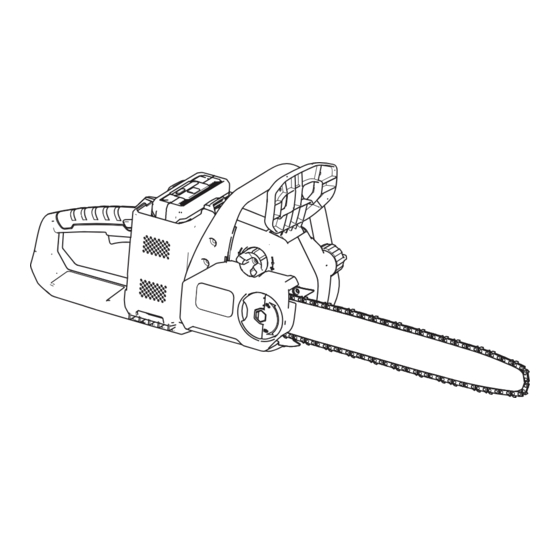
Page 8: Product Overview
Specifications Product Overview Weights Mass of the machine without 5.4 kg (12.0 lb) the battery Mass of the machine with 6.4 kg (14.2 lb) battery 88525 Mass of the machine with 7.0 kg (15.5 lb) battery 88526 Appropriate Temperature Ranges g192115 Figure 3 Charge the battery at... -
Page 9: Operation
Operation Before Using the Chain Saw Before using the chain saw, do the following: • Clean and check the chain components for excessive wear or damage and replace them as needed; refer to Servicing the Guide Bar, Chain, and Drive Sprocket (page 18) Sharpening the Chain (page 20). -
Page 10: Shutting Off The Chain Saw
Shutting Off the Chain Saw Note: Keeping your left arm straight with your elbow locked helps reduce kickback. To shut off the chain saw, release the trigger. Whenever you are not using the saw or are transporting the saw to or from the work area, move the chain brake to the S position (Figure... -
Page 11: Pruning A Tree
Pruning a Tree WARNING Cutting higher limbs from a tree off the ground can put you in an unstable position that could be unsafe for you while handling a chain saw, resulting in possible serious injury or death to you or bystanders. When cutting limbs from a standing tree, use the following practices: •... -
Page 12: Limbing A Fallen Tree
Limbing a Fallen Tree Grip the chain saw as shown in Figure Cut off the smaller limbs from the tree that are not supporting its weight off the ground. g194824 Figure 16 g212420 Figure 15 1. First cut 3. Back cut 2. - Page 13 g194822 Figure 18...
-
Page 14: Bucking A Log
Bucking a Log • If you are cutting branches from a fallen tree or cutting a log into lengths, support the log off the ground (preferably on a sawbuck); refer to Figure g194820 Figure 19 • If the log is supported on an end, cut from the top. If the chain saw binds in the cut, do not attempt to free it by running the motor. -
Page 15: Removing The Battery Pack
Removing the Battery Pack Place the chain saw on a flat surface. Press down on the latch and remove the battery pack from the cavity. g192748 Figure 23 1. Battery pack cavity 4. Battery-charge-indicator button g192109 2. Battery pack terminals 5. -
Page 16: Installing The Battery Pack
Refer to the following table to interpret the LED indicators on the battery charger. Left Light Right Light Indicates: Charger is on; no battery pack inserted Battery pack is charging Green Battery pack is charged Orange Battery pack is too warm Red Blinking Battery pack is defective Installing the Battery Pack... -
Page 17: Recommended Maintenance Schedule(S)
Maintenance Recommended Maintenance Schedule(s) Maintenance Service Maintenance Procedure Interval • Check the oil level and add bar and chain oil if necessary. • Check the chain brake. • Check the chain tension and adjust it if necessary. Before each use or daily •... -
Page 18: Adjusting The Chain Tension
move around the guide bar. If it does not, take Adjust the chain until the chain touches the the chain saw to an Authorized Service Dealer bottom edge of the guide bar, then tighten the for repair. knob an additional 1/8 to 1/4 turn. Tighten the wing nut until it is snug (Figure 29). - Page 19 g192116 Figure 30 1. Oil passage 3. Spacer 2. Clip 4. Drive sprocket Inspect the drive sprocket; if it is excessively worn or damaged, replace it. Check the oil passage (Figure 30) for debris and clean the area if necessary. Install the drive sprocket, spacer, and clip.
-
Page 20: Sharpening The Chain
Store the tool, battery pack, and battery charger If you are located outside of the US and in an enclosed clean, dry area. Canada, please contact your authorized Toro distributor. Service Should the chain saw need service, take the product... -
Page 21: Troubleshooting
Troubleshooting Perform only the steps described in these instructions. All further inspection, maintenance, and repair work must be performed by an authorized service center or a similarly qualified specialist if you cannot solve the problem yourself. Problem Possible Cause Corrective Action The motor does not run or runs 1. - Page 22 Problem Possible Cause Corrective Action All 4 LED indicators are blinking on the 1. The battery pack is over or under the 1. Move the battery pack to a place battery pack after releasing the trigger appropriate temperature range. where it is dry and the temperature is (when the battery pack is in use).
- Page 23 The Way Toro Uses Information Toro may use your personal information to process warranty claims, to contact you in the event of a product recall and for any other purpose which we tell you about. Toro may share your information with Toro's affiliates, dealers or other business partners in connection with any of these activities. We will not sell your personal information to any other company.
- Page 24 – Failure to follow proper maintenance procedures or recommended The Toro GTS Starting Guarantee does not apply when the product is used commercially. fuel procedure Some engines used on Toro Products are warranted by the engine manufacturer.