Advertisement
Quick Links
Advertisement

Related Manuals for Genuine Scooter Company Buddy Kick


Summary of Contents for Genuine Scooter Company Buddy Kick
- Page 1 B u d d y K i c k S e r v i c e M a n u a l...
- Page 2 This service manual contains basic instructions in connection with general service and maintenance of the Genuine Buddy Kick. This manual also contains detailed technical information for Genuine service technicians who are engaged in maintenance, repair, parts replacement, troubleshooting, and reassembly. The service manual is complete providing details from simple tear down to detailed disassembly and from a basic performance introduction to service preparation.
- Page 3 57 mph TOP SPEED TAIL LIGHT 92 km/hr 12V-0.2W/12V-5W FUEL CONSUMPTION BRAKE LIGHT 98.8 mpg 42 km/L 12V-2W SIGNAL LIGHT HILL CLIMB 25°↑ 12V- 2W/12V-2W TYPE HORN DC 12V FUEL 92 UNLEADED MUFFLER C-D ABSORPTION 4T / FORCE D AIR&OIL COOL CYCLE/COOLING EXHAUST DIRECTION RIGHT &...
- Page 4 This manual is a service manual for Genuine Buddy Kick with details specifying methods to disassemble or install various mechanisms, basic maintenance including inspection and adjustment of components, notices for operation, and diagnostics, etc. There are 15 sections as referenced below.
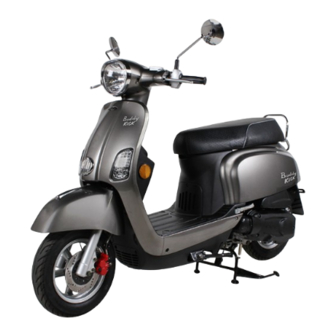
- Page 5 Information Summary and Preparation 1-1 Exterior parts diagram 1-2 Electrical Parts configuration 1-3 Positions of engine number / vehicle identification number 1-4 Code of practice 1-5 Torque 1-6 Service tools 1-7 Procedure to maintain the Electronic Management System (EMS) 1-1 Exterior parts diagram HANDLE COVER UPER HEAD LIGHT COVER FRONT HOOK...
- Page 6 Information Summary and Preparation 1-2 Electrical Parts configuration Number Type Number Type BATTERY 12V*7A STARTER RELAY MAIN / FUEL RELAY FLASHER RELAY ASSY IGNITION COIL HORN TOPPLE SWITCH MAIN SWITCH FUSE RECTIFIER FUEL GUAGE FUEL PUMP THROTTLE BODY...
- Page 7 Information Summary and Preparation 1-3 Positions of engine number / vehicle identification number J1F00000 125 C.C...
- Page 8 Information Summary and Preparation 1-4 Code of practice 1. Any clamp or cotter pin removed shall be replaced with a new one. 2. Any part to be replaced shall be manufactured by Genuine. 3. Make sure any assembled component is securely fastened and formally activated. 4.
- Page 9 Information Summary and Preparation fuel pressure, the fuel hose shall not be disassembled arbitrarily. In the event of fuel system maintenance, the pressure in the fuel system shall be released prior to removal of a fuel hose in the following order: Remove the fuel pump relay;...
- Page 10 Information Summary and Preparation 1-5 Torque Rated values Type Torque (ft-lbf) Type Torque (ft-lbf) 6 mm nut 5 mm bolt 3.5 ft-lbf 9 ft-lbf 6 mm bolt 7 ft-lbf 8 mm nut 18 ft-lbf 8 mm bolt 15 ft-lbf 10 mm nut 25 ft-lbf 10 mm bolt 25 ft-lbf...
- Page 11 Information Summary and Preparation 1-6 Service tools Front fork - Bearing cage 2. Brake oil-pumping unit 3. Bearing puller tool disassembly, tools 4. Clutch compression tool 5. Clutch Fixator 6. feeler gauge Bearing Striking Tools 8.Cylinder pressure gauge 9. Test line group 10.
- Page 12 Information Summary and Preparation 13. multimeter 14. Gasoline pressure gauge Valve compression tool 16. spark plug gap gauge 17.EMS diagnostics - dedicated Hose clamp removal tool Fuel injector cleaning tool Oil seal removal tool - small 21. Dial gauge + Magnetic Base 22.
- Page 13 Information Summary and Preparation 1-7 Maintaining the Electronic Management System (EMS) Systematic procedure to diagnose any trouble condition Items below are to be checked first prior to any detailed diagnosis for engine troubles: Make sure the engine trouble indicator light is functioning normally; Connect diagnostic tool to determine if any trouble code information has been recorded;...
- Page 14 Information Summary and Preparation (1) Engine not turning over or difficulty during start-up General trouble location: 1. Battery; 2. Start motor; 3. Main wiring or power switch; 4. Engine oil viscosity; 5. Engine mechanism. Procedure for general diagnoses: Detection Operating Procedure Subsequent Steps Results Check the voltage between two battery terminals with...
- Page 15 Information Summary and Preparation (2) Engine running but stalling during start-up General trouble location: 1. Fuel pump; 2. RPM Sensor; 3. Ignition coils; 4. Compression 5. Short Circuit. Procedure for general diagnoses: Detection Operating Procedure Subsequent Steps Results Connect a fuel pressure gauge prior to the fuel inlet of the Next step nozzle;...
- Page 16 Information Summary and Preparation (3) Difficulty starting when hot General trouble location: 1. Fuel Pump; 2. Ignition Coils; 3. Engine temperature sensor; 4. Fuel Quality; 5. Electrical Procedure for general diagnoses: Detection Operating Procedure Subsequent Steps Results Next step Connect a fuel pressure gauge before the fuel inlet of the nozzle;...
- Page 17 Information Summary and Preparation (4) Cold start difficulty General trouble location: 1. Fuel pump; 2. Ignition Coils; 3. Engine temperature sensor; 4. Throttle & idle air bypass; 5. Nozzle; 6. Fuel Quality; 7. Engine compression / valves; 8. Electrical Procedure for general diagnoses: Detection Operating Procedure Subsequent Steps...
- Page 18 Information Summary and Preparation (5) Start-up difficulty anytime despite normal RPM General trouble location: 1. Air Intake; 2. Fuel pump; 3. Ignition coils; 4. Spark Plug; 5. Temperature Sensor; 6. Air throttle and & idle air bypass; 7. Nozzle; 8. Fuel Quality; 9. Compression / Valves; 10. Ignition Timing; 11.Electrical. Procedure for general diagnoses: Detection Operating Procedure...
- Page 19 Information Summary and Preparation (6) Start-up normal but idle speed is unstable anytime General trouble location: 1. Air Intake; 2. Idle Governor; 3. Spark plug; 4. Air throttle and idle air bypass; 5. Nozzle; 6. Fuel Quality; 7. Compression / Valves; 8. Ignition Timing; 9. Electrical. Procedure for general diagnoses: Detection Operating Procedure...
- Page 20 Information Summary and Preparation (7) Start-up normal but idle speed is unstable during warm-up General trouble location: 1. Air Intake; 2. Spark Plug; 3. Idle Governor; 4. Temperature sensor; 5. Nozzle; 6. Fuel quality; 7. Engine compression / Valves; 8.Electrical. Procedure for general diagnoses: Detection Operating Procedure...
- Page 21 Information Summary and Preparation (8) Start-up normal but idle speed unstable when warm-up is finished General trouble location: 1. Air Intake; 2. Spark Plug; 3. Idle Governor; 4. Temperature Sensor; 5. Nozzle; 6. Fuel Quality; 7. Engine compression / valves; 8. Electrical. Procedure for general diagnoses: Detection Operating Procedure...
- Page 22 Information Summary and Preparation (9) Start-up normal but idle speed unstable or stalling with a load such as front lamp applied General trouble location: 1. idle governor, air throttle and idle air bypass; 2. Load test; 3. Nozzle; 4. Electrical. Procedure for general diagnoses: Detection Operating Procedure...
- Page 23 Information Summary and Preparation -1 (10) Start-up normal but idle speed too high General trouble location: 1. Air throttle and idle air bypass; 2. Vacuum tube; 3, Idle governor; 4. Engine temperature sensor; 5. Ignition timing. Procedure for general diagnoses: Detection Operating Procedure Subsequent Steps...
- Page 24 Information Summary and Preparation -1 (11) RPM low or stalling during acceleration General trouble location: 1. Water in fuel; 2. Inlet pressure sensor & air throttle sensor; 3, Spark plug; 4. Air throttle & idle air bypass; 5. Air intake; 6. Idle governor; 7. Nozzle; 8. Ignition timing; 9. Exhauster. Procedure for general diagnoses: Detection Operating Procedure...
- Page 25 Information Summary and Preparation -1 (12) Slow acceleration General trouble location: 1. Water in fuel; 2. Inlet pressure sensor and air throttle sensor; 3. Spark plug; 4. Air throttle and idle air bypass; 5. Air intake; 6. Idle governor; 7. Nozzle; 8. Ignition timing; 9. Exhauster. Procedure for general diagnoses: Detection Operating Procedure...
- Page 26 Information Summary and Preparation -1 (13) Acceleration sluggish; poor performance General trouble location: 1. Mechanical drag; 2. Air intake; 3. Fuel pump; 4. Ignition coil; 5. Spark Plug; 6. Air throttle and idle air bypass; 7. Pressor sensors; 8. Nozzle; 9. Fuel Condition; 10. Ignition timing; 11. Exhaust; 12. Electronics. Procedure for general diagnoses: Detection Operating Procedure...
- Page 27 Information Summary and Preparation -1 1) PCODE List function Description P0107 Manifold Abs.Pressure or Bar.Pressure Low Input P0108 Manifold Abs.Pressure or Bar.Pressure High Input P0112 Intake Air Temp.Circ. Low Input P0113 Intake Air Temp.Circ. High Input P0117 Engine Coolant Temp.Circ. Low Input P0118 Engine Coolant Temp.Circ.
- Page 28 Installation & Removal of Exterior Components-2 Operating instructions Removal of the exterior parts Operating instructions 1. When removing exterior body panels, ensure that panels are not forcefully removed as this can make the panels fracture. 2. Install exterior parts so they are not contacting the main wiring harness. If the mounting screw is too long and penetrates the wiring, it will make the main wiring harness short circuit.
- Page 29 nstallation & Removal of Exterior Components-2 1-3 HEAD LIGHT ASSY Disassembly a. Remove the Hex adjustment bolt, washer, and lock washer (1、2、3). b. Remove screws (4), remove the head light assy(5).
- Page 30 Installation & Removal of Exterior Components-2 2. LOWER COVER (R/L)→MIDDLE COVER→STEP FLOOR→WIND SHIELD→FRONT PANEL,INNER COVER→FRONT INNER PANEL (UPPPER、LOWER) 2-1 LOWER COVER (R/L) Disassembly- a. Remove screws (2, 6). b. Remove screws and washers (3, 4, 7, 8), remove the lower cover【L&R】 (1/5). 2-2 MIDDLE COVER→STEP FLOOR Disassembly- a.
- Page 31 Installation & Removal of Exterior Components-2 Disassembly- 2-3 WINDSHIELD→FRONT INNER PANEL COVER a. Put your hand into the gap between the Wind Shield and Front Fender, use your fingers to push the circular cover (9) outward and remove the circular cover b.
- Page 32 Installation & Removal of Exterior Components-2 2-4 FRONT UNDER COVER Disassembly a Remove screws (2), remove the under cover (1). 2-4.1 FRONT LOWER COVER/ FRONT INNER COVER, UPPER Disassembly a. Remove tapping screws (4) b. Remove the push rivets (5), remove the front lower cover (3).
- Page 33 Installation & Removal of Exterior Components-2 2-5 FRONT INNER COVER Disassembly a. Remove the screw (5), remove the front hook (4). b. Remove the washers & screws (2, 3) c. Loosen hose clamp (6), pull out FUEL HOSE (8). d. Remove the fuel tank cover cable. e.
- Page 34 Installation & Removal of Exterior Components-2 3) HANDLE BAR ASSY.→HANDLE LOWER COVER 3-1 HANDLE BAR ASSY.→HANDLE LOWER COVER Disassembly a. Remove tapping screws (17). b. Remove washers, screws (18, 19). c. Disassemble the handle switch (10-L/13-R) bolts and cable terminal, remove the handle switch. d.
- Page 35 Installation & Removal of Exterior Components-2 4-1 LUGGAGE COMP→REAR LUGGAGE BRACKET→BODY COVER (L、R) →FRONT BODY COVER →LICENSE PLATE→REAR SIGNAL LAMP (L、R) →BATTERY BOX 4-1 LUGGAGE COMP→BATTERY COVER→SEAT Disassembly a. Remove the screws (2), remove the luggage compartment (1). b. Remove the tapping screws (4), remove the battery cover (3) c.
- Page 36 Installation & Removal of Exterior Components-2 4-2 REAR LUGGAGE BRACKET Disassembly Remove the screws (2), and remove the rear luggage bracket (1). 4-3 BODY COVER ASSEMBLY (L、R) Disassembly a. Remove the tapping screws (4). b. Remove the tapping screws (5) and then remove the body cover assembly (3).
- Page 37 Installation & Removal of Exterior Components-2 4-3.2 LICENSE PLATE / REAR SIGNAL LAMP Disassembly a. Remove the tapping screws (10 & 8), remove the license plate (9-R, 7-L). b. Remove the tapping screws (12), remove the rear signal lamp (11). c.
- Page 38 Installation & Removal of Exterior Components-2 4-3.4 BODY COVER-R/ BODY COVER -L Disassembly a. Remove of the tapping screw (4). Separation of the right body cover (1) and left body cover (2). Remove the“U TYPE SPRING NUTS”(3). 4-4 BATTERY BOX –...
- Page 39 Installation & Removal of Exterior Components-2 FRONT FENDER 5-1 FRONT WHEEL ASSY (10") Disassembly – a. Remove the tapping screws (14), remove the brake caliper (13). b. Remove the front axle (8) and the lock nut (12). Torque value: 5.0~6.0kg-m c.
- Page 40 Installation & Removal of Exterior Components-2 5-2.1 FRONT FENDER Disassembly – a. Remove the screws (4). b. Remove the tapping screw (7), remove the front fender(2). c. Remove the bolts (6). Remove the front fender bracket (5). Installation- Follow the removal procedure in reverse to install.
- Page 41 Check & Adjustment-3 3-15 Compression Pressure Measurement Operating instructions 3-1 Engine oil 3-16 Throttle Adjustment 3-2 Gear oil 3-17 Brake clearance 3-18 Brakes-thin check 3-3 Air cleaner comp 3-4 Main switch 3-19 Brake fluid check / adjustment 3-20 Front lamp Seat lock / Fuel tank cover 3-21 Driving belt / clutch lining 3-6 Rear wheel disassembly instructions...
- Page 42 Inspection & Adjustment-3 PERIODIC MAINTENANCE SCHEDULE Mileages or Months First Item Content 500mi 1875mi 3750mi 5625mi 7500mi 9375mi 11,250mi (1 Month) (3Months) (6Months) (9Months) (12 Months) (15 Months) (18 Months) Replacement Replacement every 1875mi Engine Oil* Recommend 10w40 Clean; replacement ...
- Page 43 Inspection & Adjustment-3 PERIODIC MAINTENANCE SCHEDULE FOR MAXIMUM ENGINE PERFORMANCE / LONGEVITY Mileages or Months Item Content 1875mi 3750mi 5625mi 7500mi 9375mi 12,500mi First 500mi (6 Months) (9 Months) (12 Months) (1 Month) (3 Months (15 Months) (18 Months) Check and adjust the valve ...
- Page 44 Inspection & Adjustment-3 3-1 Engine oil Volume: Total oil volume: 1000c.c. Oil volume replaced: 800c.c. Service cycle: 1875mi Check the oil level Park the scooter on a horizontal surface for checks. Run the engine for 3-minute and stop it for 3- ...
- Page 45 Check & Adjustment-3 Note: If the amount of oil is not maintained within the standard range, engine performance degradation or damage may occur. ․Different types of oil cannot be mixed with each other. ․Do not let foreign objects fall into the crankcase.
- Page 46 Check & Adjustment-3 3-2 Gear oil Volume Total oil volume: 110c.c. Oil volume replaced: 90c.c. Service cycle: Every 1500 miles Checking Gear Oil Level Park the motorcycle on a horizontal surface for oil level checks. Recommended oil: ○ SAE85W-140 (90c.c) Gear oil ○...
- Page 47 Check & Adjustment-3 3-3 Air Filter Recommended service cycle: Check: Every 1750 mi Change: Every 3500 mi or less in the event of dirty riding conditions. Check / Change: 1. Remove 5 screws (1) on the air cleaner cover. 2. Remove fixed block (2). 3.
- Page 48 Check & Adjustment-3 3-4. Main switch (for ignition & illumination) 3.4.1 The instructions for using the ignition switch to control ignition and illumination are shown as follows: 1. Power disconnected; key removable. 2. Power connected; engine ready to be started; key not removable.
- Page 49 Check & Adjustment-3 Seat lock / Fuel tank cover cables Adjustment- a- Seat lock lever cable b- Tank cover lever cable Adjustment screws (C): Clockwise: loosen Counterclockwise: Tighten 3-6 Rear wheel disassembly instructions ※ When removing the rear wheels, remove the tire pressure valve stem to remove all air from the tire, and then remove the wheels.
- Page 50 Check & Adjustment-3 3-8 Charging port 1. Function: Supply 12V DC charging power. 2. Restrictions on Use: The charging current cannot be higher than 1A. 3. Power Protection: 1A fuse. 4. Usage: Use a car charger style plug and insert it into the port to charge your device.
- Page 51 Check & Adjustment-3 3-10 SPEEDOMETER FUNCTIONS AND INDICATORS Speed in miles per hour Function Indicator and clock Functional icon Engine oil EMS indicator indicator High beam indicator Low beam indicator Turn signal light (left) Turn signal light (right) Fuel level Mileage information Function key █...
- Page 52 Check & Adjustment-3 █ Fuel Level • “Fuel Level” is always indicated at █ RPM the left-hand side of the display • Press the button on the display panel for any mode. panel to indicate engine “RPM”. • Low fuel level: “Fuel Level” blinking and a symbol for low level indicated on the upper right corner █...
- Page 53 Check & Adjustment-3 Alert symbol: Power switch symbol Diagnostic mode symbol Voltage warning symbol Low fuel symbol On when power switch under seat is off On when PC is connected On when voltage drops On when gasoline is 1. Starter motor fails to turn. to the diagnostic display below 11.5V or is higher less than 1/8 of...
- Page 54 Check & Adjustment-3 3-11 Spark plug 1. Removal › Remove the middle cover. › Use a spark plug tool to remove the spark plug. Torque value: 10 ~ 12 N-M Check- 2. Check the spark plug for damage, corrosion, or carbon deposition.
- Page 55 Check & Adjustment-3 3-12 CVT - air filter cleaning 1. Removal - > Loosen clamp bolt (1). > Remove the breather pipe (2). > Remove to remove the fixed plate (3). > Remove the filter (4). 2. Checks - > Replace sponge if it is excessively dirty. 3.
- Page 56 Check & Adjustment-3 3-13 Check / Adjust timing 1. Valve Cover Removal - Please refer to section 7 of the cylinder head. – timing 2. Check › Rotate the flywheel clockwise, align the flywheel mark "T" with the arrow mark on the right crankcase cover. ›...
- Page 57 Check & Adjustment-3 3-14 Valve clearance Valve Cover Removal > Please refer to section 7 of the cylinder head. Note ․Valve clearance adjustments are done when the engine is cold. ․Rotate engine to top dead center for measurement and adjustment. Check valve clearance.
- Page 58 Check & Adjustment-3 3-15 Compression pressure measurement 1. Remove - > Spark Plugs Note Prior to removing spark plug, clean around the spark plug port to prevent dirt and debris from dropping into the spark plug port. 2. Measurement - cylinder pressure Standard value: 10 ±...
- Page 59 Check & Adjustment-3 3-16 Throttle cable free play / adjustment 1. Check - > Determine if the idle speed is too high. > Rotate the throttle grip, check the throttle cable clearance. If the clearance is abnormal, adjust cable so free play does not exceeded the standard range.
- Page 60 Check & Adjustment-3 3-17 Check the brake clearance Measurement - brake lever > Check the back-play by pressing the brake lever for any inconformity. Standard clearance :10-20mm Note: Disk brake system can adjust the brake clearance, when the clearance is not within the standard range, check whether there is air in the brake system tubing.
- Page 61 Check & Adjustment-3 3-19 Brake fluid check / adjustment Check - brake master cylinder > Brake fluid check (View Sight glass) determine whether the amount of fluid is between the high oil level (2/3) and the low oil level (1/3). >...
- Page 62 Check & Adjustment-3 3-20 Front lamp 1.Adjustment - > Moves forward or backward to adjust the projection angle of headlights. 3-21 Driving belt / clutch lining 1 Remove the following: > Please refer to section- 9 CVT maintenance cycle 2 checks - V-belt >...
- Page 63 Check & Adjustment-3 3-22 Tire & wheel Check the tread / wall for any wear, break, or nail. ▽: Tread wear indicator ▽ Check tire pressure: Front Wheel Rear Wheel 26 - 28 psi 26-28 psi ▽ ▽ ▽ Note ․Check the tire pressure at ambient temperature.
- Page 64 Check & Adjustment-3 1.Throttle cable inspection a: check > External Cables Excessive bending, popping → Replace > Cable actuation a: If the cable has been overtightened, or the cable has broken →replace b: Lubrication > Add oil to the cable. 2.
- Page 65 Check & Adjustment-3 3-24 Suspension system 一. Front shock absorber Check- › Use the center stand to support the motorcycle; firmly grip the front brake lever and press front shock absorbers several times to check any noise, leakage, screw loosened, or bushing worn. ›...
- Page 66 Check & Adjustment-3 3-25 Steering checks 1. Actuate the center stand so that the front wheel is elevated. 2 checks - > Grasp fork bottom half with hands, rock back and forth to check for play. > Grasp fork bottom half with hands holding turning left and right.
- Page 67 Check & Adjustment-3 3-26 Battery check 1. Demolition - > Battery cable > First deremove battery cable (-) negative, then split the battery lead (+) positive. 2 check - battery voltage Tools: multimeter Ways: (+) red probe is connected to the positive terminal 圖表...
- Page 68 Check & Adjustment-3 3.Installation: > Battery cable 1)First install the battery lead (+) positive,and then install the battery cable (-) negative.
- Page 69 Check & Adjustment-3 3-27 Fuse check 1. Demolition - > Windshield / Luggage > Fuse Note: Removable fuse, turn main switch to the OFF position 2 Check > Tools: multimeter Way: red probe(+) to one fuse end and the black Probe(-) connected to the other end >...
- Page 70 Check & Adjustment-3 3-28 Side stand switch comp (European specifications) TURN OFF TURN ON: (Figure I) (Figure II) Startup: will the side stand switch by the turn off position (Figure I) push to the turn on position (Figure II), motocycle can be normal start. TURN OFF TURN ON: (Figure IV)
- Page 71 Electronic fuel injection system Configuration and performance of parts in the MSE3.0 gasoline engine’s electronic control unit Throttle Body(T- MAP) Ignition coil/ Spark Plug 1. Throttle Position Sensor Ignition Coil/Spark Plug 2.Intake Pressure Sensor Injector Throttle Body 進氣溫度感測器 Intake Temperature Sensor Oxygen sensors Integrated Module Small Engine Injector...
- Page 72 Electronic fuel injection system 1.The basic principle of the electronic control system motorcycle MSE3.0 The basic composition of the gasoline electronic control system Any electronic control systems, including gasoline engine electronic control systems are composed of the following three components: (1) sensor - the engine in a variety of non-electrical quantities converted into electrical quantity , whereby a variety of information to the electronic control unit;...
- Page 73 Electronic fuel injection system Injection system circuit diagram-...
- Page 74 Electronic fuel injection system Electronic injection system parts configure- FUSE Crank speed sensor Throttle assembly 1.Injector 2.T-MAP 3.TPS 4. Temperature sensor Idle speed control (ISC) Oxygen sensors FUSE Fall down sensor...
- Page 75 Electronic fuel injection system 4-1 ECU(Electronic Control Unit) Principle: Electronic Control Unit (ECU) is the brain of the whole electronic system. ECU is effective in analyzing and processing information supplied by sensors and issuing conclusion-induced commands to any actuator for optimization of the running engine.
- Page 76 Electronic fuel injection system ECU PIN ISA-TEV+canister purge(TEV) ECU Pin Ignition1 GND(Ignition,power) Vehicle speed sensor or else input KL15 intake air temp.(ADC) Output A/D input Input 5V ex.supply KL15 Engine speed sensor B Engine speed sensor A Injector Lambda sensor heater canister purge TEV/ Auxiliary start relay ISA-TEV / TEV coolant temp.(ADC )
- Page 77 Electronic fuel injection system 4-2 Electromagnetic fuel Injector Injector Throttle assembly Function: Subject to ECU, the fuel injects atomized fuel into the engine in the specific timing. Constitution: EV-Cup; clamp; EV Injector Principle: Developed by the fuel Injector coils with electrical pulse supplied from ECU, the magnetic force will increases to overcome a resultant force composed of the return spring’s pressure, the needle valve’s gravity, and friction and makes the needle valve lifted and fuel injected.
- Page 78 Electronic fuel injection system Detectability determination: Check 1 - Method: The main switch off, remove the injector Terminal, connect a voltmeter to open main switch or start the engine, check for voltage. Measurement wire color probe stalls Judgment Working voltage injector Brown / red (Control Power)
- Page 79 Electronic fuel injection system PC diagnostic checks - Fault codes: Fault phenomenon: P0201: Cylinder 1 - Injector Circuit 1. Cold difficult to start P0261: Cylinder 1 - Injector Circuit Low 2. RPM is normal, but difficult to start P0262: Cylinder 1 - Injector Circuit High 3.
- Page 80 Electronic fuel injection system 4-2 Fuel pump Fuel pump- features: gasoline tank suction and controls the nozzle fuel pressure 3kgf/cm2. Pressure regulator Principle: pressure adjustment allows gas pressure to pump maintain stability. ※ Injection system does not perform diagnostics on fuel Low Pressure Filters pump parts Detectability determination:...
- Page 81 Electronic fuel injection system Check 3- Measurements 3- Pressure test ›Tools: Gasoline pressure gauge、Hose clamp removal tool Tool installation - 1 Turn off the main switch 2 Use Hose clamp removal tool and remove the injector injector tubing tubing 3. Injector connect one end of the gasoline pressure gauges,Connect the other end pressure tubing.
- Page 82 Electronic fuel injection system 4-3 Crank speed sensor Function of Crank speed sensor: function:induct the engine speed, tell ECU to control fuel injection & igntion. theory:calculate the interval time of each flange on the outer portion of the flywheel. Detectability determination: Crank speed sensor gap: 0.6 ~ 1.2mm Fault phenomenon: Fault reasons:...
- Page 83 Electronic fuel injection system PC diagnostic checks - Fault codes: P0321 Engine Speed Reference Mark P0322 Eng.Speed Inp.Circ. No Signal...
- Page 84 Electronic fuel injection system 4-4 Ignition coil Principle: When the battery voltage is applied to the primary winding, the primary winding is charged. Once the primary winding circuit ECU off, the charge termination,While in the secondary winding Induces a high voltage. Features: Ignition coil primary winding of low voltage converted into high voltage secondary winding, spark discharge...
- Page 85 Electronic fuel injection system Check 3- Measurements3 - Check the spark gap Tools: spark-over tester Minimum spark gap: 6mm Fault phenomenon: 1. Can not start the engine 2. Cold crank difficulties 3. Difficult to start when hot 4. Normal RPM, difficult to start 5.
- Page 86 Electronic fuel injection system 4-5 Intake air pressure sensor Intake air pressure sensor Throttle assembly Function: Induct intake air pressure, ECU judges intake or compression stroke to decide injection & ignition. Monitor absolute pressure (kPa) in the intake manifold; provide information about the engine load. Range of pressures monitored: 10~115kPa Principle: Due to any change in the intake manifold’s pressure causing deformation of a pressure sensor’s diaphragm, the...
- Page 87 Electronic fuel injection system PC diagnostic checks Fault codes: P0107 Manifold Abs. Pressure or Bar. Pressure Low Input P0108 Manifold Abs.Pressure or Bar. Pressure High Input Fault phenomenon: 1.Acceleration weakness / poor performance. 2.Acceleration reaction slow, RPM is not sustainable or engine stall. Detectability determination: Check1- Measurement - main switch on but do not start the engine, measure...
- Page 88 Electronic fuel injection system Check2- Measurement 2 - (Remov e the terminal) Use a multimeter and turn to ohm setting, Two probes are connected to the intake pressure sensor two pins, at 20 ℃ rated r esistance 1.5 ± 0.5KΩ at2 5 ℃...
- Page 89 Electronic fuel injection system 4-6 Intake temperature sensor Function: The core of the intake temperature sensor is a quick- response thermistor with circuit as follows. Principle: Measuring the temperature of the atmosphere to adjust the mix ratio. Air temperature is high (low resistance), will reduce the amount of fuel injection, Air temperature is low will contrarily increase the fuel injection quantity.
- Page 90 Electronic fuel injection system PC diagnostic checks- Fault codes: P0112 Intake Air Temp.Circ. Low Input P0113 Intake Air Temp.Circ. High Input...
- Page 91 Electronic fuel injection system 4-7 Temperature sensor Temperature sensor Function: The sensor is used to provide information about cylinder temperature. Principle: As one NTC (Negative Temperature Coefficient) thermistor, the temperature sensor has descending resistance with the cylinder's ascending temperatures. The relationship is not linear. Sectional view of a temperature sensor: 1.
- Page 92 Electronic fuel injection system PC diagnostic checks – Fault codes P0118 EngineTemp.Circ. High Input P0117 Engine Coolant Temp.Circ. Low Input Fault phenomenon: 1.Idle speed too high 2.Start normal, warm-up idle unstable 3.Start normal, after warming-up idle instability 4.Cold start difficulties 5.Hot start difficulties Method of measurement: Dip the temperature sensor inside hot water at 80℃...
- Page 93 Electronic fuel injection system 4-8 Oxygen sensor (O2) Oxygen sensor 圖表 3 Function: Test the oxygen content in exhaust to make sure of the mixture of gasoline and air has completely burned and promote the Air/Fuel Ratio precisely controlled by ECU. Theoretical Air/Fuel Ratio: 14.7:1 Air-fuel ratio with the ratio between the theoretical equivalent called the excess air ratio, expressed by the Greek letter .
- Page 94 Electronic fuel injection system Principle: When a ceramic tube’s temperature is up to 350℃, the solid ceramic electrolyte is conductive and the oxygen molecule inside and outside ceramics is catalyzed to oxygen anion, which freely moves inside ceramics, by the sensor’s platinum electrode so that oxygen molecule thereof diffuses via ceramics.
- Page 95 Electronic fuel injection system Constitution: Signal line Dish washer Lower isolating bush Sheath Wirework Heater Washer Sensor support Ceramic probe Sectional view of a heated Lambda sensor 10. Protection tube PC diagnostic checks- Fault codes: P0130: O2 Sensor Circ. Malfunction P0131: O2 Sensor Circ.
- Page 96 Electronic fuel injection system measuring terminals Measurement wire color probe stalls Judgment Blue / Black 0.2~0.8V (working jump voltage) Voltage is gray (ground) fixed or Not beating (Oxygen sensor when required to reach operating temperature starts to oscillate) ※ When measuring voltage has the following circumstances, can be judged as oxygen is bad: (to be judged in a closed-loop state) 1.
- Page 97 Electronic fuel injection system 4-9 Throttle position sensor(TPS) Throttle assembly 圖表 4 Function: The sensor can provide information about a throttle’s opening to ECU. According to the information thereof, ECU has necessary data for engine load, operating status (start-up, idle speed, partial load, and full load), acceleration, deceleration, etc.
- Page 98 Electronic fuel injection system PC diagnostic checks – Fault codes P0122: Throttle Pos.Sensor Circ. Low Input P0123: Throttle Pos.Sensor Circ. High Input ※Throttle angle is larger than the upper limit of credible or less than the lower limit of credible, throttle position sensor fault flag bits.。 TPS absolute position: Full closure: 0% fully open: 60%...
- Page 99 Electronic fuel injection system Check 2: Single product measurements - resistance Single product measurements - resistance Fully closed 710~1380 fully open 1.6K~2.4K ※3-pin Terminals, Light Blue is signal Output. Pink for the ECU to provide 5V working voltage, gray is ground.
- Page 100 Electronic fuel injection system 4-10 Fall down sensor Function: vehicles and dumping more than 65 degrees for any reason,you can cut off the power turn off. Principle: The use of gravity to make the ball move position touch sensor vehicle dumping Detectability determination: Check 1- Tools: Multimeter...
- Page 101 Electronic fuel injection system 4-11 Idle speed control Function: Based on ECU’s information for the engine load, the idle speed actuator is used in controlling the bypass airflow by means of the duration and the frequency (duty factor) of electrical pulse. Idle speed control Principle: The idle sped actuator is composed of electromagnetic coils, armature iron, and valve.
- Page 102 Electronic fuel injection system Fault diagnosis: ECU is effective in diagnosing both the idle speed control and the driving system. In the event of a short circuit (or overload) between the idle speed controller’s driving system and the battery or a short (open) circuit between the idle speed controller’s driving system and GND, the close loop control for dispensing fuel and the idle air volume learning are terminated but the latest self-learning data is employed.
- Page 103 Electronic fuel injection system Method for measurement (simplified): Disconnect the connector; turn a multi-meter’s rotary switch to the “Ω” function; connect two probes onto the idle speed controller’s two pins and check if resistance is 26± 4 Ω within the spec. at 20℃. Detectability determination: Check 1: Methods: open the main switch, remove the terminal...
- Page 104 Electronic fuel injection system 一、IMSE (throttle body assembly) Height adjustment stopper screw This screw height will affect the main air channel flow rate and initial throttle position (TPS) when it is in idle mode. The opening degree of idle speed control (ISC) will be automatically adjusted according to the flow rate of the main air channel, and the inspection standards are: During the engine warm-up process, the opening degree...
- Page 105 Electronic fuel injection system B. Ignition check During the idle stage, the ignition angle will make compensation adjustment according to the rotational speed of the engine. When it is lower than the target rotational speed, the ignition angle will be increased so as to increase the rotational speed, on the contrary, when it is higher than the target rotational speed, the ignition angle will be reduced so as to reduce the rotational speed, hence, some distinguished peak values can be neglected first, and only the mean value needs to be observed.
- Page 106 Electronic fuel injection system Notices for maintenance: Root causes of general troubles: Rustiness or airtight characteristic deteriorated due to any foreign object in the valve. ① Airflow direction conformable to spec. during installation; ② Check and replace the idle speed controller in case of failure of the controller due to some black particles inside the valve;...
- Page 107 Lubrication System-5 ∮5-0 Operating Instructions / Troubleshooting: ∮ 5-1 Cleaning of filter screen ∮ 5-2 Oil pump disassembly / inspection 5-0 Operating Instructions 1. When disassembly of the lubrication system, maintenance work directly on the motorcycles. 2.Use oil viscosity: SAE15W-40 lubricating oil 3.
- Page 108 Lubrication System-5 Lubrication system diagram...
- Page 109 Lubrication System-5 5-1 Cleaning of filter screen Demolition - › Remove the oil filter screen cover(1)and O-ring (2). › Remove the oil filter screen(4) and the spring(3). clean- › Clean the oil filter screen. ○ › Make sure of the O-ring (3)and the oil filter screen, or ○...
- Page 110 Lubrication System-5 Check {2}- › Clearance between the outer gear and oil pump body. Standard size:0.045~0.10 Limit accepted: <0.12mm Check {3}- › Clearance between gear end and Oil pump body. Limit accepted:0.2mm Assembly - > The oil pump on the inner and outer gear shaft into the oil pump body.
- Page 111 Engine group disassembly (from frame)-6 ∮6-0 Operating Information ∮6-1 Engine group disassembly (from frame) 6-0 Operating Information: 1.Please confirm before the job has the frame securely. Avoid injury to the operating personnel or vehicle. 2. Before disassembling the engine, move the engine oil drain dried and then dismantling operations. 3.
- Page 112 Engine group disassembly (from frame)-6 6-1 Engine group disassembly (from frame) Steps: ○ I. Remove the air cleaner. a. Remove the hex flange bolts M6-35L (1). ○ flat washer (2), hex flange boltsM6-50L (3). b. Remove the loosen tube clip screws M6-50 (4) . ○...
- Page 113 Engine group disassembly (from frame)-6 三. Demolition throttle air pipe assembly. a. unplugging negative pressure pipe(1) –EEC. ○ b. unplugging isc air introducing pipe(2). ○ ○ c. unplugging spark plug cap(3). d Remove the throttle assembly screws * 2, take out the ○...
- Page 114 Engine group disassembly (from frame)-6 五. Remove the muffler assy a. Remove the hex flange nut (1). Torque: 1.5 ~ 2.0kg-M b. Remove the hex flange bolts (2), spring washers (3) ○ ○ ,flat washers (4). ○ ○ Torque: 3.0 ~ 3.5kg-M ○...
- Page 115 Engine group disassembly (from frame)-6 七. Remove the Oil Cooler ○ a. Remove the hex flange bolts (1) M8-15L. ○ b. Remove the pedal support bracket (2) left and right. ○ c. Remove the bolts with washers (3) M6-20L Torque: 0.9 ~ 1.1kg-M d.
- Page 116 Engine group disassembly (from frame)-6 八. Separate engine hanger and engine assembly a. Remove the hex flange nut (1) M10. b. Remove the hex flange bolts (2) M10-290L. Torque: 3.5 ~ 4.5kg-M ○ ○ C.Separate frame (3) and engine assembly (4). ○...
- Page 117 Cylinder head -7 ∮7-0 Operating Information ∮7-5 Check the valve / valve guide sleeve ∮7-1 ∮7-6 Check the valve spring Cylinder head removal steps ∮7-2 Disassemble the cylinder head ∮7-7 Check the Cylinder head flatness ∮7-3 Check the camshaft ∮7-4 Check the rocker arm / rocker arm shaft 7-0 Operating Information 1.Removable cylinder head, first separate the engine and frame.
- Page 118 Cylinder head -7 Troubleshooting / phenomena Compression pressure is too low 1. cylinder valves 2. Cylinder head ◆Valve Seat bad leak tightness ◆Cylinder head gasket leak ◆valve timing is not correct ◆Cylinder head plane is skewed or crack (bent valve leak) ◆valve clearance adjustment adverse ◆valve spring damage ◆Valve carbon deposition...
- Page 119 Cylinder head -7 Project Part name Quantity Project Part name Quantity Project Part name Quantity CYLINDER HEAD CAMSHAFT COMP PLATE,BREATHER CR TRUSS HD TAPPING Valve Inlet Retainer, Cam Shaft SCREW(M4*8L) PACKING,CYL HEAD Valve Exhaust HEXAGON BOLT COVER HEXAGON FLANGE WASHER, Valve HEXAGON FLANGE BLOT BOLT(M6*1.0P*12L) Seal Valve Stem...
- Page 120 Cylinder head -7 Cylinder head removal steps 一. fan cover Remove the hexagon flange bolts (1) M6-22L * 2 ○ Remove the self-tapping screws (2)*2. C.Remove the fan cover (3). ○ ○ ○ ○ ○ 二.cooling cowl(一、二) ○ a.Remove the self-tapping screws (1)*3. b.Remove the cooling cowl 二...
- Page 121 Cylinder head -7 四.chain adjuster ○ a.Remove the "CR ROUND HD MACHINE SCREW" ○ (1) M6-6L * 1 and O-ring (2) b.Remove the hexagon flange bolts (3) M6-20L * 2 ○ ○ c. Remove the chain adjuster (4) and the chain adjuster ○...
- Page 122 Cylinder head -7 七. Cylinder head gasket Remove the Cylinder head gasket(1). NOTE Cylinder head gasket can not be reused, replace with new. Cylinder head installation steps: ○ Follow the removal procedure. Reverse installation. Timing adjustment: step: a. Go to the top dead center of the piston b.
- Page 123 Cylinder head -7 7-2 Disassemble the cylinder head 一. Temperature Sensor valve rocker arm ○ Camshaft assembly ○ a. Using an open wrench (14mm), Remove the ○ temperature sensor (1). ○ b.Remove the hexagon flange bolts(2) M6-16L*1 Remove Camshaft Retainer (3). ○...
- Page 124 Cylinder head -7 Check the camshaft Check the {1} - > Cam surface and the height is worn. Use limits: IN: 30.05mm EX: 29.999mm Check the {2} -› >Camshaft bearings Abnormal noise or turn the ring true →Replace Check the rocker arm / rocker arm shaft Check ›...
- Page 125 Cylinder head -7 7-5 Check the valve / valve guide sleeve Check -1 > Valves tightness Methods: gasoline or cleaning agent into the intake and exhaust ports. valve leakage →Adverse airtight Check the valves, valve seats, valve guide sleeve. Check - 2 ›...
- Page 126 Cylinder head -7 7-6 Check the valve spring Check - > Spring free length Insufficient length → Replace Standard value: 37.91 (mm) Use limits: 37.9 (mm) 7-7 Check the Cylinder head flatness Check - > Cylinder head flatness Over the limit → Replace Standard value: 0 ~ 0.03 (mm) Use limits: ≧...
- Page 127 Cylinder combination ∮8-0 Operating Information ∮8-5 Check the Piston pin ∮8-1 Cylinder, pistons demolition ∮8-6 Check the Cylinder ∮8-2 Piston Ring demolition ∮8-7 Connecting rod small end diameter ∮8-3 Check the Piston ∮8-8 Check the Cam chain guide and Cam ∮8-4 The piston ring combination installation tension rods 8-0 Operating Information...
- Page 128 Cylinder combination Measurements using the limits: J-BUBU 125 Item Standard value (mm) using limit (mm) Bore 54.0~54.015 51.6 Curve 0~0.05 0.05 Cylinder Cylindrility 0.05 Roundness 0.05 1st ring 0.015~0.055 0.09 Clearance b/w Piston and Piston Ring 2nd ring 0.015~0.055 0.09 1st ring 0.10~0.25 0.50...
- Page 129 Cylinder combination Cylinder 圖表 1 Project Part name Quantity Project Part name Quantity HEXAGON FLANGE CRANK SHAFT ASSY. BOLT(M6*1.0P*12L) WOODRUFF KEY GASKET, CYLINDER WOODRUFF KEY (C1066502000 之附件) LOCK PIN(10*14) PISTON CHAIN, CAMSHAFT CLIP, PISTON PIN TENSIONER, TIMING CHAIN PISTON PIN GUIDE COMP.,CAM CHAIN Piston Ring (Top) O RING...
- Page 130 Cylinder combination 8-1 Cylinder, piston removal 1. Cylinder a.Remove the cam chain guide (1) ○ ○ ○ b.Remove the cylinder (2) and cylinder gasket(3) c.Remove the lock pins (4) * 2 二. Piston a.using needle nose pliers to remove C-type retaining ring (1) ○...
- Page 131 Cylinder combination 8-2 Piston Ring demolition Piston rings demolition: Use the left and right hand thumb piston ring openings distraction, the order to remove the piston rings. NOTE Carefully remove piston rings, Piston Ring openings due to excessive distraction cause breakage or damage. Check - ›Piston combination Scratches →...
- Page 132 Cylinder combination Check - ›Clearance b/w Piston and Piston Ring Standard value: Ring(TOP): 0.10 ~ 0.25 (mm) Second ring: 0.25 ~ 0.45 (mm) Scraper ring: 0.2 ~ 0.7 (mm) Use limits: Ring(TOP): 0.50 (mm) Second ring: 0.60 (mm) Scraper ring: 0.9 (mm) Over the limit→Replacing Piston Ring or cylinder Check -...
- Page 133 Cylinder combination The piston ring arrangement method: 1.4th ring notch toward IN (inlet end) 5th ring toward top the right notch side,With the 4th ring angle between 120∘. 3th ring toward top the left notch side,With the 4th ring angle between 120∘.( Figure I) 2.
- Page 134 Cylinder combination Check the Piston pin Check - › Piston pin outer diameter Standard value: J-BUBU 115> 12.996~13.0(mm) J-BUBU 115> 14.994~15.0(mm) Use limits: J-BUBU 115> 12.96(mm) J-BUBU 125> 14.96(mm) over the limit→Replacing Piston pin Check the cylinder Check - › Inside the cylinder Scratches, wear →...
- Page 135 Cylinder combination Check - › Cylinder surface flatness Standard value:0~0.05(mm) Use limits:≧0.05(mm) over the limit→ Replacement cylinder 8-7 Connecting rod little end diameter Check - Standard value:13.002~13.013(mm) Use limits:13.06(mm) over the limit→Replace the crankshaft 8-8 Check the Cam chain guide and Cam tension rods Check - >Cam chain guide and Cam tension rods...
- Page 136 CVT(Continuously Variable Transmission) -9 ∮ 9-4 Face movable drive disassembly / check ∮9-0 Operating Information ∮ 9-5 Driven face belt pulley disassembly / ∮9-1 CVT disassembly ∮ 9-2 Check the drive face check ∮9-3 Check the V-belt 9-0 Operating Information: 1.
- Page 137 CVT(Continuously Variable Transmission) -9 CVT SYSTEM Project Part name Quantity Project Part name Quantity 圖表 1 BELT PULLEY COMP., DRIVEN FACE WEIGHT ROLLER COMP (7.2g) PLATE ASSY., DRIVE SLIDE PIECE NUT,SPECIAL PAMP PLATE SPRING,DRIVEN FACE BOSS DRIVER FACE OIL SEAL , G TYPE DRIVE FACE O-Ring (36.7D*1.92D) WASHER...
- Page 138 CVT(Continuously Variable Transmission) -9 CVT demolition Steps: 一. Sound off cover a. Remove the hex flange bolts (1) M6-20L. ○ b. Remove the left of the outer cap (2). ○ ○ 二. Left side cover a. Remove the hex flange bolts (1) M6-40L. ○...
- Page 139 CVT(Continuously Variable Transmission) -9 9-2 Drive face Check - disk surface > wear and tear (1) → Replace Note: Drive face with grease attached, will reduce the CVT performance, please remove oil before installation. 9-3 V belt Check - > Peeling, cracking, cotton line is broken → Replace Standard value: 20 (mm) Use limit: 19 (mm) Over the limit →...
- Page 140 CVT(Continuously Variable Transmission) -9 Face movable drive / Boss drive face Check - > Face movable drive inside diameter Standard value: 23.985 ~ 24.006 (mm) Use limits: 24.06 (mm) Over limit → Replace >Boss drive face outside diameter Standard value: 23.960 ~ 23.980 (mm) Use limit: 23.94 (mm) Over limit →...
- Page 141 CVT(Continuously Variable Transmission) -9 Weight roller Check - > Weight roller Wear → Replace Standard value: 17.90 ~ 18.10 (mm) Use limits: 17.4 (mm) Exceed the limit → Replace Installation- Follow the removal procedure in reverse can be install. Installation Notes: Weight roller is not the same at both ends,Please coated end is mounted on the the face movable drive trench right side,To Weight roller life and prevent face movable drive...
- Page 142 CVT(Continuously Variable Transmission) -9 9-5 Drive face belt pulley comp 一. Drive plate ○ a.Use the clutch spring compression(1) and fixed ○ ○ ○ nut wrench(3)Remove clutch fixing nut(4) ○ The clutch spring compression (1) slowly relax. c. Take off the drive plate (4). ○...
- Page 143 CVT(Continuously Variable Transmission) -9 四. 、Guide roller pin Bushing ○ a. Take off Bushing (1)、Guide roller pin (2) ○ b. Separation Movable driven face body comp (3) and Driven face body comp (4) ○ ○ 五. Movable driven face body comp a.
- Page 144 CVT(Continuously Variable Transmission) -9 Drive plate assy Check clutch lining wearing condition and Measure the lining thickness: Wear, spring break → Replace limit of use : change it below 1.5mm. Driven face spring Check driving spring free length. Standard: 105mm Limit of usage: Change it below 95 mm Outer body comp.cluth...
- Page 145 CVT(Continuously Variable Transmission) -9 Movable driven face body comp Check- Standard value:34.0~34.025(mm) Use limits:34.06(mm) Over the limit → Replace › G-type seal Oil spills, damage → Replace > O-ring Oil spills, damage → Replace Driven face body comp Check- Standard value: 33.965 ~ 33.980 (mm) Use limits: 33.94 (mm) Over the limit →...
- Page 146 CVT(Continuously Variable Transmission) -9 Installation- Follow the removal procedure in reverse can be install。 Note: 1 Note that when you install V-belt, drive face, clutch cover, can not have grease adhesions. 2. When the locking CVT fix screw , please tighten the screws by hand, make sure there is alignment of the crankshaft and drive surface groove, and then lock it.
- Page 147 Crankcase, crankshaft ∮10-0 Operating Instructions / Troubleshooting ∮10-1 Removing the crankcase ∮10-2 ∮10-3 Check the camshaft chain Check the crank shaft ∮10-4 Timing chain tensioner ∮10-5 Disassembly Quakeproof bush-(engine) ∮10-6 crankcase inspection and cleaning 10-0 Operating Instructions 1. Crankshaft decomposition must complete the following tasks,Before decomposition. ◎...
- Page 148 Crankcase, crankshaft CRANKCASE Part No. Q'TY Part No. Q'TY CRANKCASE,RIGHT BOLT. SPECIAL BUSH, QUAKEPROOF WASHER HEXAGON FLANGE BOLT Bush, Mainstand (M12*15L) OIL PLUG STUD BOLT DEEP GROOVE BALL LOCK PIN (10*14) BEARING PLUG OIL HEXAGON FLANGE BOLT STUD BOLT LOCK PIN CRANKCASE LEFT BUSH, QUAKEPROOF DEEP GROOVE BALL...
- Page 149 Crankcase, crankshaft Start System Part No. Q'TY Part No. Q'TY OIL PUMP COMP MOTOR ASSY STARTER C-R RECESS PAN HD. TAPPING HEXANGON FLANGE BOLT Oil Pump ,Driving Gear One Way Clutch comp. COVER CLUTCH OUTER BODY, ONE WAY CLUTCH ROLLER ONE WAY CLUTCH COP,ROLLER SPRING COMPRESS S PRING HEXAGON SOCKET BOLT...
- Page 150 Crankcase, crankshaft RIGHT CRANKCASE COVER Part No. Q'TY Part No. Q'TY COVER, R. CRANKCASE OIL STRAINER Gasket Rh. CrankCase Cover COMPRESSION SPRING OIL SEAL TC TYPE O RING OIL STRAINER COVER GAUGE, OIL LEVEL ASSY GAUGE. OIL LEVEL O-RING HEXAGON FLANGE BOLT (M6*30L) HEXANGON FLANGE BOLT HEXANGON FLANGE BOLT...
- Page 151 Crankcase, crankshaft GENERATOR / FAN COVER Part No. Q'TY Part No. Q'TY A.C.G COMP DAMPER 4 , COOLING SHROUD FLYWHEEL COMP DAMPER 2 , COOLING SHROUD STATOR COMP DAMPER 3 ,COOLING SHROUD HEXAGON FLANGE BOLT DAMPER 1 , COOLING SHROUD HEXAGON FLANGE BOLT (M5*12L) RUBBER PLUG HEXAGON FLANGE NUT (M10*P1.25)
- Page 152 Crankcase, crankshaft 10-1 Removing the crankcase 1. Fan Remove the screws (1) . Torque values:0.9~1.1kg-m ○ Remove the fan(3). ○ Remove the screws(1) Remove the flywheel (3) Torque values:4.0~4.5kg-m flywheel flywheel puller to remove the flywheel. Note flywheel puller is left-hand thread ,tighten counterclockwise.
- Page 153 Crankcase, crankshaft 4.. Stator comp a.Remove the hex flange bolts (1) M6-22L. Torque values:0.9~1.1kg-m b. Remove the hex flange bolts (2) M6-12L. Torque values:0.7~0.9M ○ C.Take out the Stator comp (3). ○ ○ 5. Starter motor a. hex flange bolts (1). M6-22L. b.
- Page 154 Crankcase, crankshaft d. Right crankcase cover screw length configuration diagram. ○ one-way clutch ○ Tools: one-way clutch removal tool ○ a. Remove the Starter reduction gear (1) and Starter reduction gear shaft (2). ○ b .using the tool one-way clutch removal tool (a) ○...
- Page 155 Crankcase, crankshaft ○ 9. Oil pump assembly a. Remove the "CR ROUND HD MACHINE SCREW" ○ ○ (1). M6-25L Torque: 0.9 ~ 1.1kg-M b. Remove the oil pump assembly (2) c. hex flange bolts (3). M6-55L Torque: 0.9 ~ 1.1kg-M Decomposition crankcase ○...
- Page 156 Crankcase, crankshaft 10-2 Check the crank shaft Measurement - › swing ness of the crankshaft journal. Over the limit→ replace a new crankshaft Standard value:0~0.04(mm) Limit of use:≧0.08(mm) Note: please rotate the crankshaft slowly during inspection Measurement - ›Clearance of connecting rod big end vertical direction. Over the limit→...
- Page 157 Crankcase, crankshaft Check - > Ball Bearings Breaking bad, abnormal sound, wear → Replace the Crankshaft. > Big end bearing Different sound, the gap is too large →Replace the crankshaft . Item Standard value (mm) Limit Item Connecting rod small end inner 15.01~15.028 ≧15.06 diameter...
- Page 158 Crankcase, crankshaft 10-3 Check the camshaft chain Check - > Camshaft chain wear → Replace the Camshaft chain 10-4 Timing chain tensioner Check - > Timing chain tensioner Wear, cracks → Replace...
- Page 159 Crankcase, crankshaft 10-5 Disassembly Quakeproof bush-(engine) Removal - Shockproof bush a. use the dismantling tool. (As shown) b. Removing Shockproof bush Installation - a. Use hands to flatten the Shockproof bush. b. Installation Shockproof bush dismantling tool. c. The Shockproof bush pressed into the crankcase.
- Page 160 Crankcase, crankshaft 10-6 crankcase inspection and cleaning 1. Pre-installation tasks: a: Use cleaning materials to clean the crankcase. b: Use a scraper to remove all the gaskets and sealants. Check - > Crankcase Uneven mating surface→Use sandpaper to adjust. Rupture, deformation →Replace the crankcase. Oil Galley >...
- Page 161 Gearbox system ∮11-0 ∮11-1 Operating instructions/ Troubleshooting Gearbox disassembly ∮11-2 ∮11-3 Bearing Removal Drive shaft check ∮11-4 ∮11-5 Idler gear check Rear axle / final gear check ∮11-6 Check the gearbox 11-0 Operating instructions/ Troubleshooting: Model: SAE85W-140 The total amount of gear oil:110C.C Recommended gear oil: PGO special gear oil...
- Page 162 Gearbox system Gear system Part No. Part No. Q'TY Q'TY TRANSMISSION COVER Tube, Tranmission Vent. Trans Cover Gasket CLIP HEXAGON FLANGE LOCK PIN BOLT(M6*60L) DEEP GROOVE BALL HEXAGON FLANGE BOLT BEARING (M6*40L) BALL BEARING WASHER (8*1.6T) BALL BEARING, DOUBLE HEXAGON FLANGE BOLT SEALED (M8*40L) Oil Sealtc TC Type...
- Page 163 Gearbox system Transmission cover 11-1 Gearbox disassembly a. Remove the hex flange bolts (1), the gear oil leaked. ○ b. Remove the hex flange bolts (2). ○ c. Take out the transmission cover (3). ○ 1 ○ 1 ○ Transmission gear set a.
- Page 164 Gearbox system 11-2 Bearing Removal Bearing installation – 11-3Drive shaft check Check - > Gear Ministry Discoloration, wear and tear, rupture → replacement Measurement - Tools: dial gauge > Roundness Maximum out-of-roundness: 0.04mm → replace the drive shaft exceed the limits 11-4Idler gear check Check - >...
- Page 165 Gearbox system 11-5 Rear axle / final gear check Check - > Gear Ministry Discoloration, wear and tear, rupture → replacement Measurement - Tools: dial gauge > Roundness Maximum out-of-roundness: 0.04mm→ replace the rear axle exceeds limits Note: Install rear axle C-rings, no R angle side upward. 2.The spring washer raised face up 3.
- Page 166 Shock absorber / brake system/wheel ∮ 12-0 ∮ 12-5 Rear suspension Operating instructions/ Troubleshooting ∮ 12-1 Front wheel ∮ 12-6 Rear swingarm ∮ 12-2 Rear wheel ∮ 12-7 Brake fluid replacement ∮ 12-3 Check the steering handle bar assy ∮ 12-8 ABS (Anti-Lock Brake System) ∮...
- Page 167 Shock absorber / brake system/wheel Troubleshooting 1.steering handlebar is abnormal, too tight. 2.steering handlebar is aslant. a. steering mechanism; washer of conical a.left and right damper is not even. bush locked too tightly. b.Front fork is crooked. b. steering mechanism; steel ball is cracked. c.The axle of front fork is crooked, wheel is aslant.
- Page 168 Shock absorber / brake system/wheel 12-1 Front wheel Steps: 1. Remove the front brake bolts(14). 2. Remove the front axle nut (12). 3.Remove the front axle(8)" spacer ring(9) code table gear(11) and wheels(10). 12-1.1 Front wheel measure Measuring - ›Horizontal direction:≧2.0mm Vertical direction:≧2.0mm Beyond the limits - replace 12-1.2 Front wheel -One sealed ball bearing...
- Page 169 Shock absorber / brake system/wheel Rotating ring true and different sound → Replace the ball bearings. 2.Oil seal Specification:22-35-7 Wear, damage→replace >Installation - Tools - Bearing removal tool. 1.A first bearing does not cover the surface with butter. 2 Bearing stamped facing the use of tools bearing knock . 3 Oil seal is loaded, installed at the sealing lip painted yellow Oil.
- Page 170 Shock absorber / brake system/wheel Disassembly steps - 1.Remove the windshield plate (see chapter 2) 2.Remove the handle cover uper, the wheel speed sensor plug out. Disc fetch:...
- Page 171 Shock absorber / brake system/wheel Remove the bolts (10/11), remove the front fender rear section (9). 5. The wheel speed sensor launched by the retaining ring. 6.Remove the bolt (5) (4). Remove the bolts (27), remove the wire clips (26).
- Page 172 Shock absorber / brake system/wheel Disassembly steps – 1.Remove the bolts (21), remove the Brake fluid hose clip A (19), Brake fluid hose clip B (20).
- Page 173 Shock absorber / brake system/wheel 12-1.4 Front wheel – Meter gear assy Check - ›Speed meter gear”1” Pinion speed meter”2” Wear, damage → Replace the code table gear 12-1.5 Front wheel - brake pads (disc) Disassembly brake pads : step- 1.
- Page 174 Shock absorber / brake system/wheel 12-2 Rear wheel Removing the rear wheels - > Step 1 Remove the oxygen sensor(4) 2 Remove the muffler(3) and gasket(2) 3 Remove the rear swing arm 4. The tire pressure to vent out 5 Remove collar and wheels Measuring - ›...
- Page 175 Shock absorber / brake system/wheel Demolition - 12-2.2 Rear disc > Step 1 Remove the rear wheels follow the steps 2 Remove the disc screws * 3 Torque value: 2.0 ~ 3.0 kg-m Checking the rear brake-disk. Standard values: 4±0.2mm Use limits:≦3.5mm Roundness:±0.1mm lost roundness: ≧...
- Page 176 Shock absorber / brake system/wheel 12-3 Check the steering Handle bar assy Demolition - See Section 2 (3-1) Check – > Handle bar Distortion, skew → Replace Remove Helmet case assy (1). 12-4 The front fork assembly installation...
- Page 177 Shock absorber / brake system/wheel Disassembly - > Step 1.Remove the handle bar(1). 2.Remove the front wheels (see section 14-1). 3.Remove the front fender (see Chapters 2-5). 4.Remove the brake hose clip and speedmeter cable Clip. 5.Using the front fork disassembly tool,Remove the steering shaft lock nut(4) and Upper ring-shape nut(3).
- Page 178 Shock absorber / brake system/wheel 1. First “upper bearing cage”and”lower bearing cage” Parallel pressed into 2. Use Fork bearing disassembly tool Will be “upper bearing cage”and”lower bearing cage”slowly turn Into the vehicle inside the station. 3.Check“upper bearing cage”and”lower bearing cage” whether there is smooth 12-4.2 The front fork assembly installation Installation –...
- Page 179 Shock absorber / brake system/wheel 12-4.3 New ball bearing gage (bakelite) Concave Convex Installation – Note: The new ball bearing gage (bakelite), when installed, must be used in conjunction with the upper bearing...
- Page 180 Shock absorber / brake system/wheel 12-4.4 Front suspension assembly Demolition - 步 步 1. Remove the front wheels (see the chapter 12-1 ). 驟:3 驟:4 2. Remove the front fender. 3. Remove the front suspension Inner cylinder screws(a). 4. Remove the front suspension fixing screws (b), take out the suspension.
- Page 181 Shock absorber / brake system/wheel Demolition - > Right Suspension 1 Remove the muffler (see Chapters 6-1). 2 Remove the hex flange bolts (1). M10-32L. 3 Remove the hex flange bolts (2). M8-40L. > Left suspension 1 Remove the hex flange bolts (3). M10-32L. 2 Remove the hex flange bolts (4).
- Page 182 Shock absorber / brake system/wheel 12-7 Brake fluid replacement Tools: pumping unit 1.Relax the drain screw. 2.Vacuum pumping unit, taking the dirty oil. 3.Open above the brake master cylinder, pour new oil. 4.Use vacuum pumping unit, out of the air brake tubing Please add brake fluid at the same time, do not let the oil cup is taking the time to suck Into the air.
- Page 183 Electronic Parts and Components-13 ∮13-0 Operating Instructions ∮13-6 Fuel guage ∮13-1 Starter syster ∮13-7 Ignition /Fuel supply system ∮13-2 Charging System ∮13-8 Fuse Description ∮13-3 Leakage current testing ∮13-9 Ignition /Fuel supply system ∮13-4 Power transfer switch ∮13-10Engine stop switch ∮13-5 Horn ∮13-0 Operating Instructions 1.
- Page 184 Electronic Parts and Components-13 13-1 start system Inspection process: a. fuse → b. batteries → c. Power transfer switch d. stop light switch → e. starter motor → f. starter relay → g. starting system wiring...
- Page 185 Electronic Parts and Components-13 a.fuse Measurement - 15A fuse broken wire > Tools: multimeter stalls: Ω Use a multimeter probe connected to the fuse pin Open circuit (∞) → replacement Battery Check - > terminal and cable Loose, poor contact → fixed, Clean (positive / negative) terminal Measurement - battery voltage...
- Page 186 Electronic Parts and Components-13 d. stop light switch Measurement - switch actuation, continuity > Tools: multimeter use multimeter probe is connected to the switch pin wire Measurement probe stalls Judgment color conduction normal Ω switch ∞ replace e.starter motor Check - start the motor rotation is normal ─...
- Page 187 Electronic Parts and g. starting system wiring Check - Tools: Multimeter > connections are correct, the line is open circuit Measurement Measurement wire color probe stalls Judgment 1.main switch (turn on) Ground Power transfer switch (ON) Check the starting 3. stop light switch system wiring (turn on) Ground...
- Page 188 Electronic Parts and Components-13 13-2 Charging system Check the process: a:battery → b:A.C.G → c: charging line check a. battery Check - Battery > Tools: multimeter Measurement: Voltage: at20 ℃ when 12.8V or more Insufficient voltage → recharged or replaced Measurement the A.C.G, connect a voltmeter (hook table or pointer).
- Page 189 Electronic Parts and Components-13 b: Check A.C.G Check- Tools: multimeter The measurement-A.C.G rechargeable coil impedance Measurement line color probe stalls Judgment Y(1) 1.3±0.5Ω Ωx1 at20° Y(2) 1.3±0.5Ω Y(1) Ωx1 Y(3) at20° 1.3±0.5Ω Y(2) Ωx1 Y(3) at20° c: Charging line inspection Check - >...
- Page 190 Electronic Parts and Components-13 13-4 Lamps lighting system a- Bulb check Check - filament whether disconnection Measurement: > Tools: Three multimeter stalls: Ωx1 Method: Three multimeter measuring rod connected to the bulb three-pin ∞ → replace Measurement: (Figure 13-2) > Tools: 12V battery stalls: DC 20V Way: using the battery connection bulbs pin Bulb does not light →...
- Page 191 Electronic Parts and Components-13 13-4.1Headlight / license lamp line loop (Electronic injection version) Measurement - 8.measurements dimmer switch (HI) - > Tools: Multimeter stalls: DC 20V Brown / white if there is 12V Check the order: 9.measurements dimmer switch (LO) - 1.
- Page 192 Electronic Parts and Components-13 13-4.2 Signal lamp Check the order: 1. Check whether each bulb filament burns out. 6. Measurement direction light switch (left) -. Pink if there 2. Measurement flasher relay - orange line if there is is 12V . 7.Check the each signal lamp Are there 12V。...
- Page 193 Electronic Parts and Components-13 13-5 Main switch Tools: multimeter Stalls: DC 20V Red / Orange Orange Green position White ○ ○ ○ ○ ○ ○ Anti-theft voltage: main switch install a resistor (51KΩ) in the Orange wire with the middle of the green wire, a signal voltage is connected to the E CU, ECU without receiving this voltage or voltage at the same time, the vehicle will not start 13-6 Horn...
- Page 194 Electronic Parts and Components-13 13- 8 Control of relays * (Relay) 15A *theory: use small current to control big current *Usage: fuel pump & injector EMS whole system headlamp * Relay measurement *use the pocket tester *使用三用電表 1.find the control coil 1.繼電器卡損位於上方...
- Page 195 Electronic Parts and Components-13 13-9 Ignition /Fuel supply system system...
- Page 196 Electronic Parts and Components-13 13-9.1 Ignition system checks: 1. Check the spark plug is normal (color brown)? Gap is normal (0.6~0.7mm)? 2. Spark gap tester to check the spark gap is more than 6mm? Check the ignition coil: circuit: Primary side: 2.8Ω ± 10%,Secondary side: 9.5kΩ ± 10% Measurement primary Measurement line multimeter...
- Page 197 Electronic Parts and Components-13 Check the main relay: Relay measurements: (see 7-6) Relay System Description Measurement line: multimeter Stalls Red probe Black probe Normal Not Normal main relay red / white Ground Orange red / white Check the main Relay? Check the line for open circuit? 2.Orange - a.check the proper functioning of other...
- Page 198 Electronic Parts and Components-13 13-9.2 Fuel supply system system Check the fuel pump: Check whether the fuel pump action? 1) Turn on main switch, check if there is the sound of relays and fuel pump action? Relay does not actuate voice: check whether the relay is bad or line anomalies? ...
- Page 199 Electronic Parts and Components-13 13-11 Engine stop switch Check the process: Project Handle 1. Battery (check the voltage) 12V- Please replace or recharge 2.Fuse:(check 15A) ∞-Replace 3.main switch (KEY ON): Check the line color: Red / White (12V)→ orange (12V) Red / white, orange = 0V to replace the ingition switch Or line barrier.
- Page 200 Injection system diagnosis-14 PGO EMS Diagnostic Software Operation Manual Vehicle Type : ● ● ● ● SENTEC E&E Co., Ltd. Diagnostic Software Operation Manual V01...
- Page 201 Injection system diagnosis-14 Hardware Connection Use USB cable to connect your PC with Diagnostic Tool. Use K-Line to connect Diagnostic Tool with Diagnostic Connector on the vehicle. Vehicle Diagnostic Connector Diagnostic Tool K-Line USB cable Wire Harness...
- Page 202 Injection system diagnosis-14 Software Installation Step1: Install USB driver, in folder English\CP2102 Driver Execute the installation file“ CP210x_VCP_Win_XP_S2K3_Vista_7.exe ” please refer to “CP210x USB Driver Installation.pdf”. Step2: Copy “PGO EMS DIAG Software” folder (in English folder) in the CD to your PC hard disc (eg. C:\ or D:\) This folder should contain following files: PGO EMS DIAG Software.exe Set_Limits.exe...
- Page 203 Injection system diagnosis-14 Execute Software Double click the file “PGO EMS DIAG Software.exe” or it’s shortcut on the desktop. Click the square icon in the upper right corner to maximize the window. The program screen shows as below:...
- Page 204 Injection system diagnosis-14 Connect to ECU Please turn key on, select correct Vehicle Type and Com Port, then click “Start Connection” 1. Press “Vehicle Type”,there are 4 vehicle type options (A1,F7,J3,PAH) Please select the vehicle type name connecting with the diagnostic tool. Please don’t change vehicle name under diagnostic process.
- Page 205 Injection system diagnosis-14 “Connect”page If connection is successful, the“Connect”page will show ECU Identification, Including ECU Software No, System Name and Part No.
- Page 206 Injection system diagnosis-14 “Troubles”page Press “Troubles” it will show “Current Trouble Codes” (the malfunctions existing now detected by ECU) and “History Trouble Codes” (the malfunctions which have occurred and saved in ECU memory). Trouble codes include: the number with P as head, malfunction name and status. Format = P-Code + Name + (Status) Status description: No fault: No malfunction detected by ECU...
- Page 207 Injection system diagnosis-14 List of “Trouble Codes” (A1,F7,J3 Vehicle type) Trouble Malfunction name codes P0107 Manifold Absolute Pressure 1 Circuit abnormal P0108 P0112 Intake Air Temperature Sensor Circuit abnormal P0113 P0117 Engine Temperature Sensor Circuit abnormal P0118 P0122 Throttle Position Sensor A Circuit abnormal P0123 P0130...
- Page 208 Injection system diagnosis-14 List of “Trouble Codes” (PAH Vehicle type) Trouble Malfunction name codes P0105 Manifold Absolute Pressure 1 Circuit abnormal P0110 Intake Air Temperature Sensor Circuit abnormal P0115 Engine Temperature Sensor Circuit abnormal P0120 Accelerator Handle Position Sensor A Circuit abnormal P0130 Oxygen Sensor Circuit abnormal...
- Page 209 Injection system diagnosis-14 “Data”page Column width can be adjusted by mouse Adjust Row height: Select any item, then press “+” key to increase row height Or press “-” key to decrease row height. Press “Data”,it will show data items from ECU, and show each data’s lower limit and upper limit.
- Page 210 Injection system diagnosis-14 “Chart1”page Press“Chart1”to show 4 common data’s change with time. “Chart2”page “Chart2”also shows 4 common data’s change with time.
- Page 211 Injection system diagnosis-14 Record page Press “Record” the “ECU Identification and Trouble Codes” window will record “Connect” page’s ECU identification information and “Troubles” page’s all malfunction information. ※Note: You need to select “Connect” and “Troubles” pages first. The “Data Analysis” table will record “Data” page’s all the data items’ values. ※Note: You need to check “Record data”, and it will record data only at “Data”...
- Page 212 Injection system diagnosis-14 Record page Press “Save” it will save data to “Records” folder using present date time as file name. Save as type (extension name) is “csv” file, which can be opened by Excel program. If you want to diagnose another vehicle or to have new records, Please press “Clear Data”, reply “Yes”, it will clear all information On Record page.
- Page 213 Injection system diagnosis-14 Calibration page (PAH vehicle type) Note: 1.A1,F7,J3 vehicle type does not need calibration on this page. 2.When you start one calibration function (eg. TPS Calibration), You need to complete this calibration (Save or Abort it), then to start another calibration (eg.
- Page 214 Injection system diagnosis-14 Calibration page (PAH vehicle type) Idle CO Adjustment On “Calibration”page select “Idle CO” page 1.Warm up engine in idle condition. 2.Press “Start”.The Idle CO adjustment (uSec) block will show current Idle CO adjustment amount stored in ECU. Press big to increase idle injection pulsewidth by 16 uSec.
- Page 215 Injection system diagnosis-14 Calibration page (PAH vehicle type) ETC Reset On “Calibration” page select “ETC” page 1. Make sure engine is stopped, and turn on the key. 2. Press “Start”. 3.ECU will perform ETC throttle position sensor calibration automatically. 4.Press “Confirm”, then ETC reset is completed.
- Page 216 Injection system diagnosis-14 “Messages” page shows the “Diagnostic Software” version. Quit Software Click “Quit” and reply “Yes” to quit the Diagnostic Software. Note: Before quit, if there is record data, please save file On “Record” page. Diagnostic Software Operation Manual V01...
- Page 217 FRAGILE STICKER HEAD LAMP INSTRUCTION PANEL FUEL INDICATOR RH TURN SIGNAL LAMP LH TURN SIGNAL LAMP HI LAMP INDICATOR...
Need help?
Do you have a question about the Buddy Kick and is the answer not in the manual?
Questions and answers