
Related Manuals for Lux Power Technology SNA6000WPV


Summary of Contents for Lux Power Technology SNA6000WPV
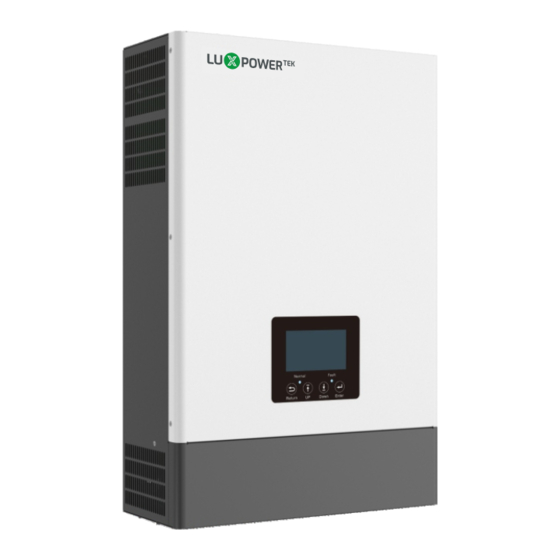
- Page 1 Version: SNA-EN-UM-1.0-05 SN:092.0004905 USER MANUAL ECO Hybrid Inverter SAN 3000-6000W WPV Where sun shined Power always on Monitor APP Download Android www.luxpowertek.com info@luxpowertek.com LUX POWER TECHNOLOGY CO., LTD...
-
Page 2: Table Of Contents
Table Of Contents 3. Working Modes Information on this Manual Validity 3.1 Offgrid modes introduction Scope 3.2 Working modes related setting description 4. LCD Display and settings Target Group Safety Instructions 4.1 LED Display 4.2 LCD Display 1. Brief Introduction 4.3 Inverter Status Display 1.1 Features of the inverter 4.4 LCD Settings... -
Page 3: Information On This Manual
1. Brief Introduction Information on this Manual 1.1 Features of the inverter Validity This manual is valid for the following devices:SNA3000 WPV/SNA4000 WPV/SNA5000 WPV/SNA6000 WPV Luxpower View Internet Scope Wifi / 4G This manual provides the installation, operation and troubleshooting of this unit, please read this manual LOGIN carefully before installations and operations. -
Page 4: Interface Of The Inverter
1.3 Packing List 1.2 Interface of the inverter Before installation, please inspect the unit. Be sure that nothing inside the package is damaged. You should have received the following items in the package: LCD display Cross Head Expansion Screw Function buttons ECO Hybrid inverter X1 User Manual X1 Wi-Fi Module X1... -
Page 5: Installation
The system connection is as below: 600V, 2*10AWG 600V, 2*10AWG Gauge Cable (mm2) Torque Value Model QF 1 SNA6000WPV 1x12AWG 1.2 Nm Grid AC Input 4. Before connecting all wiring, please take off bottom cover by removing 3 screws as shown below. QF 1 LOAD... -
Page 6: Battery Connection
Steps to mounting the unit 2.3.2 Lithium Battery Connection Step1. Use the wall-mounting bracket as the template to mark the position of the 4 holes, then drill 8 mm If choosing lithium battery for SNA5000 WPV, please make sure the battery BMS is compatible with holes and make sure the depth of the holes is deeper than 50mm. -
Page 7: Ac Input/Output Connection
CT-L1 CT-L2 CT Clamp Ratio 1 2 3 4 5 6 7 8 The inverter support 3 ratios of CT clamp- 1000:1 , 2000:1 and 3000:1 . The CT ratio of the CTs in the accessory bag is 3000:1. If you are using a 3rd party CT, please ensure the CT ratio is one of them, and select the correct CT ratio setting in the inverter monitor page or on the inverter LCD. -
Page 8: Pv Connection
2.7 Generator Connection (yellow-green) Ground L→LINE (brown or black) N→Neutral (blue) LINE (brown or black) 1. Before making Generator connection, be sure to open DC protector or disconnected first. Neutral (blue) 2. Remove insulation sleeve 10mm for 2 conductors. 3. Insert L and N wires according to polarities indicated on terminal block and tighten the terminal screws PVA+ PVA- PVB+ PVB- AC INPUT AC OUTPUT... -
Page 9: Dry Contact Signal Control
Inverter 1 Phase L1 2.8 Dry Contact Signal control Grid or Generater AC Input Phase L1 The Dry port(NO2,COM2) could be used to deliver signal to external device when battery voltage CAN 1 reaches warning level. The GEN port(NO1,COM1) could be used to wake-up the Generator and CAN 2 AC Output Parallel line 1... -
Page 10: Working Modes
Step5. Set the system as a parallel group in the monitor system Monitor Data Overview Maintain Aspergo PV+Battery power User Center PV+BAT Grid off the load together Stations Overview Station Name Search by inverter SN Device Overview Serial number Status Solar Power Charge Power Discharge Pow Load... -
Page 11: Working Modes Related Setting Description
3.2 Working Modes related setting description Working modes and Description Situation Setting 1 Setting 2 Setting 3 off grid inverter mode if P_Solar>=P_load, solar is used to take load and charge battery AC abnormal if P_Solar<P_load, solar and battery take the load together, system will discharge until battery lower than the Cut Off Voltage/SOC Hybrid Mode 1(charge first) Solar power will used to charge battery first,... -
Page 12: Lcd Display And Settings
1. SONAR can work as traditional off grid inverter or as a hybrid inverter. When disable PV&AC Discharge Setting Take load Jointly, it will work as a traditional off grid inverter, otherwise it will work as a hybrid Discharge Control According to SC Hybrid Setting Battery Warning Voltage... -
Page 13: Lcd Display
4.3 Inverter Status Display 4.2 LCD Display Normal status, running status 40 Warning Status, warning 29 Description Remarks Display the currently time/date by default(year/month/day/ hour/ minute” switching automatically). When press Up or Down buttons, Generally Information this area will display the firmware version information, serial number Display Area etc. -
Page 14: Lcd Settings
4.4 LCD Settings Run with No Battery: Step1:Choose battery type first, when no flashing, select Enter to choose Run with No battery For Lead Acid: Step1:Choose battery type first, when Lead-Acid flashing, select Enter to choose Lead-acid battery There are four buttons on the LCD. Step for settings by Step2:Then choose battery capacity Battery the display:... - Page 15 Setting range: VOLT: 40.0-OnGrid EOD Volt Default: 42V Setting range: ConChr: 50.0-59.0Vdc CutOFF: CV voltage setting Default: 56.4V Cut off Voltage or SOC, depend (Only in Lead-acid SOC: 0-OnGrid EOD SOC on TEOd battery type) Default: 15% Setting range: VOLT: Cut off Volt-56V Default: 42V Setting range: Eod:...
- Page 16 AC charge setting AC Charge function: (The setting process Setting Range: Setting range: Feed-In Disable (default) must enable the AC 1.DIS: AC charge disable; 2.TIM: According to time; charging function, Feed-In 3.VOL: According to battery voltage; confirm the full Enable/disable 4.SOC: According to battery soc;...
- Page 17 External Grid CT (Latest Version Only) Setting Range: Setting Range: Green Function Disable Disable (default)/Enable (default) Power Save CT Offset Internal CT Offset Function Setting Range:-200~200W Green Function Enable enable/disable 20W (default) Setting Range: Fan1 Speed Percent ECO Mode Disable (default) ECO Mode Enable Setting Range: 20-100% 70% (default)
-
Page 18: Specifications
The monitor website is: server.luxpowertek.com Table 1 Line Mode Specifications The APP is also available in the google play and apple APP store(Scan two code bar to download the APP). SNA6000WPV/SNA5000WPV/ INVERTER MODEL SNA4000WPV/SNA3000WPV Please download the introduction of guidance by website: https://www.luxpowertek.com/download/... - Page 19 15% SOC (Grid off ) ( settable) (AC Charger Plus Solar Charger) Low DC Cut-off Return SOC Low DC Cut-off SOC +10% Table 4 General Specifications Charge Cut-off Voltage 58.4Vdc SNA6000WPV/SNA5000WPV INVERTER MODEL SNA4000WPV/SNA3000WPV No Load Power Consumption <60W Safety Certification Table 3 Charge Mode Specifications Operating Temperature Range 0°C to 50°C...
-
Page 20: Trouble Shooting & Error List
7. Trouble Shooting & Error List The failures mainly divided into 5 categories, for each category, the behavior is different: Description Trouble shooting Description Trouble shooting Code Code Restart inverter, if the error still exist, contact us (DSP&M3) E000 Internal communication fault1 Check if you have choose the right battery brand and Communication failure communication cable is right, if the warning still exist,...
Need help?
Do you have a question about the SNA6000WPV and is the answer not in the manual?
Questions and answers