Table of Contents
Advertisement
Quick Links
P-XX1587 ISSUE 4
800CF GAS LOG FIRE
USER INSTRUCTIONS
INSTALLATION INSTRUCTIONS
SERVICE INSTRUCTIONS
Do not use this appliance if the front glass panel is broken, removed or fi ed incorrectly.
It is a regula on that these instruc ons be handed to the customer a er installa on is
complete. It is also the responsibility of the installa on engineer to ensure that the customer is
Model number: BM-121XX2 SLIDE For use on Natural Gas (G20) at a supply pressure of 20 mbar in GB
THIS INSTRUCTION MANUAL MUST BE LEFT
WITH THE CUSTOMER AFTER INSTALLATION
This product is not suitable for primary hea ng purposes.
Advertisement
Table of Contents

Related Manuals for Be Modern Calleos 800CF


Summary of Contents for Be Modern Calleos 800CF
- Page 1 P-XX1587 ISSUE 4 800CF GAS LOG FIRE USER INSTRUCTIONS INSTALLATION INSTRUCTIONS SERVICE INSTRUCTIONS Do not use this appliance if the front glass panel is broken, removed or fi ed incorrectly. It is a regula on that these instruc ons be handed to the customer a er installa on is complete.
-
Page 2: Table Of Contents
Contents Appliance Commissioning Check List ………………………………...……..…..……………......User Instruc ons—Important informa on & Warnings ……………………………..………………..User Instruc ons—Controls & Opera on …………………………………………..…………………………….. 5 User Instruc ons—General Maintenance & Cleaning ….……………………………...………………….… 6 Log Layout Instruc ons …………………………………………………………………………………………………..9 Running in and Troubleshoo ng …………………………...……………………………………………………………... 14 Unpacking the appliance ...……………………………………………………………………………………………………. -
Page 3: Appliance Commissioning Checklist
Safety Check APPLIANCE COMMISSIONING CHECKLIST It is the installers responsibility to complete the following checklist when commissioning this appliance. The informa on recorded on this page may be requested at the me of any warranty call made. If the informa on is not made available it may affect the warranty support for the customers appliance. -
Page 4: User Instruc Ons-Important Informa On & Warnings
INSTRUCTIONS Welcome 2.0 Congratula ons on the purchase of your new Be Modern 800CF gas fire. Ensure you keep these instruc ons in a safe place as they will be required for installa on, service and general upkeep of your appliance. -
Page 5: User Instruc Ons-Controls & Opera On
USER INSTRUCTIONS Controls 2.1 This appliance has a concealed slide control knob. It is discreetly concealed in the space between the decora ve trim and the glass door frame on the lower right hand side. Simply press the knob and it will protrude from its current posi on to enable opera on. -
Page 6: User Instruc Ons-General Maintenance & Cleaning
USER INSTRUCTIONS Ba ery 2.2 This gas appliance uses a single AAA type ba ery which supplies the power for the spark generator used during the igni on process. The ba ery box which houses this ba ery is located between the decora ve frame and the glass door panel in the lower le hand corner. - Page 7 USER INSTRUCTIONS Cleaning is recommended for some parts of this appliance. The glass can be cleaned with a non Cleaning abrasive glass cleaner and lint free cloth. Metal parts can be cleaned with a lint fee damp cloth. HEALTH AND SAFETY NOTICE Fuelbed This appliance uses fuel effect pieces manufactured from Refractory Ceramic Fibres (RCF).
- Page 8 USER INSTRUCTIONS pilot It may be necessary to clean areas around the pilot assembly. If the appliance is running and then turns itself off automa cally for no apparent reason, it may be that the O.D.S (oxygen monitoring device) has become par ally blocked and may need to be cleaned. The pilot to this appliance has a small aera on hole at its base, some mes lint and dust can be draw in with the air supply to the pilot.
-
Page 9: Log Layout Instruc Ons
USER INSTRUCTIONS 2.3 The following instruc ons detail how the ceramic fuel bed and loose components are to be LOG SETUP installed onto the appliance. Great care should be taken when handling these ceramic parts as they are fragile and can easily be broken. Do not force any component into posi on, if it does not fit easily then you are not fi... - Page 10 USER INSTRUCTIONS Place the volcanic rock on top of the centre burner as shown. Ensure a 4-5 mm gap is le FUELBED between each piece. Then using half of the glowing ember wire supplied, ruffle between fingers to make it loose, about 20mm wide and as long enough to cover the volcanic rock then align over the rock as shown.
- Page 11 USER INSTRUCTIONS Place Log C onto the right raised burner as shown ensuring it fits securely. Place Log D in the orienta on shown ensuring the branch sits just in front of the air hole in the main log as shown. Place Log E in the orienta on shown.
- Page 12 USER INSTRUCTIONS Place Log F onto the burner bed in front of the centre burner as shown. Place the bark around the fuel bed as shown. Ensure that no bark can interfere with the pilot bark opera on,. Place Log G as shown in the picture.
- Page 13 USER INSTRUCTIONS Place Log H onto the burner bed as shown. Place Log I onto the burner bed as shown.
-
Page 14: Running In And Troubleshoo Ng
The Be Modern 5 year limited guarantee is managed directly by Be Modern Ltd. With our experienced Gas Safe engineers and through our extensive network of service centres throughout the UK we will ensure your appliance receives the right care should anything fail prematurely. -
Page 15: Unpacking The Appliance
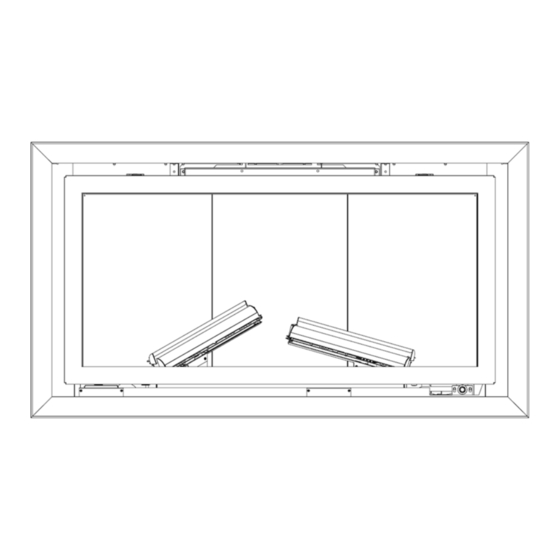
INSTALLATION INSTRUCTIONS 3.0 TAKE GREAT CARE WHEN UNPACKING THE APPLIANCE—SOME PARTS CAN Unpacking appliance BE EASILY DAMAGED. Once the carton has been opened, carefully remove the polystyrene packing components to reveal the appliance. The appliance has two handles, one on each side, as shown in the diagram below. -
Page 16: Regulatory Informa On
INSTALLATION INSTRUCTIONS 3.1 NOTE THE FOLLOWING PRIOR TO THE INSTALLATION OF THIS APPLIANCE. REGULATORY INFORMATION This gas appliance MUST be installed by a GAS SAFE registered installer by law. It must be installed in accordance to these installa on instruc ons and the GAS SAFETY (Installa on &... -
Page 17: Si Ng The Appliance
INSTALLATION INSTRUCTIONS 3.4.0 This appliance can be installed into a suitable fireplace or as a ‘Hole in the SITE Wall’ (HIW) type installa on. For both types of installa on the chimney or flue must REQUIREMENTS be either Class 1 (brick chimney or 7” diameter flue) or Class 2 (5” diameter flue) The minimum effec ve height of the flue must be 3 metres, (10’). -
Page 18: Clearance From Combus Bles (Installa On)
INSTALLATION INSTRUCTIONS 3.4.4 The following diagram shows the area which must be clear of all combus ble combus bles materials. 3.4.5 If the appliance is being fi ed with the flange against slips or a back panel, it BACK PANELS must be of a suitable material. -
Page 19: Installa On Into Studding
INSTALLATION INSTRUCTIONS 3.7 It is also possible to install this appliance into a studded cavity providing it studding complies to the following requirements: • The installa on must have an insulated flue with a minimum diameter of 125mm (5”) diameter and a minimum effec ve overall height of 3 metres and comply with BS EN 1856-2 (metal flue pipes for appliances). -
Page 20: Flue Liner Installa On (Op Onal)
INSTALLATION INSTRUCTIONS Flue Liner This appliance can be installed directly onto a flue liner if installed within a (Op onal) masonry fireplace. Under no circumstances should a liner be used in any other type of installa on. The following diagrams show the step by step process of conver ng the appliance to top vent and securing the liner to the firebox. - Page 21 INSTALLATION INSTRUCTIONS Flue Liner Now remove the four screws and take off the top cover-plate (op onal) Next, fit the flue closure plate with the 3 screws provided. NOTE THIS PART CAN ALSO BE FITTED FROM THE INSIDE OF THE APPLIANCE.THEN THE LOWER HOLE WILL BE USED.
- Page 22 INSTALLATION INSTRUCTIONS The flue spigot should first be fi ed to the base of the 5” flexible liner, then from Flue Liner inside the appliance, using the grab handle within the spigot, pull the liner (op onal) downwards and locate the studs into the correct posi on. Note that by rota ng the spigot through 180 the centre line can be moved fore and a by 30mm.
-
Page 23: Installa On Methods
INSTALLATION INSTRUCTIONS 3.9 This appliance has 4 different installa on methods: Methods of installa on When the appliance is installed in front of the heatproof board (or slips) on the wall or in front of the fireplace back panel then the 800CF Slim Trim supplied with the appliance should be removed and discarded. -
Page 24: Slim Trim Installa On
INSTALLATION INSTRUCTIONS 3.9.1 The 800CF Slim Trim is supplied with the appliance. Remove this trim and place SLIM TRIM somewhere that damage cannot occur whilst preparing the installa on. INSTALLATION The appliance is already prepared for installa on of this trim, with the excep on of the two ver cal side wings. -
Page 25: Slim Trim Back Panel Requirements
INSTALLATION INSTRUCTIONS 3.9.2 When the 800CF Slim Trim op on is selected the following diagram shows the back SLIM TRIM panel/slip set dimensions which should be used. INSTALLATION Cri cal Mantel Dimensions... -
Page 26: Wide Trim Installa On
INSTALLATION INSTRUCTIONS 3.9.3 The 800CF Wide Trim is purchased separately. The Wide trim is supplied with the Wide TRIM necessary components to complete the installa on. INSTALLATION Remove the Slim trim brackets from the top panel of the firebox. Cover these holes with aluminium tape (supplied) on the outside of the firebox. -
Page 27: Wide Trim Back Panel Requirements
INSTALLATION INSTRUCTIONS 3.9.4 When the 800CF Wide Trim op on is selected the following diagram shows the Wide TRIM back panel/slip set dimensions which should be used. INSTALLATION Cri cal Mantel Dimensions... -
Page 28: Fixing The Appliance-Cable Fixing
INSTALLATION INSTRUCTIONS 4.0 Fixing the Appliance - Cable Fixing System. Fixing the The appliance can be installed using the wire fixing kit. This type of fixing is shown in the appliance following picture. The fi ng system comprises four (4) eyebolts, two (2) fixing cables, two (2) screwed nipples and two (2) adjuster fi... -
Page 29: 4.1 Fixing The Appliance - Screw Fixing
INSTALLATION INSTRUCTIONS 4.1 Fixing the Appliance - Screw Fixing Fixing the appliance The appliance can be installed using the screw fixings supplied. See the diagrams below. The foam seal which is supplied with the appliance should be affixed to the rear face of the flange. -
Page 30: Connec Ng The Gas Supply
INSTALLATION INSTRUCTIONS 4.2 Connec ng the Appliance to the Gas Supply Connec ng To gas supply The gas supply should be connected to the appliance by a concealed fi ng from the rear. In all installa on condi ons the gas connec on should be provided using 8mm (O/D) copper tubing. - Page 31 INSTALLATION INSTRUCTIONS Connec ng To gas supply Remove the ceramic pad using the finger slot provided. Remove the heat shield plate.
- Page 32 INSTALLATION INSTRUCTIONS Disconnect the HT Lead from the electrode on the pilot. Only if tray is to be Connec ng removed for cable fixing. To gas supply Disconnect the black switch harness plug/socket. Only if tray is to be re- moved for cable fixing.
-
Page 33: Log Layout Instruc Ons
INSTALLATION INSTRUCTIONS 4.3 The following instruc ons detail how the ceramic fuel bed and loose components are to be LOG SETUP installed onto the appliance. Great care should be taken when handling these ceramic parts as they are fragile and can easily be broken. Do not force any component into posi on, if it does not fit easily then you are not fi... - Page 34 INSTALLATION INSTRUCTIONS Place the volcanic rock on top of the centre burner as shown. Ensure a 4-5 mm gap is le FUELBED between each piece. Then using half of the glowing ember wire supplied (Tools & Fi ngs Pack), ruffle between fingers to make it loose and about 20mm wide then align over the volcanic rock as shown.
- Page 35 INSTALLATION INSTRUCTIONS Place Log C onto the right raised burner as shown ensuring it fits securely. Place Log D in the orienta on shown ensuring the branch sits just in front of the air hole in the main log as shown. Place Log E in the orienta on shown.
- Page 36 INSTALLATION INSTRUCTIONS Place Log F onto the burner bed in front of the centre burner as shown. Place the bark around the fuel bed as shown. Ensure that no bark can interfere with the pilot bark opera on,. Place Log G as shown in the picture.
- Page 37 INSTALLATION INSTRUCTIONS Place Log H onto the burner bed as shown. Place Log I onto the burner bed as shown.
-
Page 38: Ligh Ng The Fire
INSTALLATION INSTRUCTIONS LIGHTING 4.4 Opera ng Instruc ons THE FIRE This appliance has a concealed slide control knob. It is discreetly concealed in the space between the decora ve trim and the glass door frame on the lower right hand side. Simply press the knob and it will protrude from its current posi on to enable opera on. -
Page 39: Check For Spillage
INSTALLATION INSTRUCTIONS 4.5 Spillage monitoring System (ODS Pilot) Check for spillage This appliance is fi ed with an atmospheric sensing system in the form of an oxygen sensing pilot burner. This is designed to shut the fire off in the event of products being spilled into the room where the fire is being operated. -
Page 40: 4.6 Combus Ble Shelf
INSTALLATION INSTRUCTIONS COMBUSTIBLE 4.6 Combus ble Shelf SHELF This appliance may be fi ed below a surround with a combus ble shelf providing the following dimensional criteria is met: There must be a minimum distance of 250mm from the top of the appliance to the underside of the shelf. -
Page 41: Complete The Installa On
INSTALLATION INSTRUCTIONS Complete the 4.7 INFORM THE CUSTOMER OF THE FOLLOWING TO COMPLETE THE INSTALLATION installa on Demonstrate the ligh ng of the appliance and the controls to control the heat se ngs. Demonstrate how to turn the fire off. Demonstrate the removal of the trim and how to reinstall correctly. -
Page 42: 5.0 Servicing The Appliance
SERVICING INSTRUCTIONS 5.0 Servicing the Appliance. Servicing The following procedures can and should only be performed by a Gas Safe registered installer. This appliance should be serviced annually by a Gas Safe registered installer. 5.1 Removal of the burner tray. The removal and replacement of all the gas carrying components will require the removal of the burner tray. - Page 43 SERVICING INSTRUCTIONS Remove the ceramic pad using the finger slot provided. Remove the heat shield plate. Fit isola on valve to the inlet pipe as shown below.
- Page 44 SERVICING INSTRUCTIONS Disconnect the HT Lead from the electrode on the pilot Disconnect the black switch harness plug/socket. Carefully remove the burner tray from the firebox.
-
Page 45: Removal Of The Gas Valve
SERVICING INSTRUCTIONS 5.2 Remove of Slide Gas Valve. Remove 1 screw to remove the heat shield. Remove the pilot tube. - Page 46 SERVICING INSTRUCTIONS 5.2 Remove of Slide Gas Valve—con nued Remove the 3 screws shown, then remove the thermocouple nut, the gas inlet tube nut and the main burner gas outlet nut. The valve can now be removed, serviced or replaced. When reassembling the valve ensure that the washer sits in the gap as shown in the diagram...
-
Page 47: Removal Of Pilot
SERVICING INSTRUCTIONS 5.3 Remove of pilot assembly. Remove the pilot gas supply nut, the thermocouple nut from the valve and the 5 screws as shown in the diagram below. 5.4 Remove of spark generator. Remove the screw. Detach the black and white connector. -
Page 48: Removal Of The Tee Valve (High Se Ng)
SERVICING INSTRUCTIONS 5.5 Removal of Tee valve (High Se ng). Remove the 17 screws as shown in the diagram below to release all pipework from the underside of the burner tray. Take care not to mix up the screws. 5 x self-tap silver screws marked 4 x M5 silver screws marked 1 x M3 silver screw marked 7 x self tap black screws. -
Page 49: Removal Of The Injectors
SERVICING INSTRUCTIONS Removal of Tee valve (High Se ng) - Con nued Remove the gas inlet and gas outlet nuts then remove the two nuts securing the tee valve to the underside of the burner tray. 5.6 Removal of Injectors Remove the 8 screws (4 each side) as shown in the diagram The two raised burners can now be removed... - Page 50 SERVICING INSTRUCTIONS Removal of Injector. Con nued The 4 injectors can be accessed using the socket driver. Finally remove the screw as shown below, The tee connector can be pulled out and the middle burner injector can be removed. This injector is marked 110.
-
Page 51: Debris Removal
SERVICING INSTRUCTIONS 5.7 Removal of the Debris Access Cover. Remove the 5 screws and the 3 nuts as shown in the diagram below to remove the access cover. This will reveal the access for debris removal. -
Page 52: 6.0 Record Of Annual Services
SERVICING INSTRUCTIONS 6.0 Record of annual services The extended warranty of the specified components within this appliance is condi onal on the annual service of the appliance by a Gas Safe registered engineer. Failure to maintain the product or to use the product in away which is not intended will void the manufacturer's warranty. -
Page 53: Product Fiche
This is not to be confused with the net efficiency, or useful efficiency of the appliance (shown in the tables above). This product MUST be installed by a Gas Safe Registered Installer. Full details are provided in this manual. Be Modern Ltd. Bede Industrial Estate, Jarrow, Tyne & Wear, NE32 3BE. - Page 54 This page is inten onally le blank...
- Page 55 This page is inten onally le blank...
-
Page 56: Manufacturers Instruc Ons And User Replaceable Spares
Ceramic Bark Pack P-XX1234 Ember Wire Pack It is important to note that the above spares are user serviceable components that can be changed by the customer. . Be Modern Ltd Bede Industrial Estate, Jarrow, Tyne & Wear, NE32 3BE www.bemodern.com Tel: 0191 489 8006 Fax: 0191 580 0085 Email: sales@bemodern.com...
Need help?
Do you have a question about the Calleos 800CF and is the answer not in the manual?
Questions and answers