
Related Manuals for anko KRC641


Summary of Contents for anko KRC641
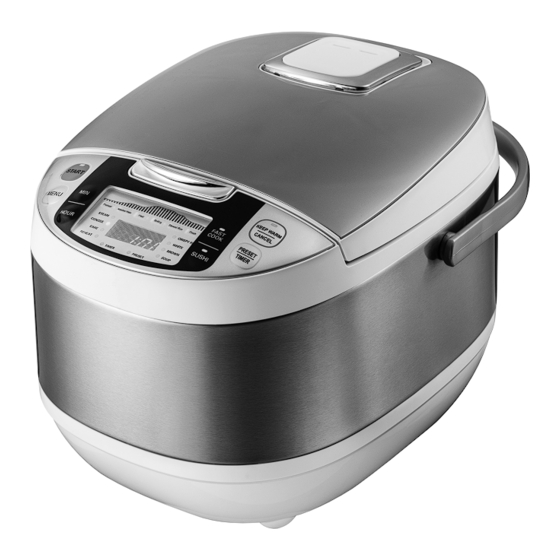
- Page 1 Multi Rice Cooker KRC641 Instruction Manual To ensure proper operation of this device, please read this instruction manual carefully before using the device and keep it for further reference.
-
Page 2: Important Safeguards
IMPORTANT SAFEGUARDS When using electrical appliances, in order to reduce the risk of fire, electric shock and/or injury, these basic safety precautions should always be followed: FOR YOUR SAFETY Read all instructions carefully, even if you are familiar with the appliance. •... - Page 3 • Please use an individual earthed power outlet of 10A rated current, do not plug into power boards or double adaptors in conjunction with other appliances, overload may cause fire or malfunction. • For electrical safety, any repairs to the appliance must be carried out by qualified electrical person only.
- Page 4 • Discontinue using the appliance immediately and unplug when abnormality or breaking down occurs to avoid fire or electric shock. E.g. for abnormality or breaking down: The power plug and the power cord become abnormally hot; The power cord is damaged;...
- Page 5 • Unplug and allow the appliance to cool down fully before cleaning and storing it to avoid burns. • Do not move the appliance while it is hot. • To avoid damage or malfunction, keep this appliance away from heat sources (Cooktop, stoves etc.) (Fig.1). •...
- Page 6 Fig.1 Fig.2 Fig.3 Fig.4 • Before the Rice Cooker is operated, check the cooking pot and Steam Cap are in place to avoid any malfunction. • During use, the Rice Cooker may generate tiny sound of “click” or “sizz”, which is a normal sound of operation, this is the thermostat or steam release.
- Page 7 WARNING Do not use the appliance under following circumstances: • This appliance or the power cord is damaged or has signs of wear tear. • This appliance has been dropped accidently, causing damage or malfunction. • Potential injury from misuse. •...
- Page 8 FEATURES OF YOUR MULTI RICE COOKER Power Socket Steam Vent Detachable Power Cord Control Panel 10 Rice Scoop 11 Soup Scoop Handle 12 Measuring Cup Detachable Inner Lid 13 Steamer Cooking Pot Lid Open Button...
- Page 9 INSTRUCTION ABOUT CONTROL PANEL Control panel OPERATION INSTRUCTION Press MENU repeatedly to select the desired menu/cooking mode. The corresponding indicator light flashes. Selectable menus: Crispy Rice, White, Brown, Soup, Steam, Congee, Cake and Reheat. NOTE: SUSHI and FAST COOK menus can only be selected by pressing corresponding buttons directly.
- Page 10 This appliance is equipped with a 24-hour timer, which can be used for all cooking modes except CAKE and REHEAT menus. Within 10 seconds after selecting the cooking mode: CRISPY RICE, WHITE, BROWN, SOUP, STEAM, CONGEE, SUSHI or FAST COOK, press PRESET button to set the preset time or cooking time, and use HOUR/MIN button to adjust the time.
- Page 11 The KEEP WARM/CANCEL button can be pressed at any time during cooking to cancel the operation. To manually activate KEEP WARM mode, simply press the KEEP WARM/ CANCEL button in Standby mode. KEEP WARM indicator light will light up and KEEP WARM time shows on LCD display.
-
Page 12: Preparation Before Cooking
PREPARATION BEFORE COOKING NOTE: For the best results, before each use make sure that: . The steam vent is in place and is not damaged. . The sealing ring of the inner lid is in place and is not damaged. . - Page 13 3. Place the washed rice into the cooking pot and fill with water to match the corresponding water level marking for number of cups of rice used. Always ensure rice is spread evenly across the bottom of the Cooking Pot and not heaped to one side. •...
- Page 14 5. Press down the Outer Lid until a click sound (lid lock) is heard. Connect the appliance electrical cord set to the appliance first and then connect plug to domestic power outlet only, then switch ON power outlet. COOKING With the appliance placed on a stable, level, dry and heat- resistant surface you are now ready to start cooking.
- Page 15 Select the desired menu. The corresponding indicator light will flash. 2. Set preset time HOUR Within 10 seconds after selecting the cooking mode: CRISPY RICE, WHITE, BROWN, SUSHI or FAST COOK, press PRESET/ TIMER button to set the preset time and use HOUR/MIN button to adjust the time.
- Page 16 Timer Function This mode can only be used for Congee, Soup, Steam menu selection. This allows user to increase or decrease the default cooking time shown on LCD display. Congee Press MENU button repeatedly to select SOUP, STEAM or CONGEE which require the Timer function, press the PRESET/ TIMER Button once, the corresponding indicator light flashes.
- Page 17 Keep Warm Function 1. After cooking is finished, the corresponding indicator goes out, the appliance emits several “beeps” and automatically enters the KEEP WARM mode. 2. To manually activate KEEP WARM mode, simply press the KEEP WARM/CANCEL button in Standby mode. 3.
- Page 18 MENU CRISPY RICE Press MENU button to select CRISPY RICE menu. When CRISPY RICE indicator light is flashing, press START button to start cooking. The START indicator light turns on. The LCD Display will not show a time, an illuminated circulating digit parameter is displayed to indicate the cooking process is activated.
- Page 19 REHEAT This cooking mode is used when just wanting to warm up leftovers (e.g. cold cooked rice etc.). 1. Stir rice so that it covers evenly on bottom of cooking pot. 2. Add enough water to moisten the rice completely without excess water being visible.
- Page 20 CONGEE Press MENU button repeatedly to select CONGEE menu. Default cooking time is 1 hour. Cooking time can be adjusted from 45 minutes to 1 hour and 15 minutes by pressing PRESET/TIMER button and then HOUR/MIN button repeatedly. TIMER indicator light will light up.
- Page 21 Press START button to start steaming process. The START indicator light turns on. There will be countdown remaining time showing on the LCD display. Tips for steaming: • Place a steam rack (not included) or the provided steamer inside the cooking pot for steaming the food. •...
- Page 22 CAKE 1. Select a suitable recipe and prepare the ingredients as directed. Grease the cooking pot with a little vegetable oil or spray oil and add cake ingredients mixture into the cooking pot. Smooth the top a little with a spoon and close the lid. 2.
-
Page 23: Cleaning And Maintenance
CLEANING AND MAINTENANCE • Some smells may remain in this appliance after cooking rice or other ingredients. Make sure to clean it after cooking is finished. • Before cleaning and maintenance, make sure power supply has been disconnected and this appliance cools completely. Use clean, soft and damp cloth to wipe body, lid and other parts. - Page 24 3. Insert lock part of inner lid into the square groove on the lid, push inner lid toward the lid, the assembling is finished when you hear popping sound 4. Pull steam vent upwards to remove it, rotate and disassemble it, wash it with clean water and wipe with soft cloth, reassemble it and place back into the lid.
- Page 25 TECHNNICAL SPECIFICATIONS Model: KRC641 Rated power input : 860W Voltage and frequency: 220-240V AC, 50Hz NOTE: As a result of continual improvements, the design and specifications of the product within may differ slightly to the unit illustrated on the packaging.
- Page 26 FAQS AND TROUBLESHOOTING GUIDE Malfunction Possible reason Solution Check whether power cord is well 1. Power is off Indicator light connected can’t be turned Contact Kmart customer service team 2. Circuit failure for further advice 1. Circuit failure Heating element Contact Kmart customer service team 2.
- Page 27 12 MONTH WARRANTY Thank you for your purchase from Kmart. Kmart Australia Ltd warrants your new product to be free from defects in materials and workmanship for the period stated above, from the date of purchase, provided that the product is used in accordance with accompanying recommendations or instructions where provided.
- Page 28 Cat. No. KRC641 March 2023...
Need help?
Do you have a question about the KRC641 and is the answer not in the manual?
Questions and answers